
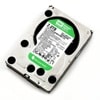
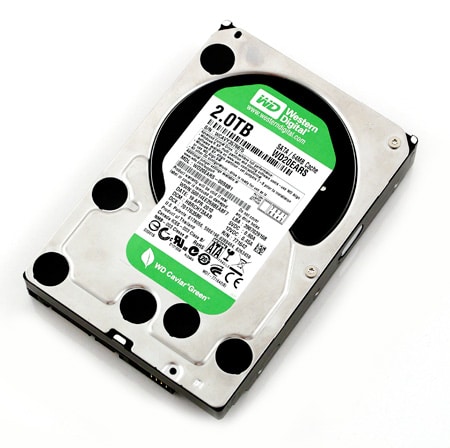
 Power consumption is one of the hot topics currently being discussed in today’s hard drive market. Manufacturers are looking at many ways to cut down on power draw; either by decreasing spindle speed or in some cases having aggressive parking. On drives that support these newer power modes, excessive head parking can occur under the right circumstances, causing alarm as users watch some drives close in on the manufacturers rated load cycle count in short order. In this article we will look at one way to disable this power profile on Western Digital hard drives like the popular 2TB Caviar Green WD20EARS.
Power consumption is one of the hot topics currently being discussed in today’s hard drive market. Manufacturers are looking at many ways to cut down on power draw; either by decreasing spindle speed or in some cases having aggressive parking. On drives that support these newer power modes, excessive head parking can occur under the right circumstances, causing alarm as users watch some drives close in on the manufacturers rated load cycle count in short order. In this article we will look at one way to disable this power profile on Western Digital hard drives like the popular 2TB Caviar Green WD20EARS.
Background
On some of the drives we have recently reviewed and been testing long-term in our office, we have noticed excessive load cycles, particularly on the set of 2TB Caviar Green drives used in our NAS reviews. In a Synology unit currently in the review queue, load cycles increased by 600-800 counts per day. The side effect of this can be a small delay added into a data retrieval command as the head hones in on its intended spot, as well as the long term wear possibilities. This problem was even more pronounced on the Scorpio Blue 750GB notebook drive, parked every few seconds, causing system lag and annoying clicking almost like clockwork.
WDIDLE3.exe
For the enterprise-class hard drives Western Digital currently sells, they offer a utility called WDIDLE3 that lets the user adjust the idle3 power setting. The actual usage commands are outlined below:
WDIDLE3 [/S[<Timer>]] [/D] [/R] [/?]
where:
/S[<Timer>] Set timer, units in seconds. Default=8.0 (8.0 seconds).
Resolution is 0.1 seconds from 8.0 to 12.7 seconds.
Resolution is 30 seconds from 30 seconds to 300 seconds.
Note, times between 12.8 and 30 seconds will be set to 30 seconds.
/D Disable timer.
/R Report current timer.
/? This help info.
One somewhat unknown fact of this utility is that it is compatible with nearly all new Western Digital drives, consumer and enterprise alike. You need to hunt for it on the WDC support site to get to an enterprise drive support page that has the WDIDLE download. In testing it worked with every Western Digital hard drive in our office (no it wouldn’t work with the SiliconEdge Blue SSD). This included the Caviar Green 2TB WD20EARS, the 3TB Caviar Green WD30EZRS, the 500GB Scorpio Black WD5000BEKT, and the 750GB WD7500BPVT and 640GB Scorpio Blue notebook drives. We even tested it on the 1TB Scorpio blue inside our Western Digital TV Live Hub with positive results.
Using WDIDLE3
The WDIDLE3 utility will only work in a DOS environment. If you have ever dealt with flashing the BIOS of a motherboard, or updating the firmware on an early SSD, you are probably familiar with this process. You need to create a bootable CD, floppy, or USB stick, and stick a copy of WDIDLE3.exe on it. In our case we used the bootable USB stick method outlined on this website. Other methods will work though; this is just an easy path to take.
With the bootable device ready, start your system with the drive you want to modify connected. It is probably best to do this one drive at a time, and stick with only Western Digital drives, since they are the only ones supported by this application. At the command prompt, simply type WDIDLE3.exe and press enter. It will give a printout of the current drive’s model and serial number, as well as the current idle setting.
We wanted to disable the idle timer completely, and let the operating system handle spinning the drives down if required. To do this, just type the following:
WDIDLE3.exe /D
Verify the command worked by typing “WDIDLE3.exe” which should now say the timer is disabled. At this stage just turn off the system and boot as usual.
Readers looking to disable fast spin-down times on notebook drives such as the 750GB Scorpio Blue should know that while it stopped the excessive load cycles, the drive still spun down after a few seconds of idle activity.
Conclusion
The fight against power consumption is a good cause; but in some cases can be a bit heavy handed. The approach many newer hard drives take is short idle times before the drive has its heads parked to reduce power draw. In notebooks this will help with increased battery life and multi-drive server environments, this can possibly add up to money saved on your monthly electrical bill.
In the case of our three 2TB Caviar Green WD20EARS drive, a perfect storm of light usage caused excessive head parking. On Western Digital’s product specification sheets, they list the maximum load cycle count as 300,000. If you average 500 cycles per day (some see even more than this) your drive’s lifespan shortens to about 600 days, or just over a year and a half. Thankfully in the case of Western Digital hard drives, WDIDLE3 may just save the day.