

![]() QNAP has released Hybrid Backup Sync 3 (HBS) beta – Multi-cloud backup, data deduplication, instant restoration and flexible synchronization. Lets dive in and see how to install this latest release and what’s in store for end users. But first, a word about beta software. Fair warning: beta software is never intended to be ready for “Production” – that said; if you are a business user – beware, homelabbers – have fun!
QNAP has released Hybrid Backup Sync 3 (HBS) beta – Multi-cloud backup, data deduplication, instant restoration and flexible synchronization. Lets dive in and see how to install this latest release and what’s in store for end users. But first, a word about beta software. Fair warning: beta software is never intended to be ready for “Production” – that said; if you are a business user – beware, homelabbers – have fun!
QNAP has released Hybrid Backup Sync 3 (HBS) beta – Multi-cloud backup, data deduplication, instant restoration and flexible synchronization. Lets dive in and see how to install this latest release and what’s in store for end users. But first, a word about beta software. Fair warning: beta software is never intended to be ready for “Production” – that said; if you are a business user – beware, homelabbers – have fun!
Beta software will allow you to try new features and allow developers to test fixes and configurations with a smaller group of guinea pigs test users. If you like to live dangerously you do so at your own risk. Don’t load up beta software on your QNAP NAS box and complain to everyone when your box stops working. Developers want to know if your box stopped working though, this is where you get to provide feedback to the beta team and they work with you to solve the issues. Your experience (Good or Bad) will help prevent others from experiencing a bad outcome in the final QTS or HBS build.
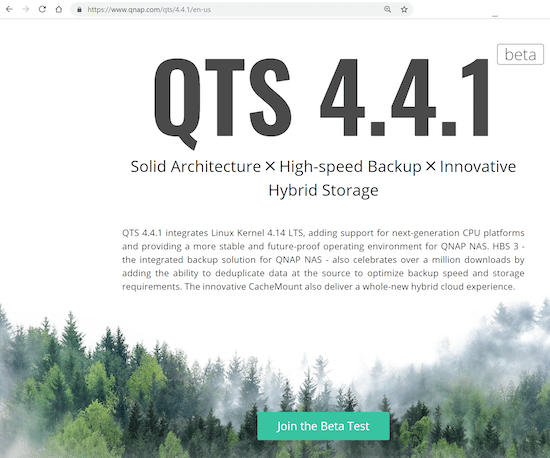
If you have made it this far I will assume that I didn’t scare you away and that you are ready to try some great new features. Installation of QNAP beta software is generally simple; Sign up, download and install. It installs as simply as a standard firmware update. The following guide will revolve around the new QNAP QTS 4.4.1 beta and the new HBS 3 beta.
The carrot and the stick
With beta software come new features – in addition to the new features – comes new services. Now before I get a bunch of angry emails about my tinfoil hat being too tight, I will say that in many cases the information that is collected by various companies and shared is NOT the same as sharing your file names and details. All the agreements are clearly listed on the website and this is good to help the developers to debug the product and services.
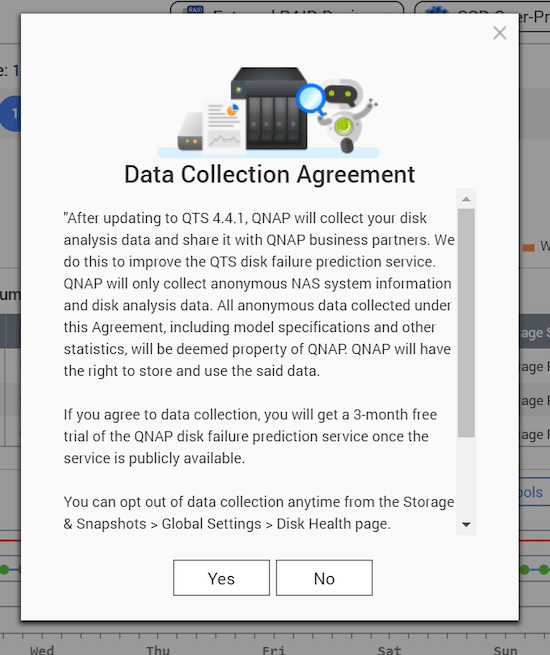
Now that I have covered the stick, the carrot for the new QNAP disk failure prediction service is fantastic! The third party that QNAP is mentioning is a company called ULINK Technology inc. Why should this matter to me? At the end of May this year (2019) QNAP announced they would be partnering with ULINK Technology. This function, once enabled, is claimed to be better able to spot potential problems with drives before they happen, minimize disruption and mitigate potential data loss.
It’s about time we had something that was better than a SMART failure or bad sector count to tell us when a drive was about to pack it in. Lets dive in.
How to Join the QNAP Beta Program
Once you decide to join the Beta Test – you will see the following dialogue:
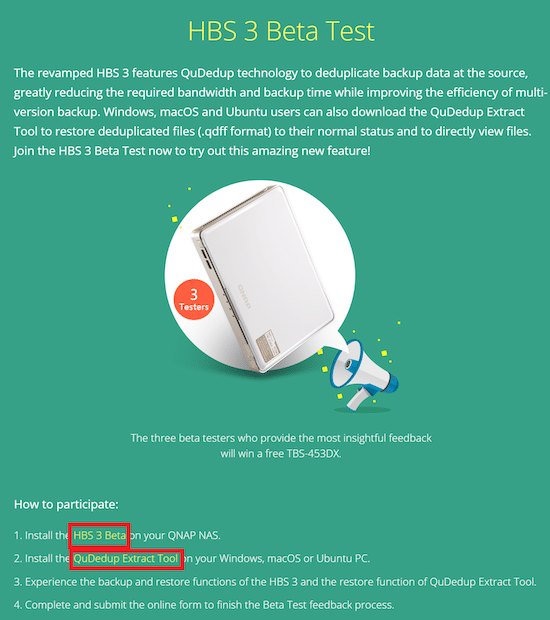
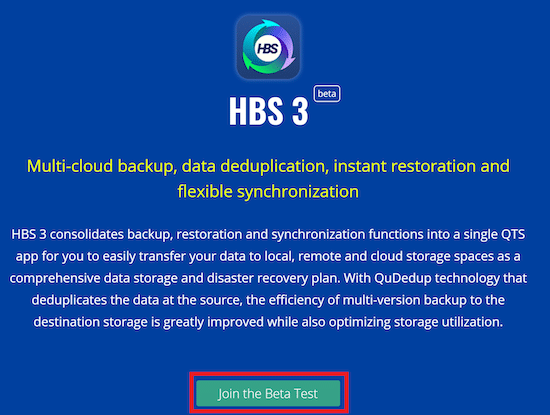
QNAP is running a contest and giving away prizes to reward lucky testers for feedback – details are on the site – We just need to click HBS 3 Beta link and download the appropriate version of the application onto your QNAP NAS running QTS 4.4.1.
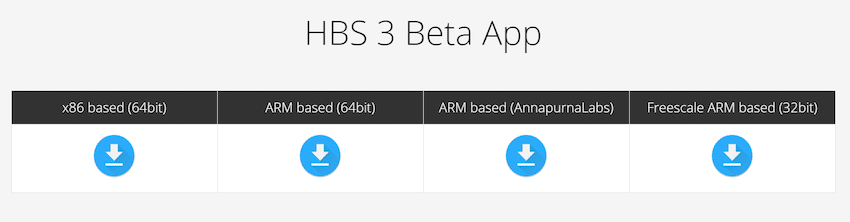
If you don’t know which version you need, there is a great document that QNAP maintains that will tell you.

Once the file has been downloaded – go ahead and login to the QTS dashboard. Open up App Center and select install manually.
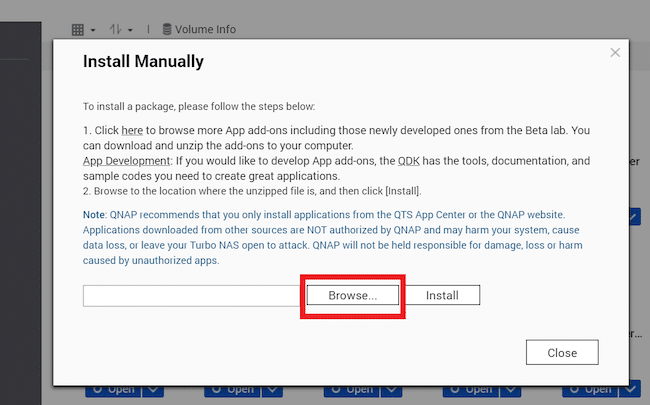
Locate the file that you downloaded that contains the HBS 3 Beta. When prompted to install – select OK. Once again – this is Beta software and as such is not complete with all the finishing touches of the final product. You need to affirm your understanding that there are risks if you want to continue. Once you click you understand and install – the process will complete automatically.
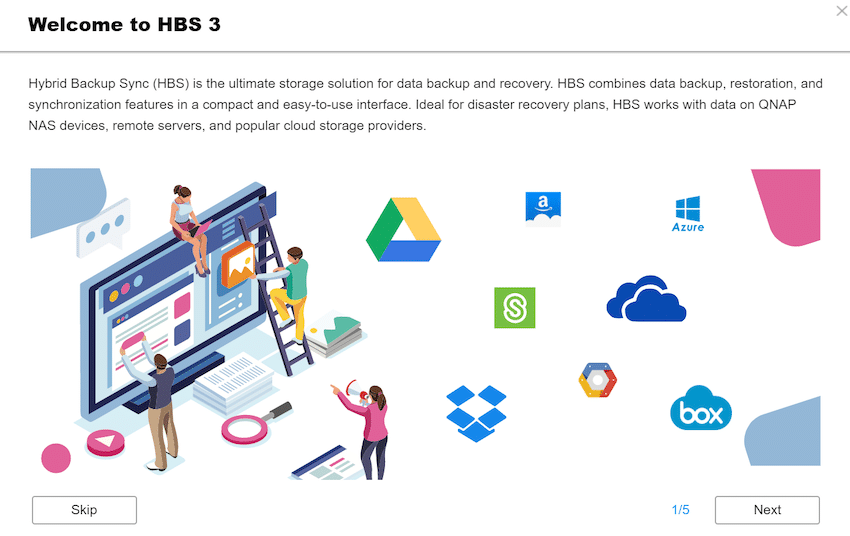
Once the install is complete – you will be greeted with an overview of the features and function of HBS 3.
QNAP HBS 3 Hands On
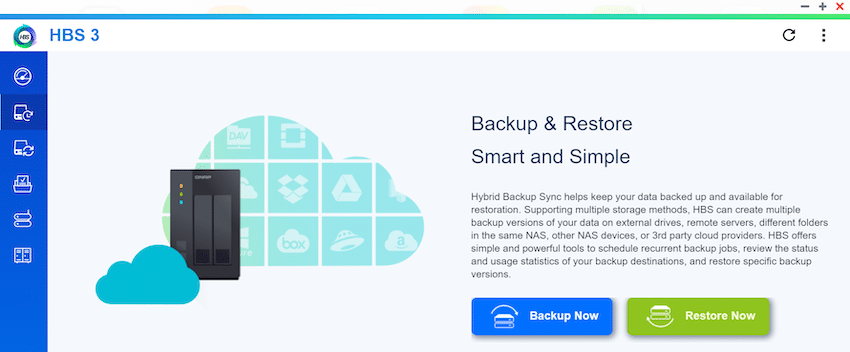
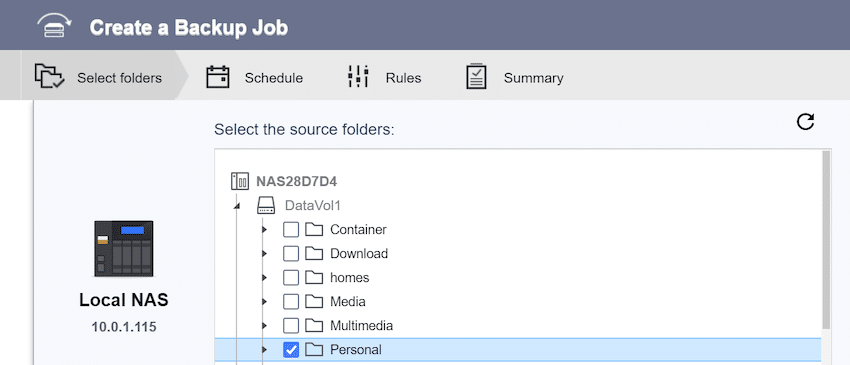
Creating a cloud backup job is simple – All we need to do is click the “Backup Now” button and select what we want to backup.
Cloud destinations are listed and can easily be added by selecting a service and signing in. For this example I will login to OneDrive.
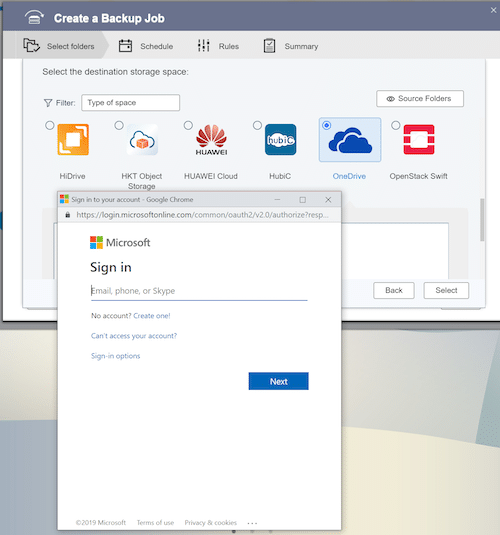

The process is rather simple as there are very little options to get a cloud service registered.
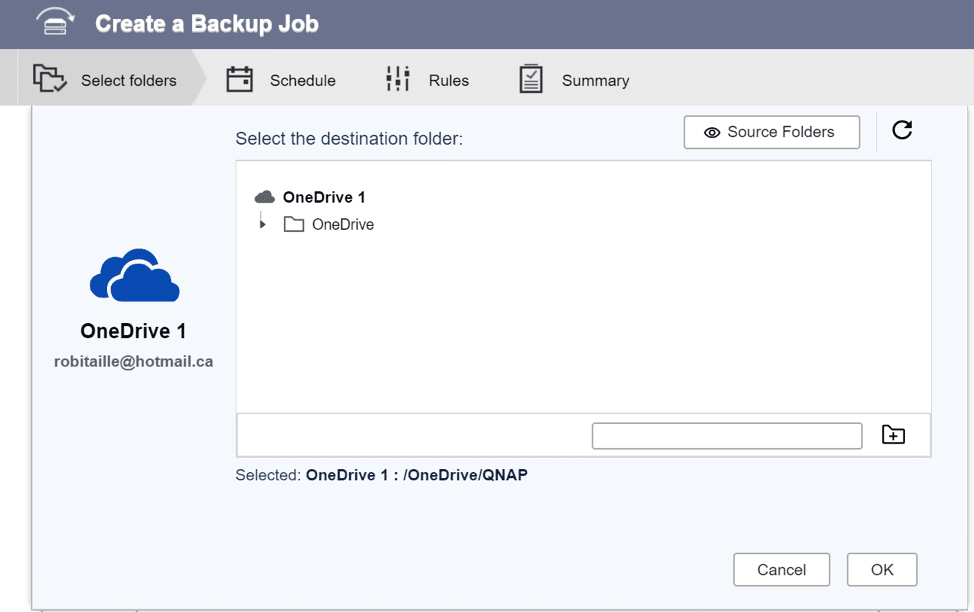
Provide a destination for the files on the cloud service and click OK.
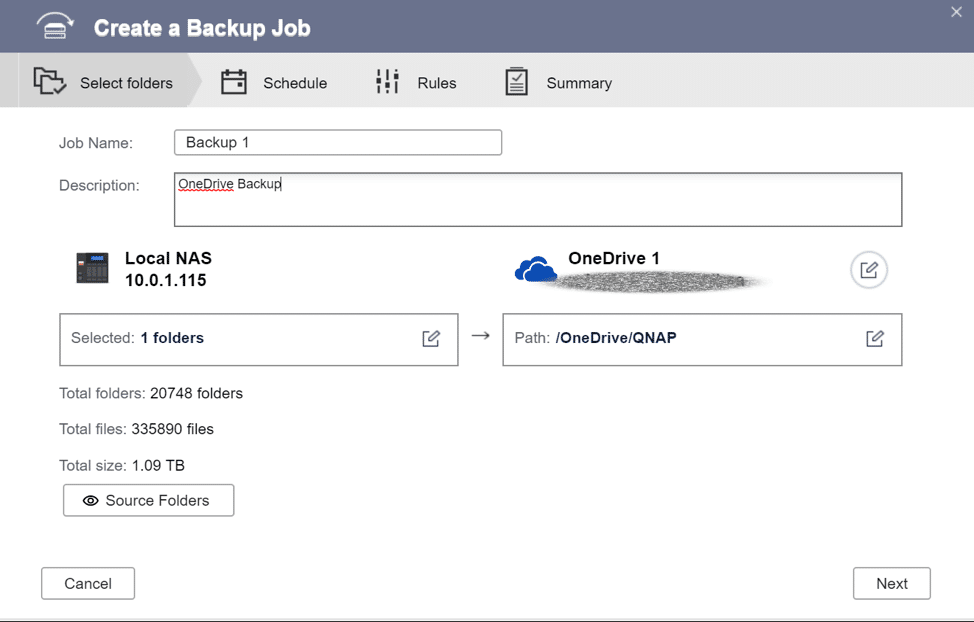
The details of the backup job will be detailed here.
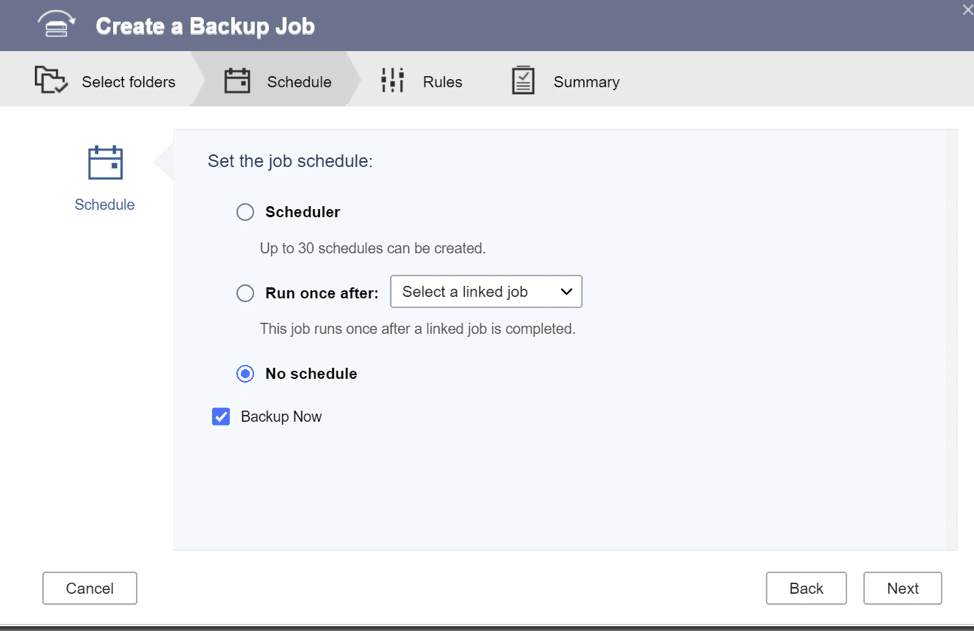
To ensure that my personal files make it off site safely – I will have the job “Backup Now”

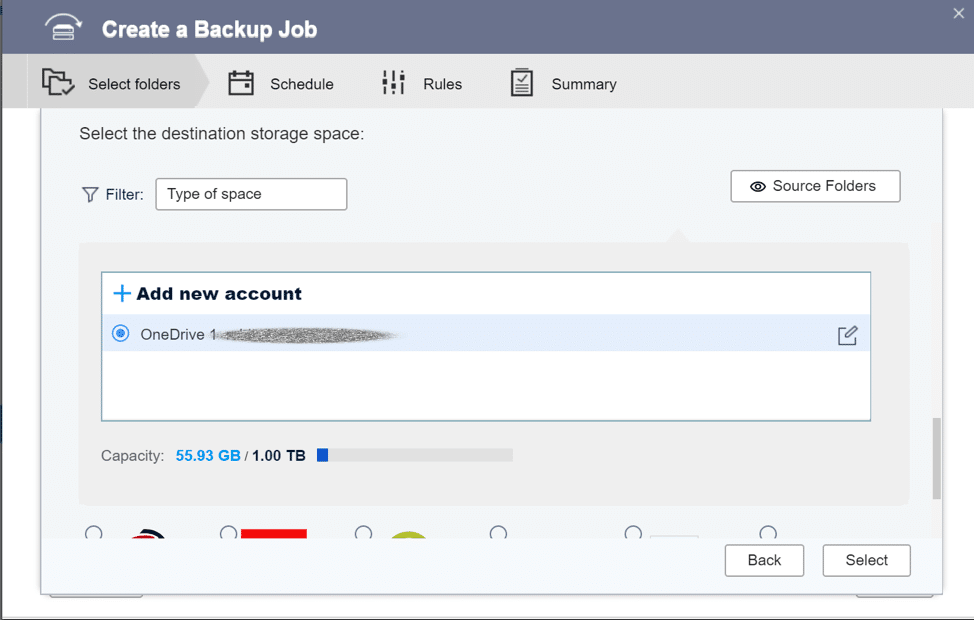
You may have noticed that I have 1.09TB of files and only 1TB of storage in the cloud – The data compression feature will allow for files to be compressed to save space.
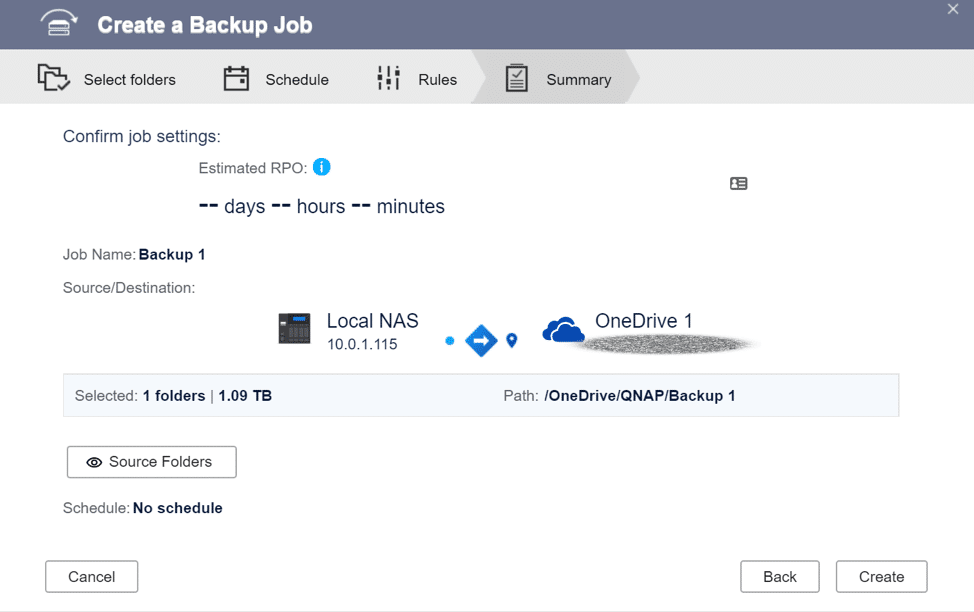
Once the job is created – the backup task kicks off and the system starts uploading.
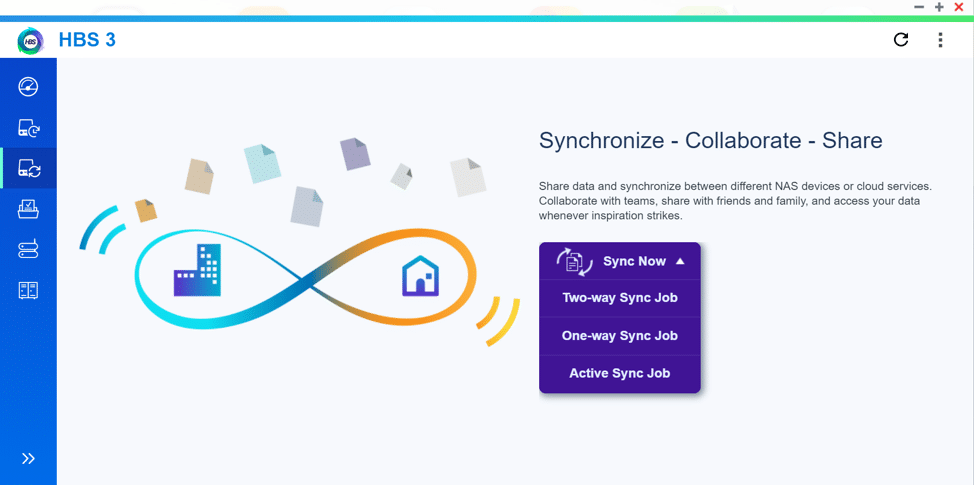
My favorite feature of many of the NAS solutions I have dealt with in the past few years is the ability to sync cloud services to a local drive for workgroup access. This allows me to significantly lower the amount of bandwidth I need to use for collaboration when working with large files such as photos or spreadsheets. Here I will show how I setup a local active sync for my Google Drive.
Login to the Google account when prompted.
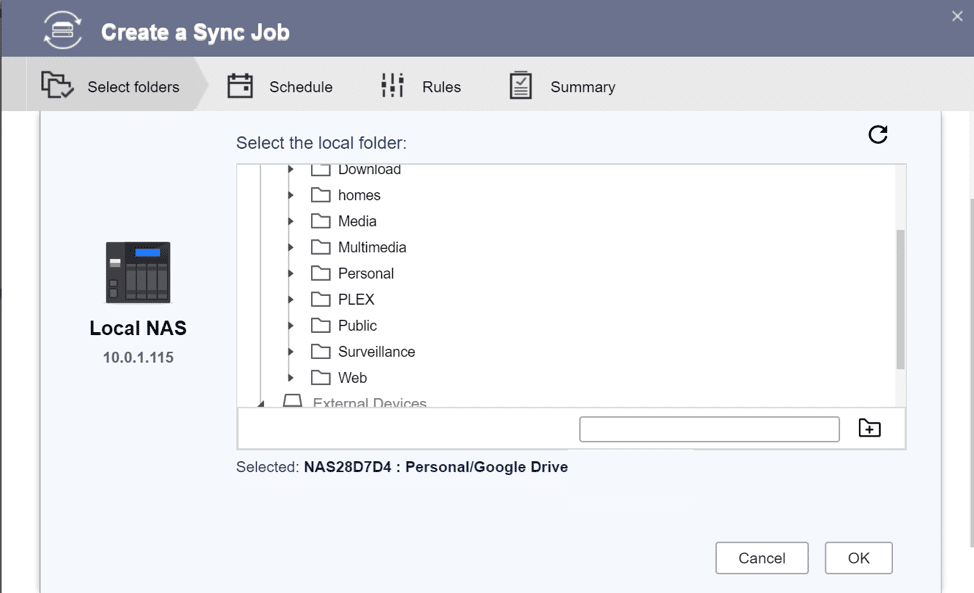
To sync the files, simply give the folder name where you want the files to “Live” on the NAS.
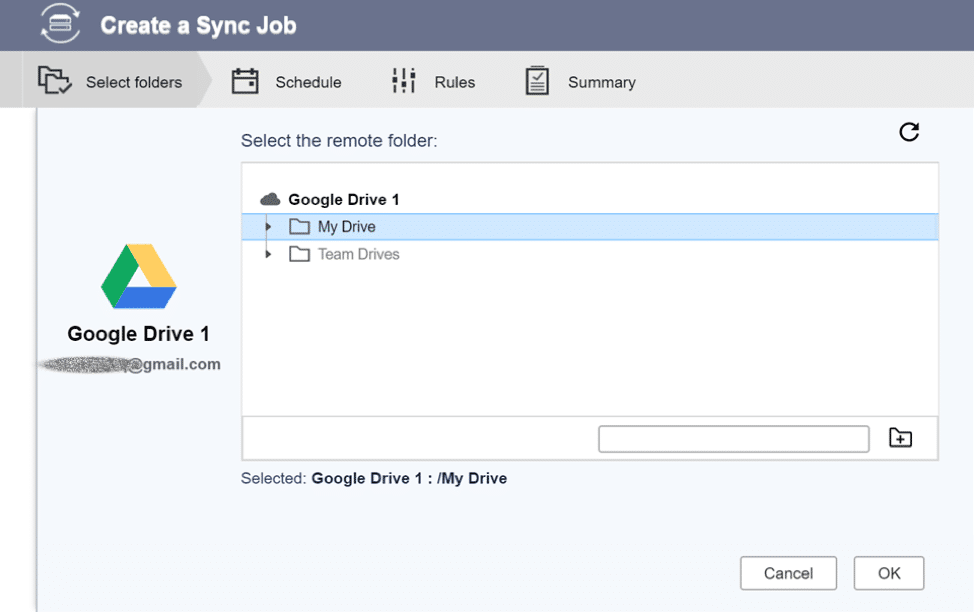
Select what files on the google Drive you want to sync.
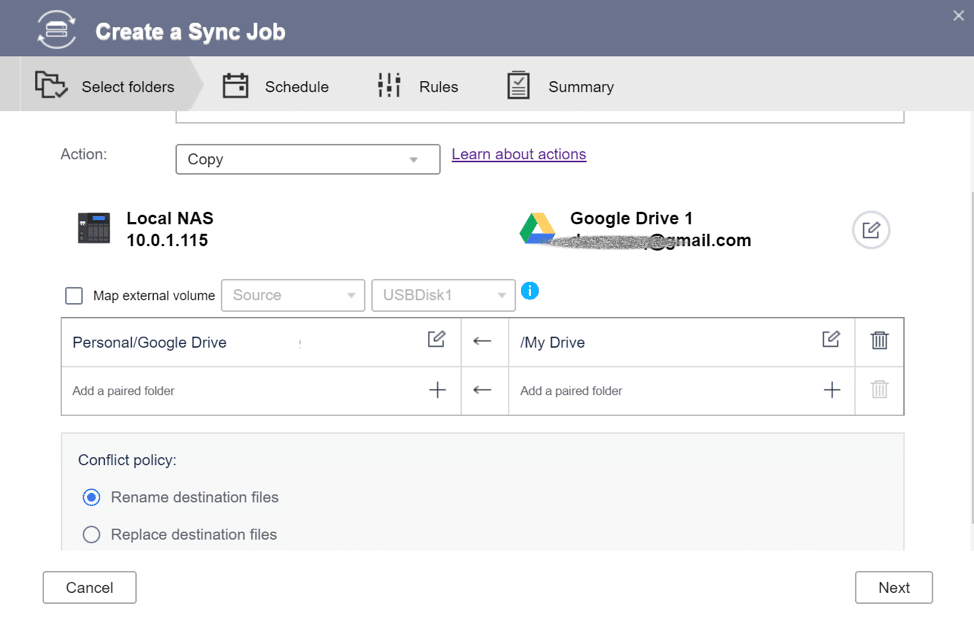
Ensure that source and destination direction are set. Establish a conflict policy.
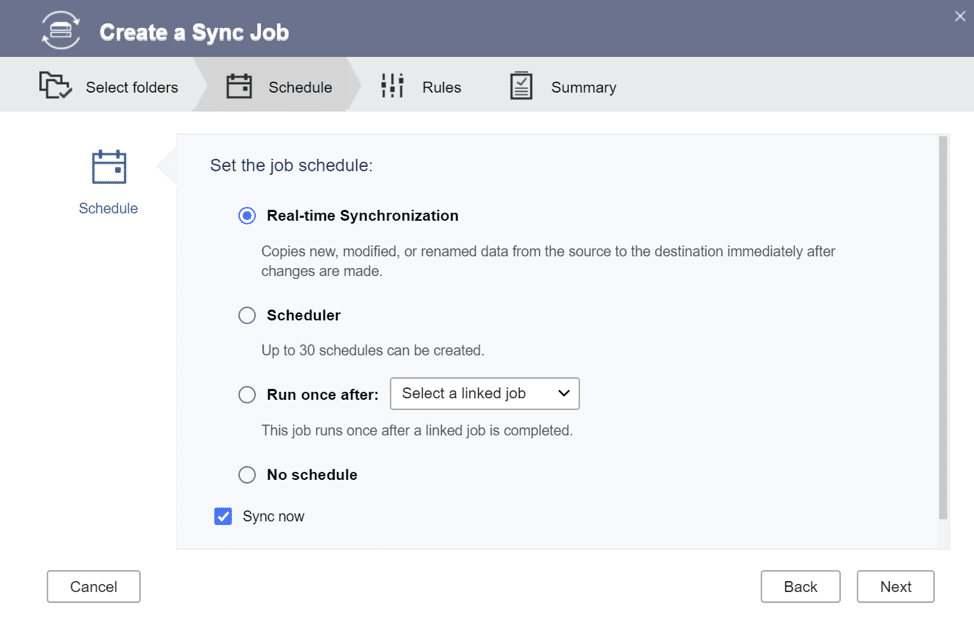
Here you will need to select what type of synchronization you require – Real-Time will consume some system resources, a benefit if you feel that you will use this service – If this is a would be nice to have just in case the cloud is down – you may want to consider scheduler – that way you can have a daily sync every night or two.
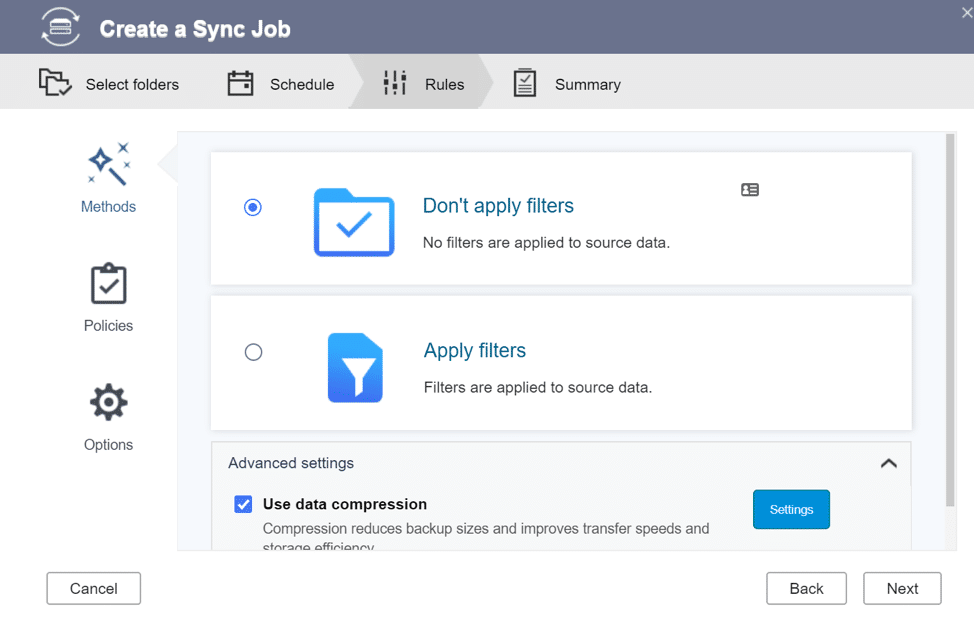
Just like the backup – you can filter files and use data compression.
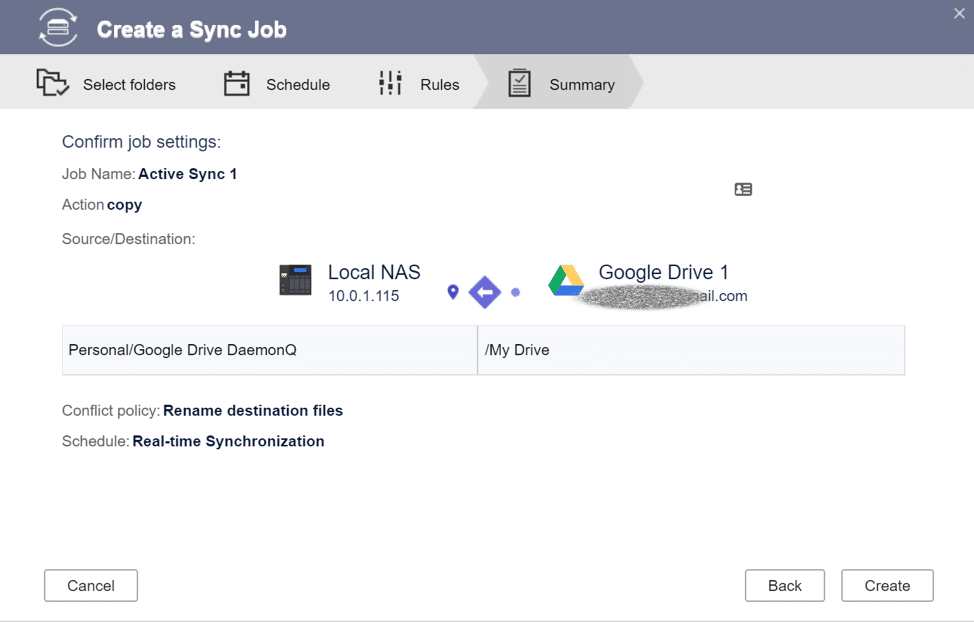
The final confirmation will start the sync. (If you selected “sync now”).
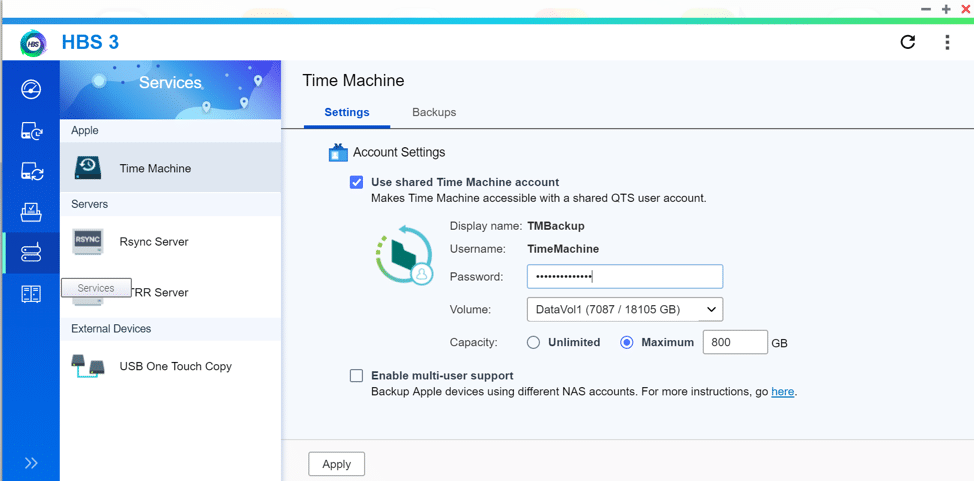
Under services you can enable Time Machine (For us Mac Users) – this will allow for you to use the NAS as a time machine destination.
Conclusion
Running the bleeding edge of software has its advantages and its disadvantages. I have found that running beta software in my home lab to be useful in testing client solutions, that being said I work with IT for a living and can generally spend the time to fix problems when they arise. It’s ultimately a gamble, but in this case I’ve enjoyed the new features with few headaches along the way. QNAP has done well to continually add to their QTS platform and the associated extra bundles.
Sign up for the StorageReview newsletter