

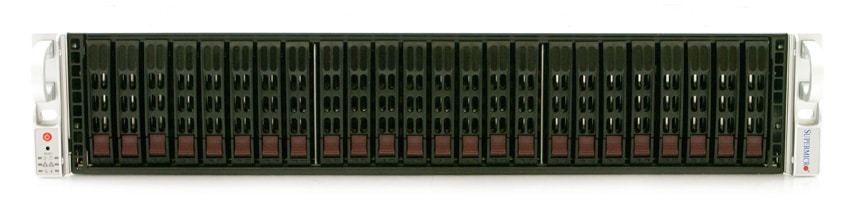
When reviewing large batches of SSDs for a certain project, the time always comes where to get back to a clean state, a bunch of SSDs need to be secure erased. This process can't be overlooked, since depending on the workload, not putting a drive back into its factory fresh condition can cause problems switching between workloads. In this lab tip we've documented how to secure erase SSDs by streamlining the process. We've created bulk erasing scripts for Linux server environments, which handle up to 23 SSDs at a time in a Supermicro SuperStorage Server 2027R-AR24NV.
For erasing groups of 16 SAS SSDs, which is a common SSD set size for array and enterprise SSD reviews, we've created a formatsas.sh script using bash. The script is quite simple, although one step to never forget is looking for the current boot drive and commenting it out. This prevents erasing the boot drive out from under you in the process! For this process we leverage the sg3_utils package and the sg_format command.
sg_format –format /dev/sda
sg_format –format /dev/sdb
sg_format –format /dev/sdc
sg_format –format /dev/sdd#sg_format –format /dev/sde
sg_format –format /dev/sdf
sg_format –format /dev/sdg
sg_format –format /dev/sdhsg_format –format /dev/sdi
sg_format –format /dev/sdj
sg_format –format /dev/sdk
sg_format –format /dev/sdlsg_format –format /dev/sdm
sg_format –format /dev/sdn
sg_format –format /dev/sdo
sg_format –format /dev/sdpsg_format –format /dev/sdq
The next script aptly named formatsata.sh is used for secure erasing large groups of SATA SSDs. In this setting we usually fully populate the 24-bay server with consumer and enterprise SSDs alike to get them all back to a factory fresh condition after a group of tests are complete. The same tip of commenting out the boot drive applies. For this process we use hdparm, which is commonly installed in most Linux distributions. If not, installing the hdparm package usually does the trick. To erase a SATA SSD you need to first enable security on it with a password of your choice, then initiate the secure erase command in a later step.
hdparm –user-master u –security-set-pass password /dev/sda
hdparm –user-master u –security-set-pass password /dev/sdb
hdparm –user-master u –security-set-pass password /dev/sdc
hdparm –user-master u –security-set-pass password /dev/sddhdparm –user-master u –security-set-pass password /dev/sde
hdparm –user-master u –security-set-pass password /dev/sdf
hdparm –user-master u –security-set-pass password /dev/sdg
hdparm –user-master u –security-set-pass password /dev/sdhhdparm –user-master u –security-set-pass password /dev/sdi
hdparm –user-master u –security-set-pass password /dev/sdj
hdparm –user-master u –security-set-pass password /dev/sdk
hdparm –user-master u –security-set-pass password /dev/sdlhdparm –user-master u –security-set-pass password /dev/sdm
hdparm –user-master u –security-set-pass password /dev/sdn
#hdparm –user-master u –security-set-pass password /dev/sdo
hdparm –user-master u –security-set-pass password /dev/sdphdparm –user-master u –security-set-pass password /dev/sdq
hdparm –user-master u –security-set-pass password /dev/sdr
hdparm –user-master u –security-set-pass password /dev/sds
hdparm –user-master u –security-set-pass password /dev/sdthdparm –user-master u –security-set-pass password /dev/sdu
hdparm –user-master u –security-set-pass password /dev/sdv
hdparm –user-master u –security-set-pass password /dev/sdw
hdparm –user-master u –security-set-pass password /dev/sdxhdparm –user-master u –security-erase password /dev/sda
hdparm –user-master u –security-erase password /dev/sdb
hdparm –user-master u –security-erase password /dev/sdc
hdparm –user-master u –security-erase password /dev/sddhdparm –user-master u –security-erase password /dev/sde
hdparm –user-master u –security-erase password /dev/sdf
hdparm –user-master u –security-erase password /dev/sdg
hdparm –user-master u –security-erase password /dev/sdhhdparm –user-master u –security-erase password /dev/sdi
hdparm –user-master u –security-erase password /dev/sdj
hdparm –user-master u –security-erase password /dev/sdk
hdparm –user-master u –security-erase password /dev/sdlhdparm –user-master u –security-erase password /dev/sdm
hdparm –user-master u –security-erase password /dev/sdn
#hdparm –user-master u –security-erase password /dev/sdo
hdparm –user-master u –security-erase password /dev/sdphdparm –user-master u –security-erase password /dev/sdq
hdparm –user-master u –security-erase password /dev/sdr
hdparm –user-master u –security-erase password /dev/sds
hdparm –user-master u –security-erase password /dev/sdthdparm –user-master u –security-erase password /dev/sdu
hdparm –user-master u –security-erase password /dev/sdv
hdparm –user-master u –security-erase password /dev/sdw
hdparm –user-master u –security-erase password /dev/sdx
Should your goals be more pedestrian than wiping drives 24 at a time, the command for doing a secure erase on a single drive is the same… just targeting one drive instead of many. In a client scenario this can be done for repurposing an SSD for a new machine or to ensure all data is gone before donating or otherwise recycling an old SSD. In a Windows environment with an SSD that supports trim, you can copy this process by deleting all partitions from the drive, making one full-size partition and performing a quick format, and then deleting the partition. That initiates a TRIM command across the entire drive surface.


 Amazon