

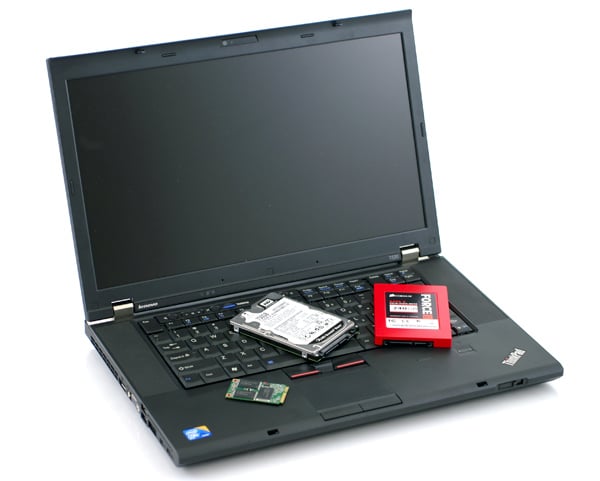
Upgrading your notebook to increase performance doesn't have to be a frustrating experience. At StorageReview we understand many users want to get the most out of their computer, but not everyone is as experienced or comfortable diving when it comes to diving into a laptop. For this reason we are kicking off a new type of guide covering everything you need to know to upgrade the storage devices in your system. With help from Lenovo supplying the notebook and required accessories, this guide will cover how to upgrade the hard drive or SSD and memory in a new ThinkPad T520. Our goal is to help you through each step, from unscrewing the first panel to migrating data with as little frustration as possible.
When working with any internal components of a computer, make sure you take precautions to reduce or prevent static discharge. Touching a metal water faucet before starting your work is a simple and effective way to ground your body.
Lenovo ThinkPad T520 Component Specifications:
- System Memory: 204-pin PC3-10600 (DDR3 1333) DDR3 Memory
- Primary Drive Bay: 9.5mm 2.5-inch SATA Hard Drive or SSD (Some models ship with 7mm height drives which will use a different drive caddy and rubber rails)
- Secondary Drive Bay: 9.5mm 2.5-inch SATA Hard Drive or SSD
- mSATA Slot: Compatible with all newer mSATA SSDs
System Memory
Upgrading system memory can help out in many ways if you originally purchased your system with only 2GB or 4GB of RAM. If you fit into the power-user segment, editing video or photos or play lots of video games, being low on memory can hurt performance. Luckily, adding in more memory doesn't have to be a daunting task.
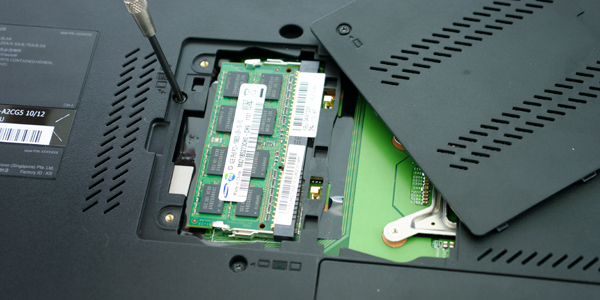
The Lenovo ThinkPad T520 is designed to make memory upgrades a very simple task. The notebook includes two memory slots, one located on the bottom of the notebook and another underneath the keyboard. The bottom RAM slot is easily accessible by removing an access panel on the underside of the notebook by removing two Phillips head screws.
The top memory slot takes a little more work, but can be reached by removing one screw under the bottom RAM cover and one additional screw on the bottom chassis cover. With those screws taken out, you turn the notebook over, open the screen lid, and push the keyboard forward gently to unlatch small tabs holding the bottom of the keyboard in place. The movement required is very small, but once the bottom edge comes free, you carefully lift the keyboard up completely exposing a thin cable and the second RAM slot.
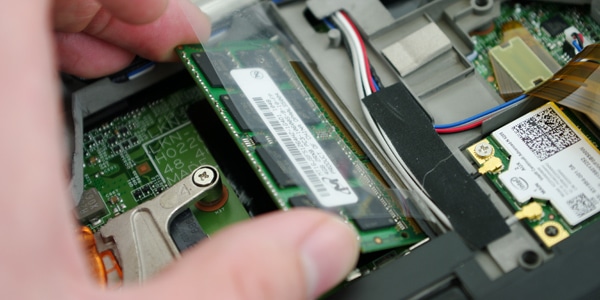
The swap out memory from either slot, spread the small metal clips out on each side which releases the RAM and allows it to tilt up. Once the memory is at roughly a 30 to 40-degree angle pull it out and away from the connector. Installation is reverse of removal, with the memory inserted first at a slight angle (making sure it is fully seated) and then pressed down and clipped into position.
Hard Drive or SSD
The Lenovo ThinkPad T520 supports a wide range of SSD and hard drive options, all of which have their pros and cons. There are a few combinations that get you the best of both worlds though, which we will cover in this upgrade guide.
Generally speaking, users turn to hard drives for high capacity and affordability, but the downside is they are much slower than an SSD. SSDs offer great performance but currently none come close to the storage capacity or affordability of hard drives… well until mSATA came along at least. By installing an mSATA SSD as a boot drive, you free up the primary bay for a high-capacity hard drive. This combo gives you as much storage capacity as you could want, while still keeping flash-storage in the driver's seat.
The ThinkPad T520 supports a total of three storage devices including the primary 2.5-inch bay, a mSATA SSD slot, and an optional secondary hard drive bay for the UltraBay. Even the low-tech user, with a bit of patience, can easily access all of these drive bays to install a new drive or upgrade an old one.
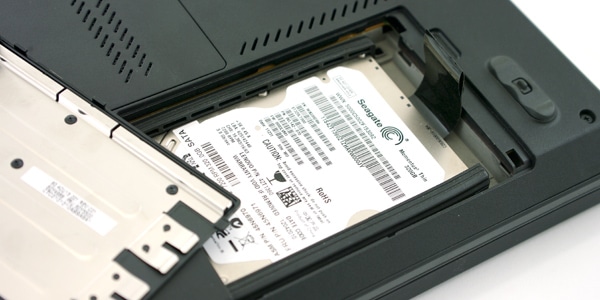
For most users the primary bay will be the main focus of their upgrade. The easiest swap is removing the old hard drive and installing your own fast SSD. The primary storage bay is accessed through a panel on the bottom of the notebook, held in place by a single Phillips head screw. With the screw removed, lift the cover out of the way, exposing the drive on its caddy resting in the computer. To remove the drive, carefully grip the plastic pull tab and tilt up about 1cm and pull it out of the system.
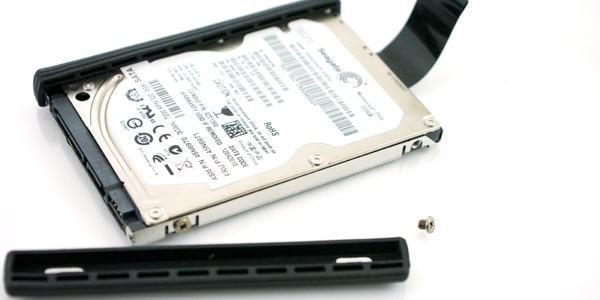
Once the caddy is outside of the system, pull off the rubber rails exposing the screws that retain the drive in the tray. Remove the screws, take out the old drive, place in your new one, and replace the screws. Installation is reverse of removal with the drive caddy sliding back into its position with very little effort required.
Depending on the original drive included with the T520, you could have either a 7mm or 9.5mm height drive. The 9.5mm height is the most common for the 2.5-inch form-factor and will be compatible with any 2.5-inch SSD currently on the market. The 7mm height is more limited, so it is important to check the caddy size beforehand. If you got stuck with the smaller size, you can still upgrade your system but you may have to purchase a 9.5mm height caddy as there are very few 7mm drive options.
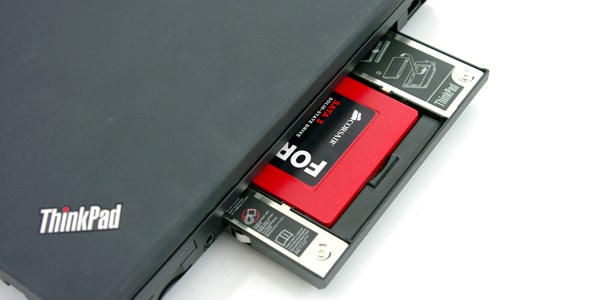
The Lenovo ThinkPad T520 also supports a secondary 2.5-inch storage bay through an add-on which takes advantage of the versatile ThinkPad Ultrabay. This bay interfaces with the same Intel SATA 6.0 bus, meaning even high-performance SSDs will still show full gains through this secondary bay. Installation for this bay is as simple as sliding your new drive into the secondary slot, flipping down the drive locking tab, and sliding the whole assembly into the computer in place of the optical drive.
The last storage upgrade area on the T520 is the mSATA slot, supporting new SSDs like the Intel SSD 310 without taking away room for a standard 2.5-inch drive in the primary bay. We love this new interface standard because it allows users to install a boot-drive capacity SSD in the notebook and still retain the 2.5-inch bay for a high-capacity hard drive.
The mSATA slot is located underneath the keyboard and accessed the same way as the top memory slot. With the keyboard removed using the same instructions listed above in the System Memory section, you will find an open mSATA/mini-PCIe slot near the middle of the keyboard opening. If your notebook was equipped with WWAN from the factory, this slot may be in use, so some road warriors will have to factor in which feature they prefer in their notebook.
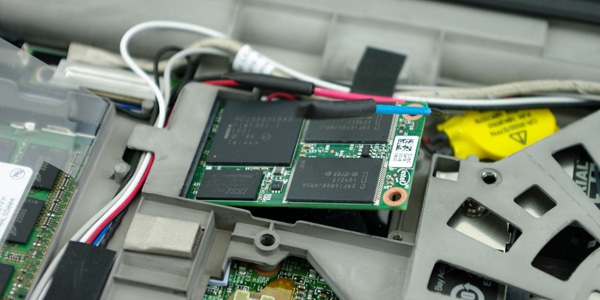
To install the card, first remove the included retention screw, then insert the mSATA SSD at a slight angle in the open slot and screw it down to hold the card in place. Then reassemble your notebook, change the BIOS boot order to boot from the mSATA device, and install your OS to the new mSATA SSD.
Wrap-up
Overall the Lenovo ThinkPad T520 offers plenty of upgrade options for users interested in getting the most out of their new system. In this guide we covered installing memory in the upper and lower RAM slots, as well as installing a hard drive or SSD into the one of three available storage bays. For additional help during the upgrade process not covered in this guide, feel free to ask questions in our Storage Review forums.


 Amazon