
 In our latest In the Lab Series we will be upgrading our TurboBox (NA211TB-LD) from Thunderbolt 1 to the newest Thunderbolt 2 technology, which we reviewed back in October of 2013, using the company’s Thunderbolt 2 upgrade kit. The Netstor TurboBox is an slick looking external PCIe enclosure that offers storage expansion through a Thunderbolt connection (10Gb/s originally and 20Gb/s with an upgrade) using its equipped three PCIe slots and four 2.5″ bays; which support both SSDs and SAS/SATA HDDs. Users also have the option of adding a RAID card to the TurboBox, which allows for multiple RAID configurations. The TurboBox is equipped with a 250W power supply alongside a fan as well as an abundance of ventilation located on the front and back of the high-end aluminum enclosure. The Netstor TurboBox is primarily targeted towards mobile users looking to expand on local storage options, including creative professionals who require incredibly fast transfer speeds and need to offload data quickly for sharing and editing of their work. Switching to Thunderbolt 2 technology will further increase the performance of the TurboBox, enabling more efficiency in enthusiasts’ workflows.
In our latest In the Lab Series we will be upgrading our TurboBox (NA211TB-LD) from Thunderbolt 1 to the newest Thunderbolt 2 technology, which we reviewed back in October of 2013, using the company’s Thunderbolt 2 upgrade kit. The Netstor TurboBox is an slick looking external PCIe enclosure that offers storage expansion through a Thunderbolt connection (10Gb/s originally and 20Gb/s with an upgrade) using its equipped three PCIe slots and four 2.5″ bays; which support both SSDs and SAS/SATA HDDs. Users also have the option of adding a RAID card to the TurboBox, which allows for multiple RAID configurations. The TurboBox is equipped with a 250W power supply alongside a fan as well as an abundance of ventilation located on the front and back of the high-end aluminum enclosure. The Netstor TurboBox is primarily targeted towards mobile users looking to expand on local storage options, including creative professionals who require incredibly fast transfer speeds and need to offload data quickly for sharing and editing of their work. Switching to Thunderbolt 2 technology will further increase the performance of the TurboBox, enabling more efficiency in enthusiasts’ workflows.
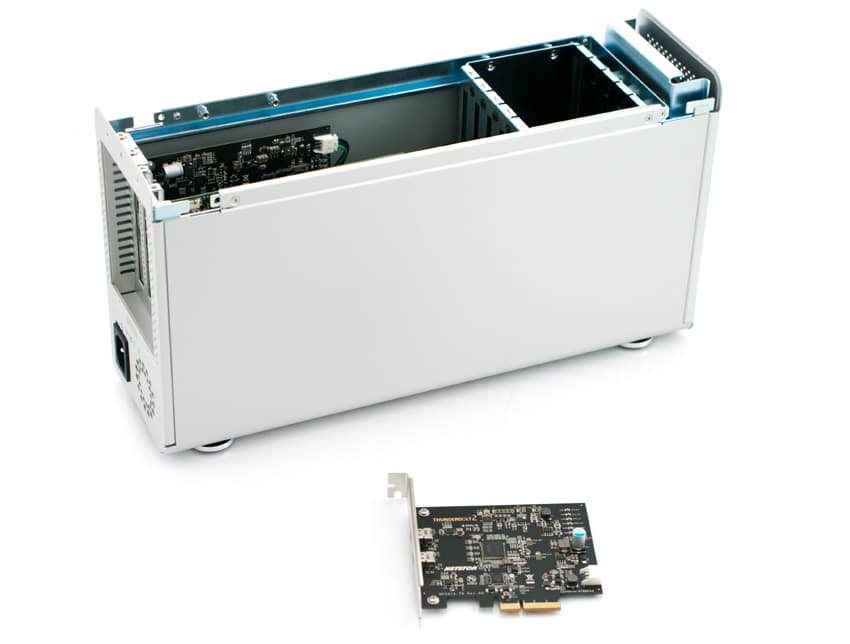
Nonetheless, in order to upgrade our unit, Netstor provided us with their Thunderbolt 2 upgrade kit. The package itself simply contained their Thunderbolt 2 PCIe board, which was protected inside an anti-static bag. The PCIe board is branded with both Thunderbolt 2 and company logo at the top left and bottom left respectively.
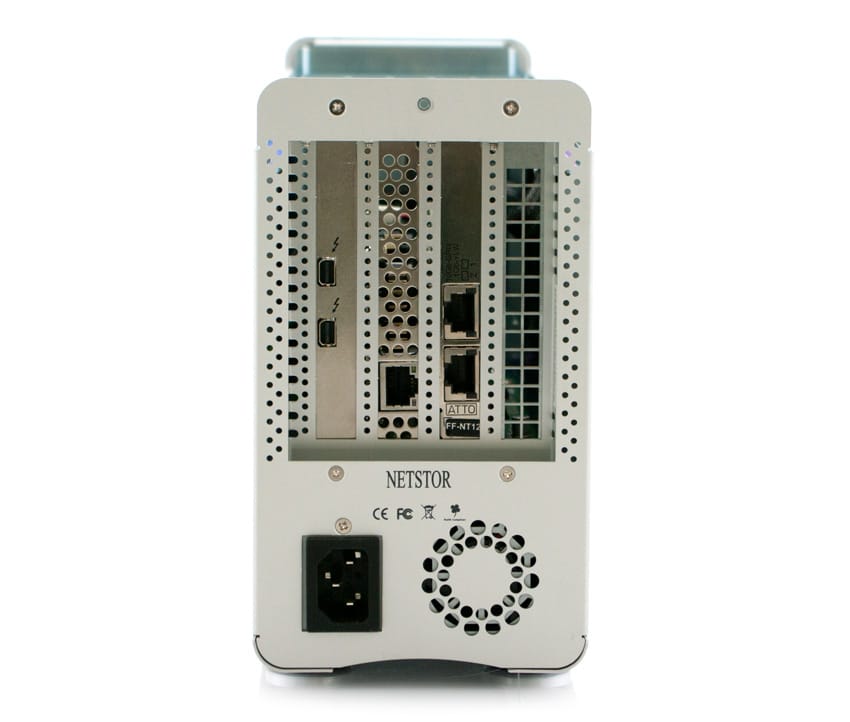
The actual installation of the PCIe board is quite straightforward. Once the TurboBox has been turned off, turn the device around to the rear panel of the enclosure. You will see the currently installed Thunderbolt 1 card with two ports, as well as three removable PCIe slot guards. To open the enclosure, twist the rear-mounted screw until you can remove the top panel, which reveals the four drive bays and the PCIe expansion and Thunderbolt 1 cards.
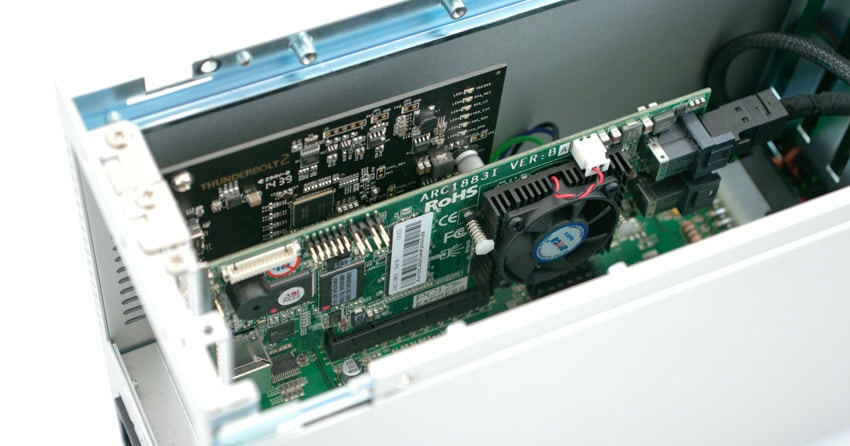
Remove the 3-pin power cable that is connected to The Thunderbolt 1 PCIe board located at the top corner. Next, simply remove the 1x Phillips head screw that is securing the card in place and carefully take out the Thunderbolt 1 PCIe board using the metal bracket.
Now, it’s just simply the matter of replacing the card. First, take the 3-pin power cable and connect it to the bottom right of the card. Once that it done, take the Netstor Thunderbolt 2 board from the upgrade kit and gently place it in the PCIe slow that is labeled with SLOT4 (Upstream PCIe x8). After it has been securely installed, tighten the Phillips screws on the bracket of the Thunderbolt 2 PCIe board and now our Netstor TurboBox enclosure now has Thunderbolt 2 technology, which will significantly increase its throughput.
As you can see, this process was very seamless and will take users no more than five or ten minutes of simple hardware removal and installation; even for those with little or no experience. In an upcoming review, we will test the upgraded Netstor TurboBox for performance numbers using the new Thunderbolt 2 PCIe board. This time around we will be using a SAS3 RAID card configuration using the internal 4 slots with SSDs as well as an external version with a JBOD.
Our review of the upgraded Netstor TurboBox
Discuss this story