

Proxmox Server Solutions recently announced NVIDIA vGPU support for their Virtual Environment (VE) hypervisor, unlocking a whole new world of GPU acceleration for rendering, VDI, AI, and other applications. Join us as we review and walk you through the hypervisor’s new feature set and evaluate its performance.
What’s the Big Deal with vGPU Support?
If you’re unfamiliar with NVIDIA’s vGPU software, it allows a GPU’s computing and memory resources to be partitioned and distributed among multiple virtual machines (VMs). In this setup, the VMs alternate using the GPU’s processing power and allocate a portion of the card’s memory for their needs. This approach enables the GPU to maintain peak utilization, even as the workloads of the guest VMs vary in intensity.

Before We Begin… (Prerequisites)
You’ll need a few things before spinning up a GPU virtualization environment in Proxmox VE (PVE). Like many data center goodies, NVIDIA’s vGPU software isn’t free. You’ll need to purchase or sign up for the evaluation version of their Virtual GPU Software and create an NVIDIA Enterprise account. Next, you must get a vGPU-compatible card and download the appropriate drivers from the licensing portal. Grab the current versions of the “Linux KVM” drivers. At a minimum, download these:
- vGPU Software: 18.0
- Host driver: 570.124.03
- Linux guest driver: 570.124.06
- Windows guest driver: 572.60
We leveraged the NVIDIA L40S and a Dell PowerEdge R760 for this project.

Additionally, you will need a dedicated licensing server (DLS) or cloud licensing server (CLS) to activate vGPU functionality on your guests. You can find a quick start guide by clicking here.
Next, verify that your server’s UEFI (BIOS) settings enable the proper virtualization features. Look for VT-d or AMD-v, SR-IOV, above 4G decoding, resizable bar, and Alternative Routing ID Interpretation (ARI) settings, and make sure all are enabled.
Note: You might not find all these features in the UEFI menu, as some may not be exposed to the user.
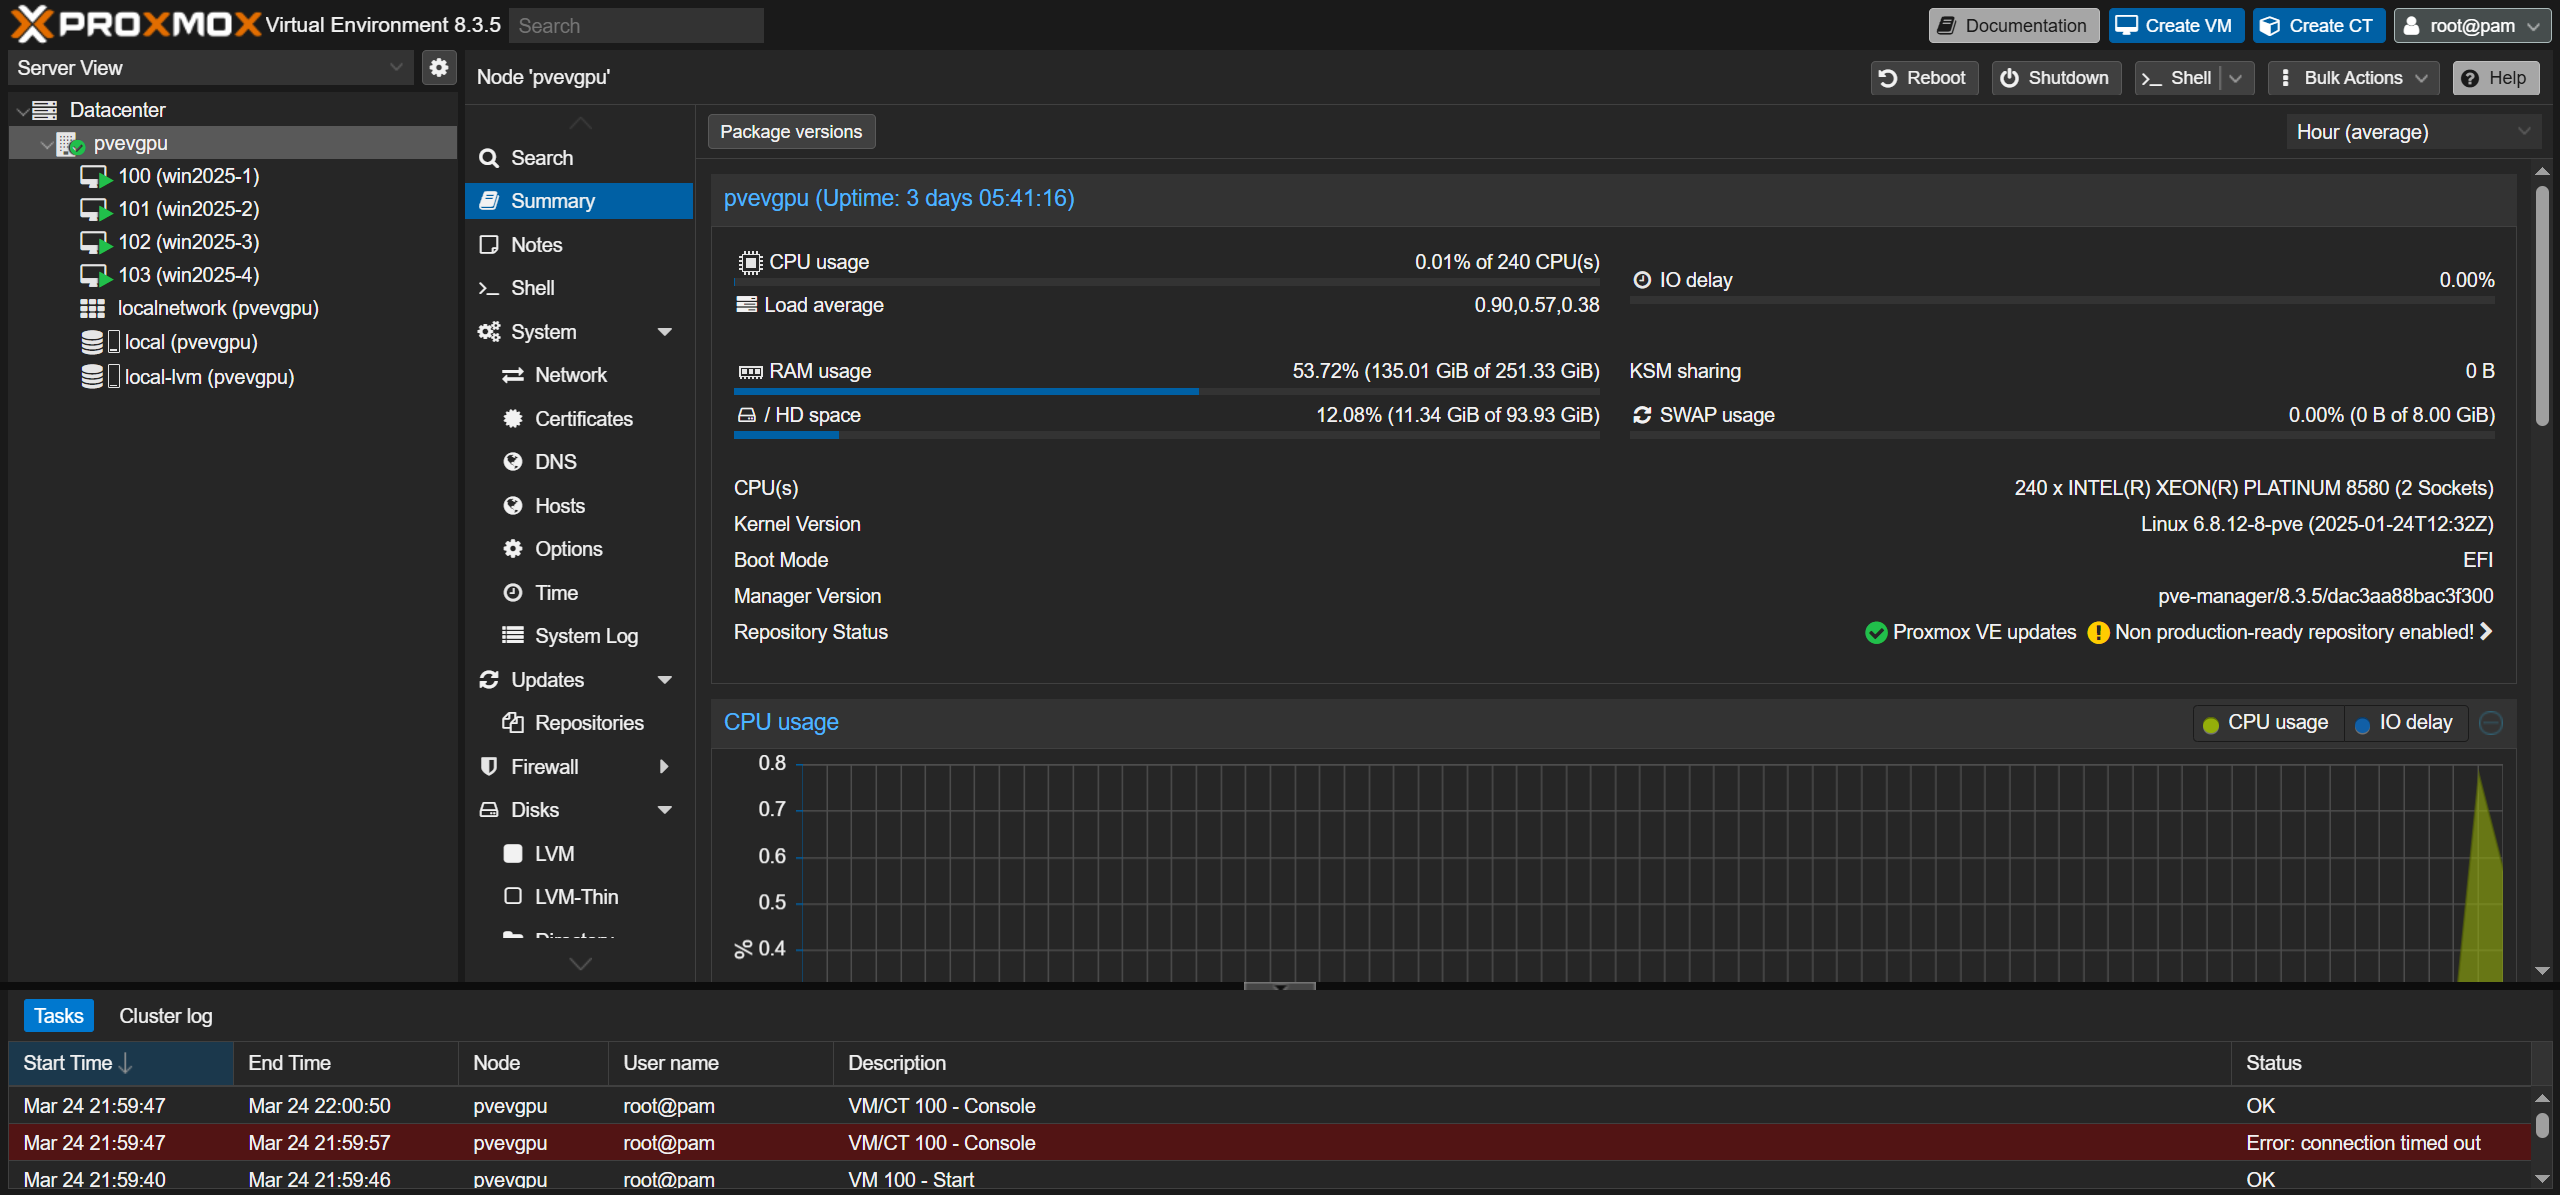
Last, check that you’re using a suitable version of Proxmox VE. vGPU functionality requires, at a minimum, pve-manager version 8.3.4, with kernel 6.18.12-8-pve or newer. You can check your PVE node’s software versions by navigating to the “Summary” tab on the desired server, as shown below:
The Host With the Most (Proxmox Host vGPU Setup)
Now that everything is ready, it’s time to configure the Proxmox VE server. In your Proxmox VE server’s web interface, click the server name on the left side of the screen and select the “Shell” tab. Type this command in the console window that appears and press Enter when finished:
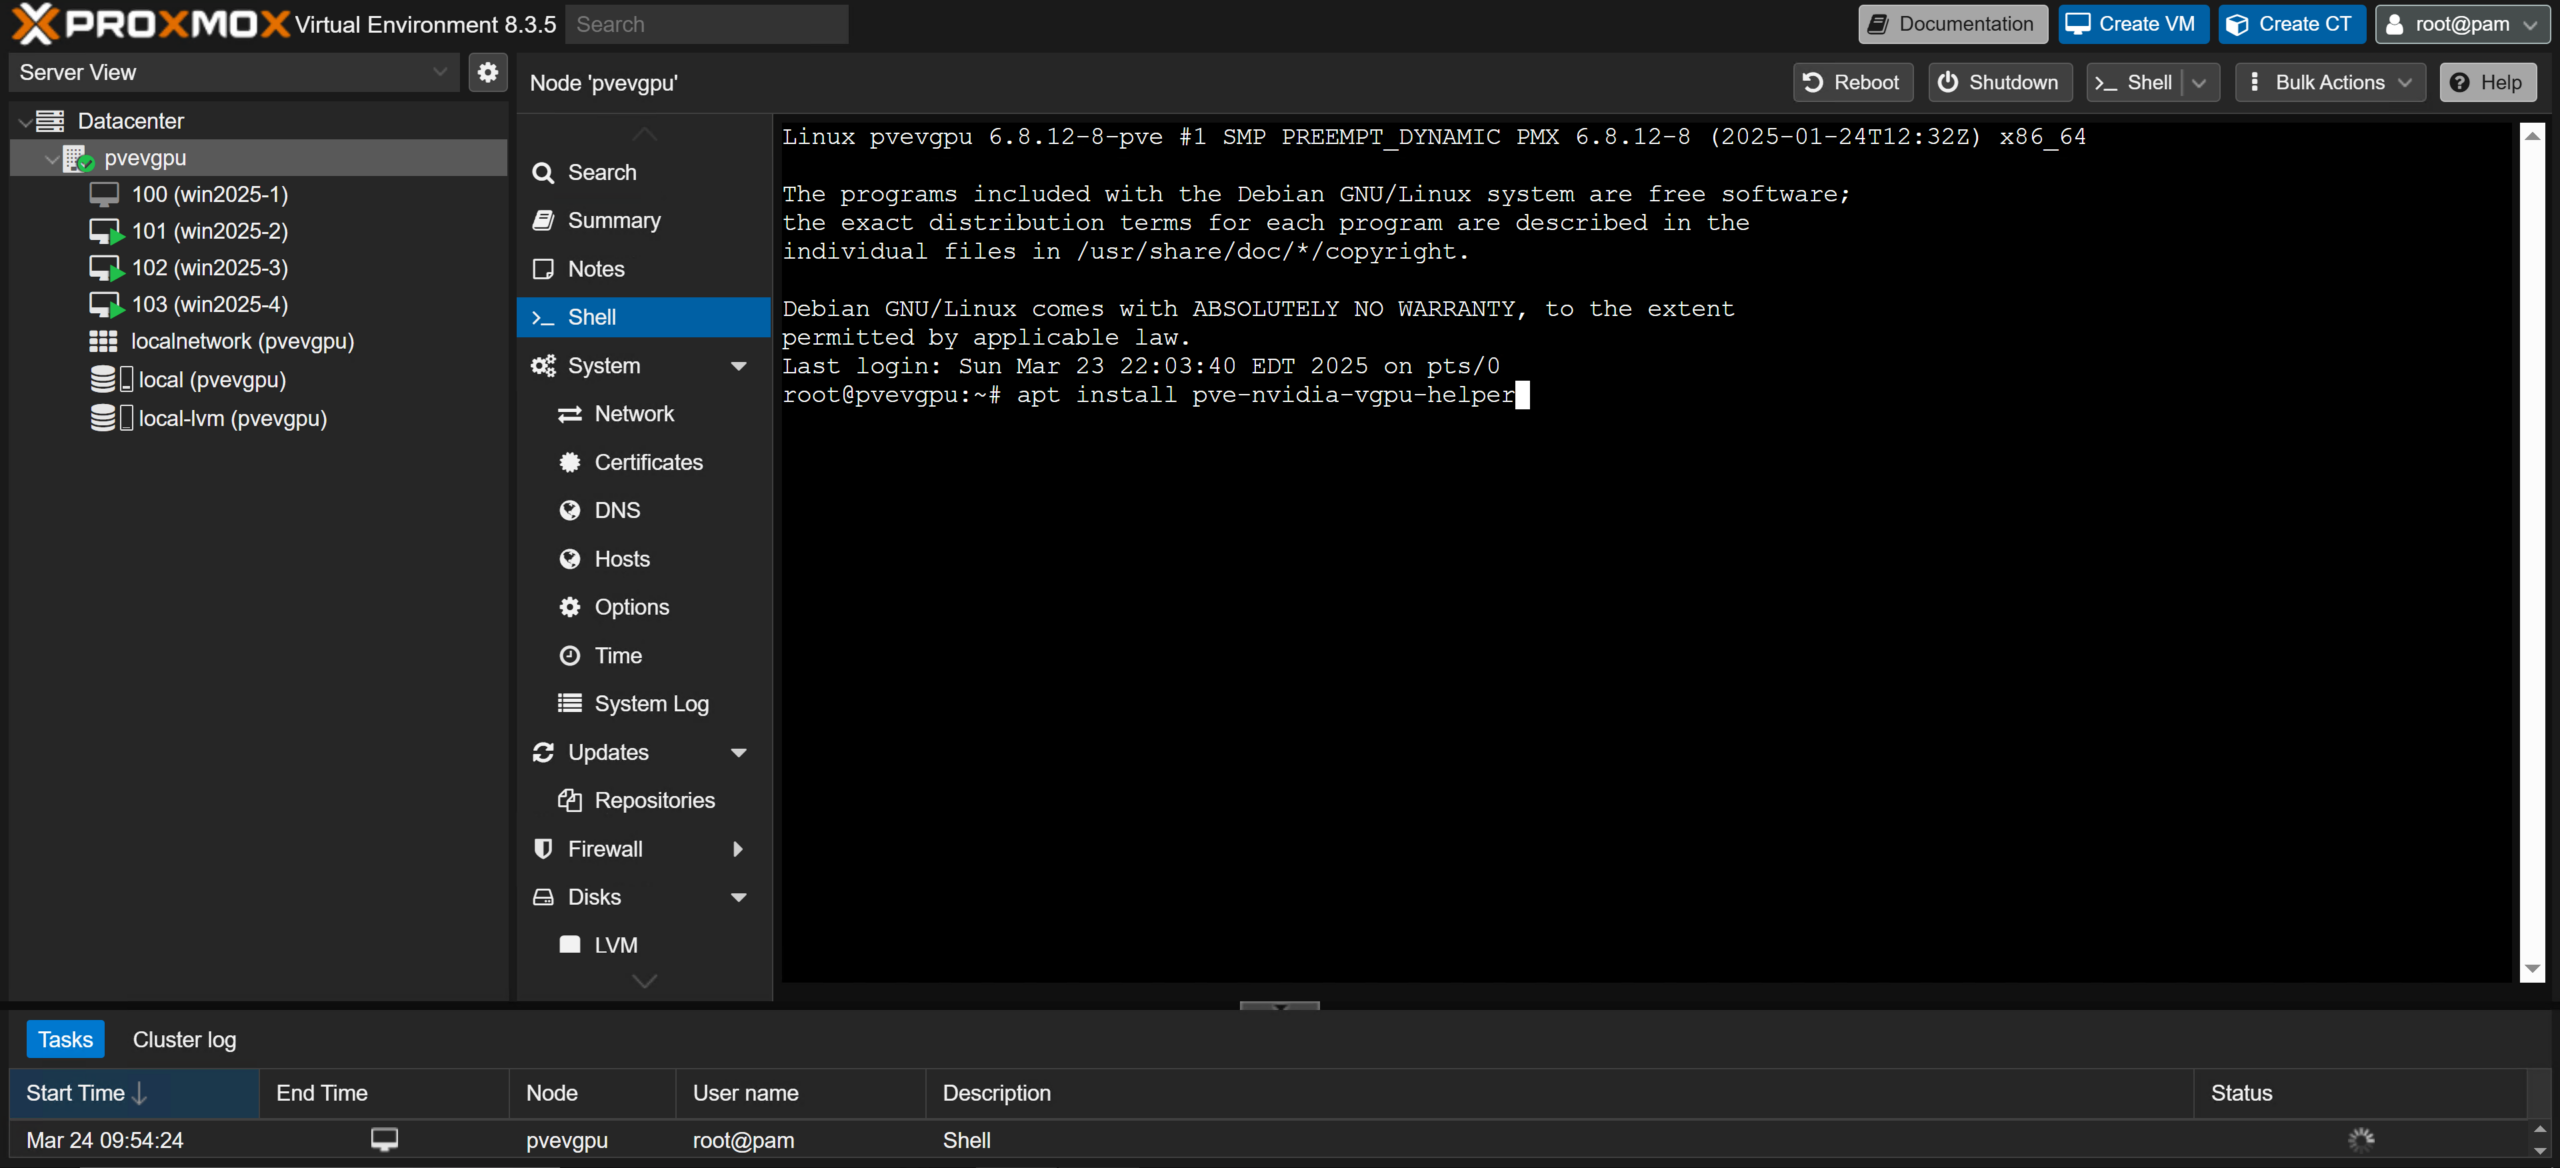
apt install pve-nvidia-vgpu-helper
This will ensure the vGPU setup tool is installed on your server, preparing it for Proxmox vGPU support. After the server finishes installing the script or informs you it is already present, run one more command to execute the tool.
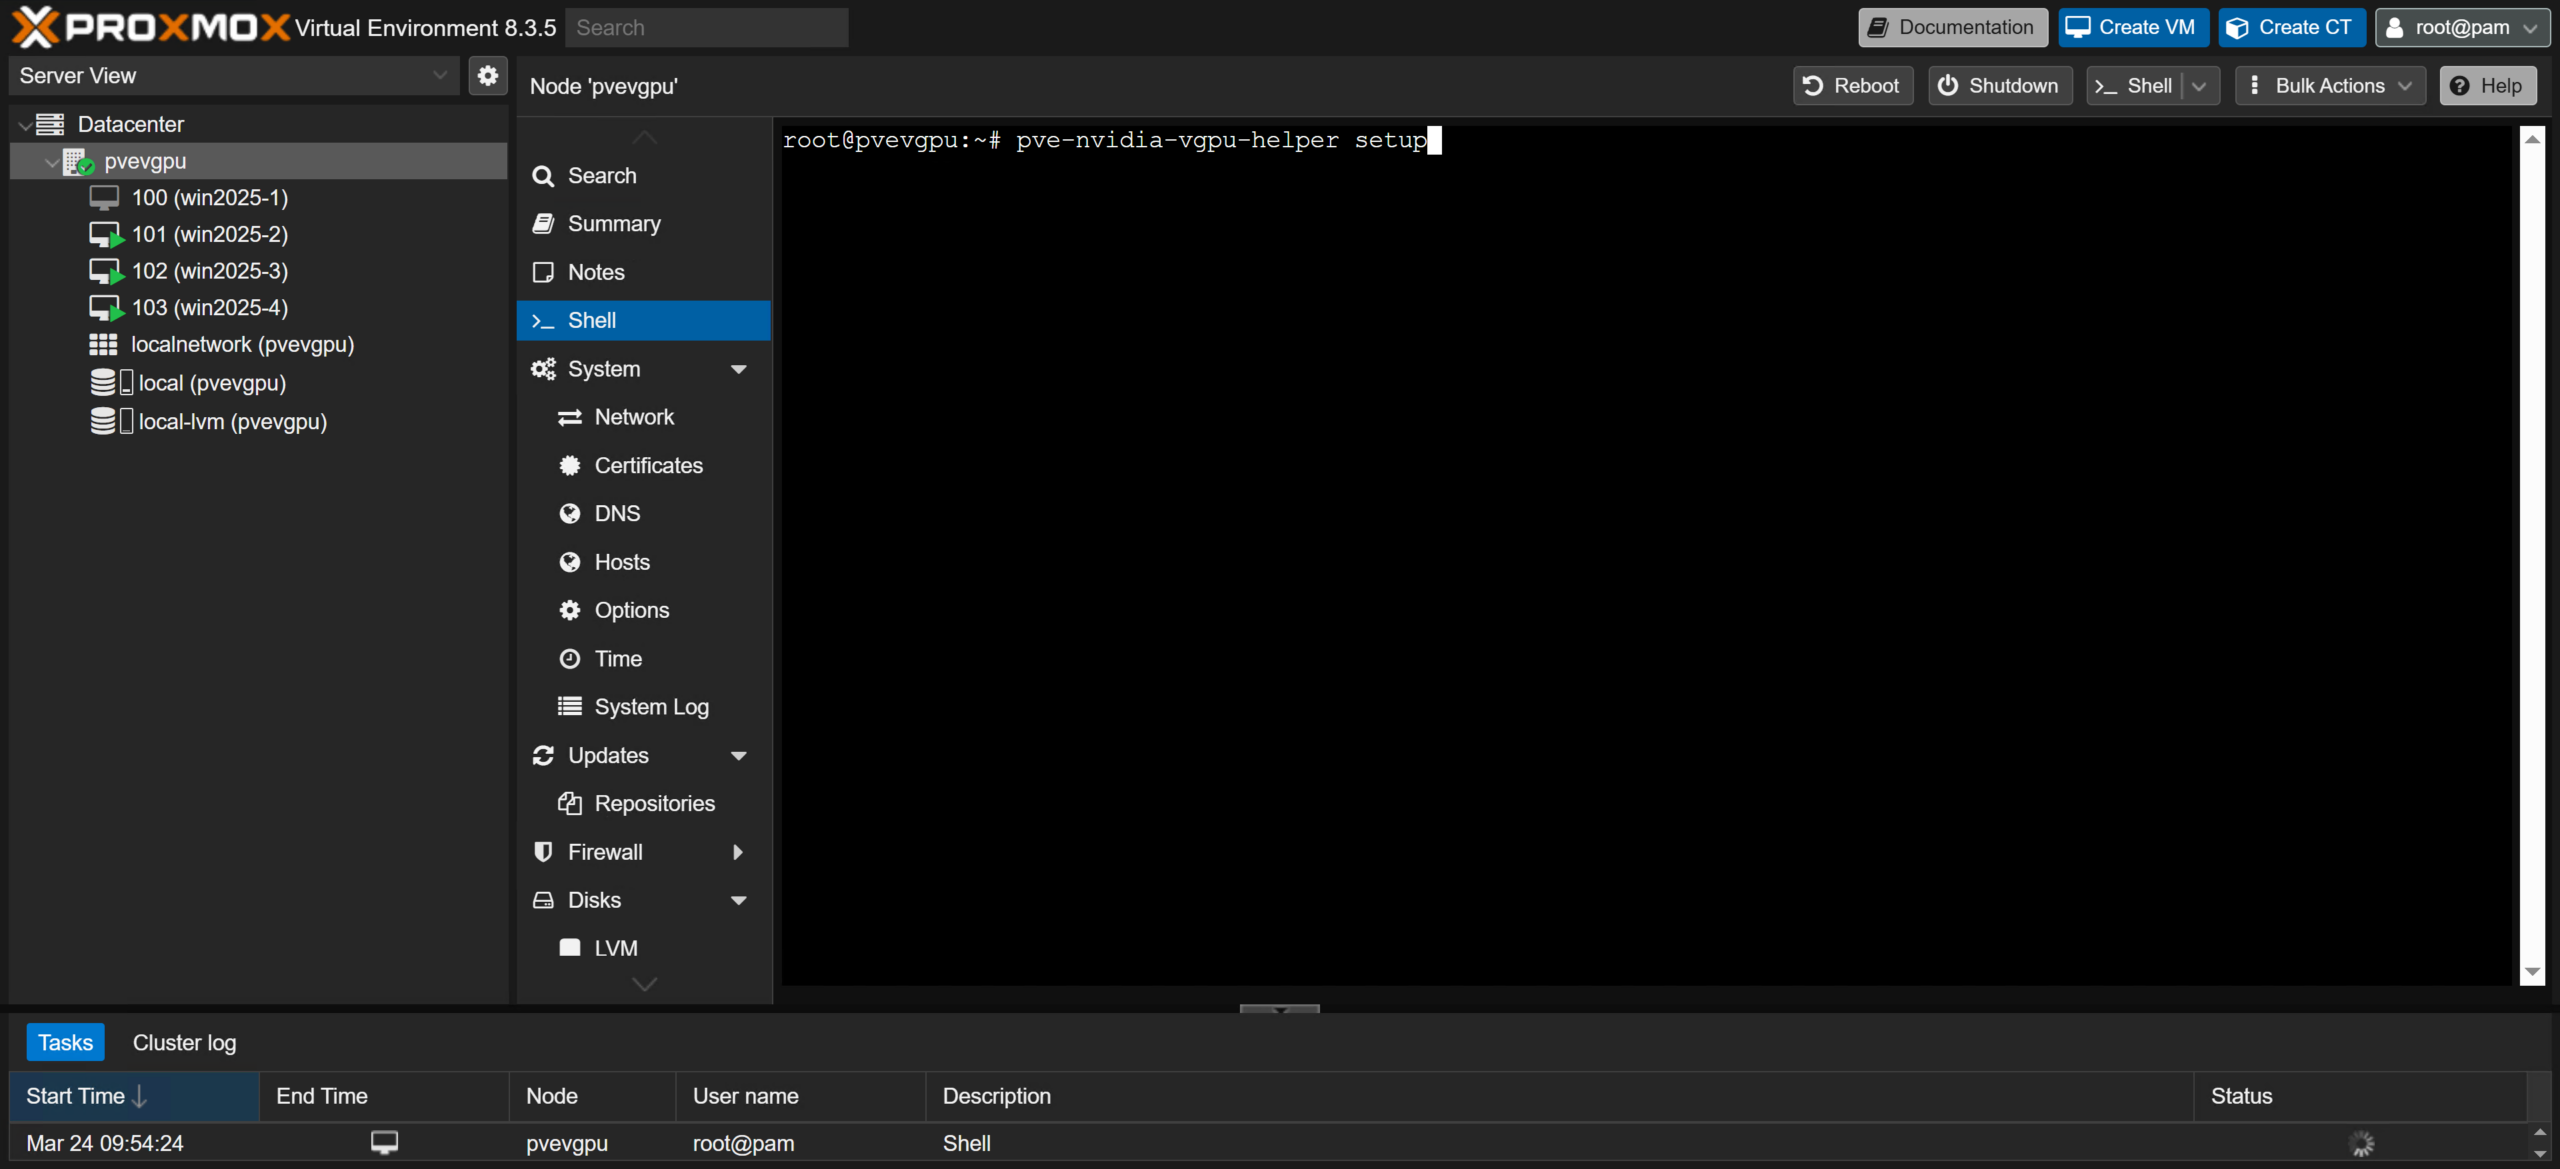
pve-nvidia-vgpu-helper setup
Answer “Y” to any questions, and proceed until the console window returns and the script is finished. Perform a quick restart of the server by navigating to the server’s “Summary” tab and hitting the “Reboot” button, or type the reboot command into the “Shell” tab console and press Enter.
Next, NVIDIA’s vGPU host driver needs to be loaded onto the server. After the server has completed rebooting, use an SSH or SCP transfer tool such as WinSCP to copy the host driver to the node.
Note: If you downloaded all drivers together as a compressed (.zip) folder, you may need to extract its contents first and choose the “.run” file from the “Host_Drivers” folder.
Place the file in the server’s “/home” directory, and prepare to run the installer with the following commands.
cd /home
chown root NVIDIA-Linux-x86_64-570.124.03-vgpu-kvm.run
chmod +X NVIDIA-Linux-x86_64-570.124.03-vgpu-kvm.run
./NVIDIA-Linux-x86_64-570.124.03-vgpu-kvm.run --dkms
Note: Replace “NVIDIA-Linux-x86_64-570.124.03-vgpu-kvm.run” with the actual name of the driver you downloaded. You can use the “ls” command to show the file’s name once it has been placed into the “/home” directory.
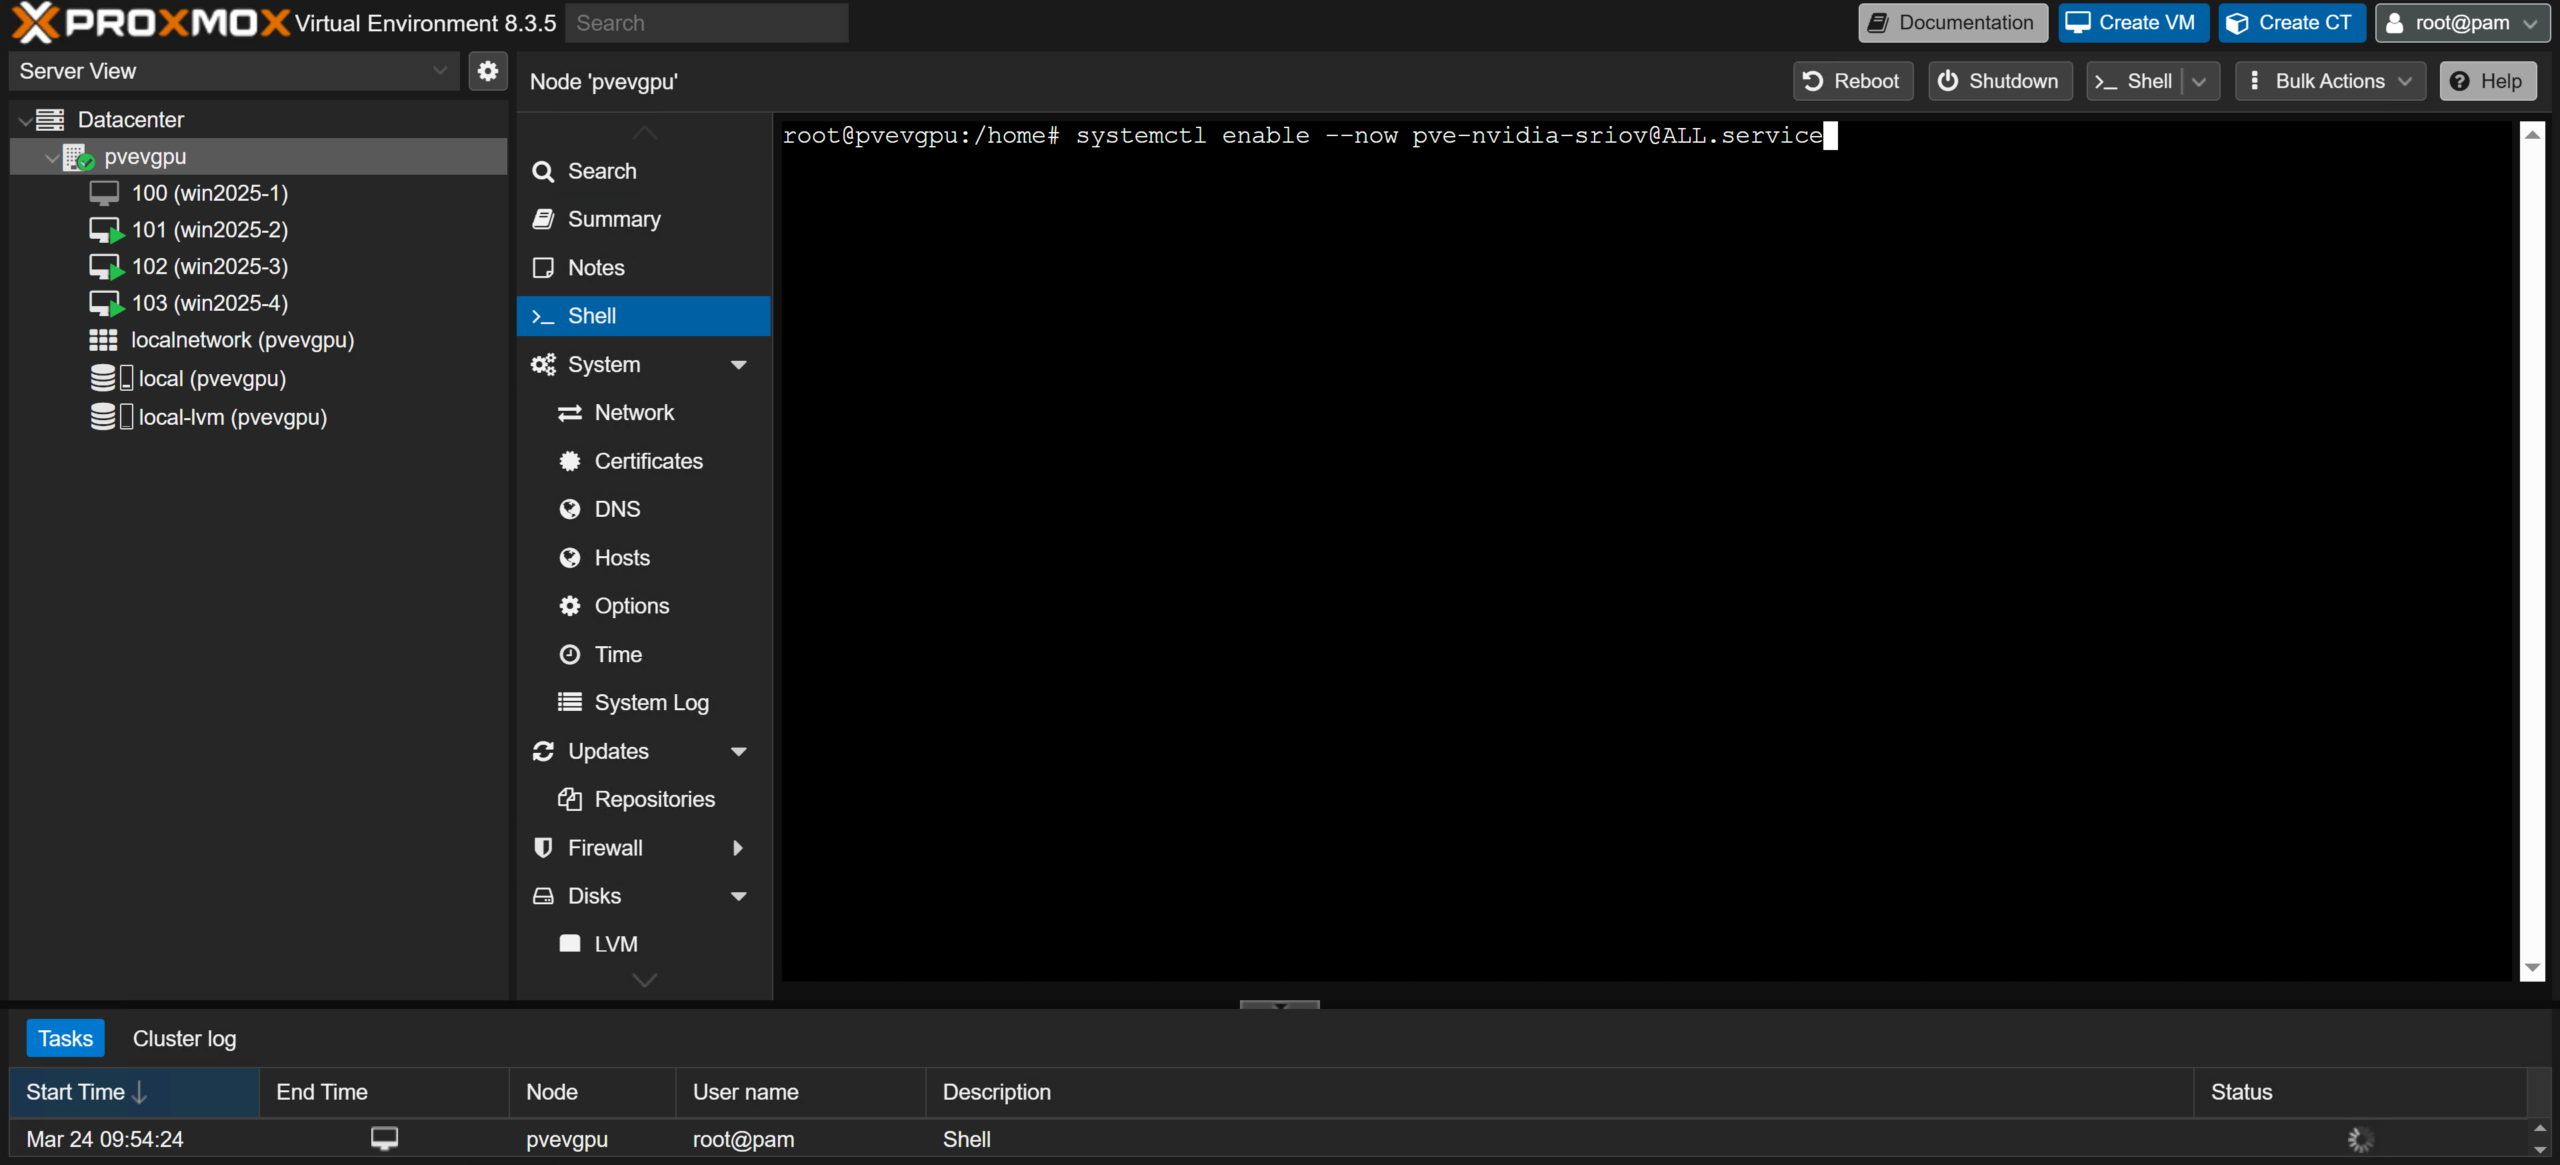
 Now that the driver has been installed on the server, we are only a few steps away from having the host side of our Proxmox vGPU configuration done! Before we can mark the GPU as a device that can be split between virtual machines, we must enable Single Root I/O Virtualization (SR-IOV). NVIDIA defines this feature as “…a technology that allows a physical PCIe device to present itself multiple times through the PCIe bus. This technology enables multiple virtual instances of the device with separate resources.” Since SR-IOV is a critical piece of technology needed for basic vGPU functionality on modern GPUs, set it to turn on at boot with the following command:
systemctl enable --now pve-nvidia-sriov@ALL.service
 Finally, we can map out the GPU’s resources to split them neatly between VMs. On the Proxmox VE server’s web interface, click “Datacenter” in the top-left corner and scroll down to select the “Resource Mappings” tab.
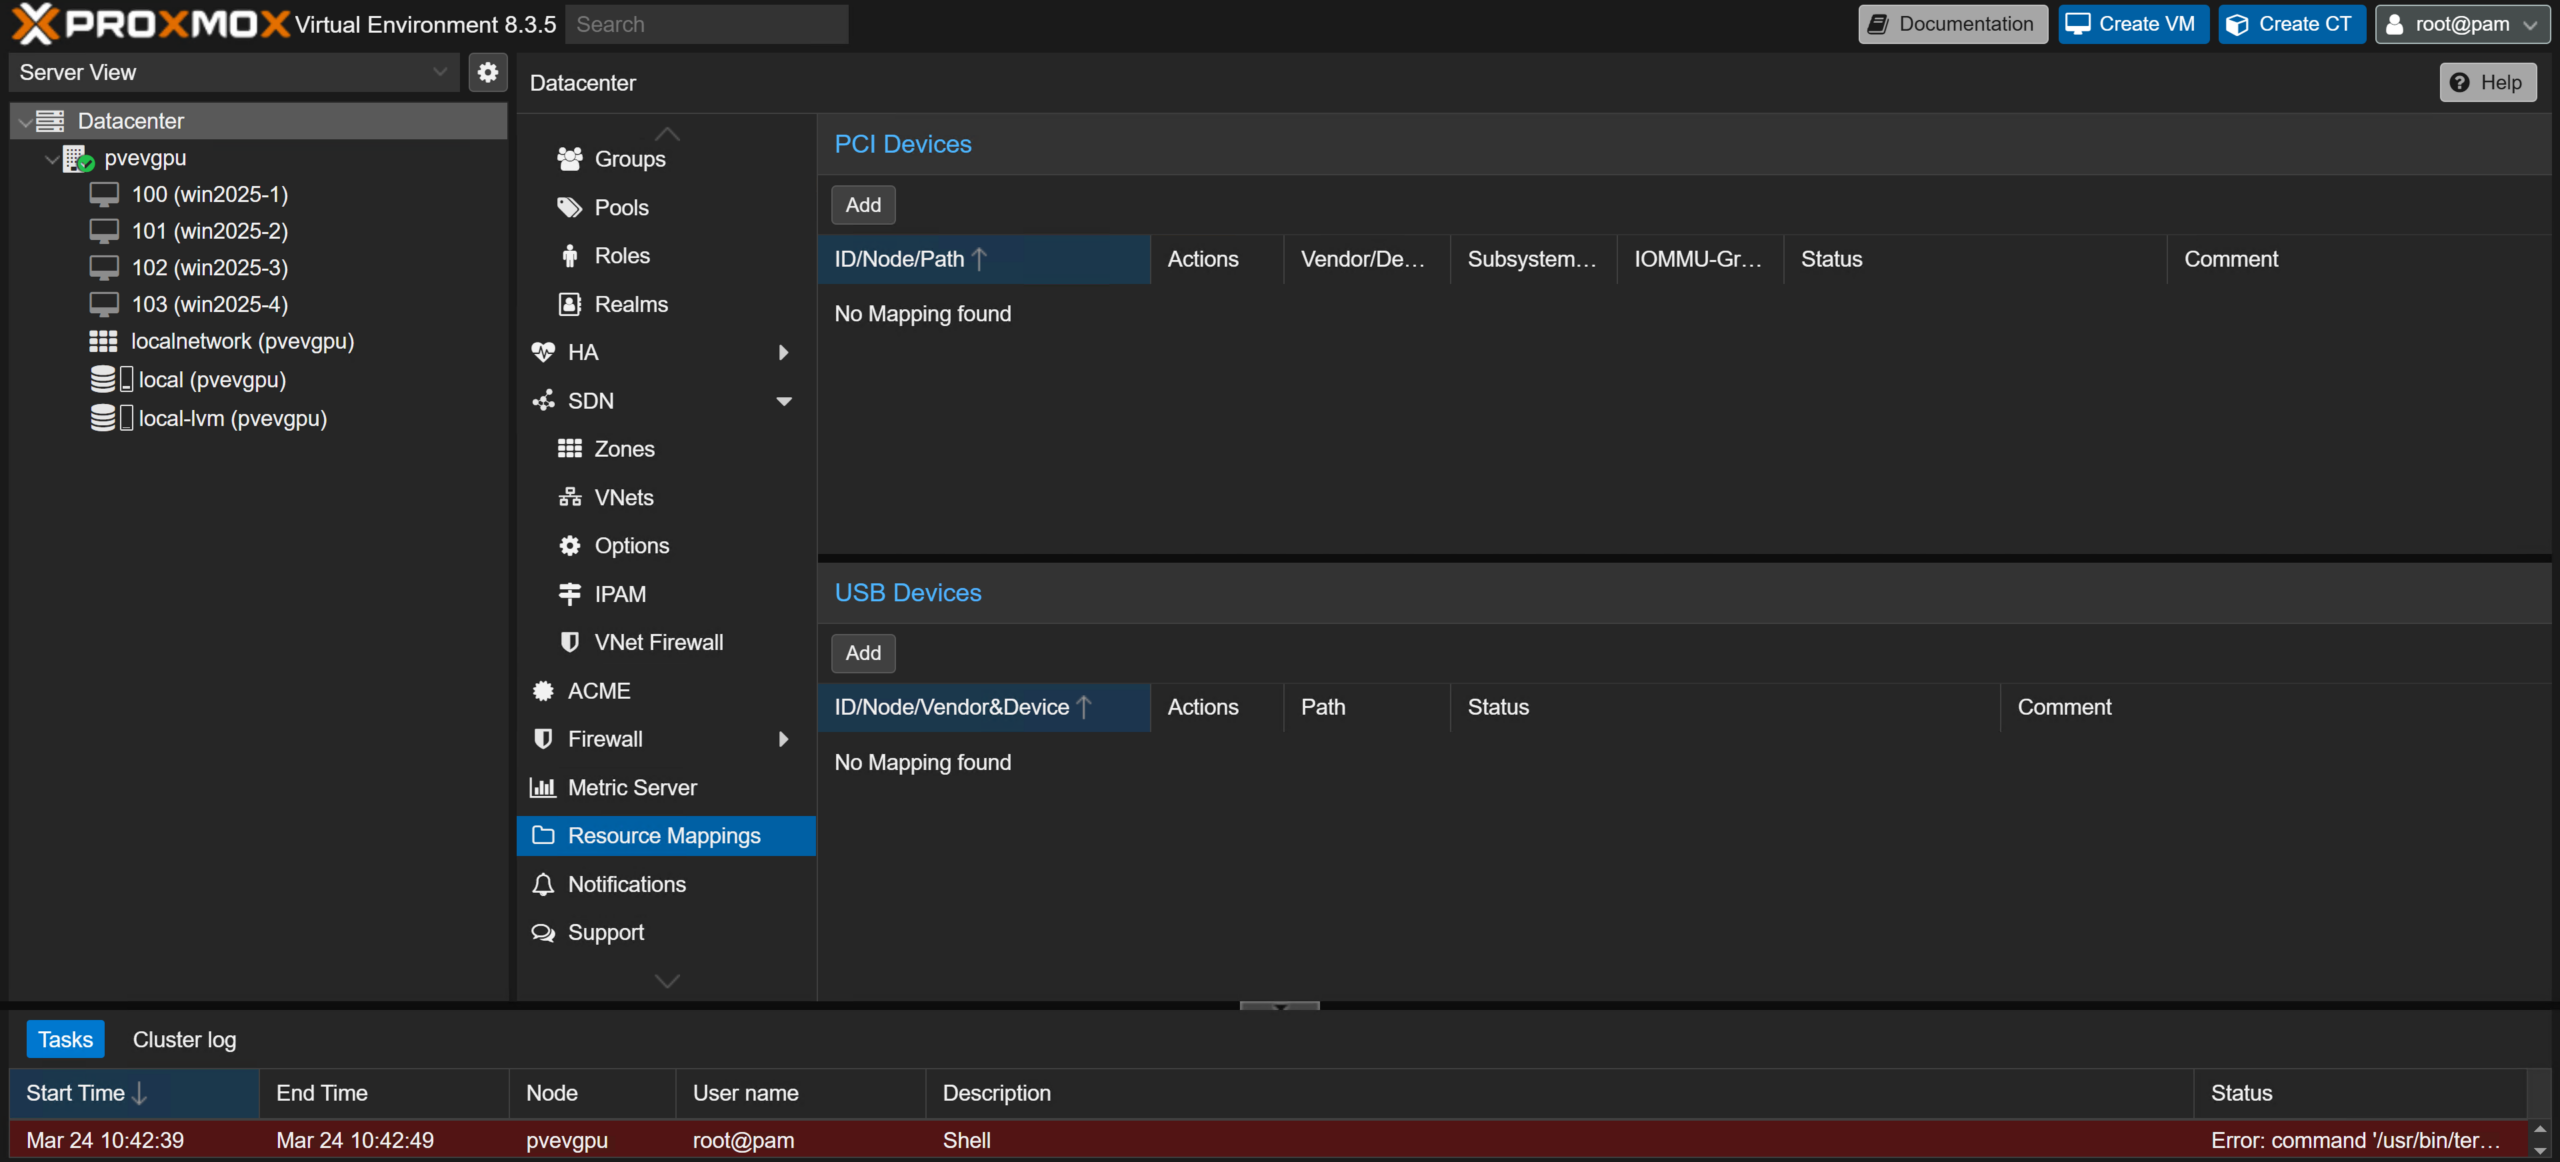 Click the “Add” button underneath the “PCI Devices” section of the page, and fill in the “Name:” field on the next window with the name that describes the GPU you are mapping.
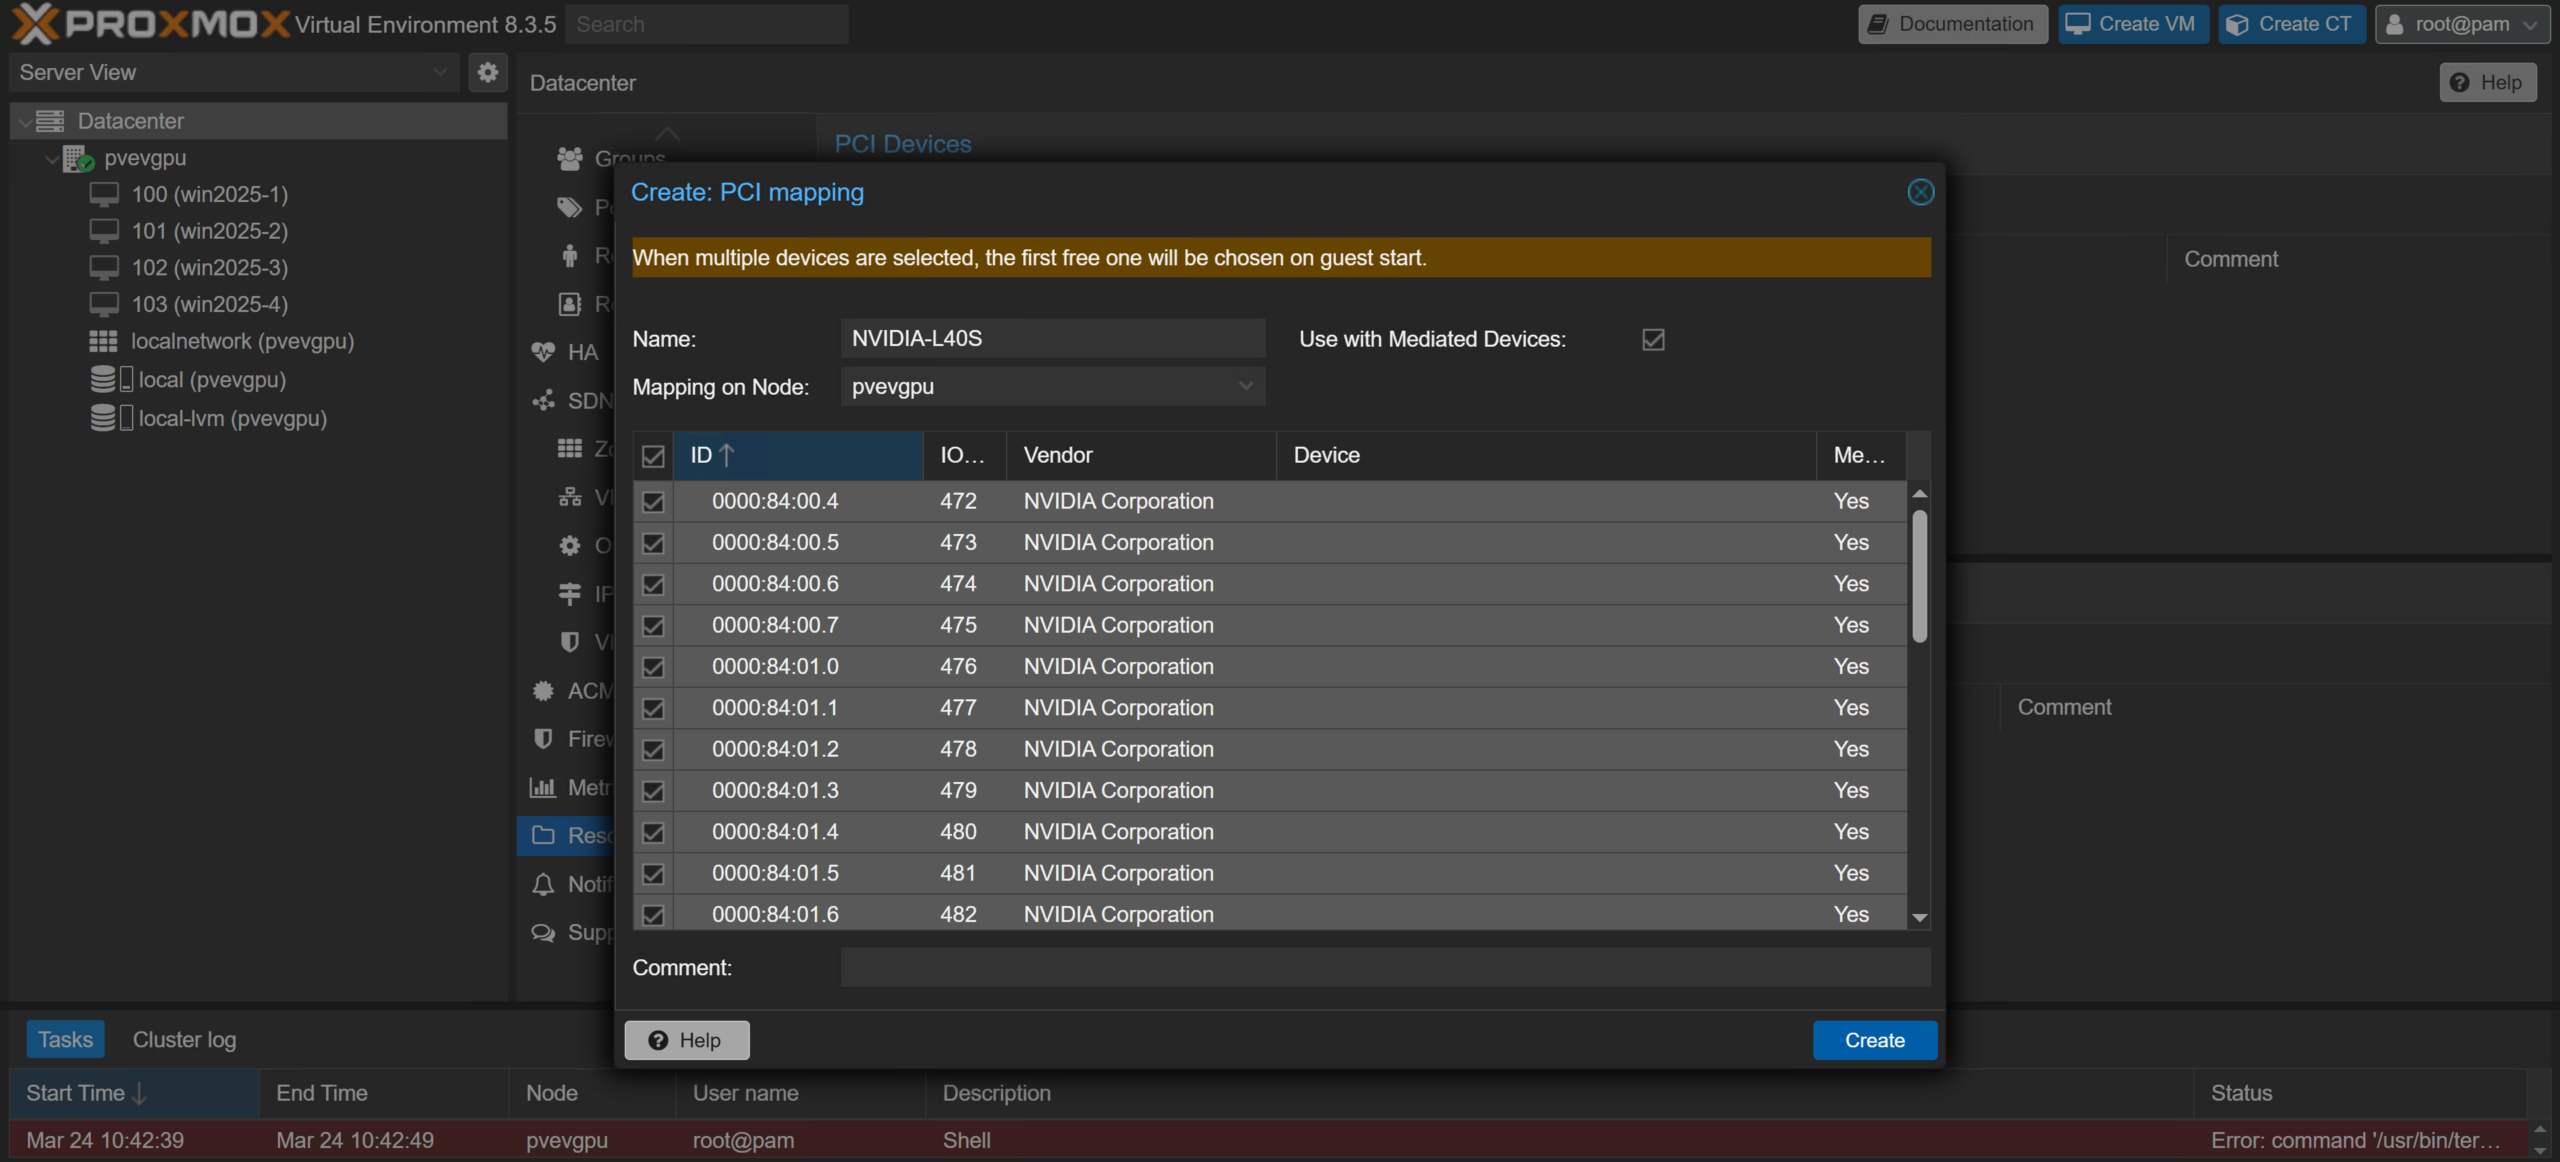 Next, check the box labeled “Use with Mediated Devices” and ensure that the “Mapping on Node” drop-down menu contains the server with the GPU being mapped. Scroll down the list of devices, confirming that all device IDs have “NVIDIA Corporation” present in the “Vendor” column. If this is true, click the checkbox at the top left of the table to select all devices; otherwise, select only the devices with “NVIDIA Corporation” as the vendor.
Note: If multiple GPUs are installed in your system, you can use the “lspci” command in the “Shell” tab on the desired server to determine the IDs that go with each card.
When finished selecting the device, click the “Create” button in the bottom right of the pop-up window to confirm your selection. Your NVIDIA GPU is now ready to be sliced into vGPUs for your Proxmox VE server’s guests!
Serving the Guests (Assigning vGPUs to Virtual Machines)
The pieces are all in place for us to begin assigning and using vGPUs on our virtual machines. Start by creating a new virtual machine, as usual, or by using an existing VM. For our demonstration, we will use a Windows Server 2025 virtual machine.
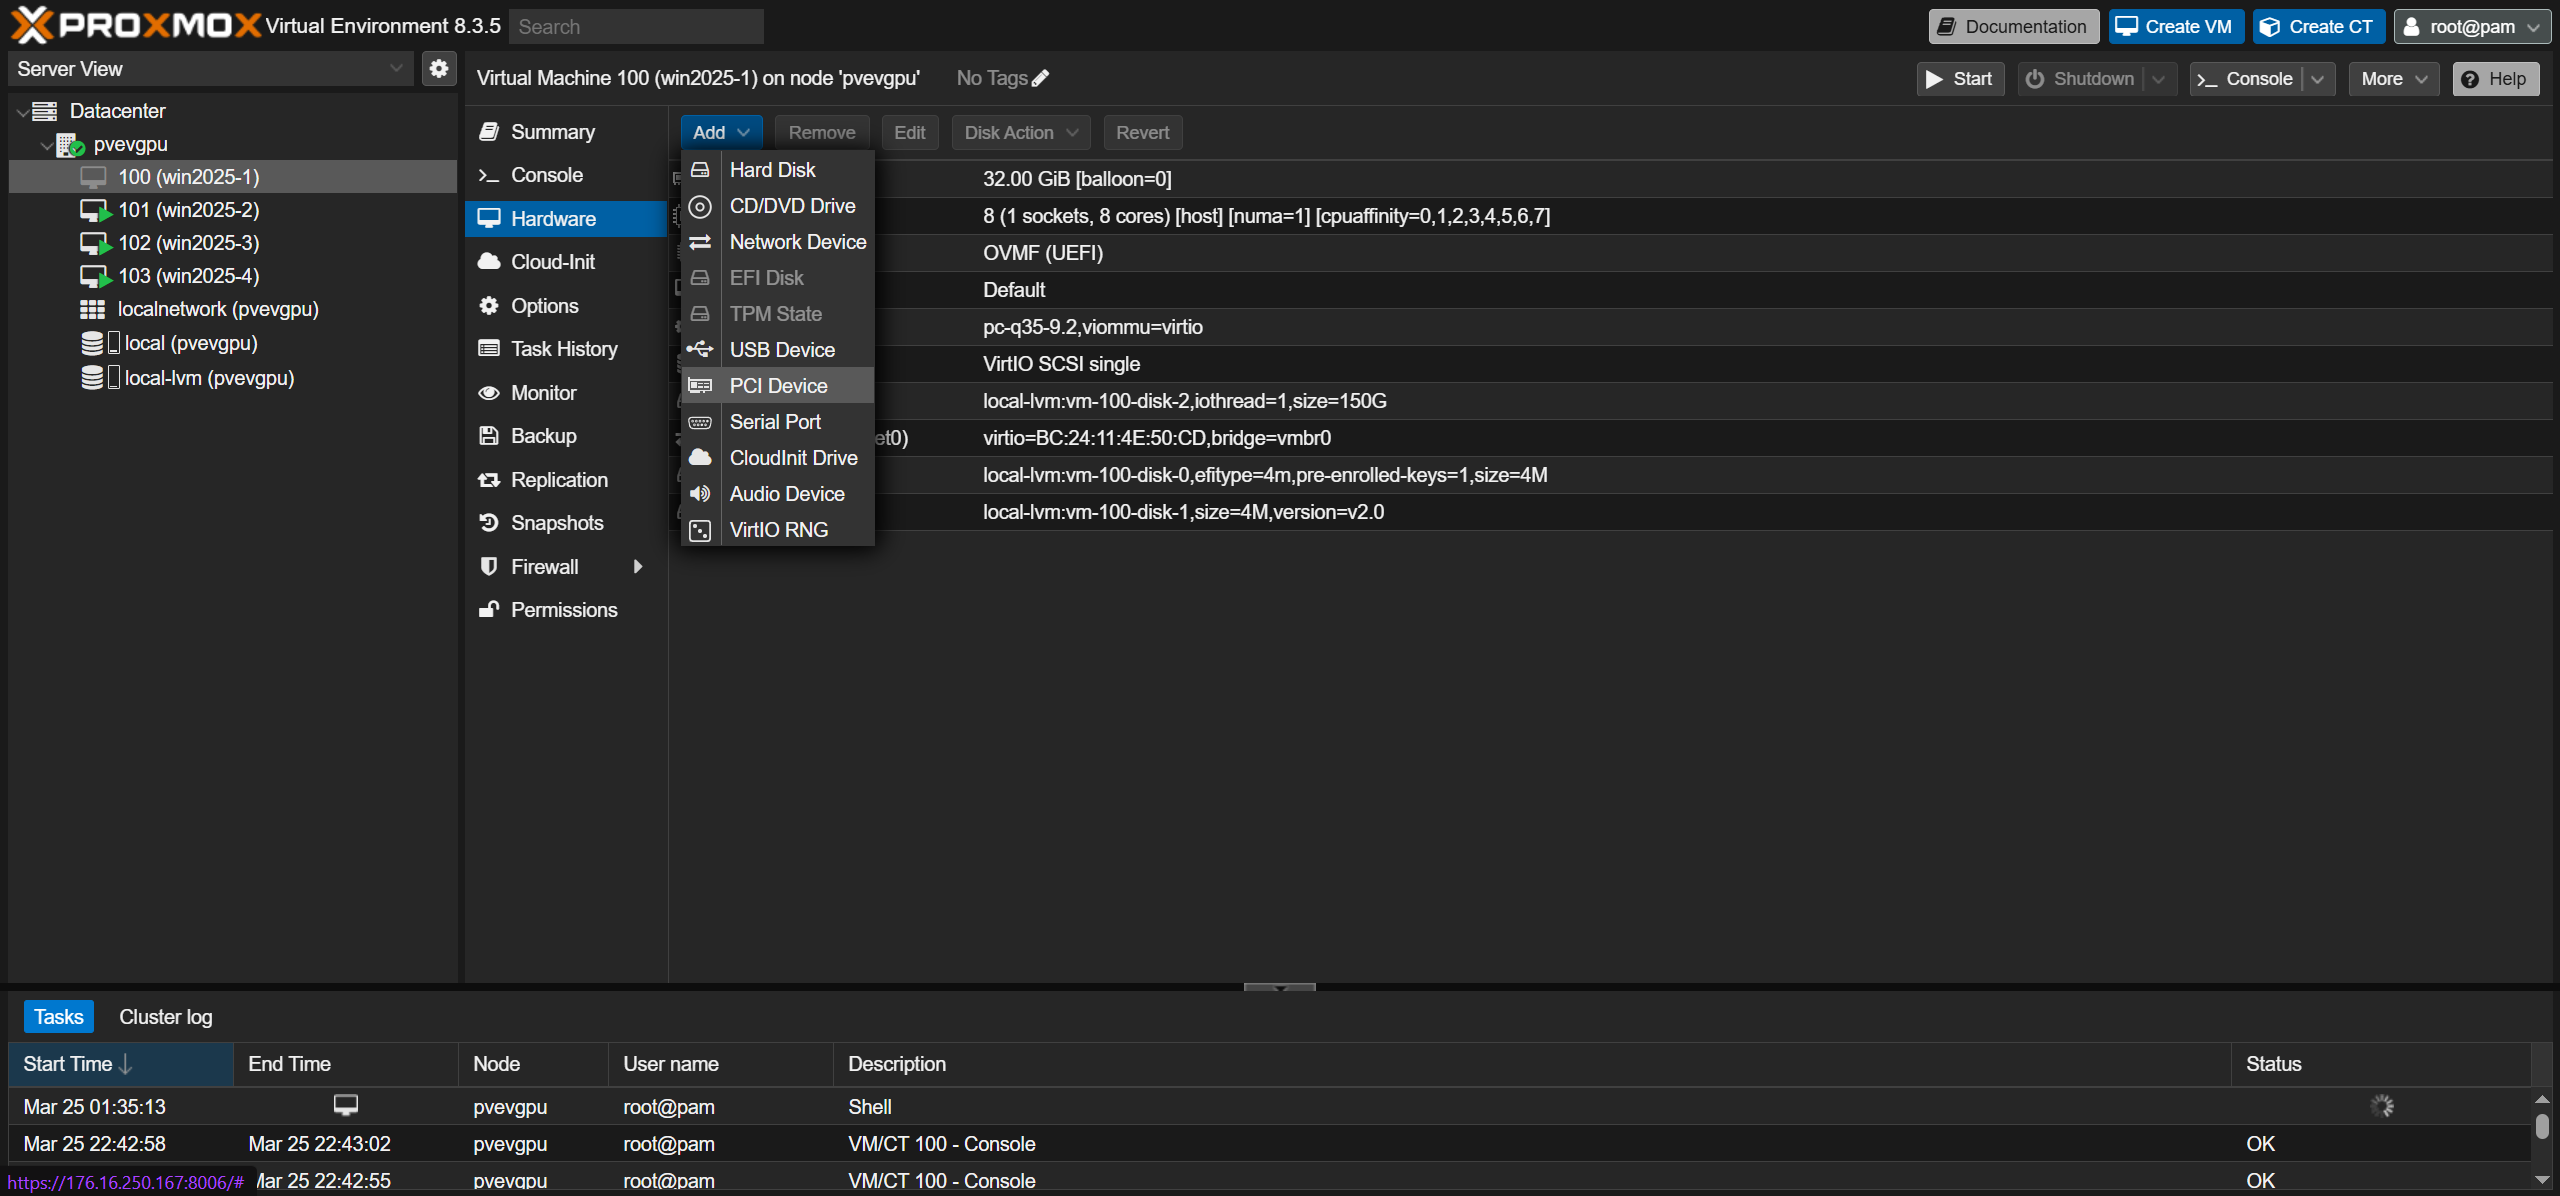
In the Proxmox VE server’s web interface, shut down the virtual machine using any method you see fit (noVNC console, guest power menu, etc.), and click on the guest’s “Hardware” tab.
 In the drop-down menu that appears after clicking the “Add” button, select a “PCI Device.”
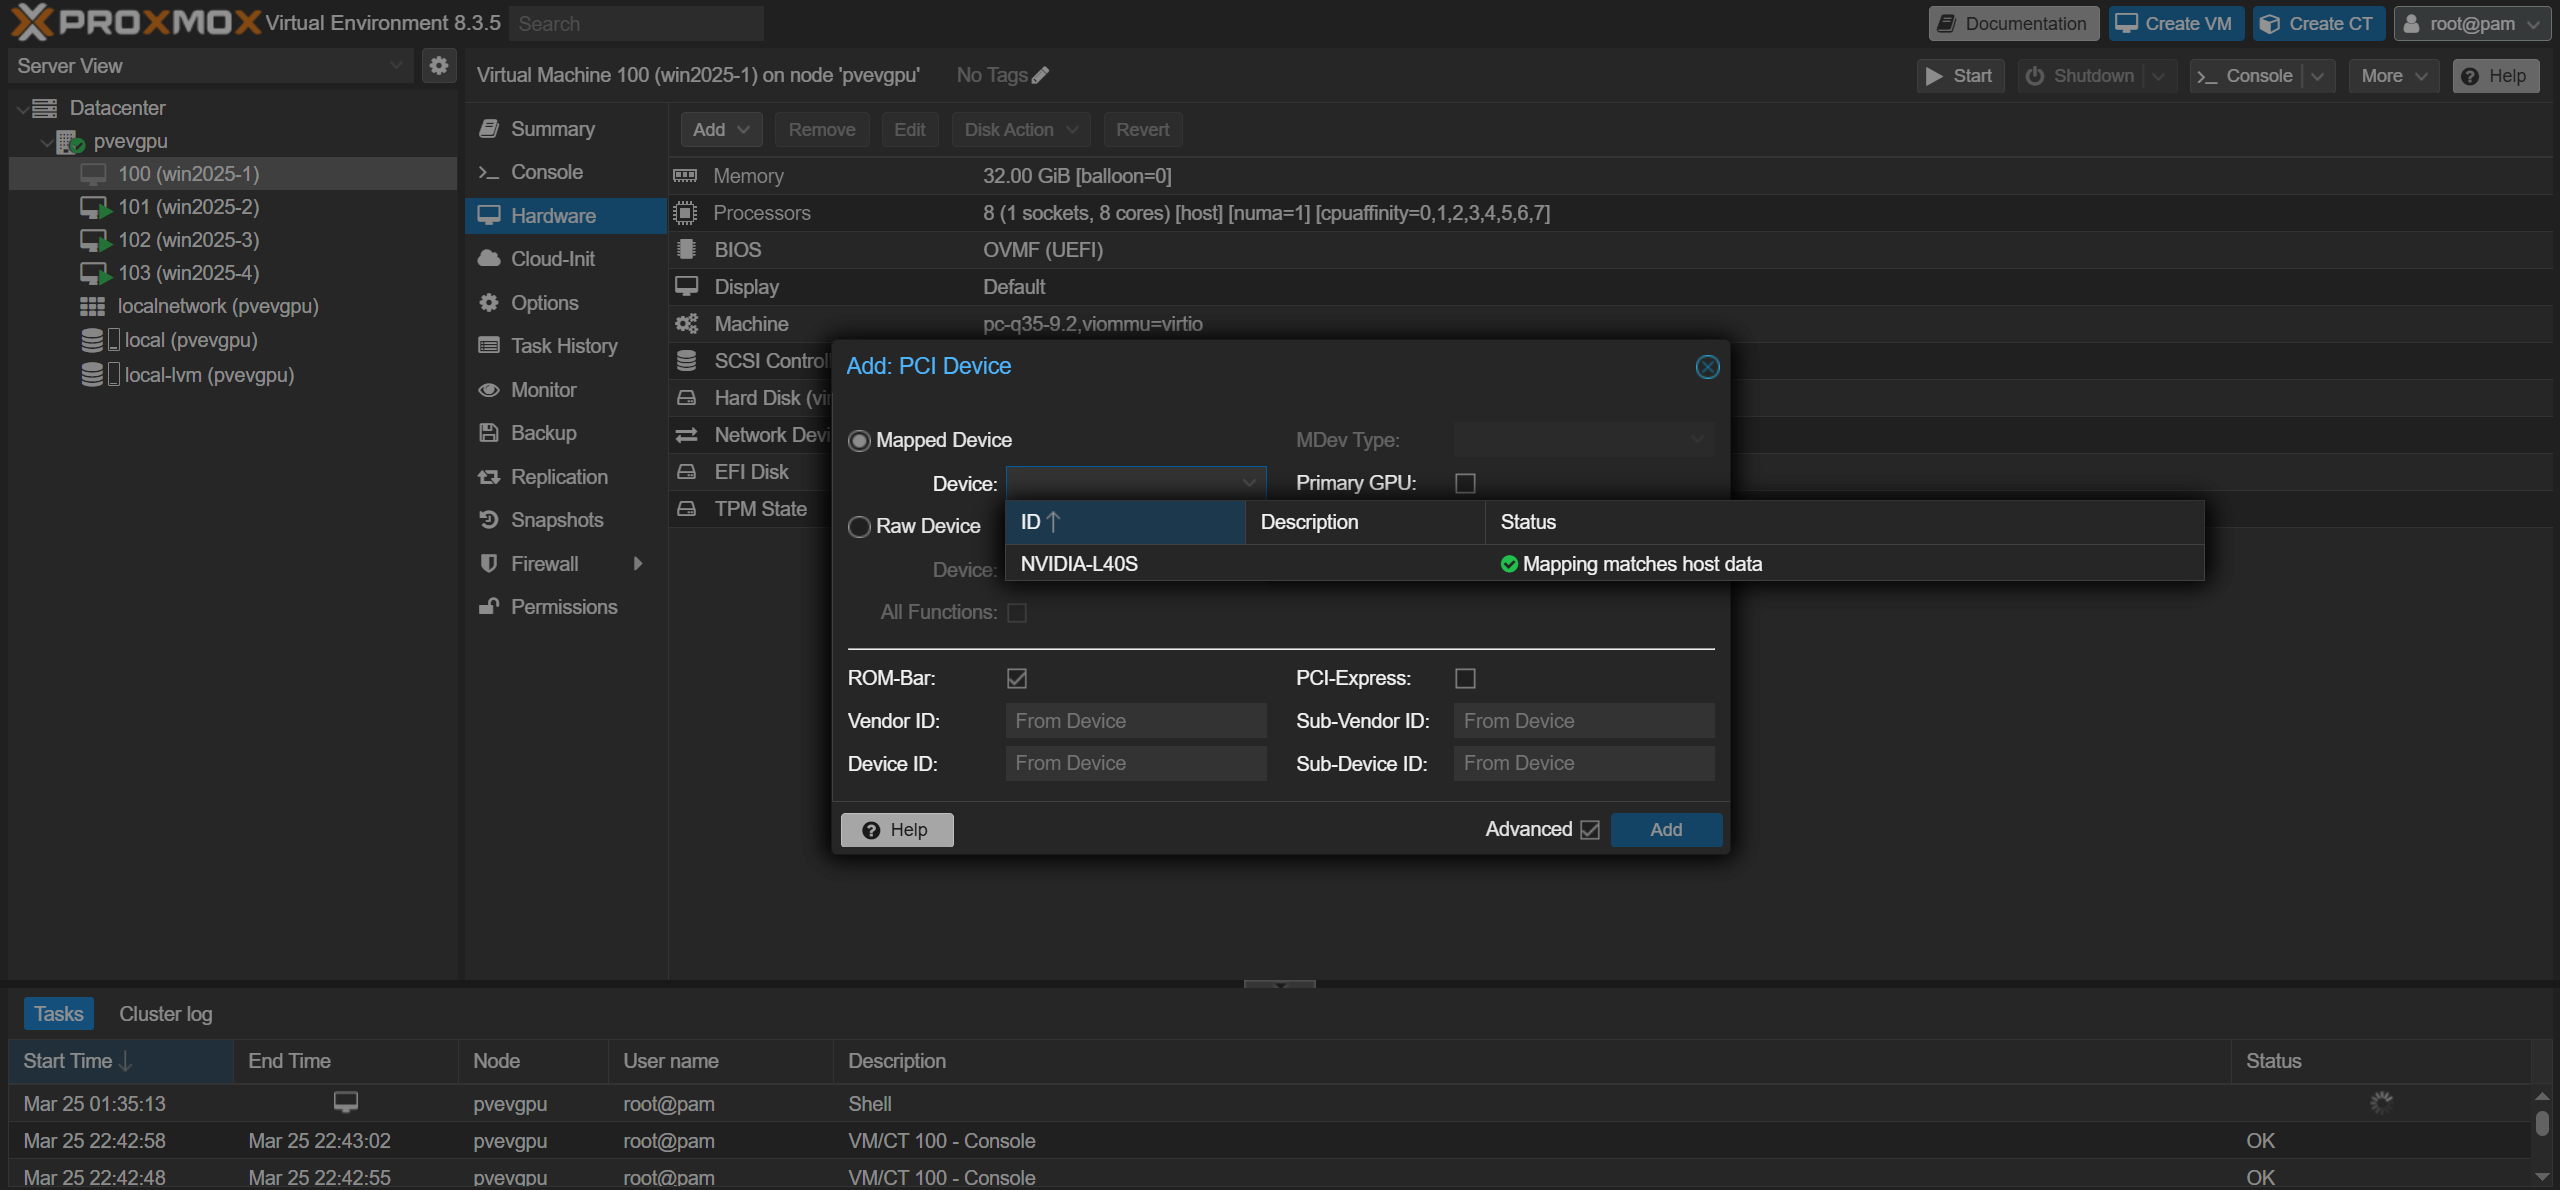
 In the pop-up “Add: PCI Device” window, select the name you assigned to the resource-mapped GPU in the “Device:” field.
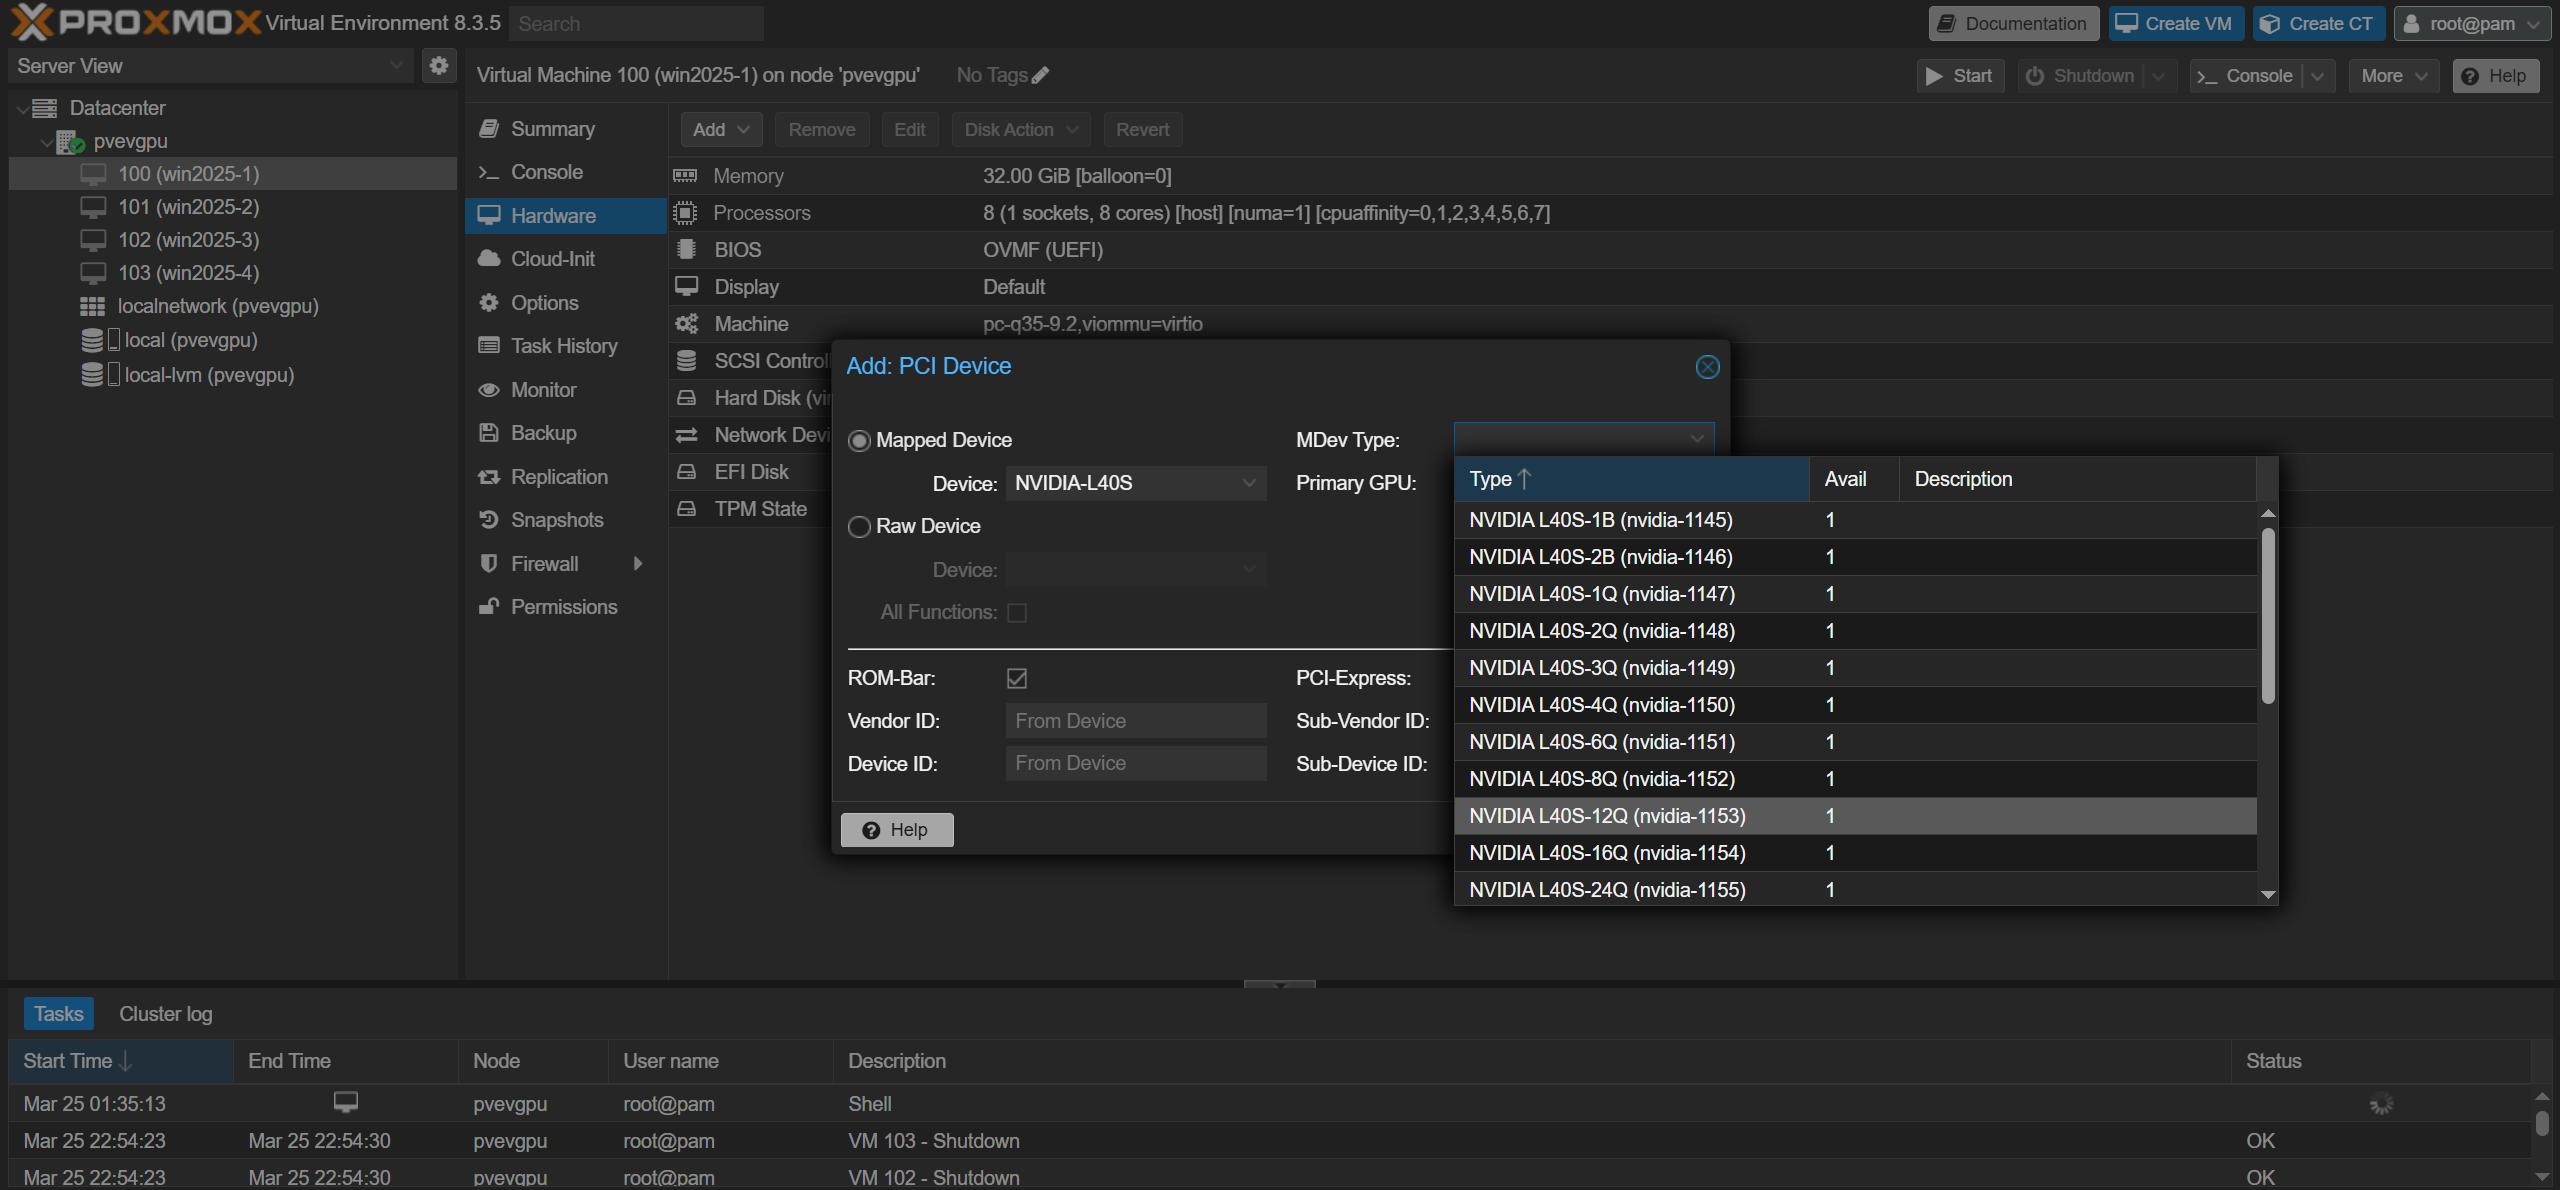
 Next, click the “MDev Type:” field and observe the list of presented mediated device type options. You may notice that each choice has a number and letter designation. The number represents the amount of VRAM assigned to the guest (in gigabytes), while the “A”, “B”, and “Q” refer to the use case of the vGPU:
- Q – Virtual workstations with RTX Enterprise Drivers (requires RTX vWS license)
- B – Virtual desktops (requires NVIDIA Virtual PC license or RTX vWS license)
- A – Application solutions (requires an NVIDIA Virtual Applications license)
Note: You can read more about the different vGPU profiles and their required licenses here.
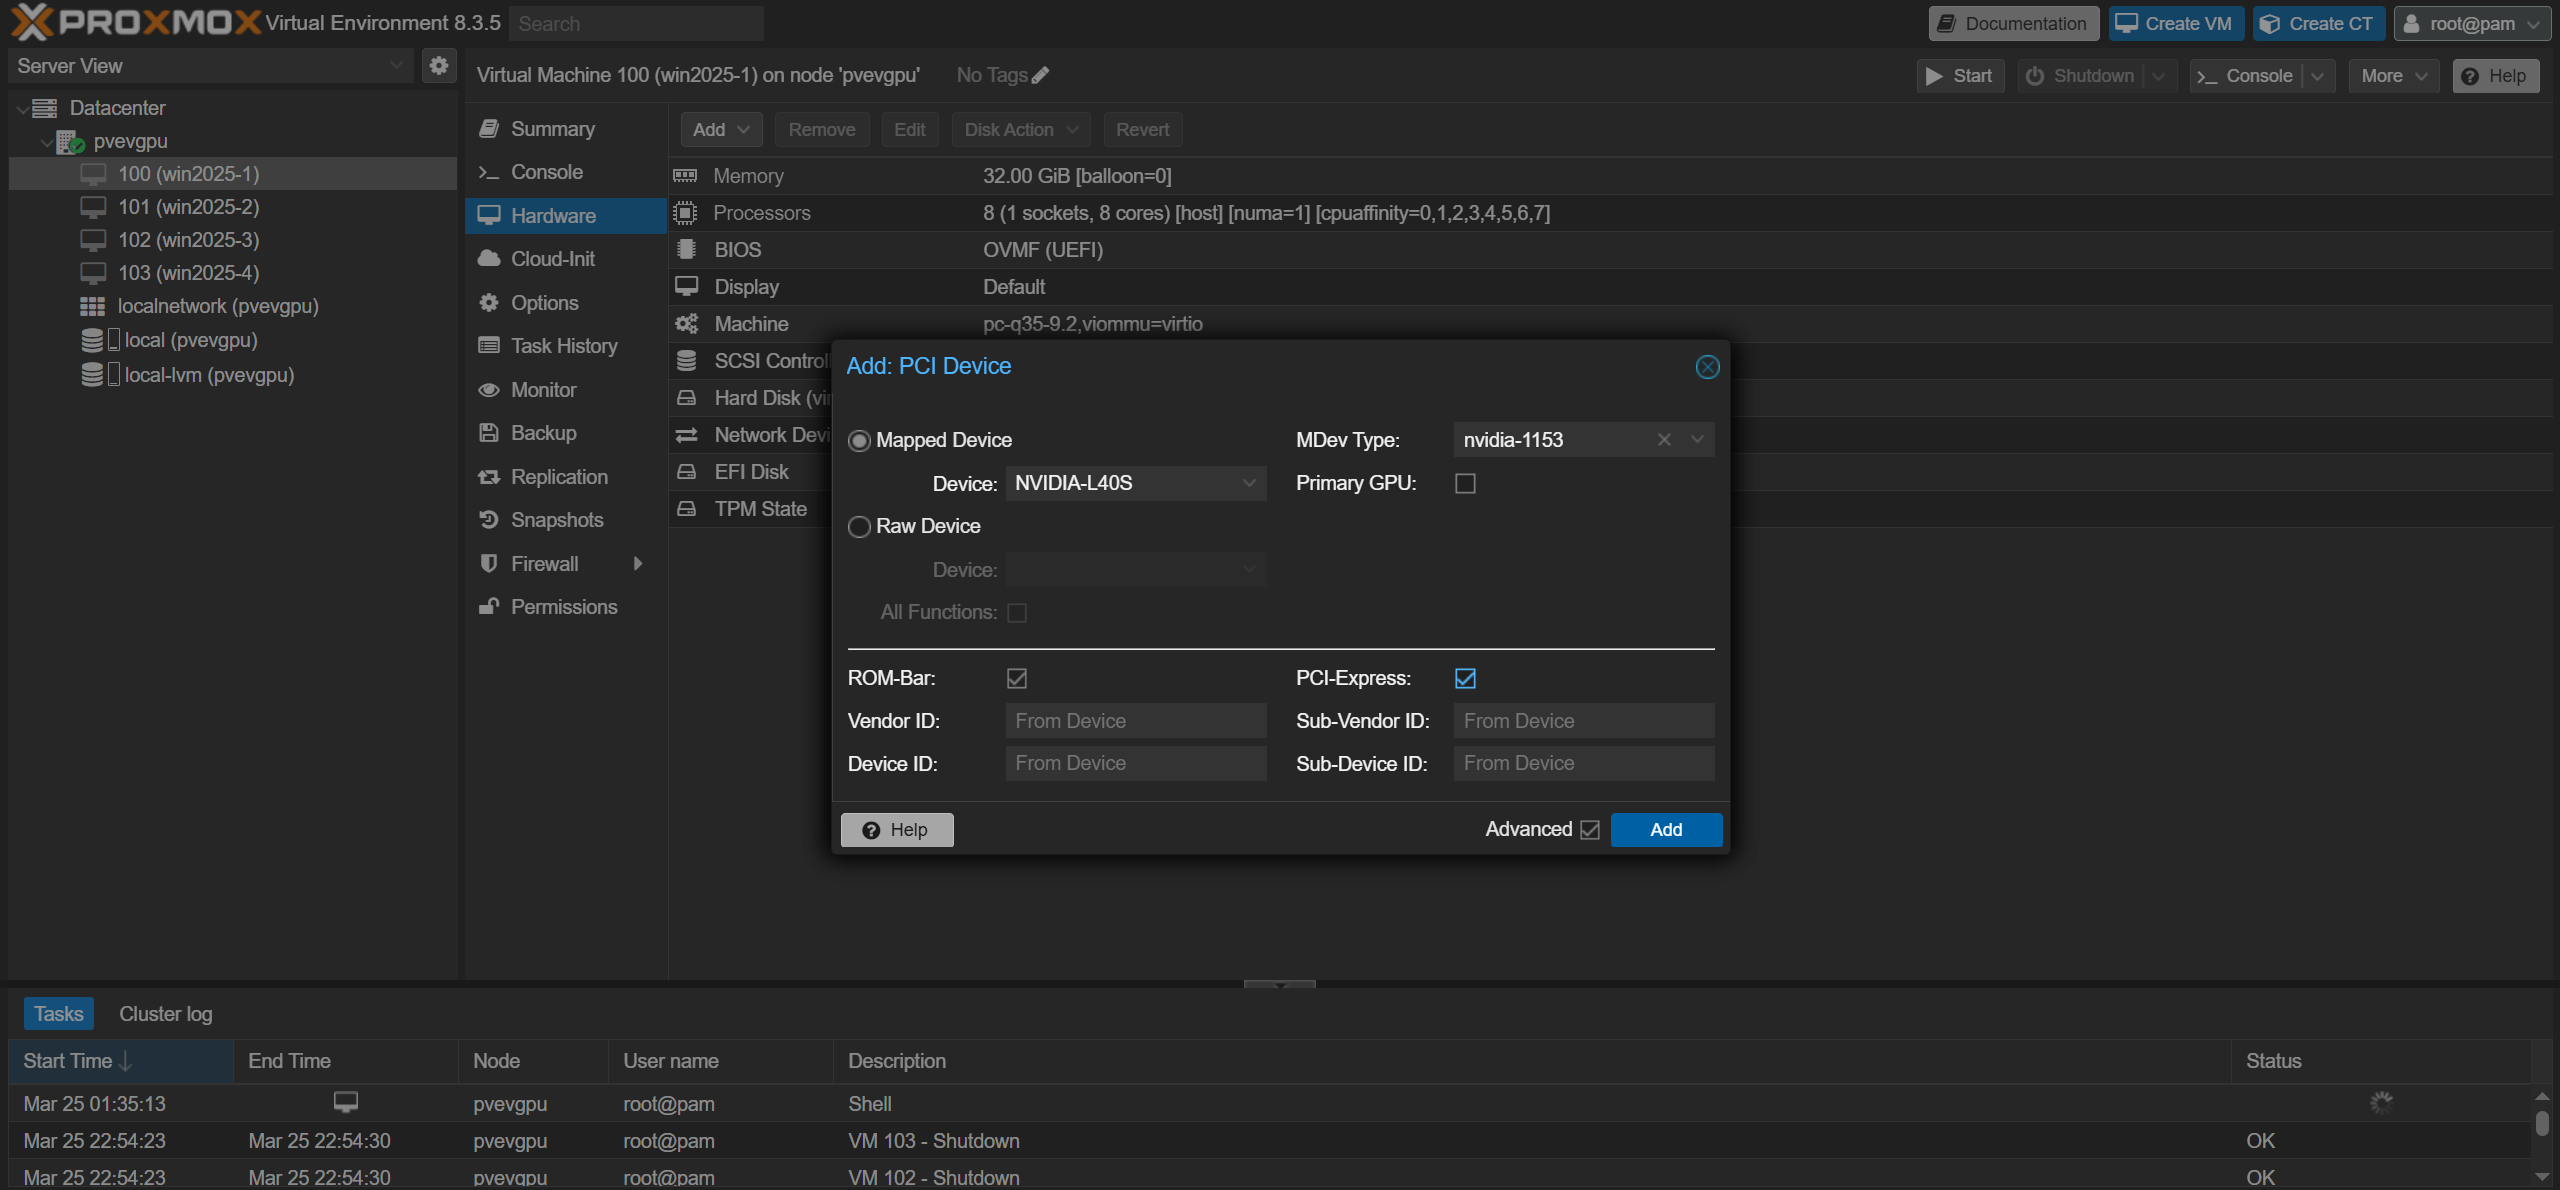
 For this demonstration, we used the “NVIDIA L40S-12Q” profile. After selecting your desired mediated device type, finish by checking the “PCI-Express” checkbox and clicking the blue “Add” button.
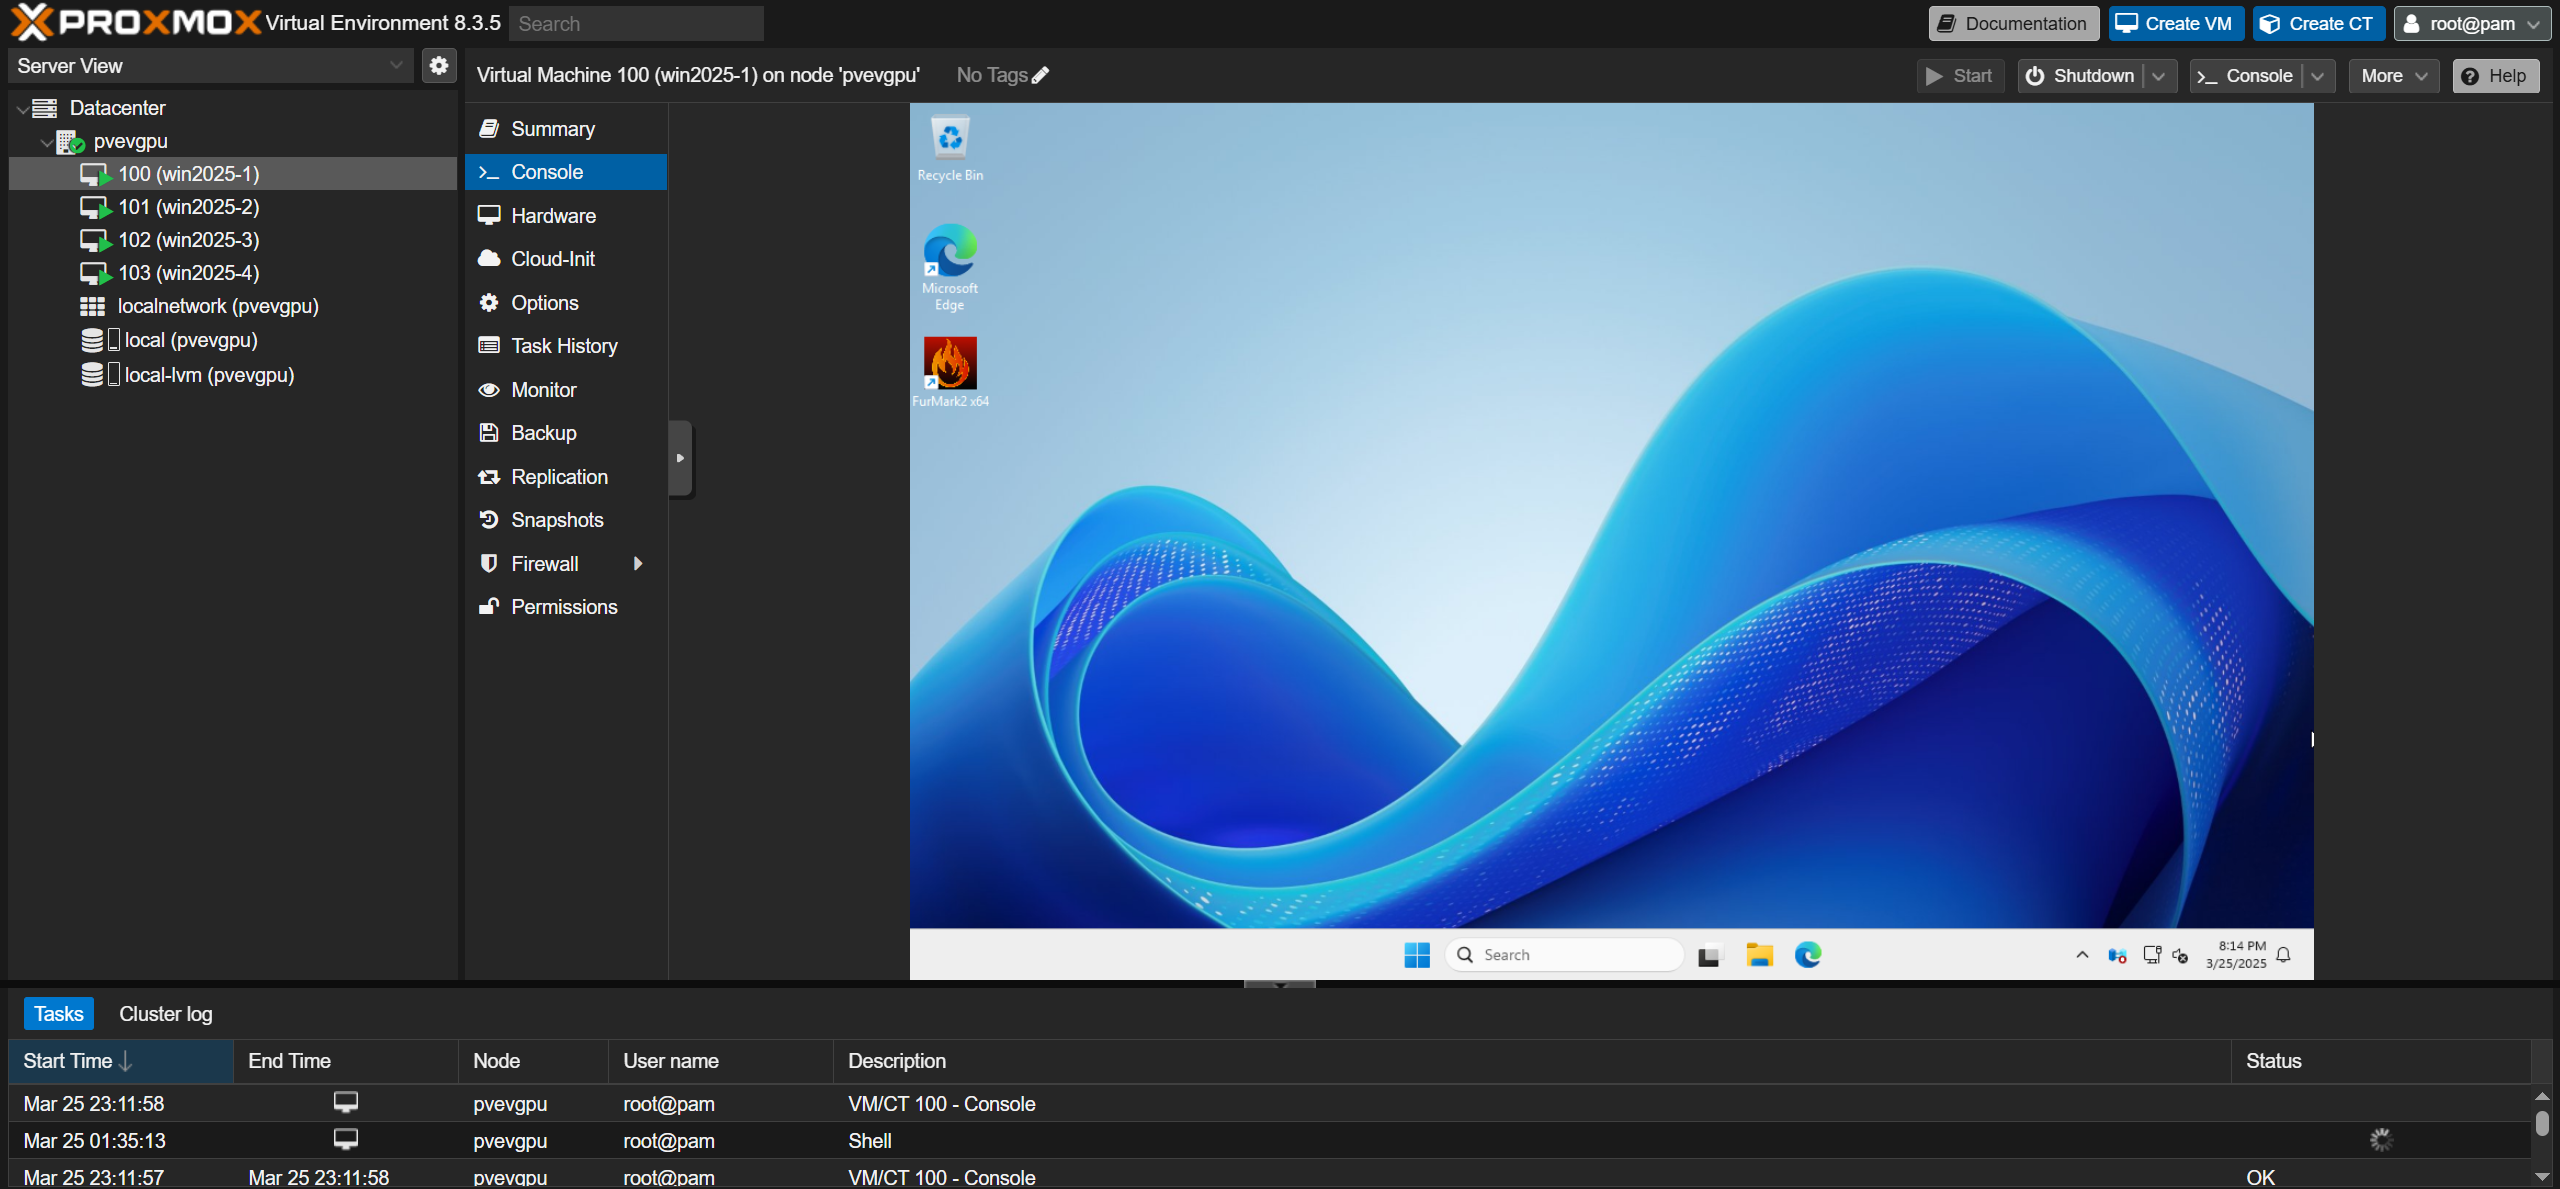
 The VM now has a vGPU assigned to it, but we still need to install the guest driver and a licensing token to get things rolling. You can now power on the virtual machine and log in.
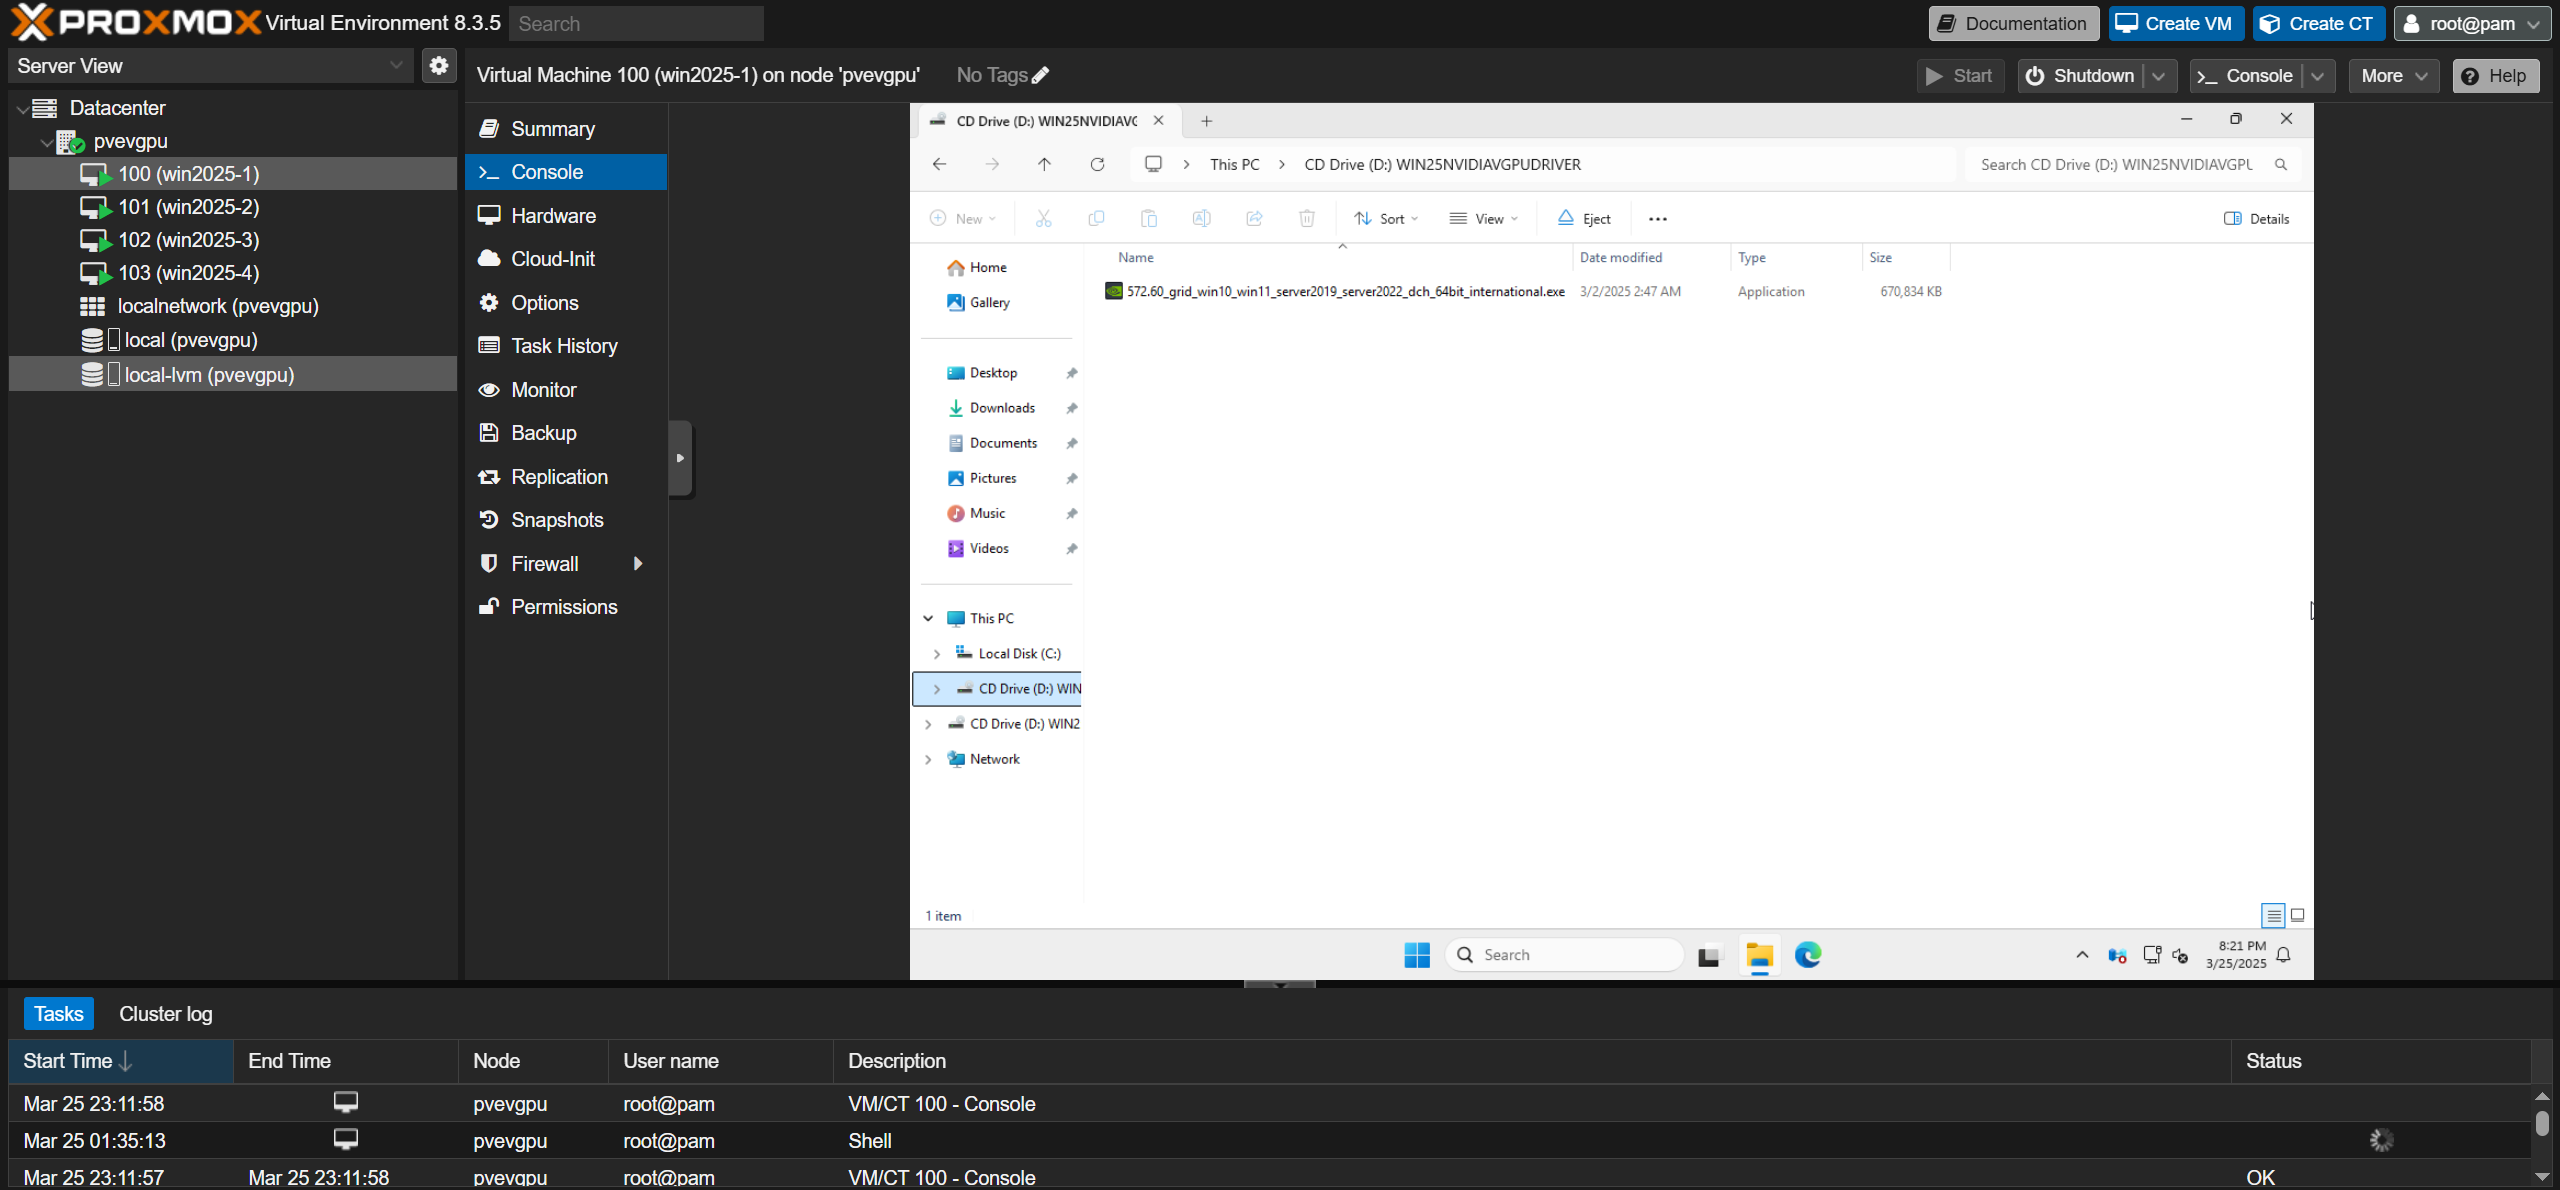
 After logging in, transfer the NVIDIA vGPU guest driver acquired earlier from the licensing portal to the VM in any fashion you like (SMB, SCP, direct download, etc.). Alternatively, you can create and upload a virtual CD-ROM file (.iso) containing the driver to your PVE server’s storage using software like ImgBurn to deploy many vGPU-enabled guests simultaneously.
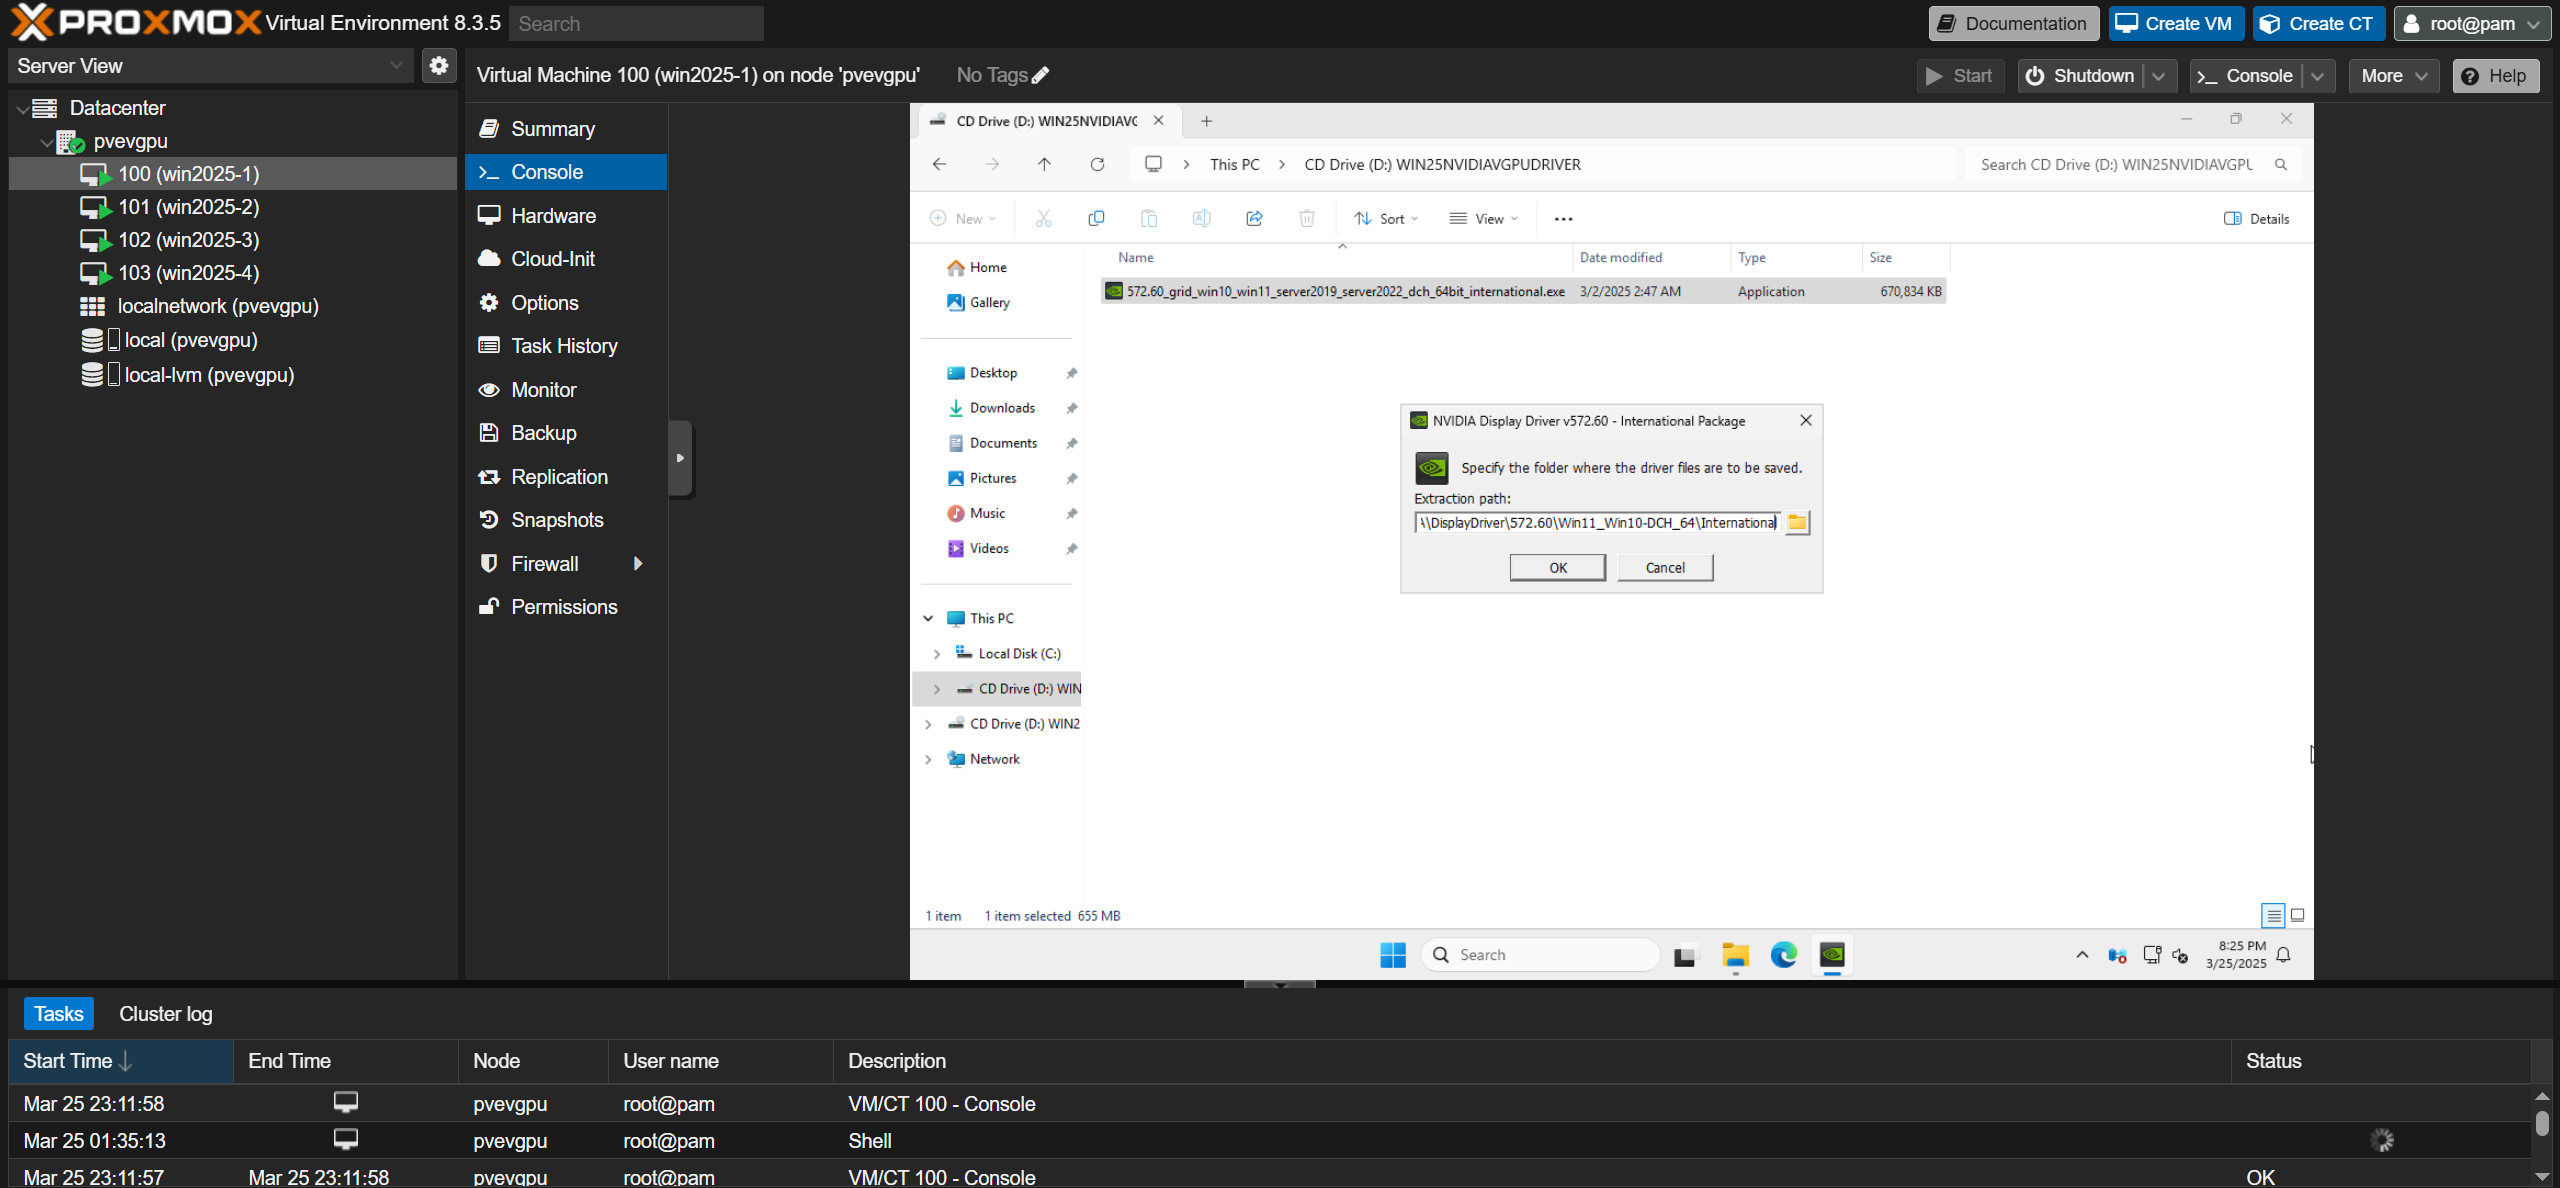
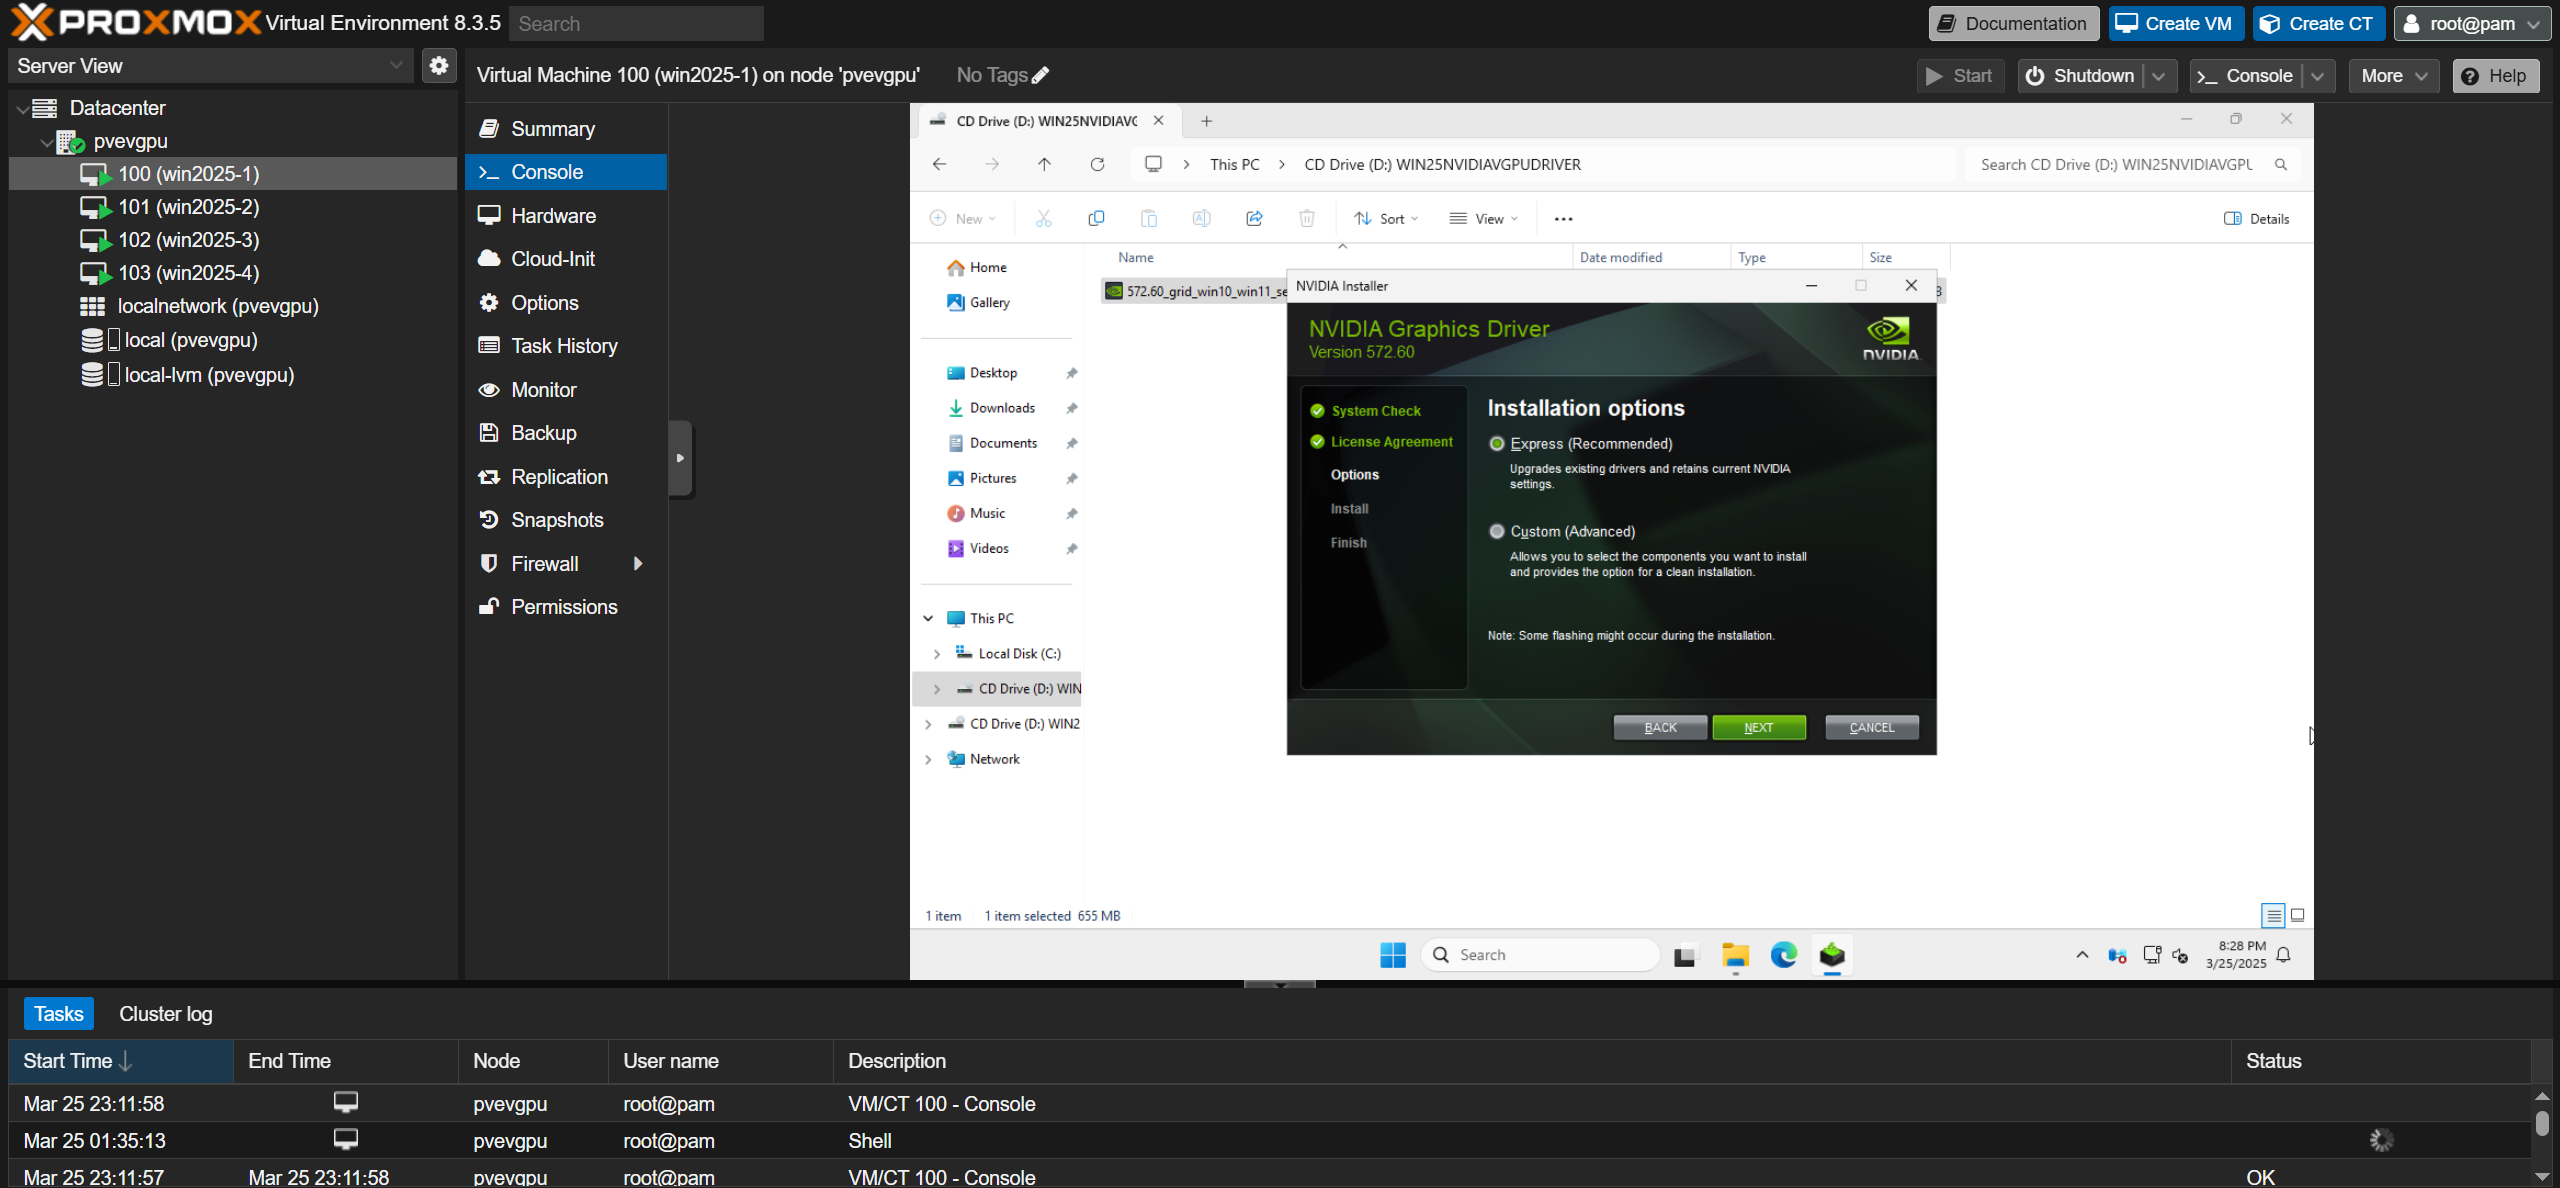
Run the driver installer file by double-clicking the executable and follow the instructions on the installation menu that appears.
 Extract the driver to the default location in the “Extraction path:” field, and choose the “Express” installation option when prompted.
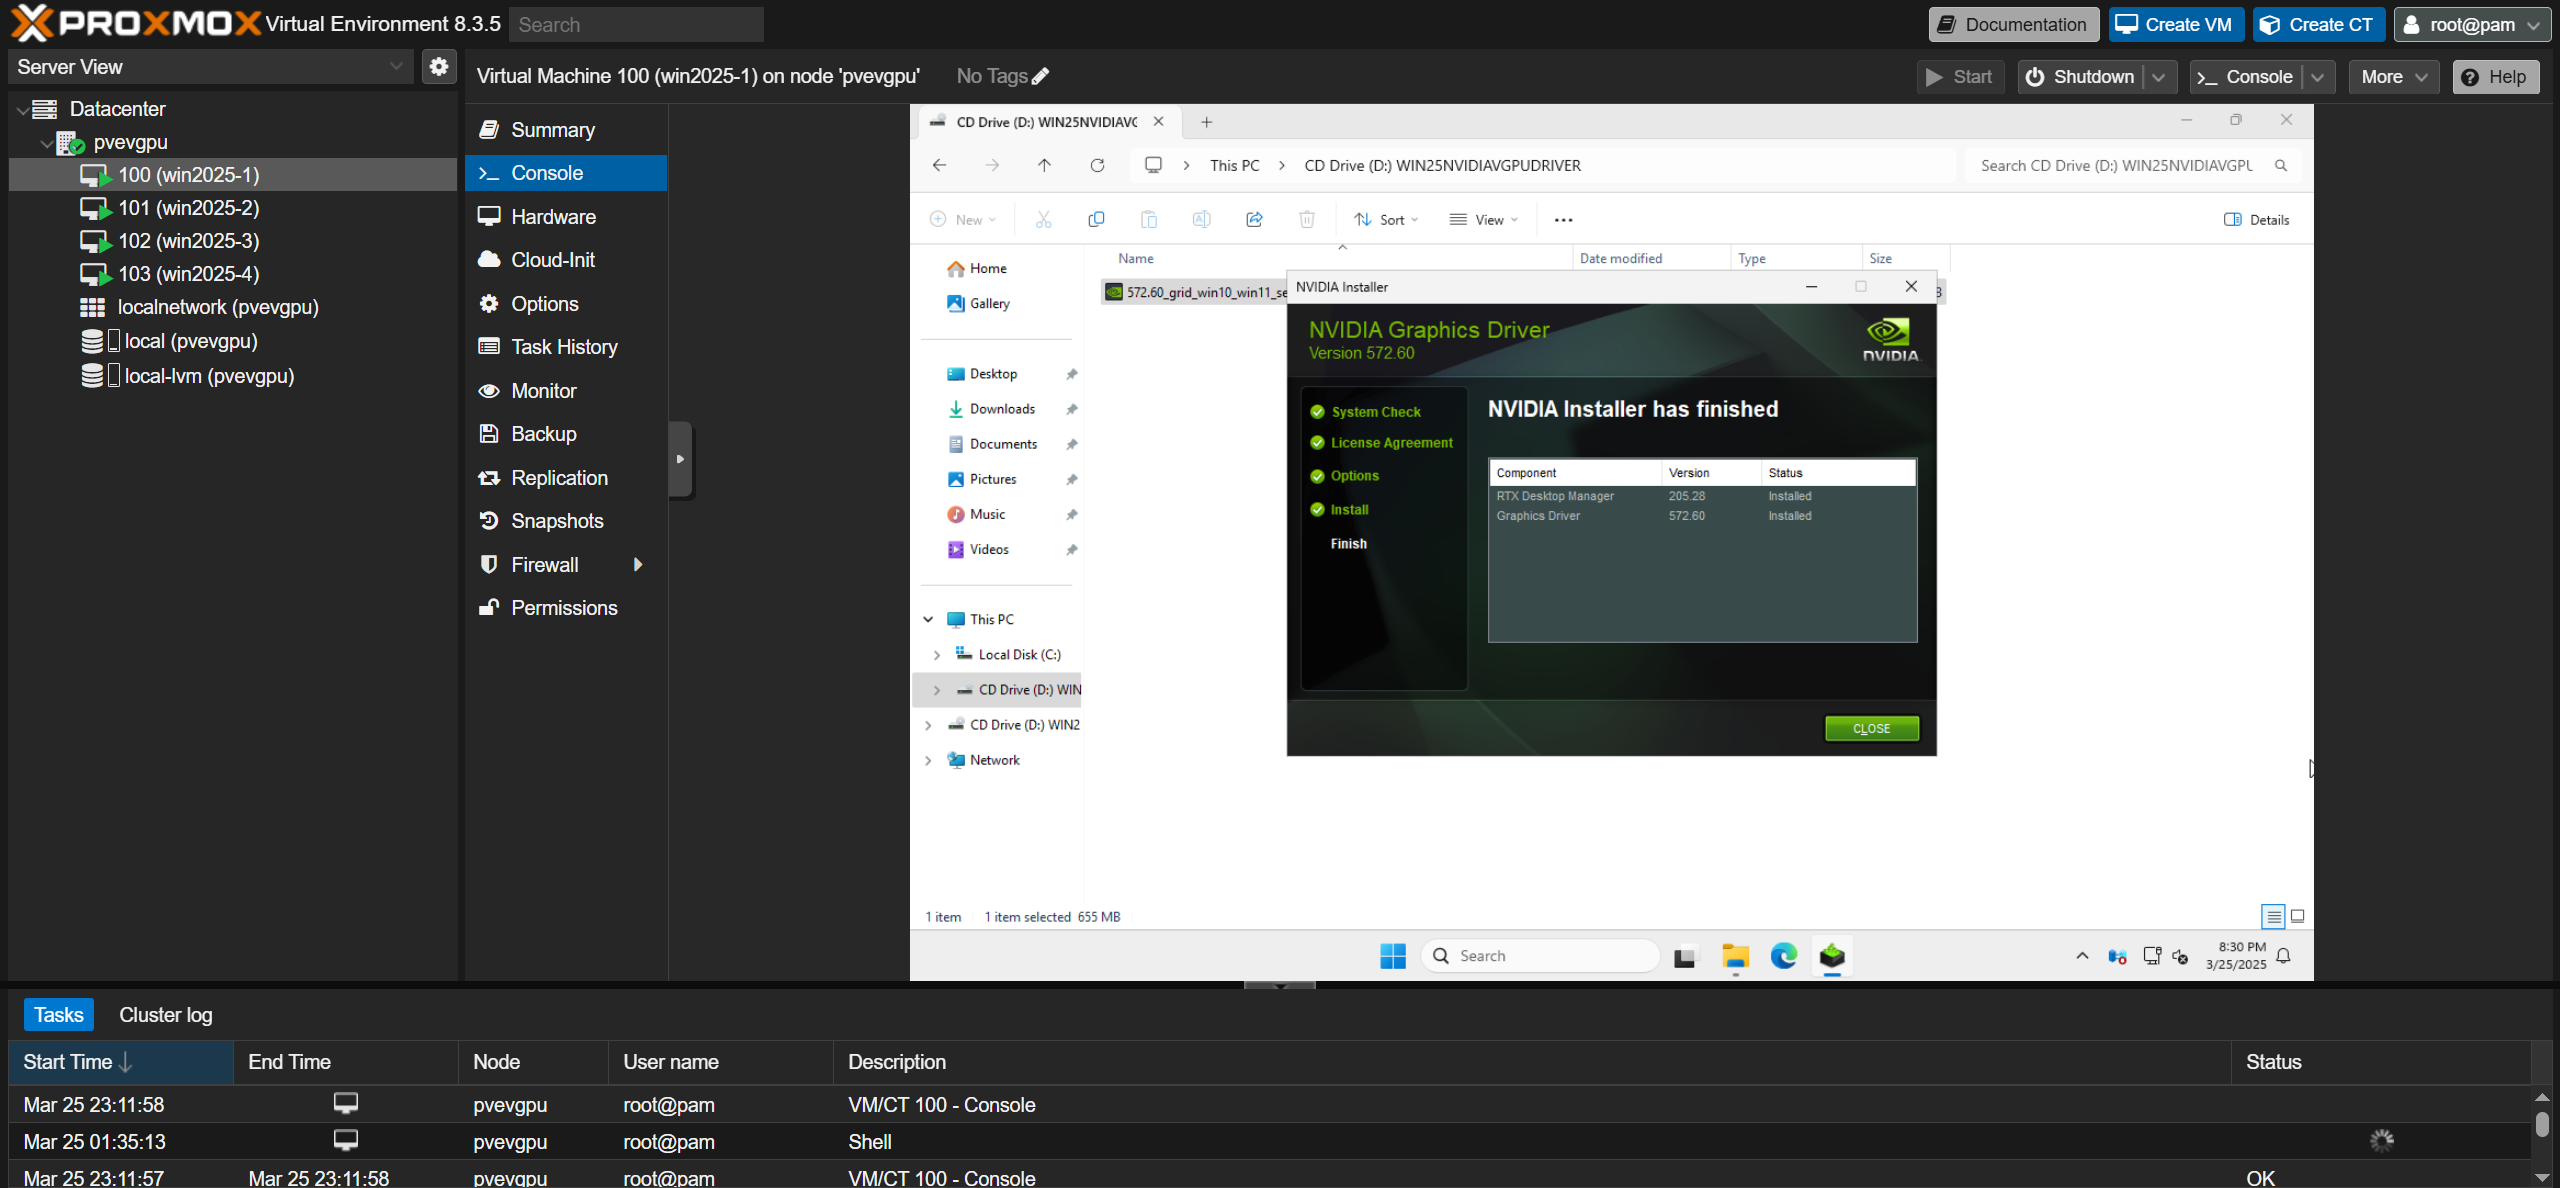
 Once the driver installation is complete, click the “CLOSE” button to exit the menu.
 Next, we will need to activate the vGPU license on the guest. Activation methods may differ significantly depending on whether you select a dedicated license server (DLS) or cloud license server (CLS), and your operating system. Follow NVIDIA’s License System Quick Start Guide and Client Licensing User Guide for detailed steps on activating clients for your specific setup.
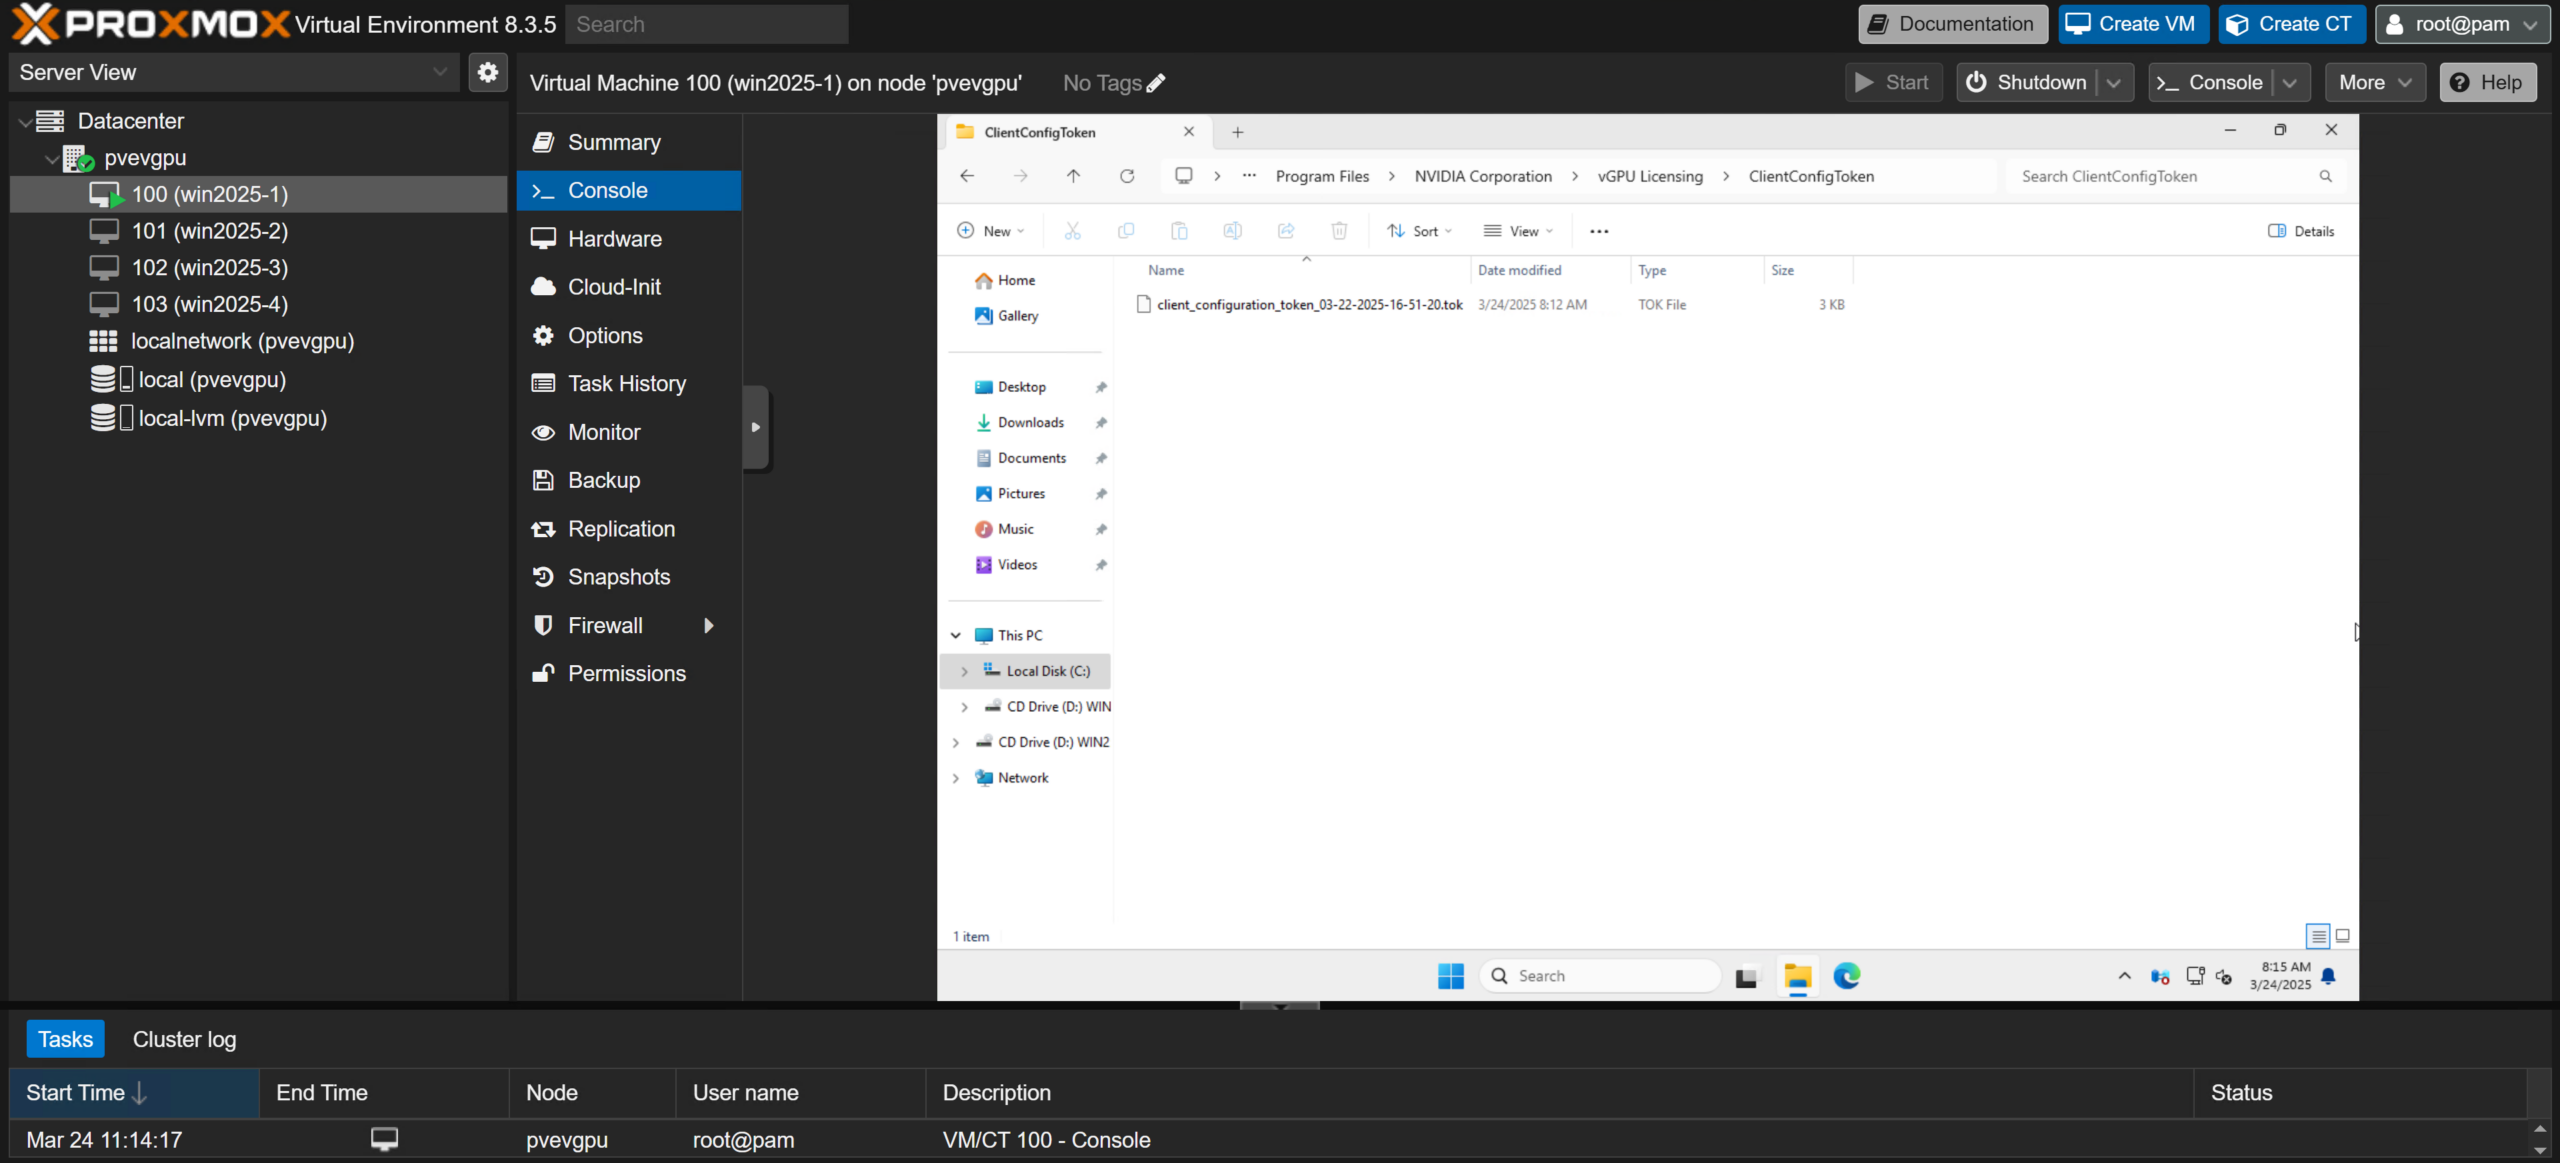
We used a cloud license server and received a token file to place on guests for activation. Move this file onto the guest and copy it to the “C:\Program Files\NVIDIA Corporation\vGPU Licensing\ClientConfigToken” folder.
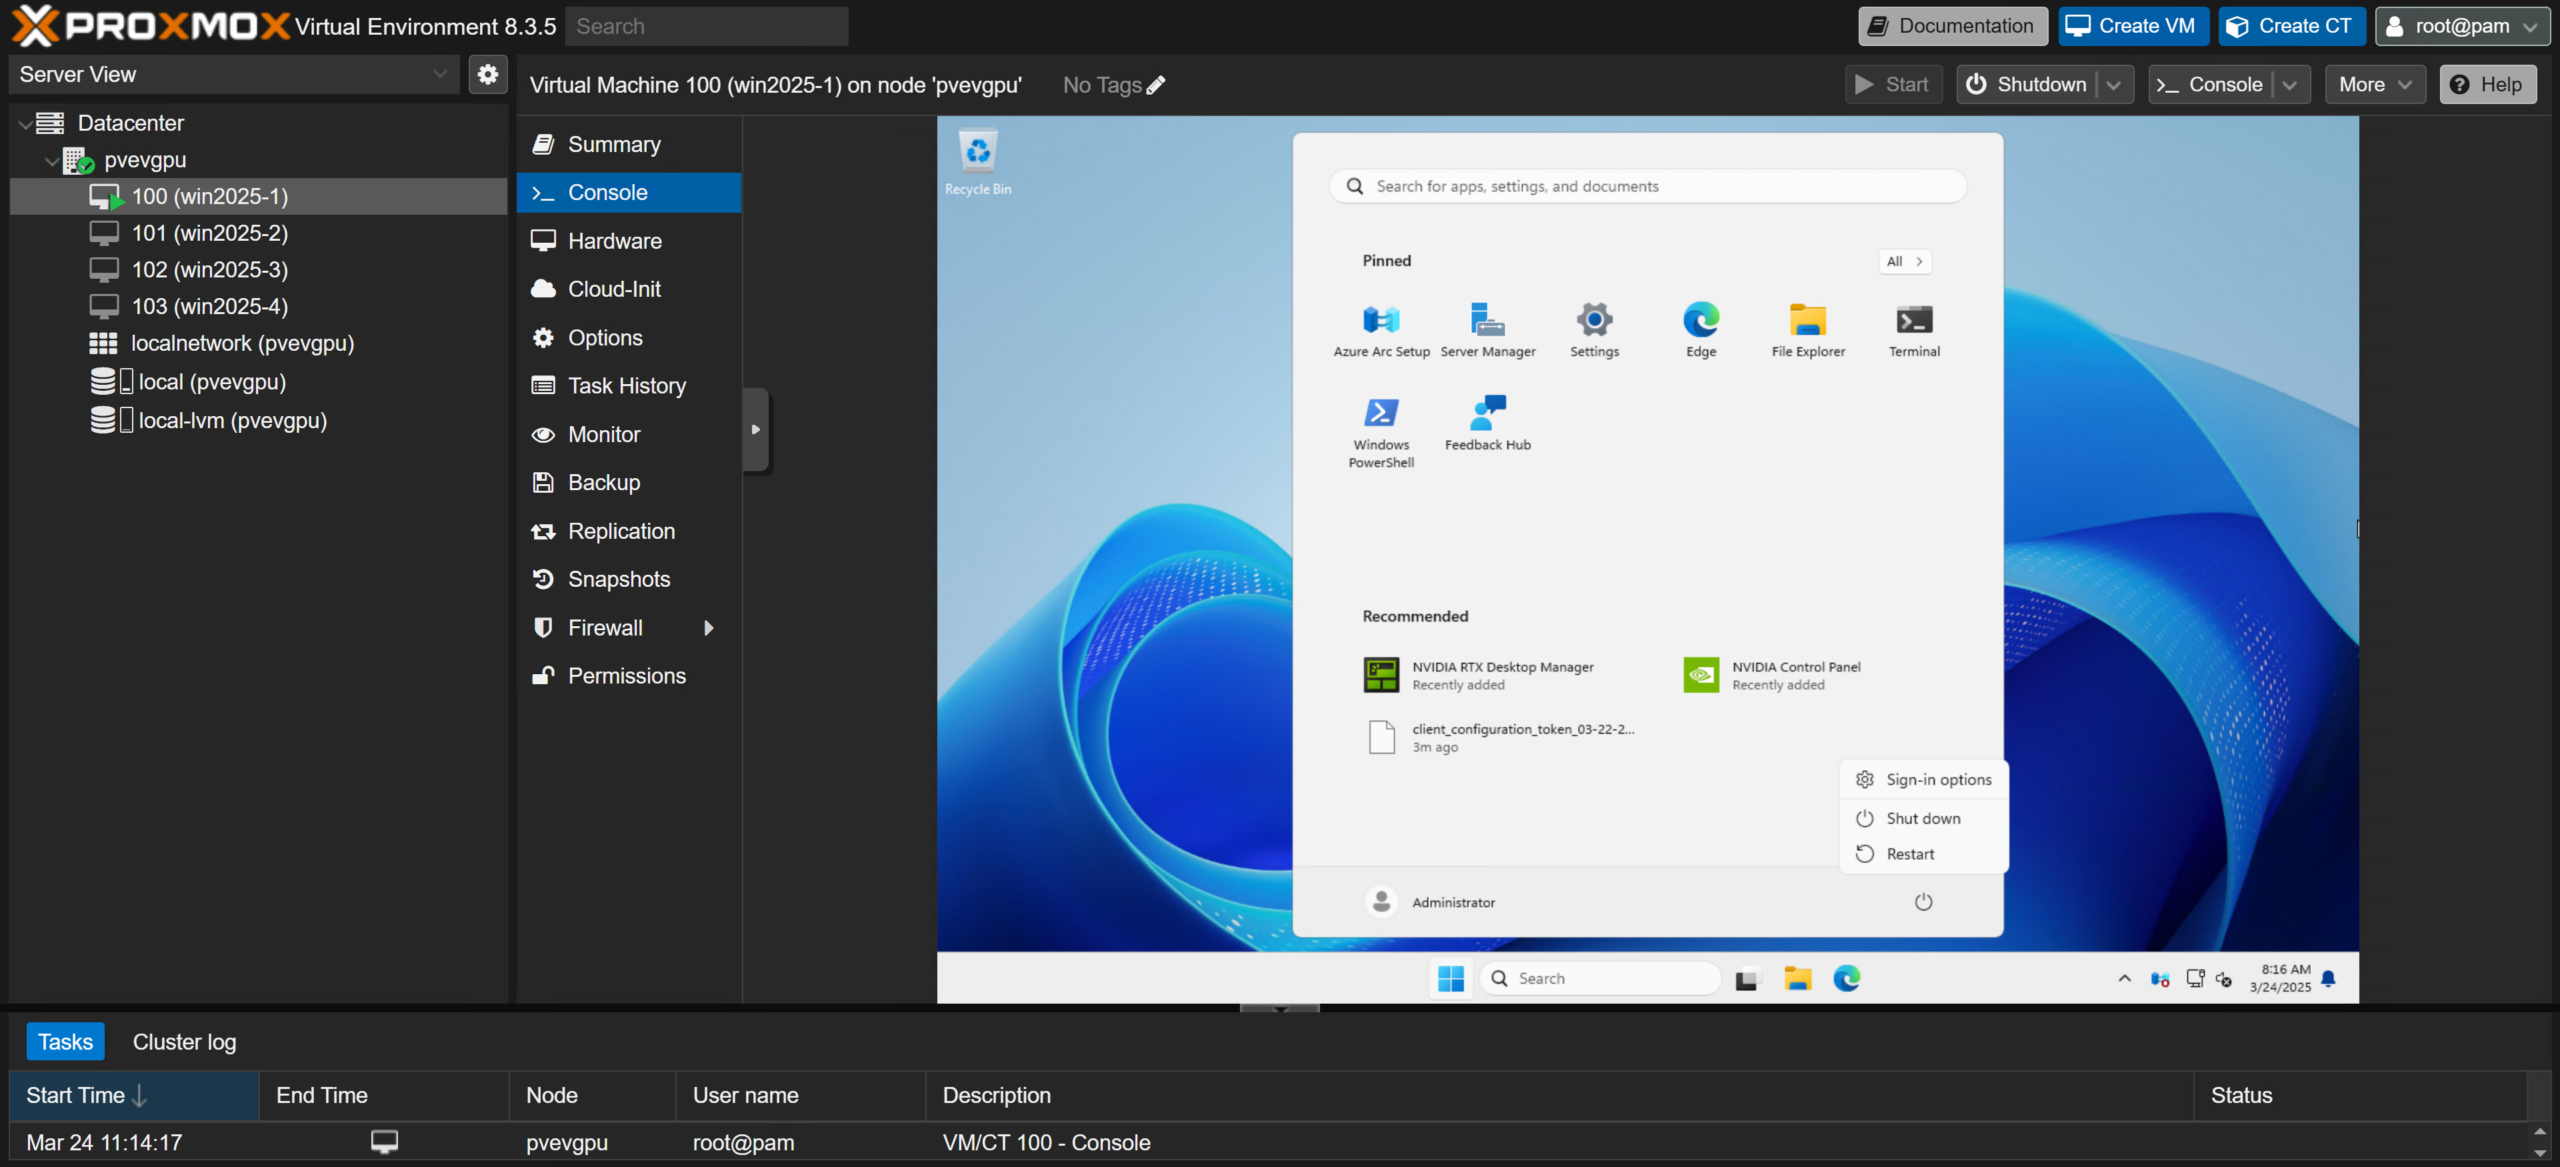
 Next, a reboot of the guest is necessary to complete the activation process.
 Following all the host and guest configuration steps detailed here, you should be ready to run programs and applications requiring a GPU. Don’t forget to enable Remote Desktop Protocol (RDP) or install your favorite remote desktop software on your guests after the reboot to enjoy GPU-accelerated remote viewing goodness!
Revving the Engine (Trying Out Proxmox vGPU)
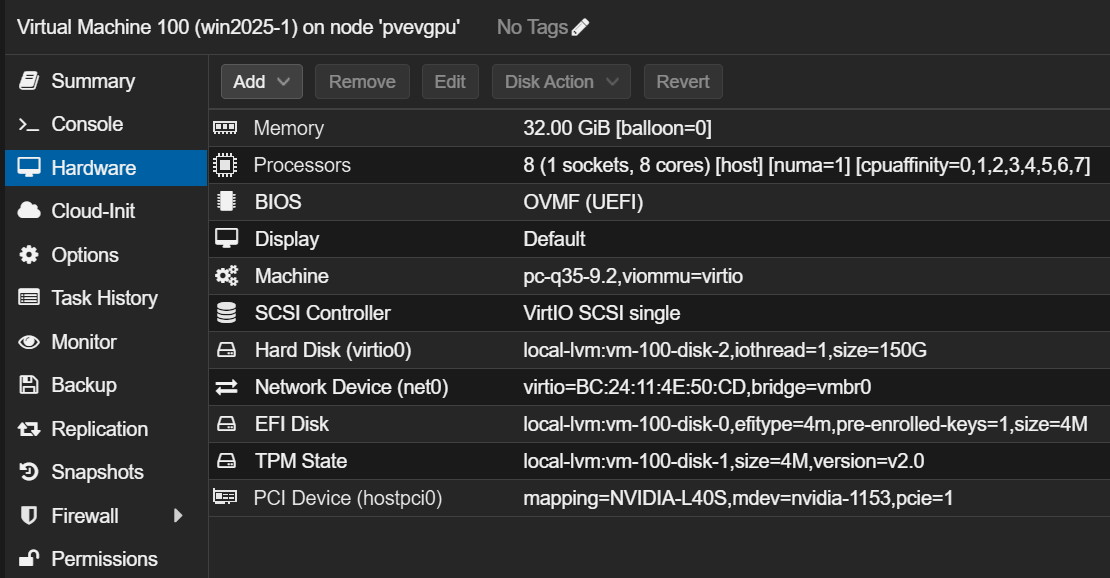
Now that we’ve got some virtual servers with virtual GPUs, let’s take them for a spin! Each of our VMs has been configured with 8 pinned Intel Xeon Platinum 8580 vCPUs (4 hyperthreaded cores), 32 gigabytes of DDR5 4800 MT/s registered ECC RAM, and the NVIDIA L40S-12Q (virtual workstation) vGPU profile with 12 gigabytes of VRAM. You can see the virtual machines’ complete hardware configuration below:
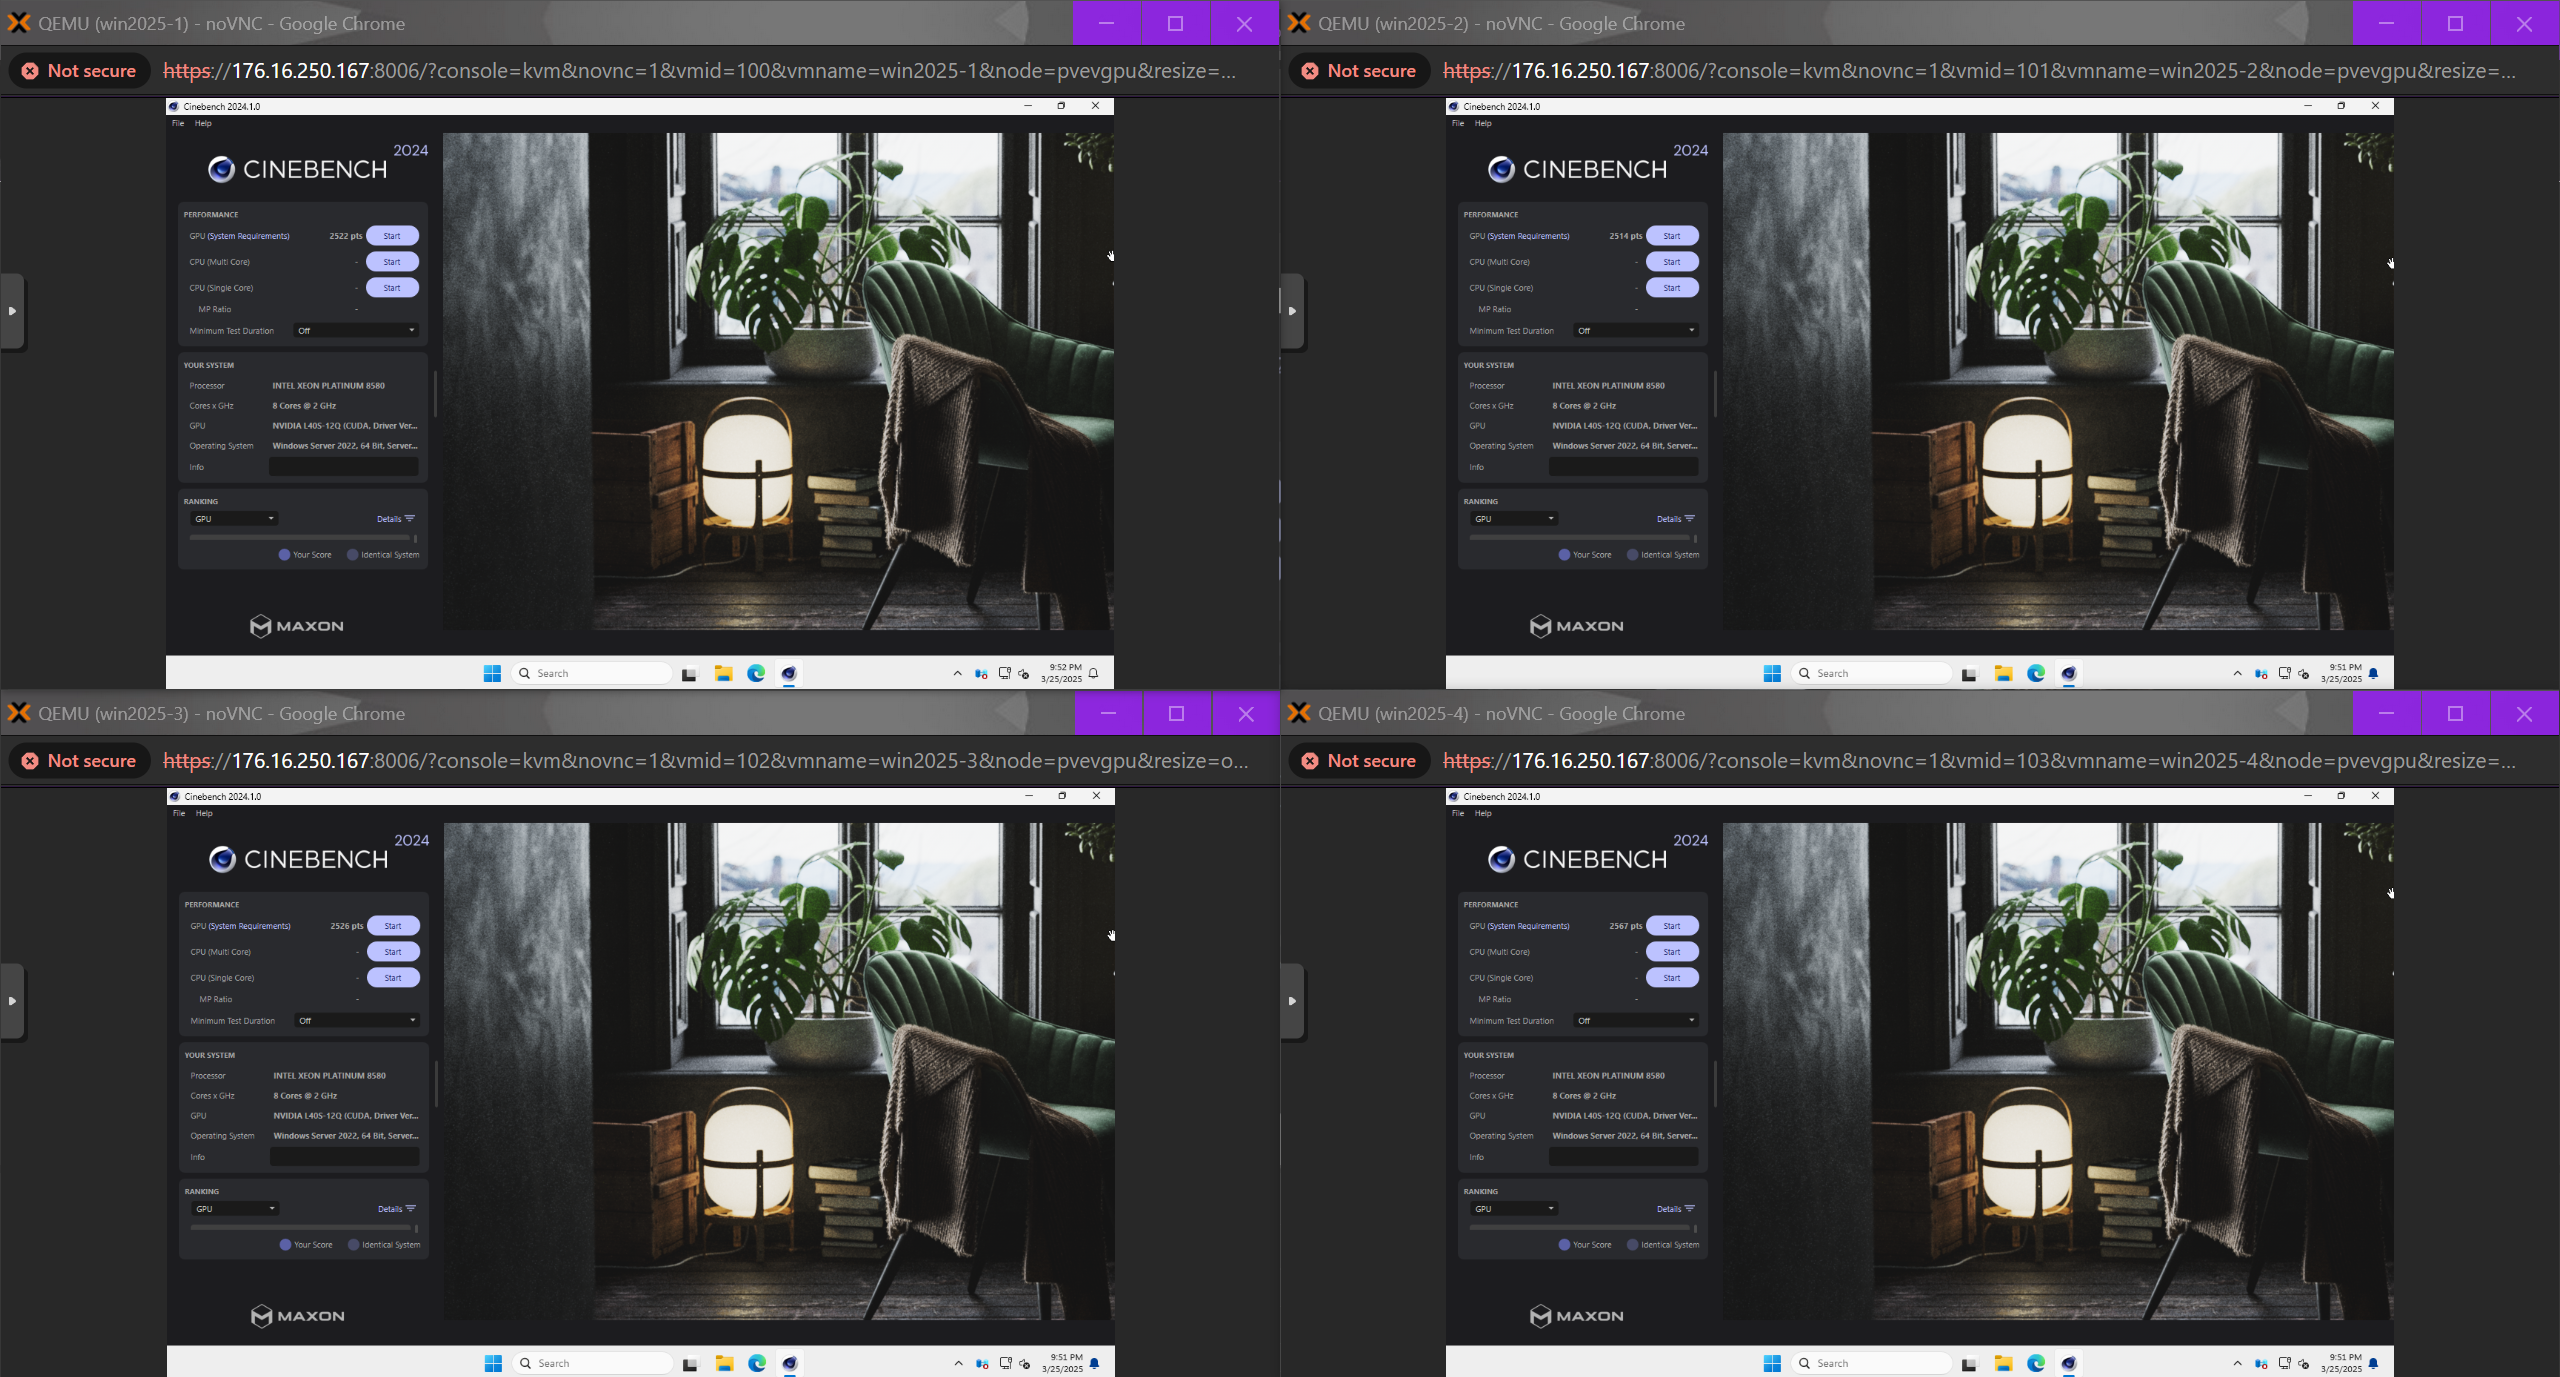
Cinebench 2024
Based on Maxon’s Cinema 4D modeling and animation software, Cinebench 2024 offers an interesting and objective look at rendering performance on vGPUs. Let’s compare the full might of the L40S in its “48Q” (all 48 gigabytes of VRAM) profile with one virtual machine versus four VMs running the “12Q” profile.
 While it doesn’t make much sense to have one virtual machine hogging the entire L40S, we can see that performance is impressive at 21,147 points in the single-pass GPU benchmark. However, splitting the GPU four ways shows the impact of NVIDIA’s time-slicing approach to sharing the GPU’s CUDA cores, with individual scores ranging from 2,514 to 2,567 when the benchmark was run simultaneously across all VMs.
 Rerunning the test on a single virtual machine with the “12Q” profile, and the other three VMs idling, boosts the score back up to 15,133. It is not exactly a return to the full GPU’s score, but it is still respectable for a partitioned vGPU.
Blender Benchmarks
Let’s continue with a few more rendering benchmarks with Blender. Following similar trends to Cinebench 2024, splitting the GPU four ways results in dramatically lower total performance when compared to a single virtual machine running the same workload in the same profile.

As demonstrated in the Monster benchmark, just four VMs sharing the GPU’s compute power means that individual render performance can be as little as 8% of a single VM with the same profile. However, we did observe one virtual machine gaining quite a lead on the others—up to 2.4 times the worst performer’s score.

The Junkshop and Classroom benchmarks tell similar tales, with large dips in performance for three out of the four VMs and a single guest getting a much higher score than the others.

Interestingly, there appear to be brief moments where one virtual machine’s vGPU is given higher priority and takes a significant lead. For example, during the Classroom benchmark, our second Windows Server 2025 VM (WIN2025-2) attained more than triple the performance of its peers despite being run simultaneously. While we can’t precisely determine if this is due to the vGPU software’s scheduling or the nature of the GPU itself, it highlights some performance oddities synonymous with NVIDIA’s time-slicing-only approach with this card.
Conclusion
Setup and support for NVIDIA’s vGPU software may not be as polished as other competing platforms. Still, it is an exciting and valuable feature for organizations and homelabbers already running Proxmox Virtual Environment systems. Although performance is significantly reduced when splitting GPU resources, many organizations still take advantage of NVIDIA’s vGPU technology and have determined that sharing a GPU outweighs this downside. This attitude has been adopted by many hyperscalers and space-restricted data centers, where cramming as many tenants (in this case, virtual machines with vGPUs) into the smallest footprint possible is the most efficient and profitable option.
Proxmox Server Solutions’ recent and rapid expansion of features like software-defined networking, support for the Linux 6.11 kernel, and a dedicated data center management system shows significant progress and proves it is becoming a valid choice in the hypervisor arena. We hope to see continued development in this space and look forward to telling you more about exciting tools and technologies coming to PVE soon!


 Amazon