

In the past, we had reviewed some of the based management controller (BMC) solutions from major server manufacturers, including HPE iLO 5 and Lenovo XClarity Controller (XCC). These embedded server management technologies allow a system administrator to monitor and manage servers and other network-attached equipment by remote control regardless of whether the machine is powered on or whether an operating system is installed or functional. Each of these solutions has similar functionality to the others, and each has been improved over the years to add new functions and capabilities. In this review, we take a close look at the integrated Dell Remote Access Controller (iDRAC) with Lifecycle Controller, on the current version 9, which is included in generation 14 of PowerEdge servers.
The Integrated Dell Remote Access Controller (iDRAC) has a long journey on the out-of-band management solutions. iDRAC9 is built off the features and functionality of iDRAC8, which is embedded in the previous 13th generation PowerEdge servers. iDRAC9 is designed to make system administrators more productive, allowing them to deploy, monitor, update, and manage PowerEdge servers, both locally and remotely, either from GUI or scripting.
The iDRAC controller is a piece of hardware integrated on the motherboard of the server, and as well as other BMC solutions, has its own processor, memory, network connection, and access to the system bus. The iDRAC provides remote access to the system console (keyboard and screen), allowing the system BIOS to be accessed over the Internet when the server is rebooted. Key features of iDRAC include power management, virtual media access, and remote console capabilities. These features give administrators the ability to configure a machine as if they were sitting in front of the local console.
Previous server generations and versions of iDRAC were loaded with a lot of options, and now, iDRAC9 has new features that are available only on the 14th generation Dell EMC PowerEdge servers. iDRAC9 has a brand new processor, which Dell claims to be four times faster than the previous generations, allowing all the GUI pages to change and load faster, as well as all the backend processes. Another feature is Connection View, that helps knowing where the iDRAC, as well as PCIe devices, are connected at the top rack switch, so you could know where are all cables connected without going into the server room. And System Lockdown mode, it is a secure mode that when is enabled, the system doesn’t allow any configuration changes whether wanted or unwanted into the system.
Types of licenses
Each generation of iDRAC with Lifecycle Controller comes with a basic level of functionality. Based on the server model ordered, licensing features differ. Based on the desired level of management functionality, companies and IT administrators should decide what features fit them best.
iDRAC Basic or iDRAC Express are the standard licenses available by default on the system. iDRAC Enterprise license includes all the licensed features.
iDRAC is available in the following variants:
- iDRAC Basic. Available by default for 200-500 series servers
- iDRAC Express. Available by default on all 600 and higher series of rack or tower servers, and all blade servers
- iDRAC Enterprise. Available on all server models
Lifecycle Controller
At the heart of the Dell PowerEdge servers management solution, is the embedded Lifecycle Controller (LCC). The LCC is a lightweight operating system that runs from the iDRAC to receive instructions from management systems. It also serves as a direct point for updates and helps to perform automated tasks as directed to create and maintain healthy servers.
The LCC is loaded on demand; it is not continuously running. The network configuration within the LCC allows it to access network resources for performing platform updates. Since the iDRAC can be accessed remotely, and many of the features available through the LCC are also available via the iDRAC, the LCC is commonly used for initial systems configuration. The LCC user interface provides a connection to Dell’s Internet-based firmware and software repository via FTP, eliminating the need for removable media.
The key features of Lifecycle Controller are:
- Provisioning. Entire pre-operating system configuration from a unified interface.
- Deploying. Simplified operating system installation with the embedded drivers on Lifecycle Controller.
- Download drivers for operating system installation from downloads.dell.com
- Patching or updating. Operating system agnostic, and reduced maintenance downtime with direct access to updates. It simplifies firmware updates by maintaining a working version for rollback.
- Servicing. Continuous availability of diagnostics without depending on a hard-disk drive.
- System erase. Deletes the server and storage-related data on selected components of a server.
- Security. Support local key encryption.
- Enhanced Security. Support for TLS 1.2, 1.1, and 1.0. To enhance security, default setting is TLS 1.1 and higher.
- Restoring the server. Back up the server profile (including RAID configuration) and restore the server to a previously known state.
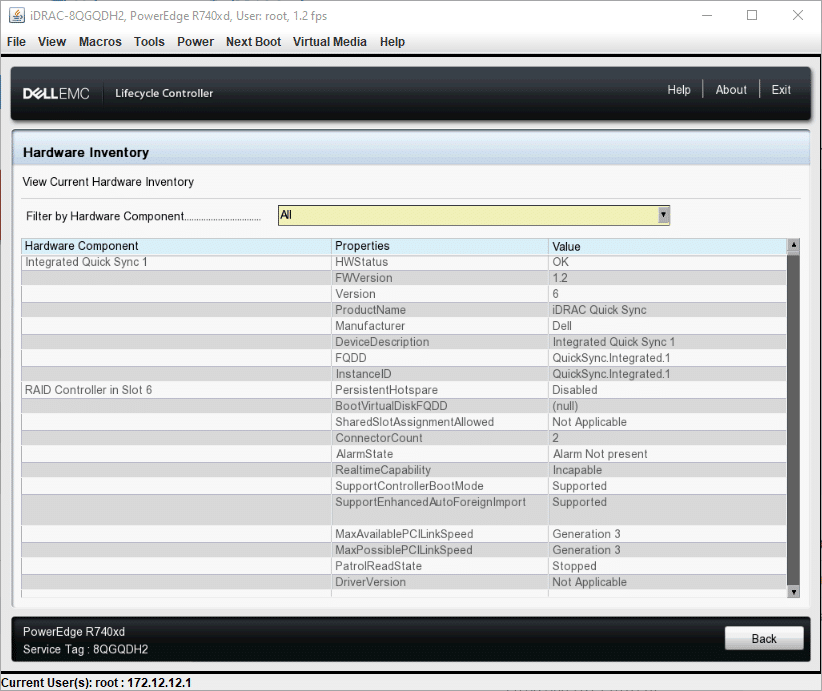
- Hardware inventory. Provides information about the current and factory system configuration.
- Lifecycle Controller logs for troubleshooting.
Lifecycle Controller GUI
Lifecycle Controller provides a graphical user interface; this allows administrators to leverage the embedded controller without having to utilize additional management tools. In order to provide a comprehensive review of Dell’s iDRAC solution, we walked through the menu and common systems management tasks of the Lifecycle Controller, using its GUI.
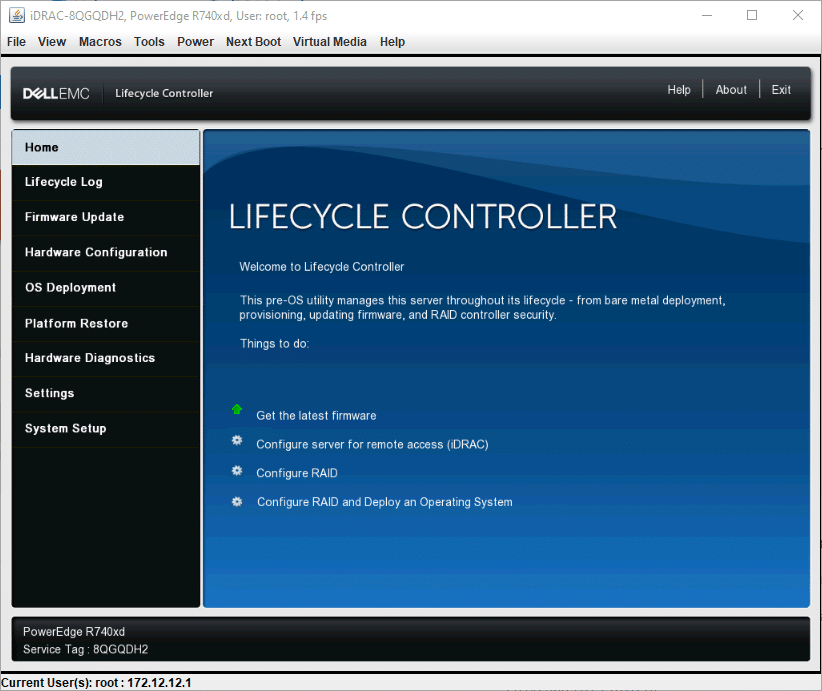
The LCC GUI can be accessed by pressing F2 when booting the server or from the iDRAC Web Interface, which we are going to overview below. For this review, we connect to the LCC, using the Virtual Console from iDRAC and a Java plug-in.
We need to reboot the server to access the LCC; after that, we will be directly brought to the LCC home page. From here, we can perform quick options such as updating the firmware, configure the server for iDRAC, configure RAID, or Deploy and Operating System.
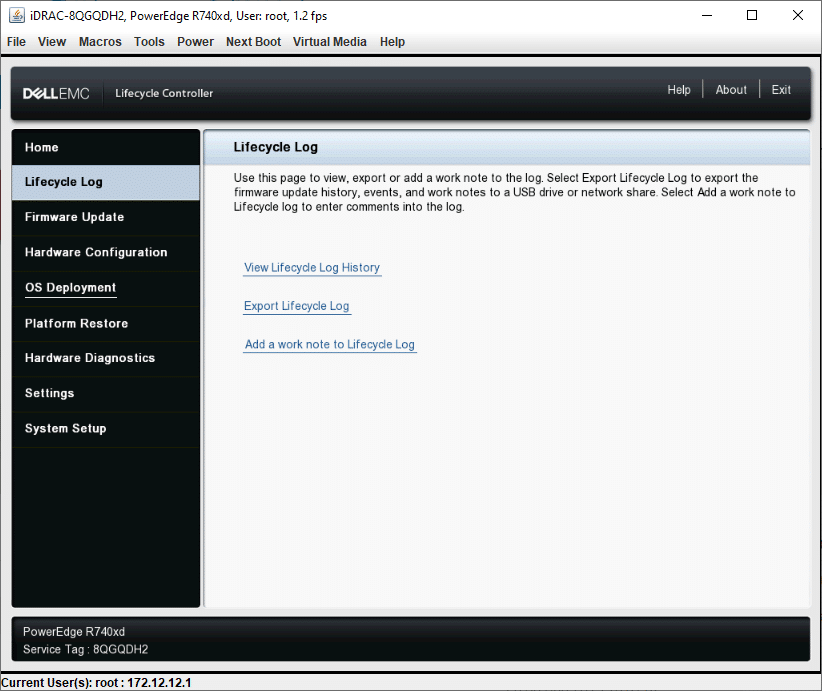
The next item on the menu is Lifecycle Log. Here we can view, export, or add a work note to Lifecycle Log.
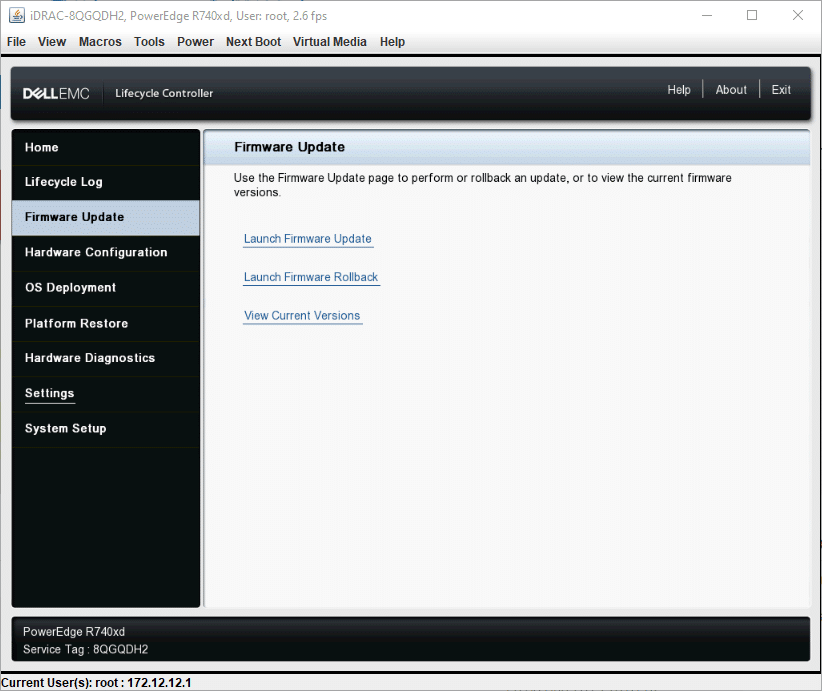
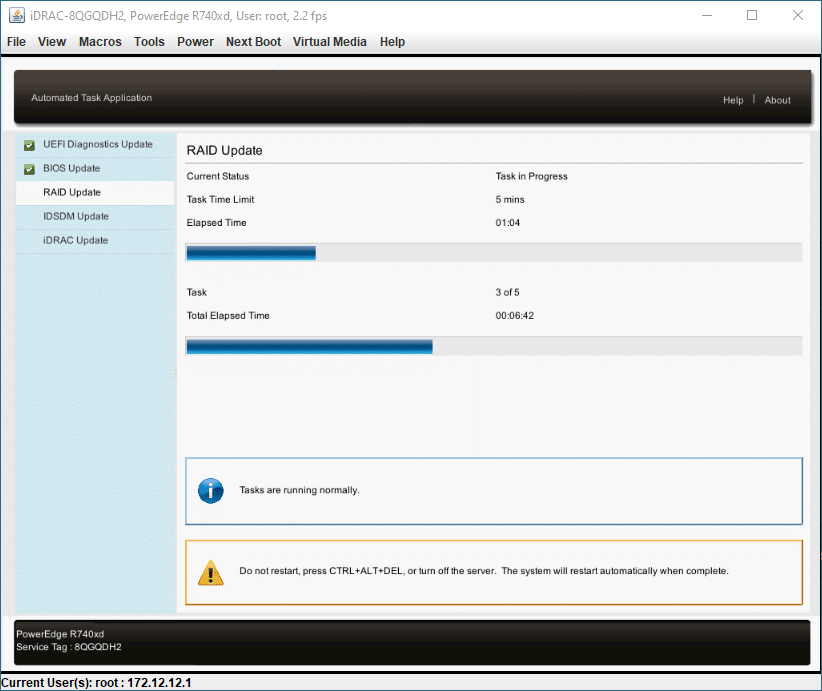
Under Firmware Updates, we can view the current firmware version or perform updates and rollbacks. This option great, and it is one of the reasons to use the LCC. See the section below.
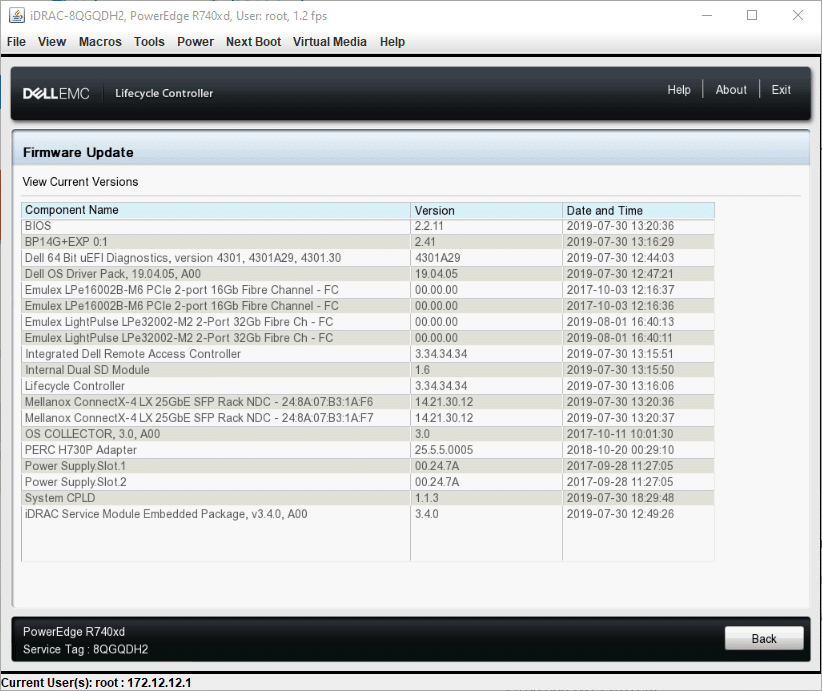
Clicking on View Current Versions, a list of all components will be displayed.
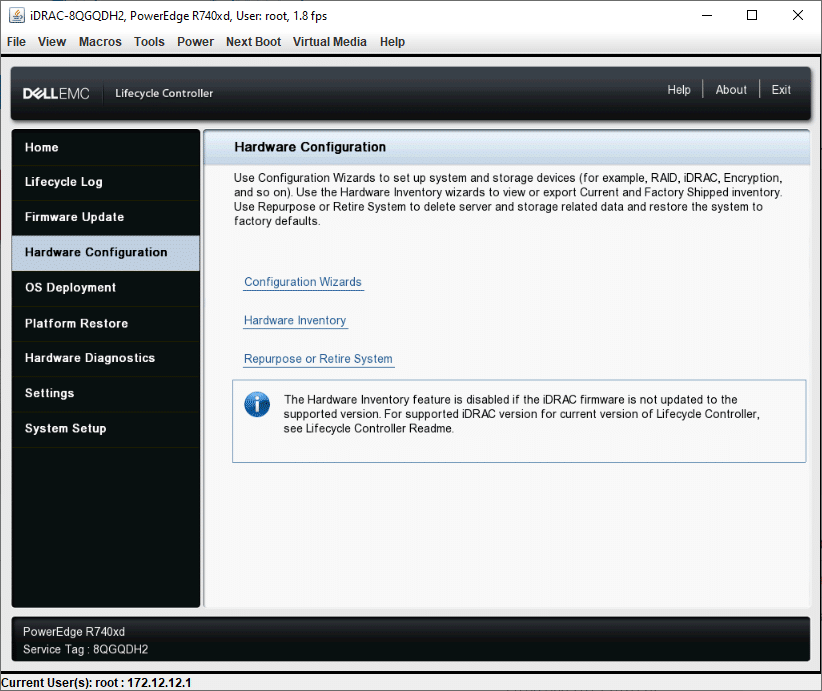
Next on the menu is Hardware Configuration. Here we can configure the system and storage devices.
Under the Hardware Inventory, one can check a list and details of all hardware components quickly.
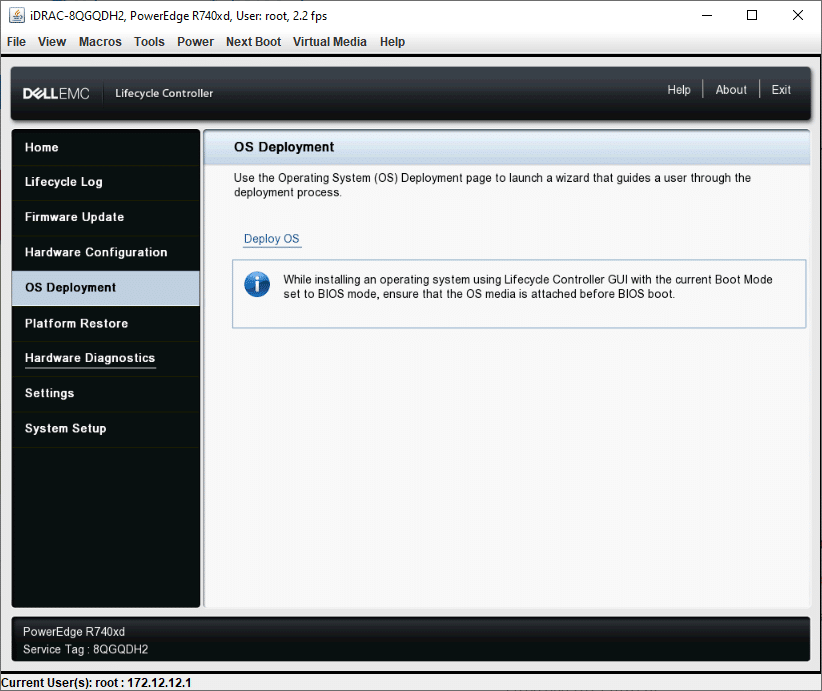
OS Deployment is another powerful tool of the LCC. From here, we can launch a wizard that will assist in the deployment of a new operating system.
Other options from the Lifecycle Controller GUI include Platform Restore, useful to import server profiles, Hardware Diagnostics, to detect hardware problems, and Settings, to perform basic configuration such as select language, keyboard, and network settings. The last option in the menu, System Setup, allows performing Advanced Hardware Configuration.
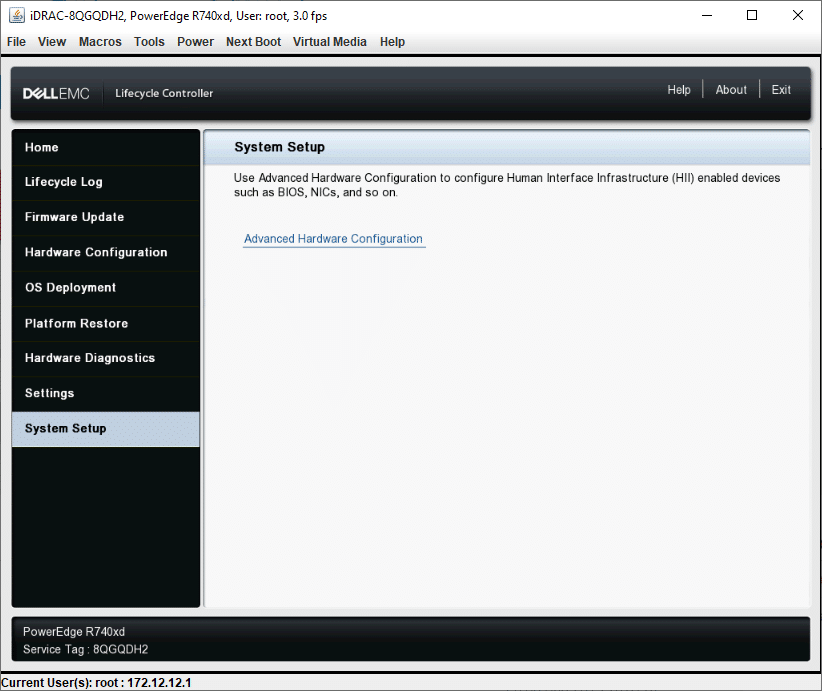
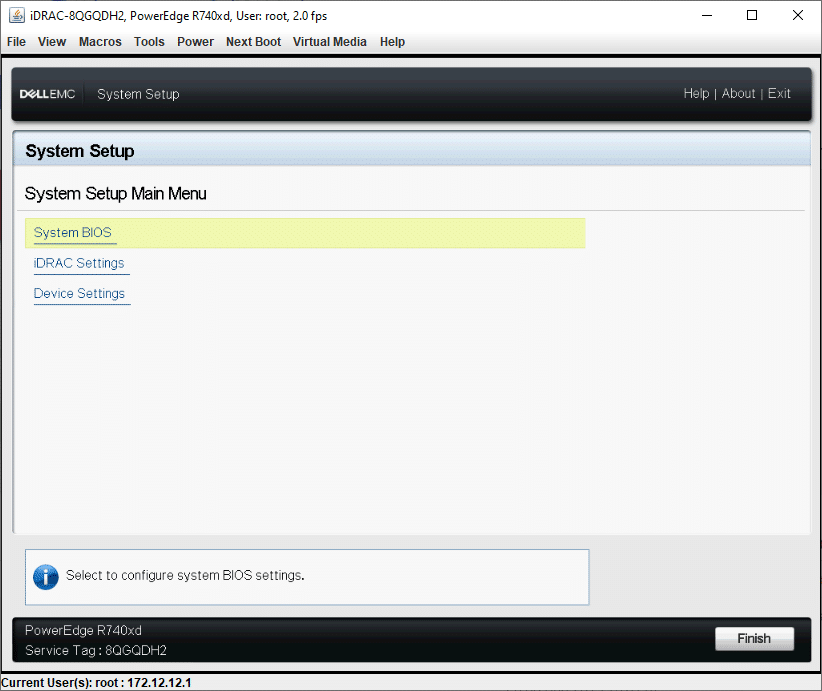
Under Advanced Hardware Configuration, we can more options, System BIOS, iDRAC Settings, and Device Settings. Several configurations are going to be found under these three main options. Besides, most of these options can be performed from the iDRAC Web Interface.
Firmware Update
For iDRAC9 is possible to update single devices using the web interface. For iDRAC7/8, the process can be carried out from the Lifecycle Controller GUI.
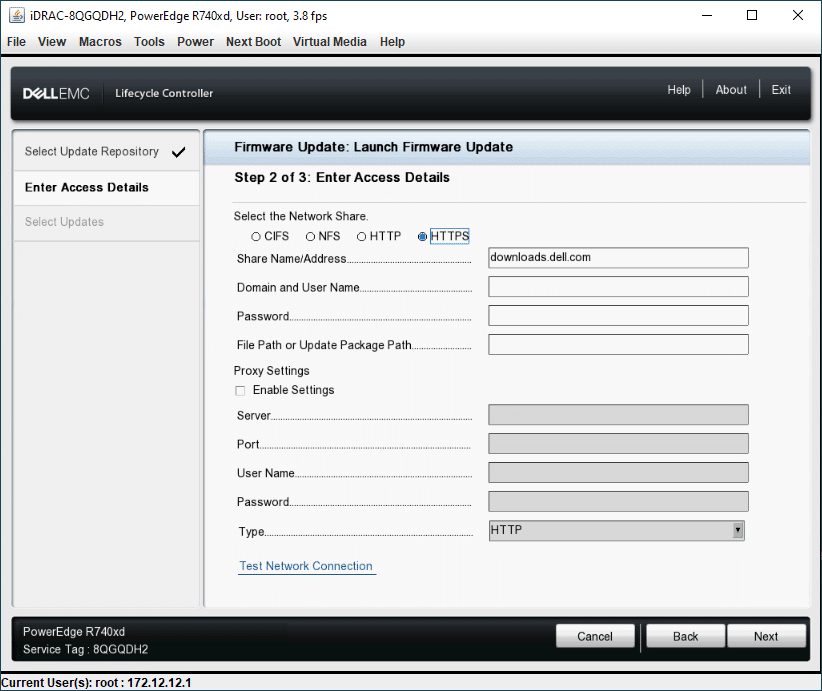
To perform firmware updates, first, we must select the repository location. We can use network share and access to a remote repository.
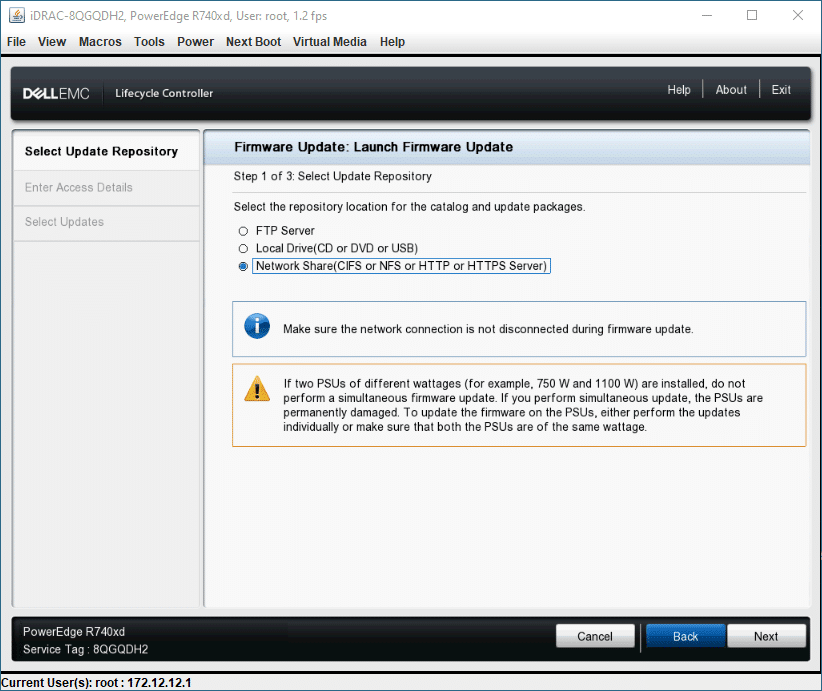
Using HTTPS, the default location is from the Dell website.
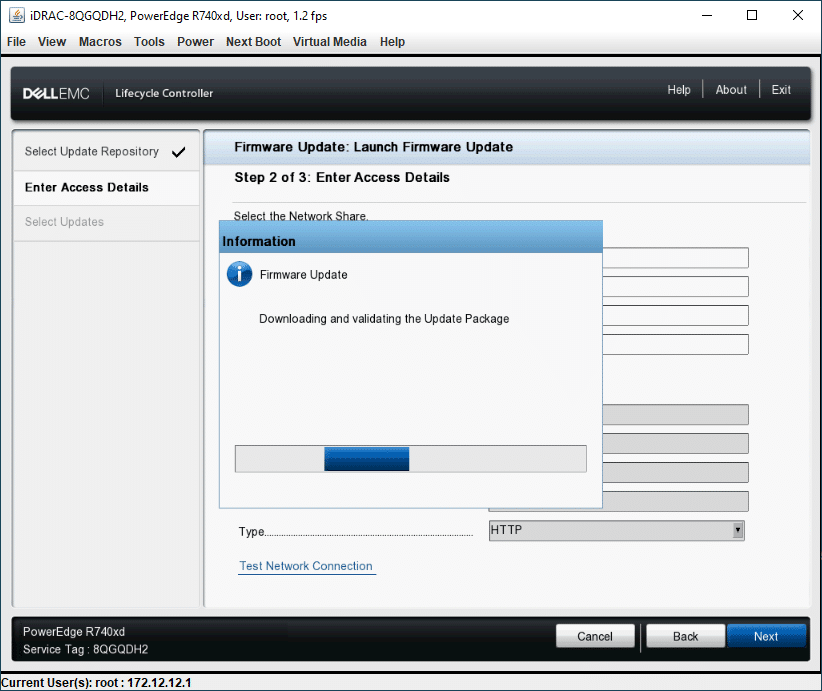
The firmware packages will be downloaded and validated.
A list of available system updates will be shown here.
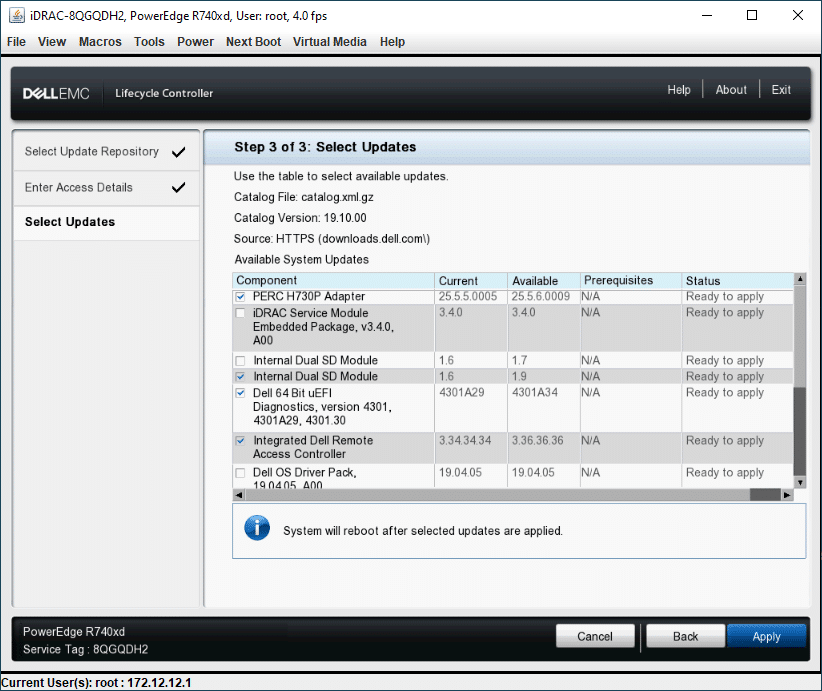
The system will apply all updates available or selected. After this, the server will be rebooted.
iDRAC Web Interface
The main iDRAC management takes place via a web-based interface. There are multiple ways to logging in to iDRAC using the web-based interface; one could use the local iDRAC user, a Microsoft Active Directory user, or a Lightweight Directory Access Protocol (LDAP) user. Other options for log in to iDRAC, include using a smart card, Single Sign-On, remote RACADM, public key authentication, or SMCLP. With all these login options, IT administrators have extensive accessing management that increases security. During this review, we are accessing as a local user, but this access doesn’t have implications in the functionality of the GUI.
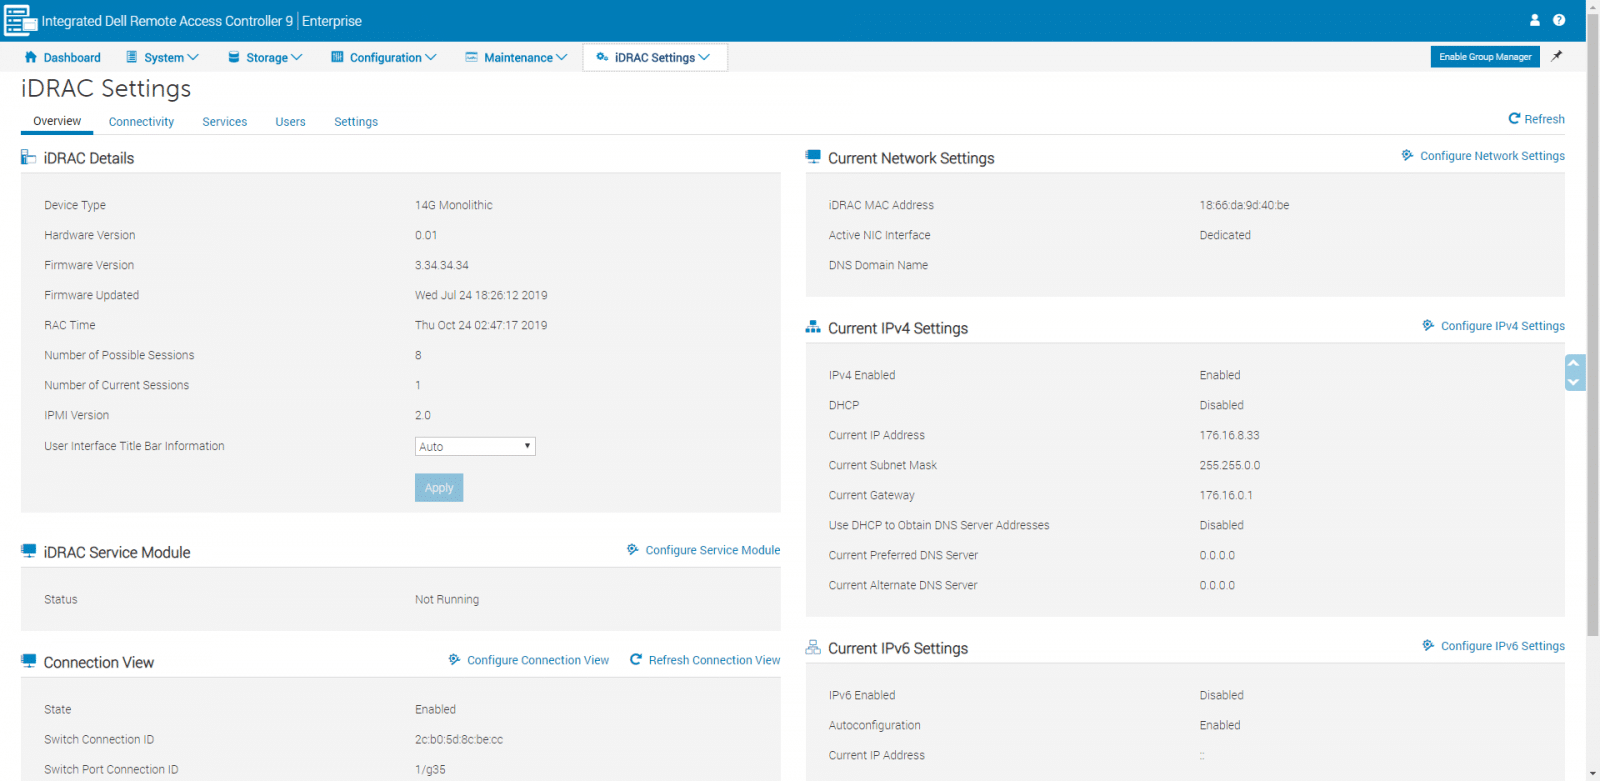
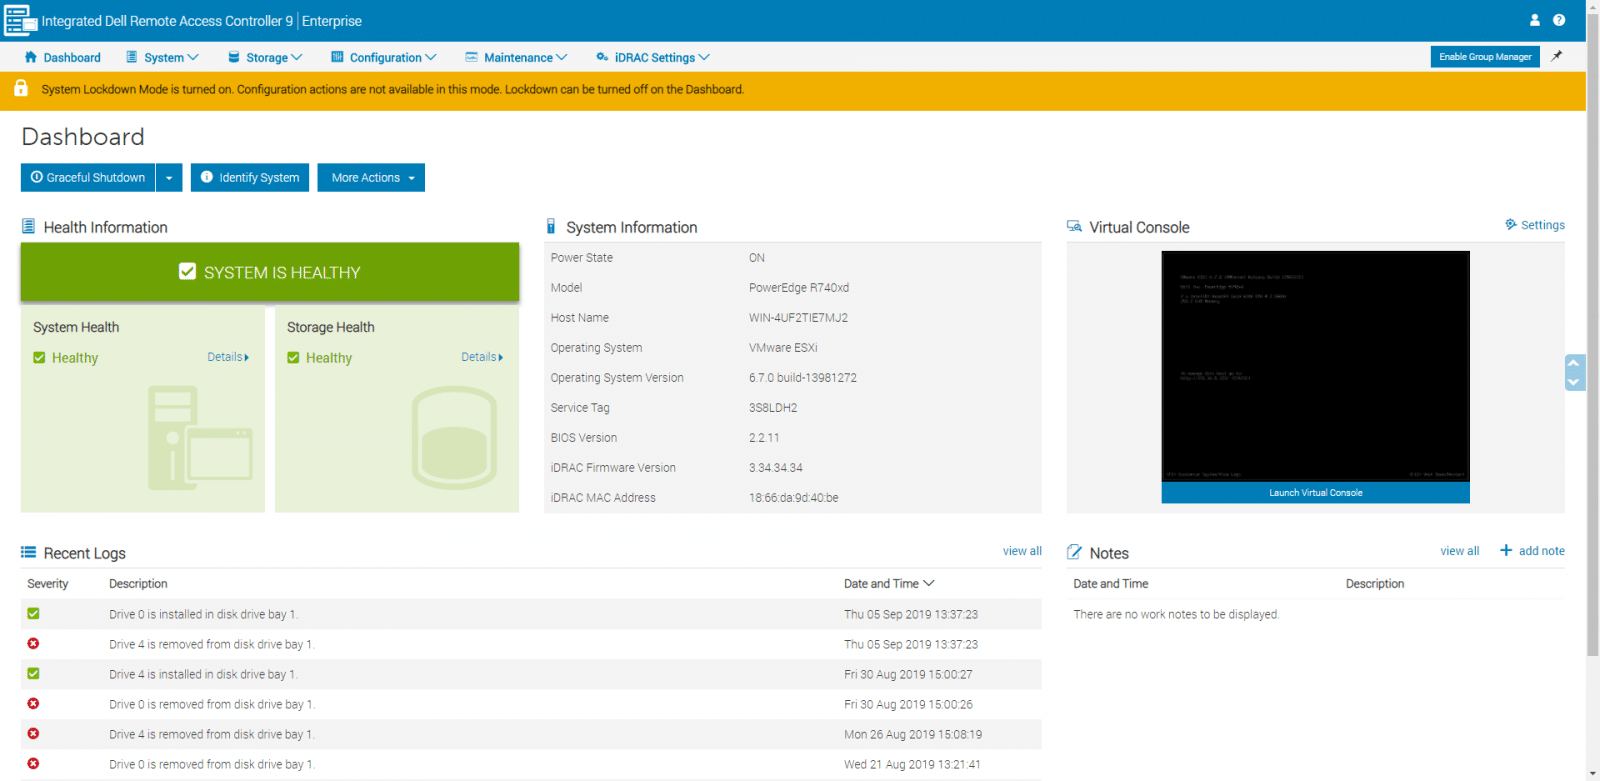
Once we log in to iDRAC, the first page we see is the dashboard, along with the main menu composed by System, Storage, Configuration, Maintenance, and iDRAC Settings located at the top of the interface. From Dashboard, we can take quick actions on the server, like graceful shutdown, identify system or turn on the system lockdown mode (shown below). Also, in the Dashboard, we have an overview of the system divided into different areas, including Health Information, System Information, Virtual Console, Recent Logs, and Notes. From the Dashboard, we can also enable the iDRAC Group Manager feature, which is available for the 14th generation of Dell Servers.
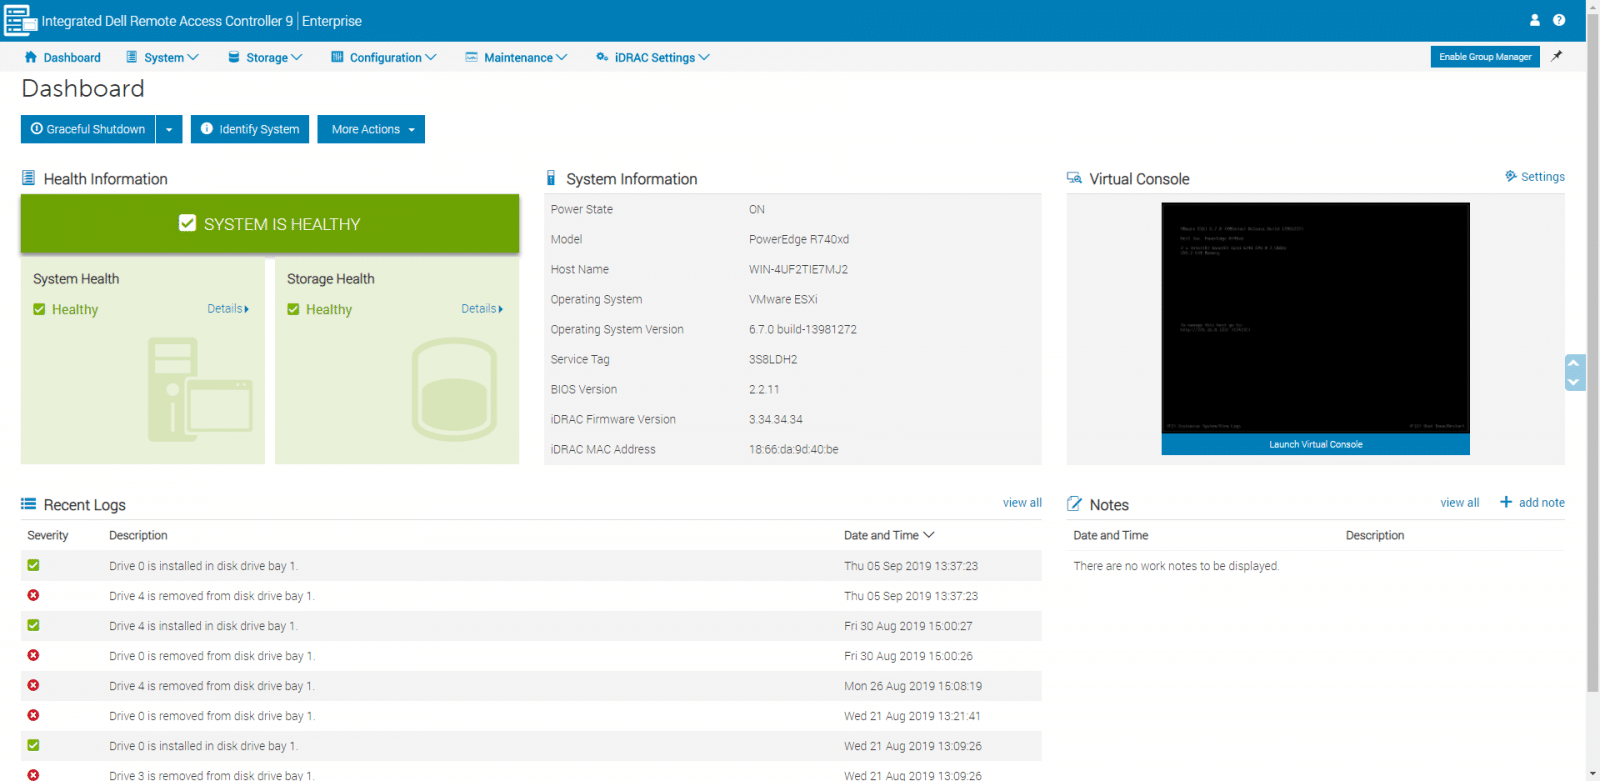
Similar to other BMC tools, we can launch a remote connection to the system directly from the Dashboard, in this case, from the Virtual Console area.
If we turn on the system lockdown mode, under the More Actions button, the GUI will show a yellow banner indicating that we are in this secure mode. Lockdown mode will keep you from making changes to the hardware configuration, improving security, and allowing to performer monitoring-only actions, for example. Lockdown mode is available from iDRAC9.
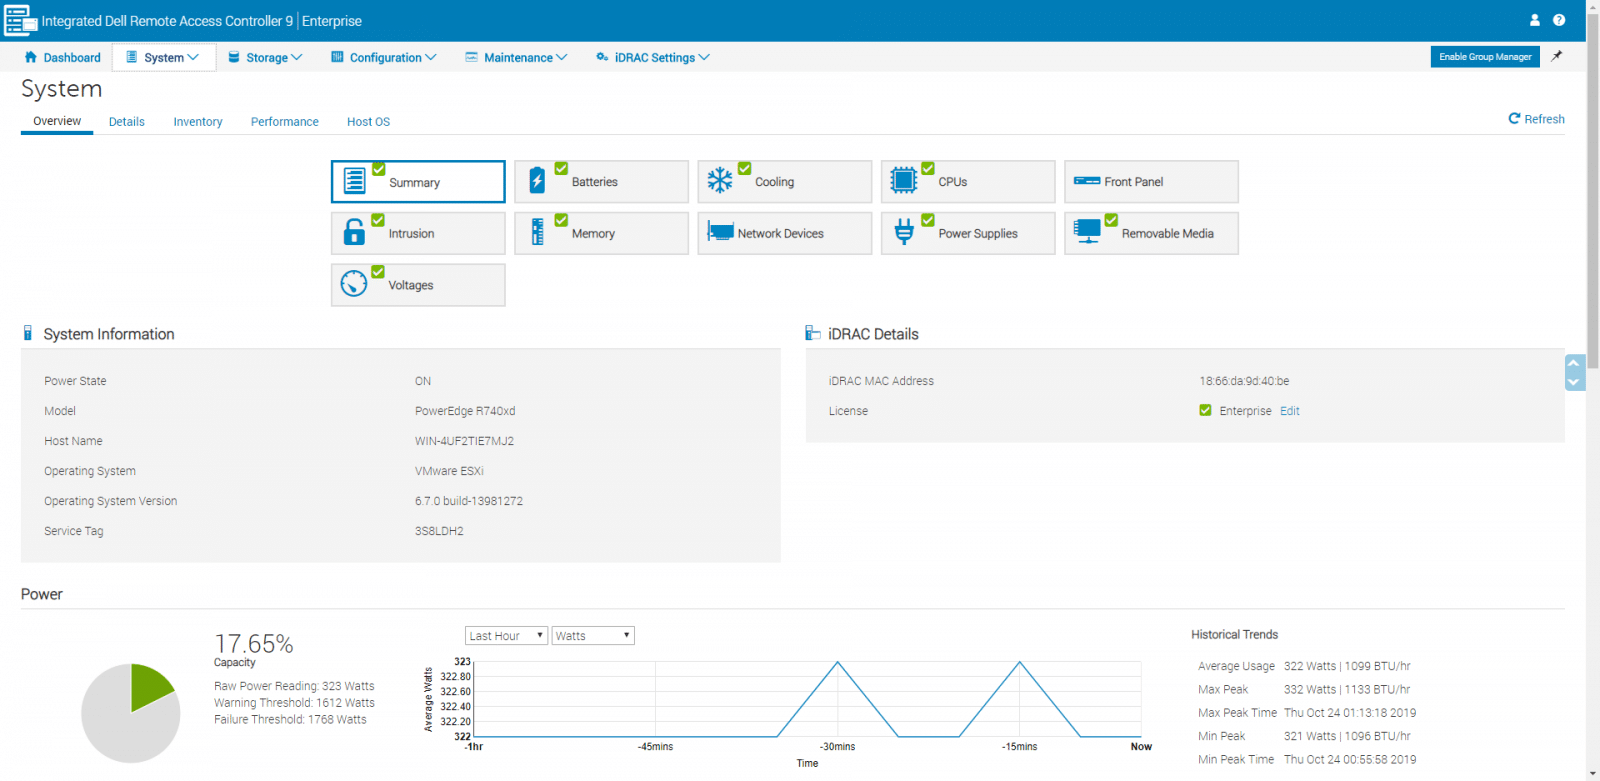
The next item in the main menu is System, which shows system details, iDRAC details, inventory, and performance logs, and we can navigate on the System sub-menu that includes Overview, Details, Inventory, Performance, and Host OS. From Overview, one can view details about the system, installed components, voltages, temperatures, and others. We start noting how depth we can go navigating in the menus, submenus, and options of this feature-rich management tool. Under Summary, essential information is displayed, such as System Information, iDRAC Detail, and many others, scrolling down. Also, we can monitor the power capacity of the system.
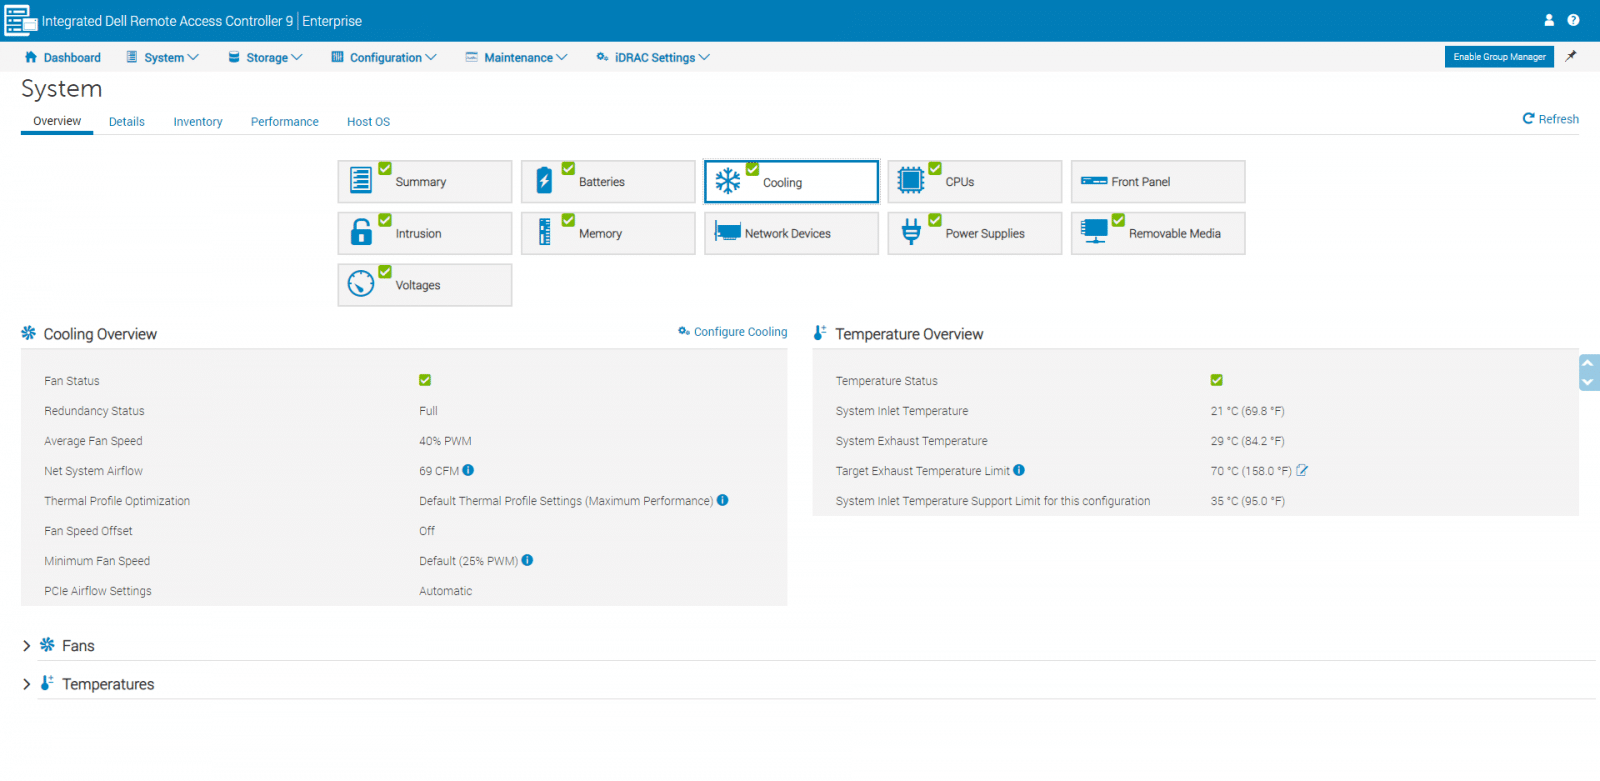
Under cooling, one can overview and configure the system cooling. A temperature overview is also available here.
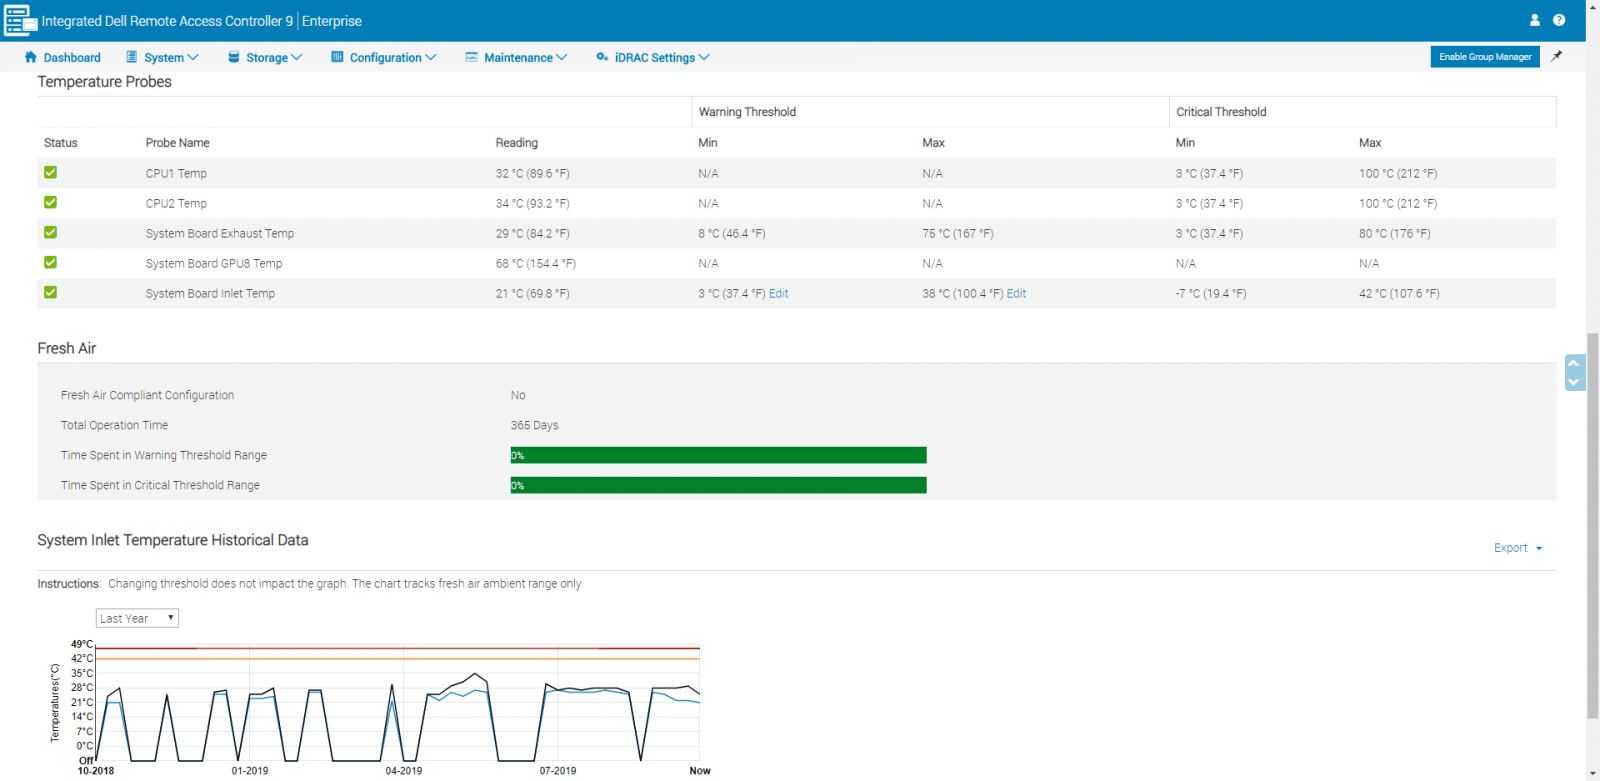
If we scroll down under Cooling and expand Temperatures, we can take a close look at the temperature probes with detailed information.
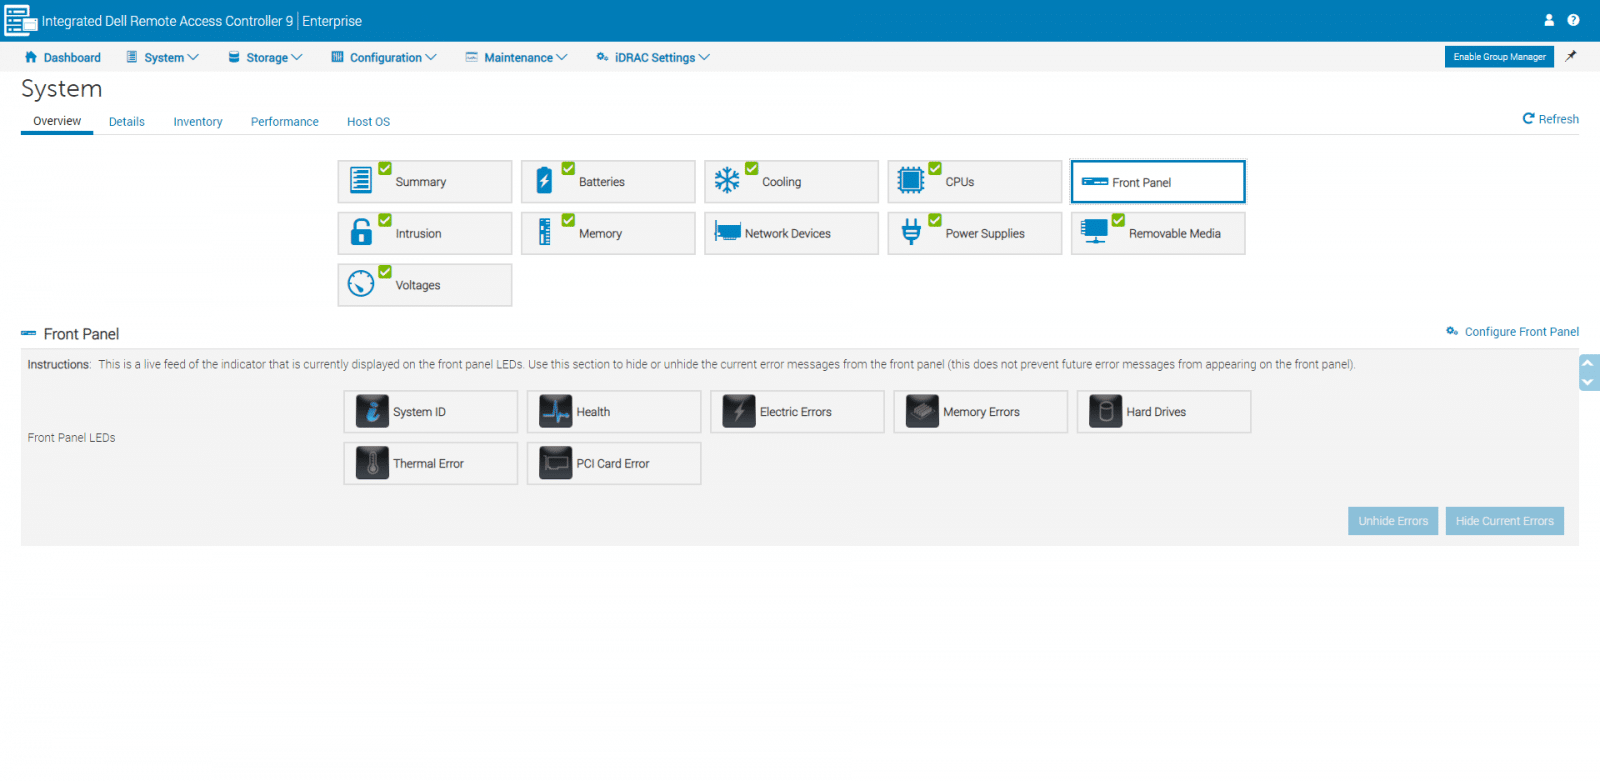
Under Overview, we also highlight some of the options like Front Panel, that allows viewing the live feed of the status that is currently displayed on the physical front panel LEDs.
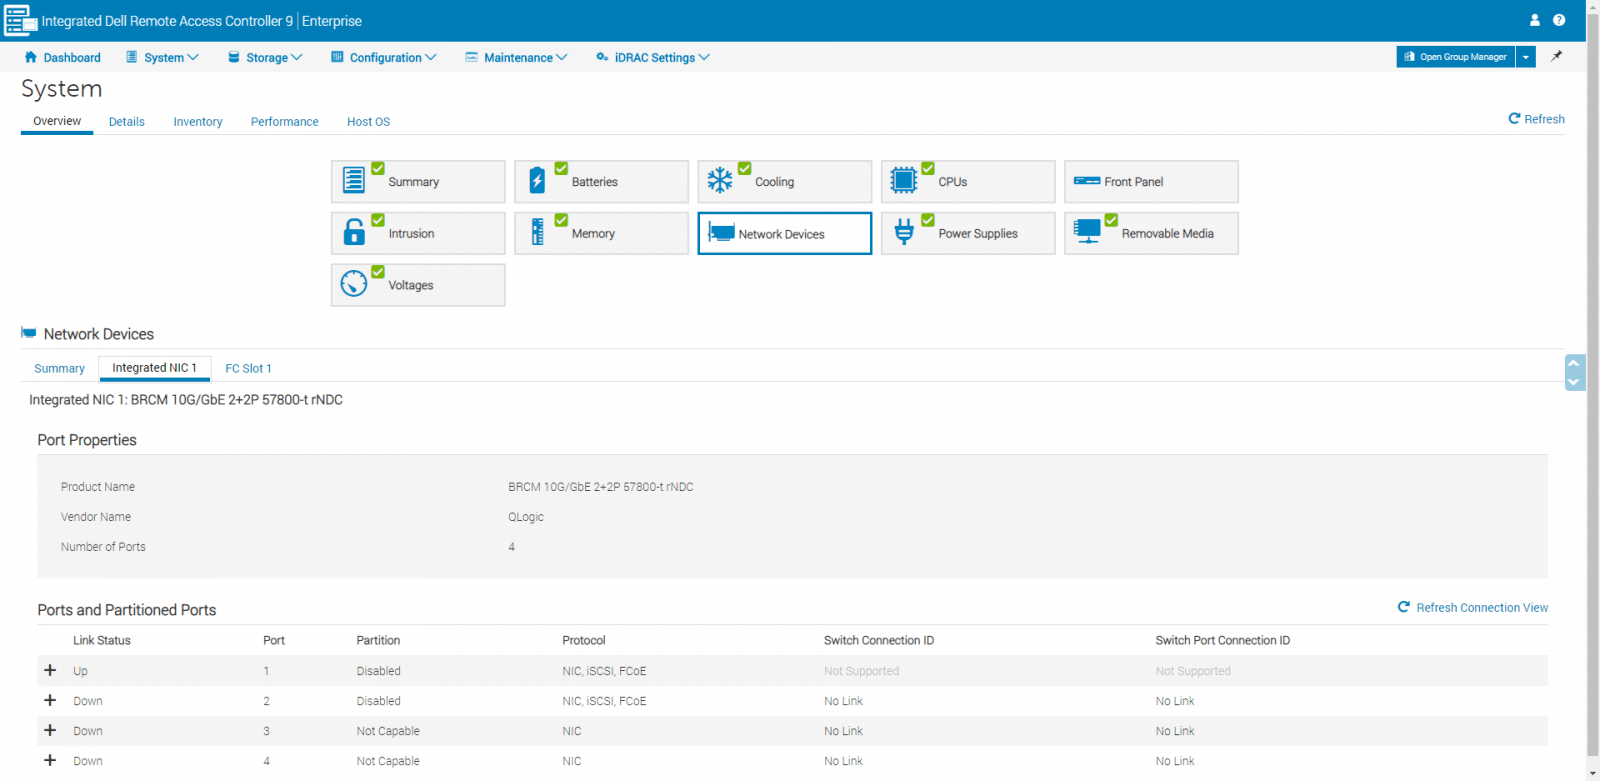
As part of iDRAC9, we can leverage the Connection View feature, which allows us to check and troubleshoot network connections remotely. Here we can see the status and connection on switches, switches ports, and network adapters associated with the server.
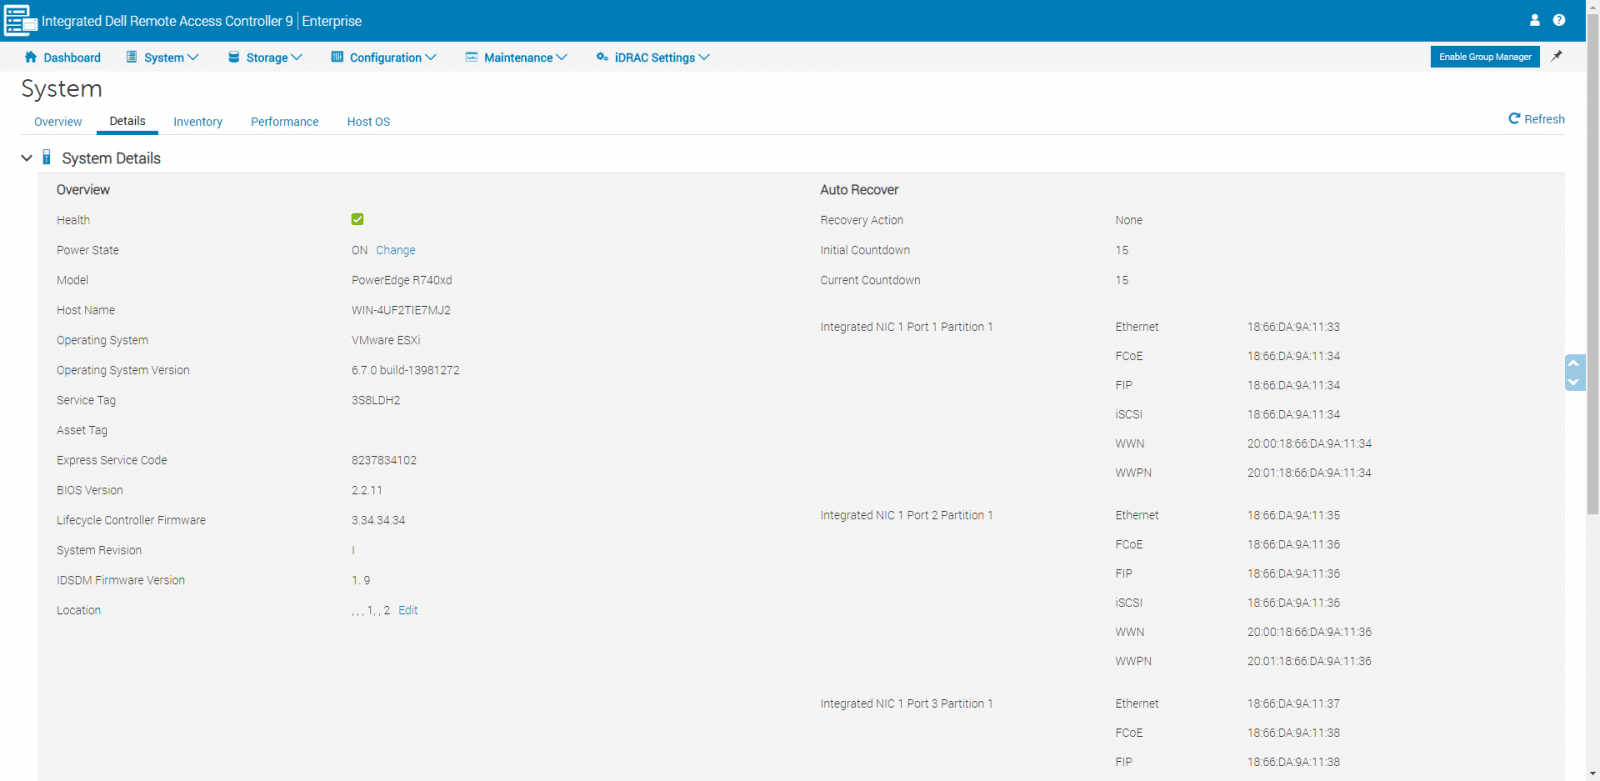
We move to the next item under System, Details, where we can expand and general system details.
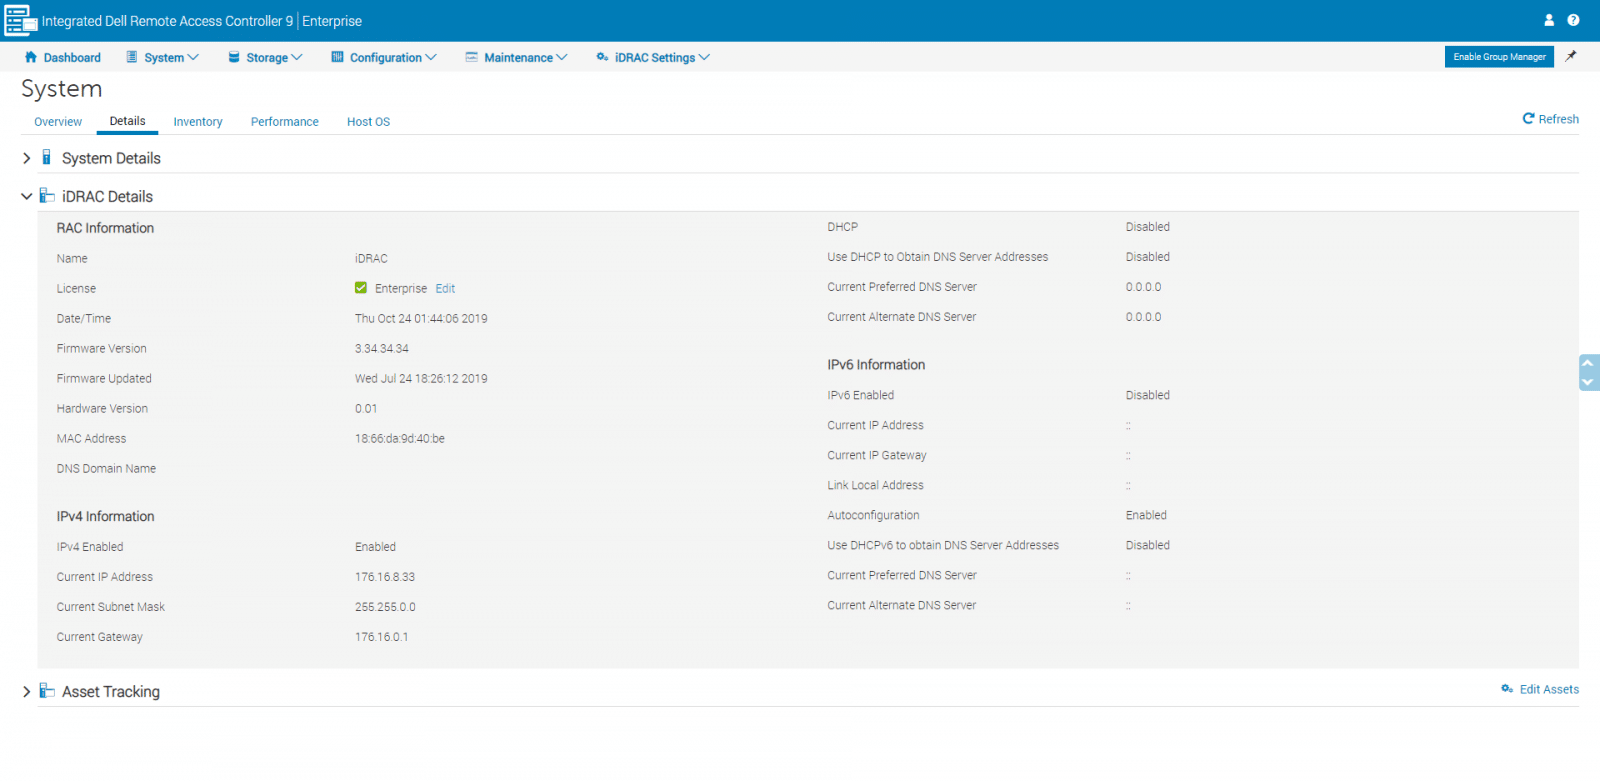
Expanding on iDRAC details, we can quickly check firmware and hardware information, as well as the general configuration of the iDRAC. Below, the Asset Tracking displays the list of asset information that you have configured under the Asset Tracking page.
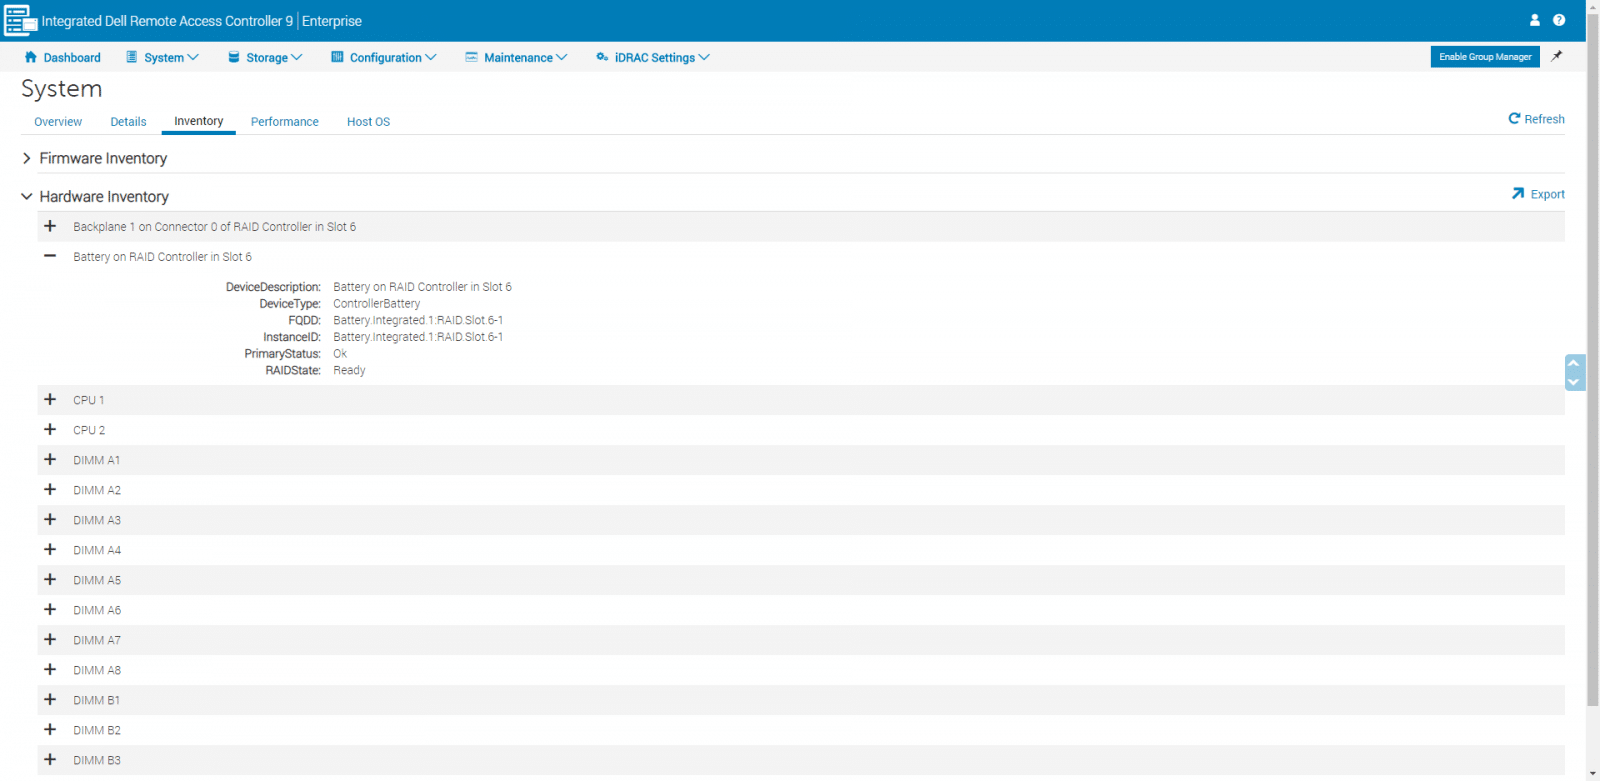
The inventory shows firmware and hardware inventory. Firmware displays the firmware components installed on the system.
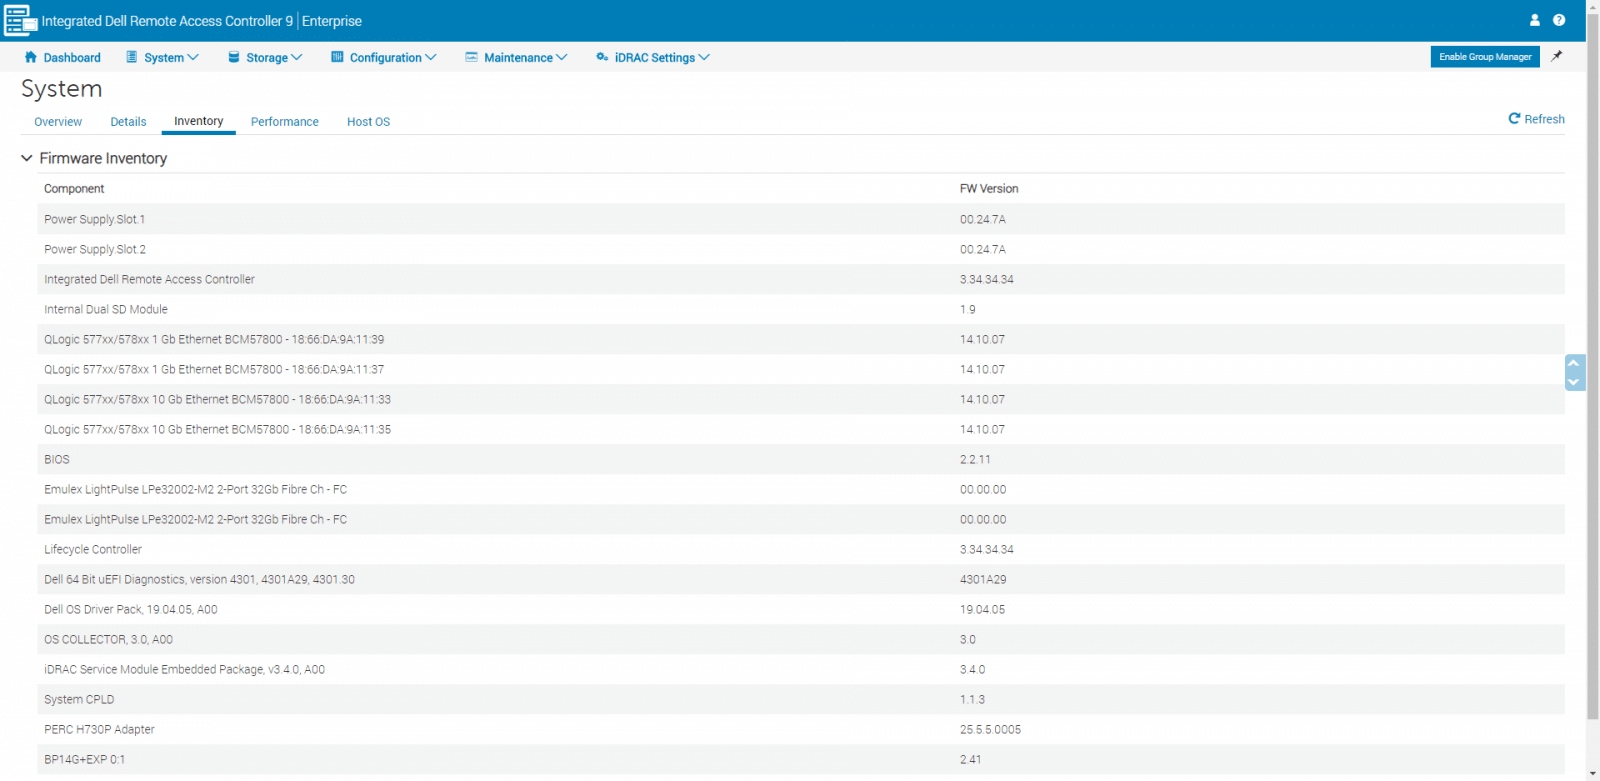
As an example, under Hardware Inventory, we can see hardware components like Battery, as well as respective values for each device, CPUs and DIMMs.
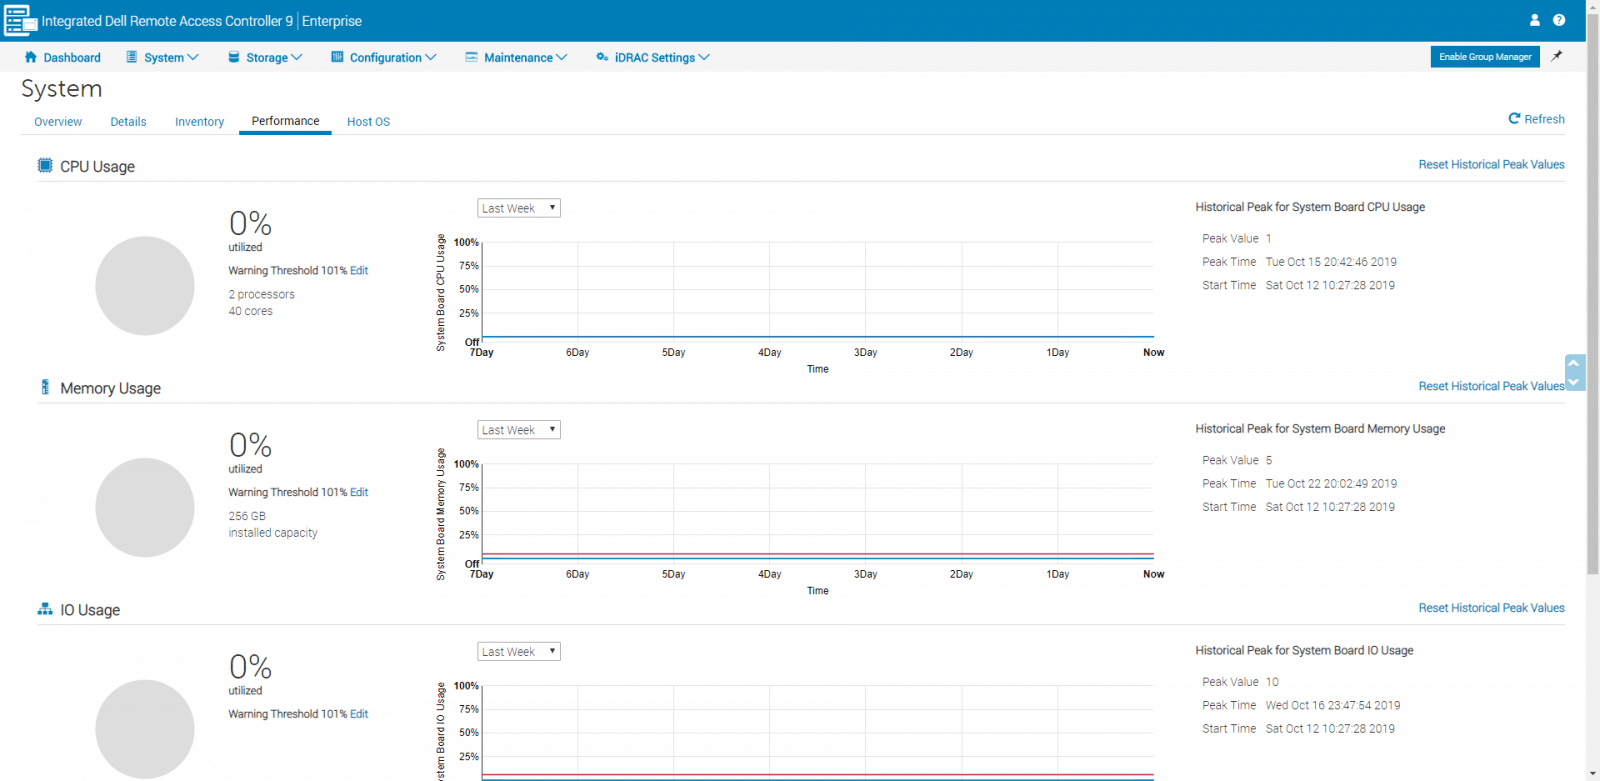
Next, we move to the Performance tab. Here one can see real-time performance monitoring data for CPU, memory, I/O, and system utilization.
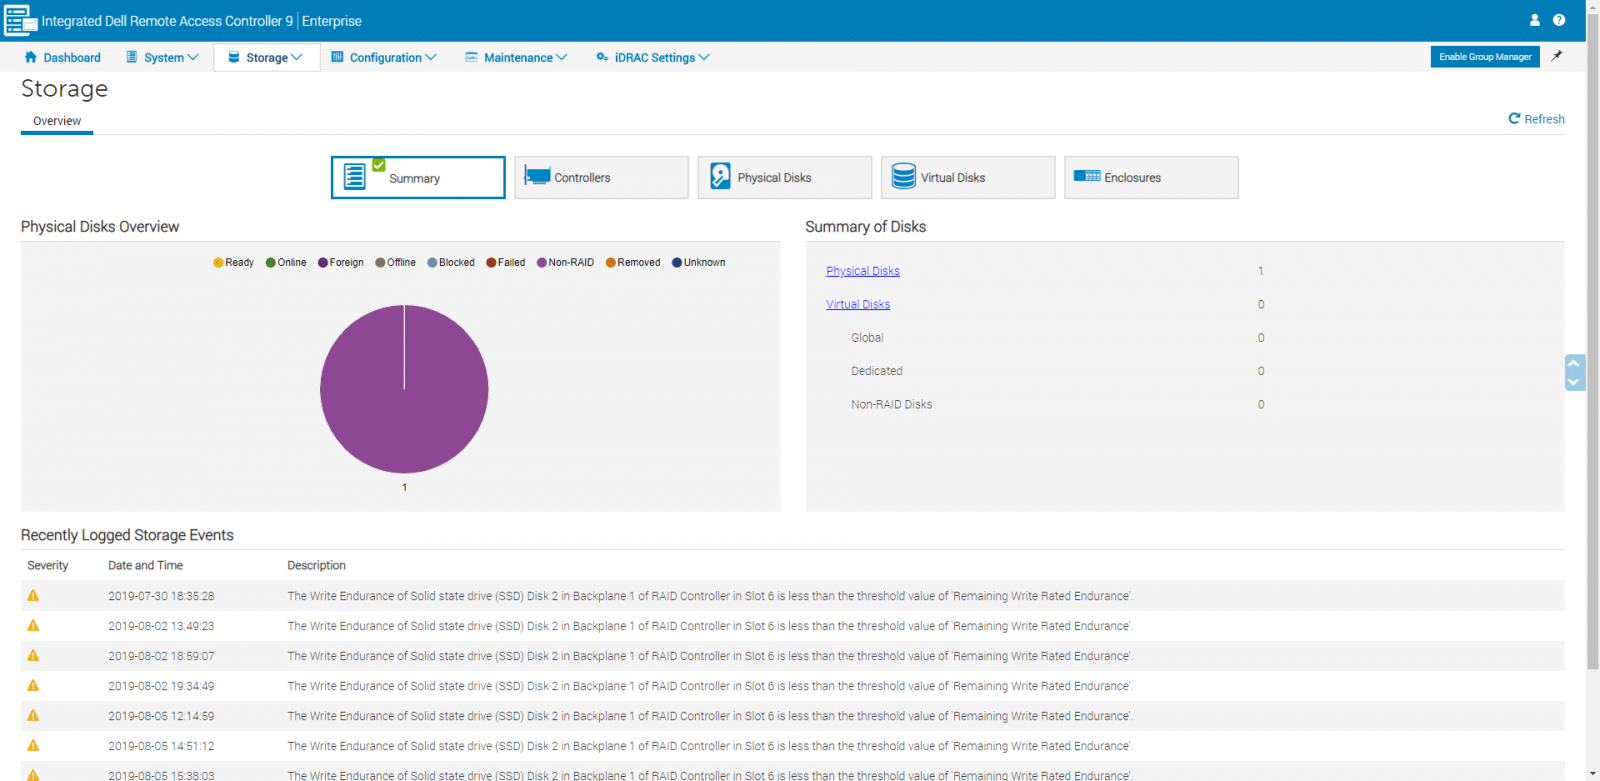
We move back to the main menu, under Storage, we can view, troubleshoot, identify, and configure various storage components. We are initially placed on the Summary option, and here, we can also move under other sub-options, including Controllers, Physical Disks, Virtual Disks, and Enclosures.
The next item on the main menu is Configuration. The first page we see here is Power Management, and we can use this page view and configure the power policy for the server.

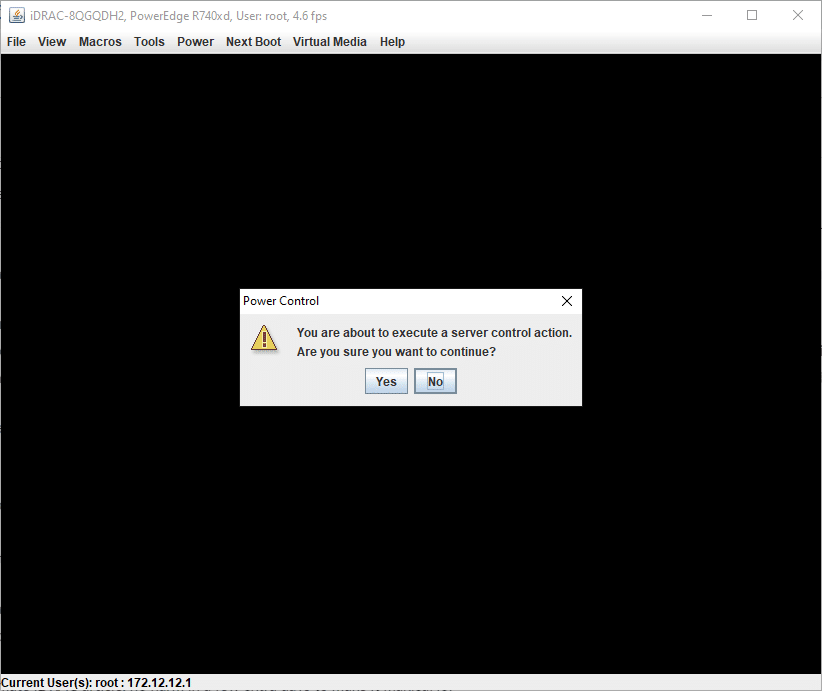
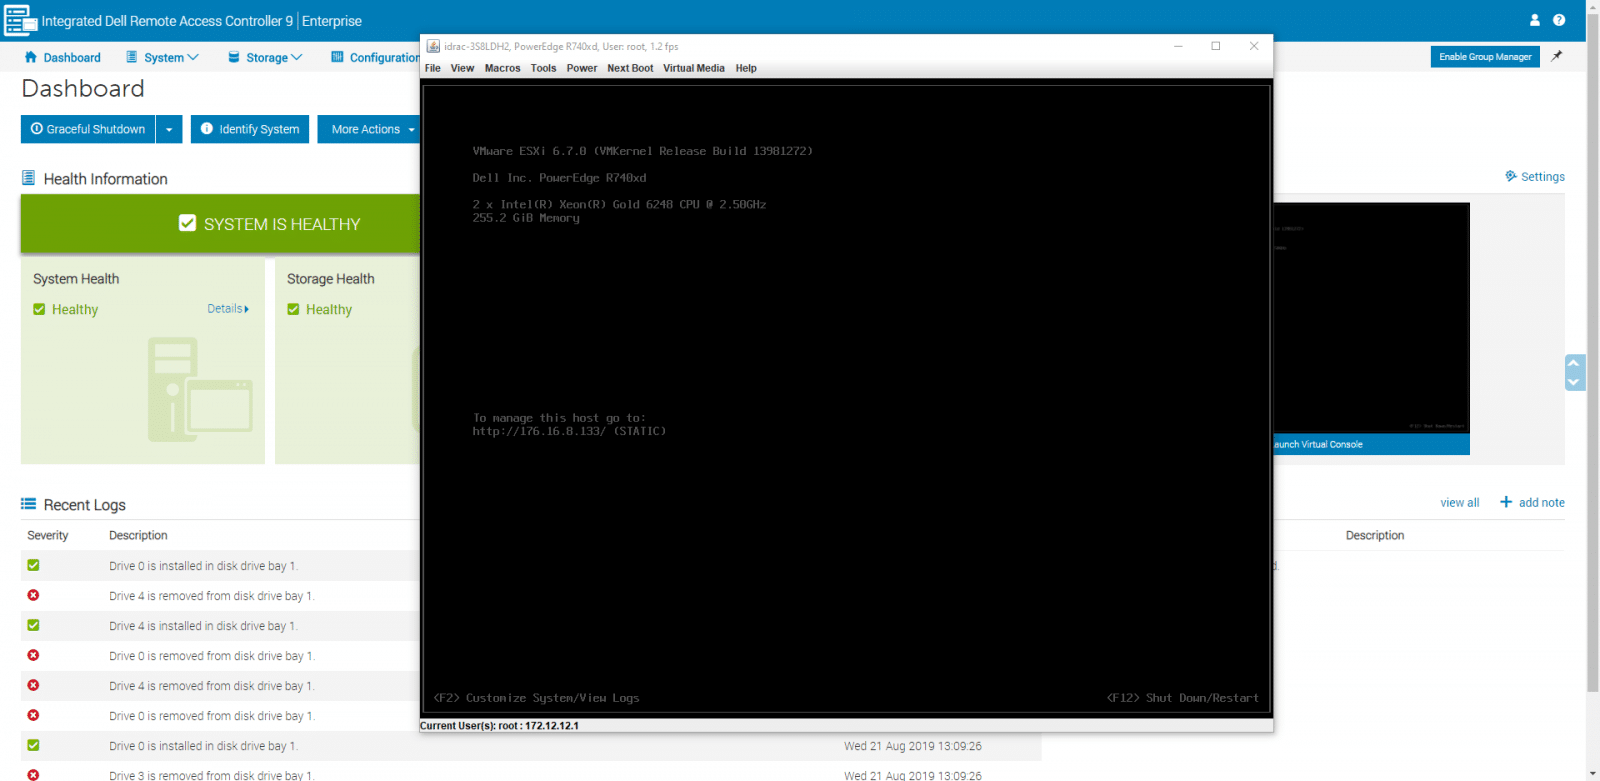
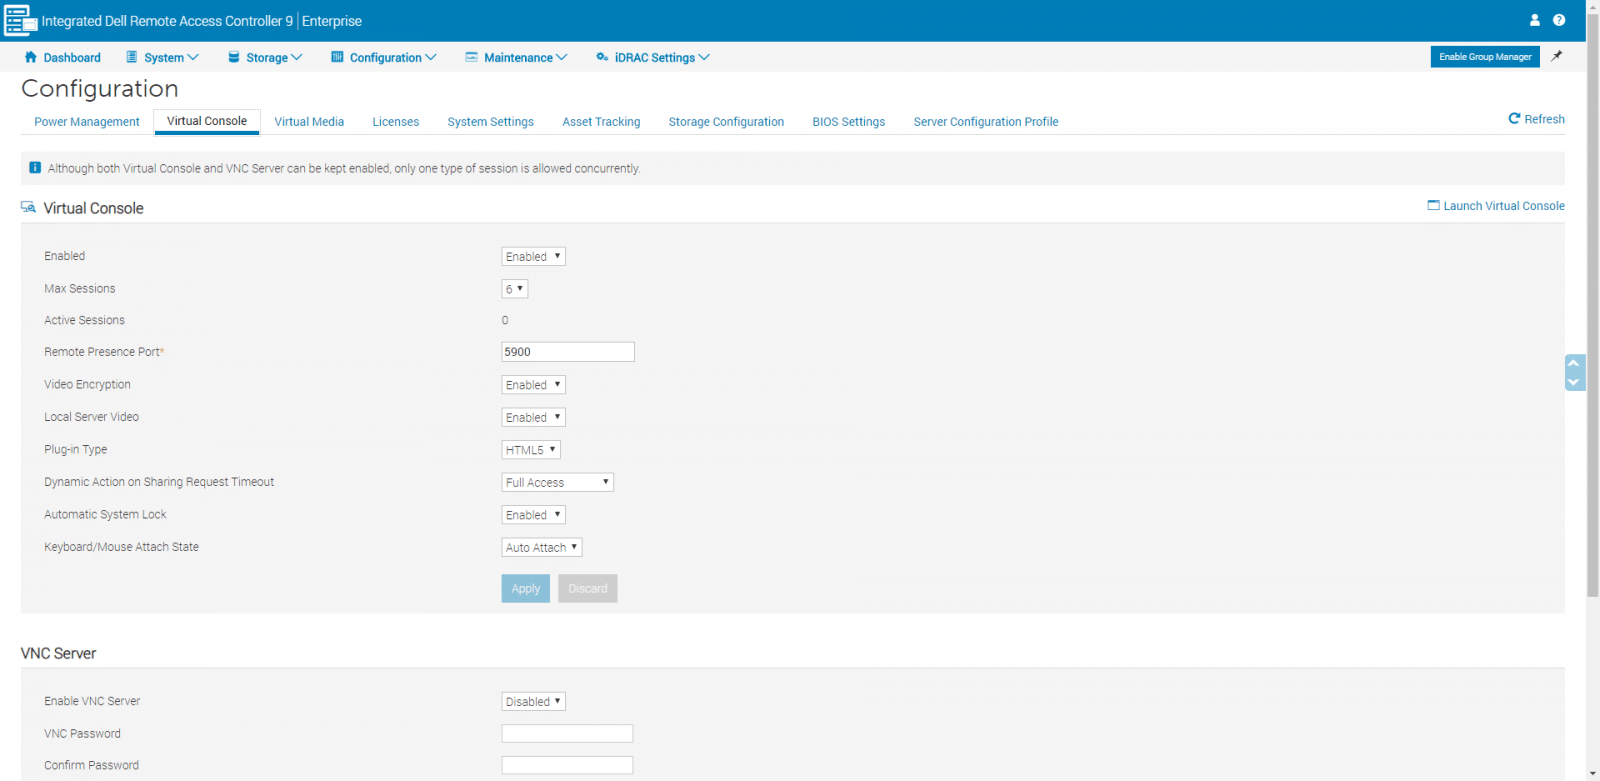
The Virtual Console is very important, as it is the preferred tool to manage the OS remotely, as well as accessing the Lifecycle Controller GUI. Using the Virtual Console, one can control the remote system using the keyboard, video, and mouse on the local management station.
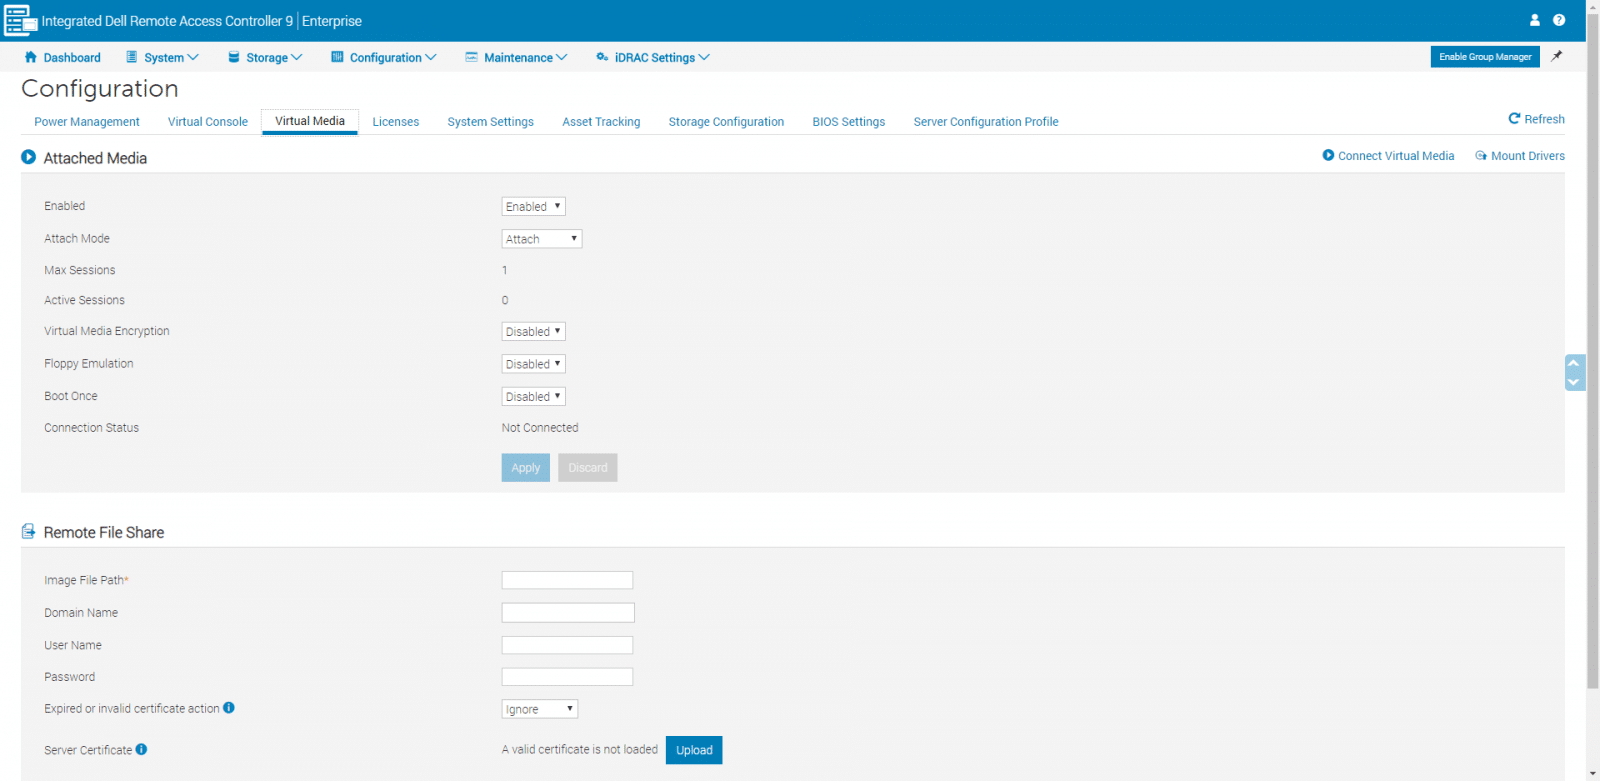
From Virtual Media, we can configure the Attached Media and Remote File Share settings. Virtual Media is accessed through the Virtual Console viewer, and it is handy to access media connected to a remote system on the network.
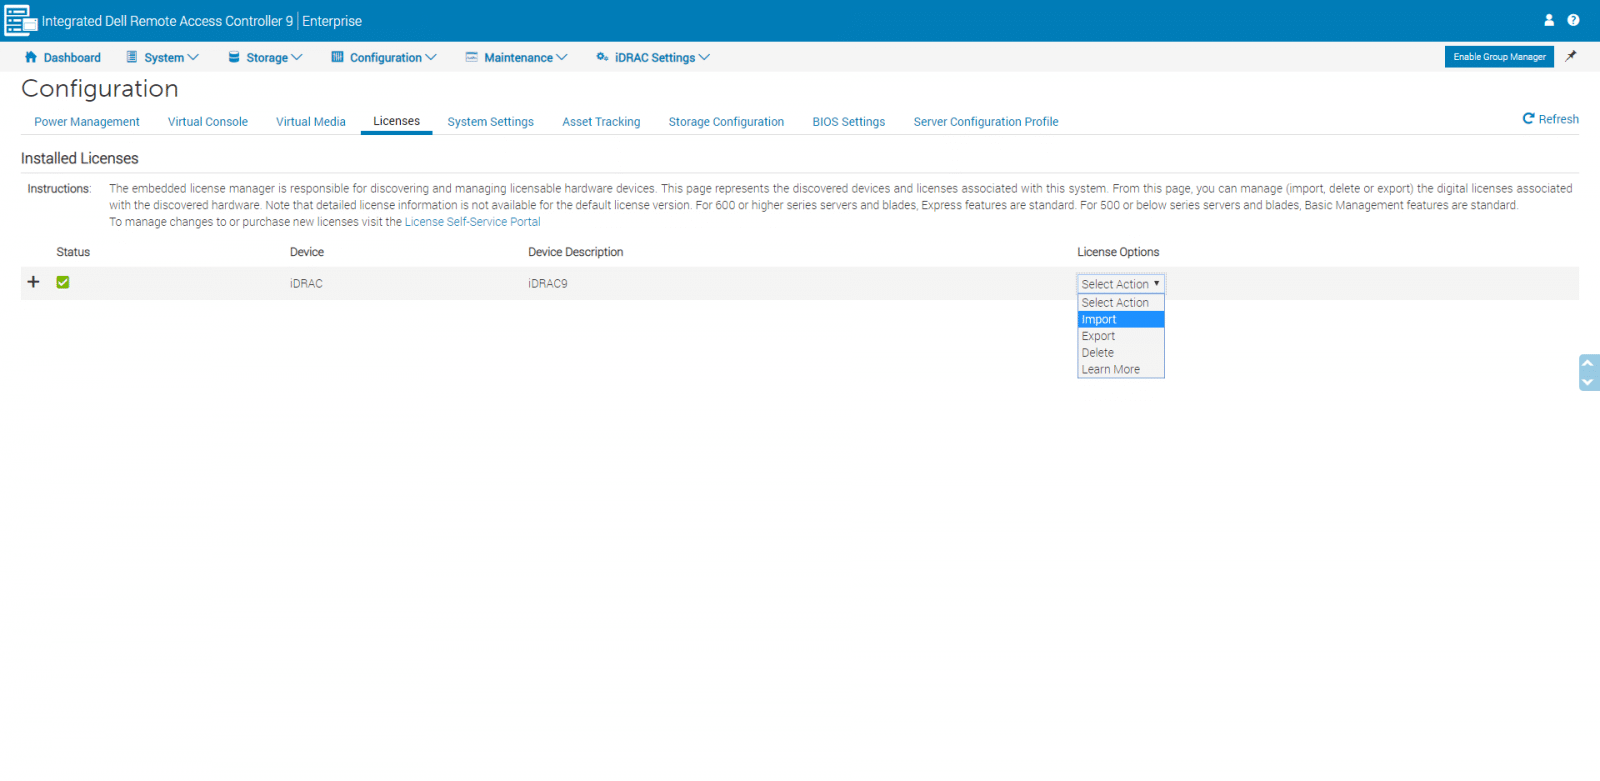
From the Licenses page, we see and manage the digital licenses associated with the installed hardware devices. Here we can Import, Export, or Delete licenses.
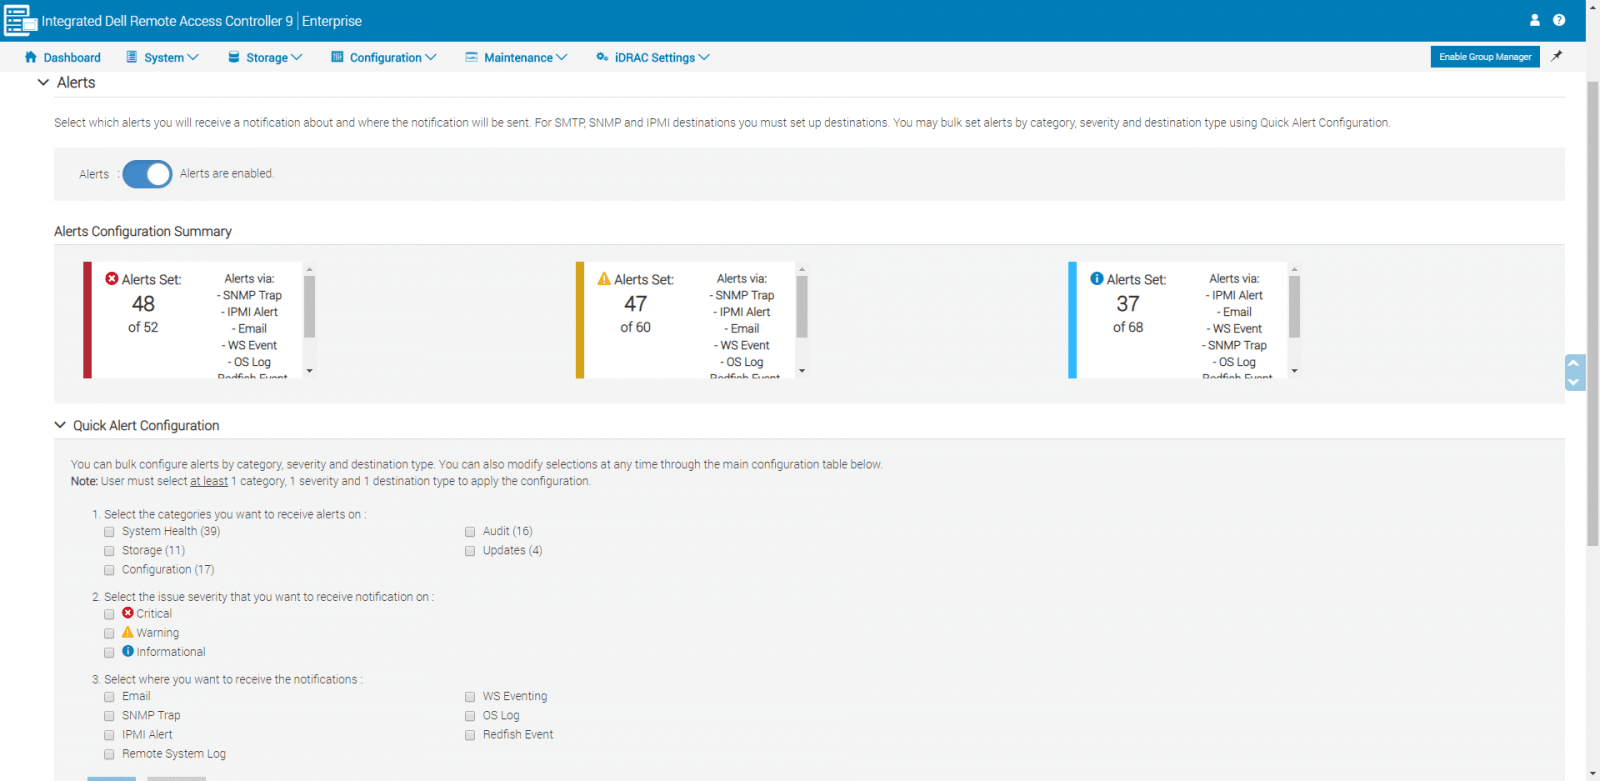
We move to the System Settings page. Here we can view and edit system settings such as alerts, traps, email and email server, fans, front panel, first boot device, and more parameters.
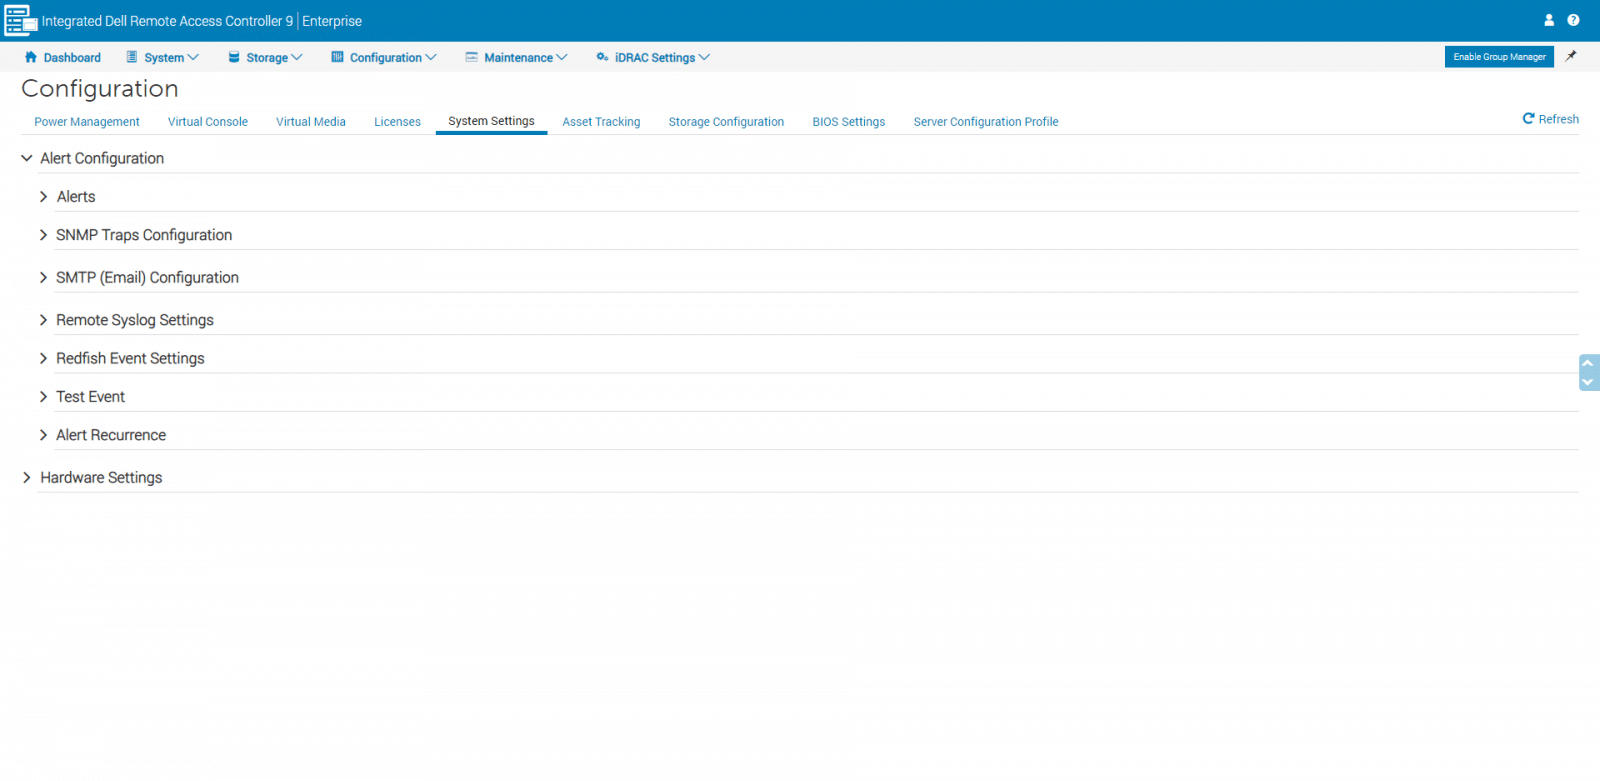
Expanding on Alerts, one can enable or disable alerts. Alerts Configuration Summary will display all the alerts for selected fields. Here we can also perform quick alert configurations.
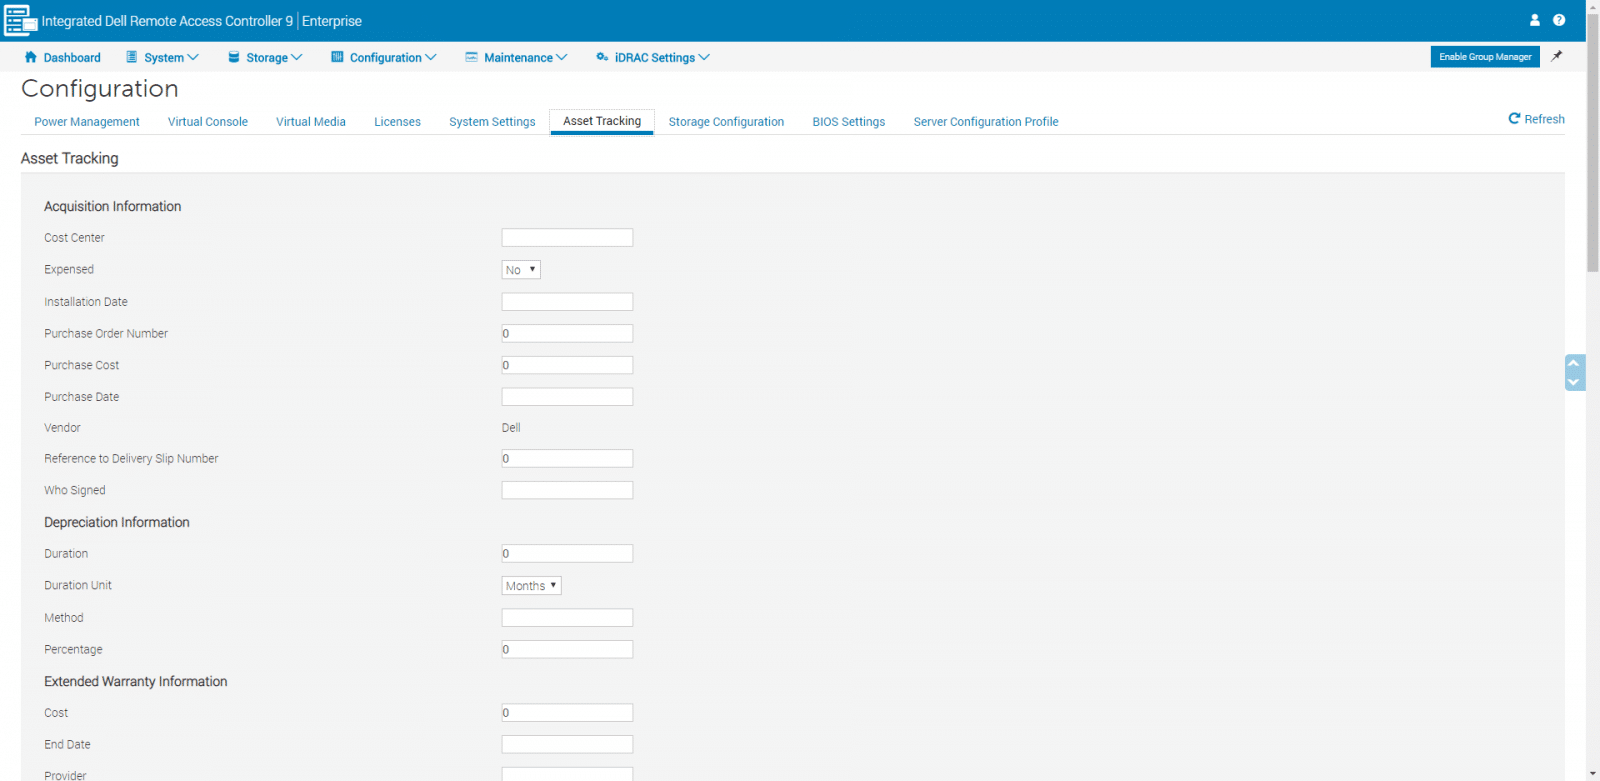
The Asset Tracking page will present the list of pre-defined assets data.
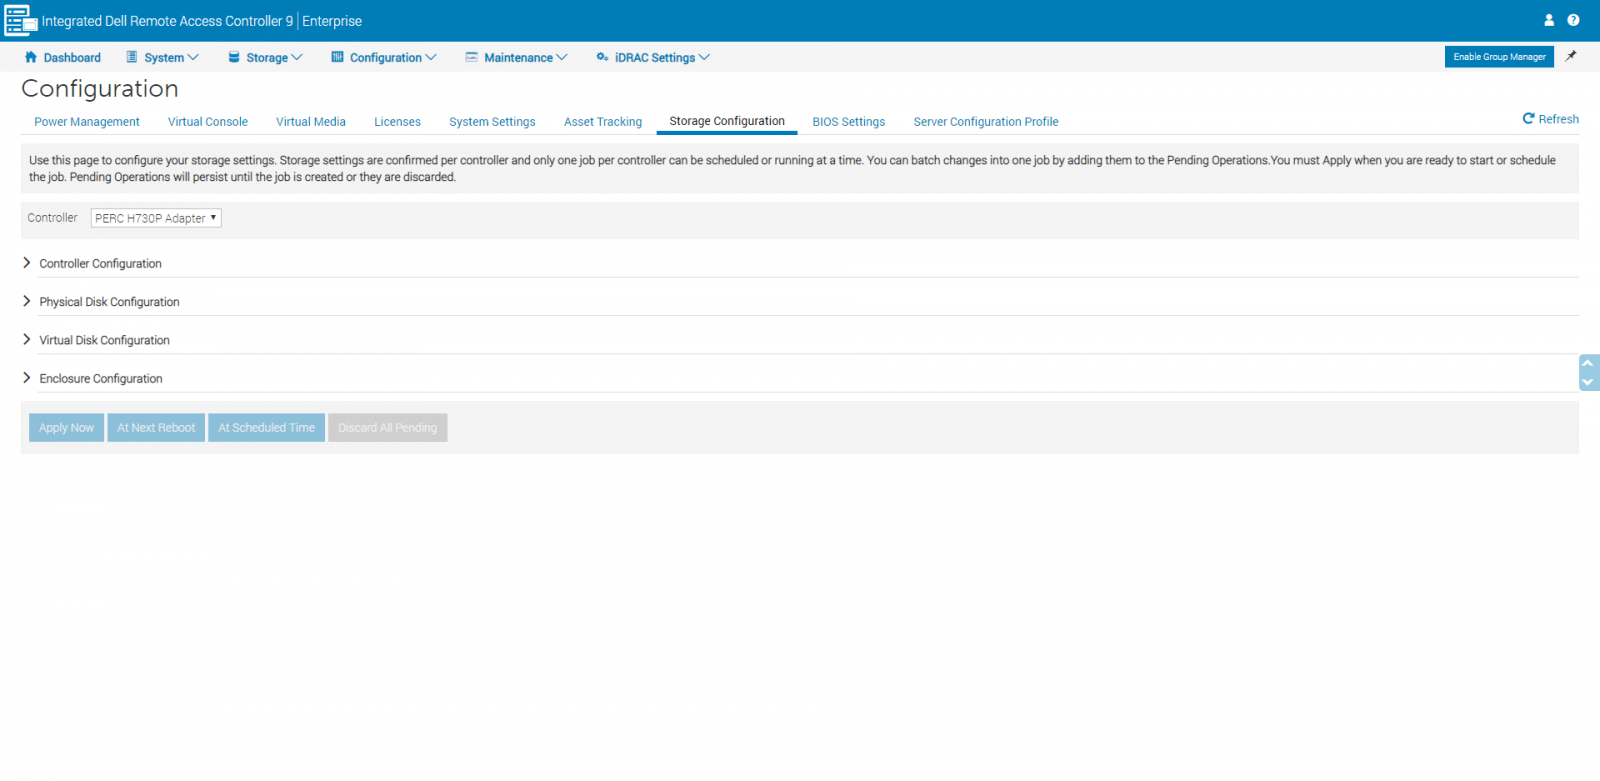
Under Storage Configuration, we are allowed to configure the storage settings. Here we notice that storage settings are based on one single controller, and only one job per controller can be scheduled at a time.
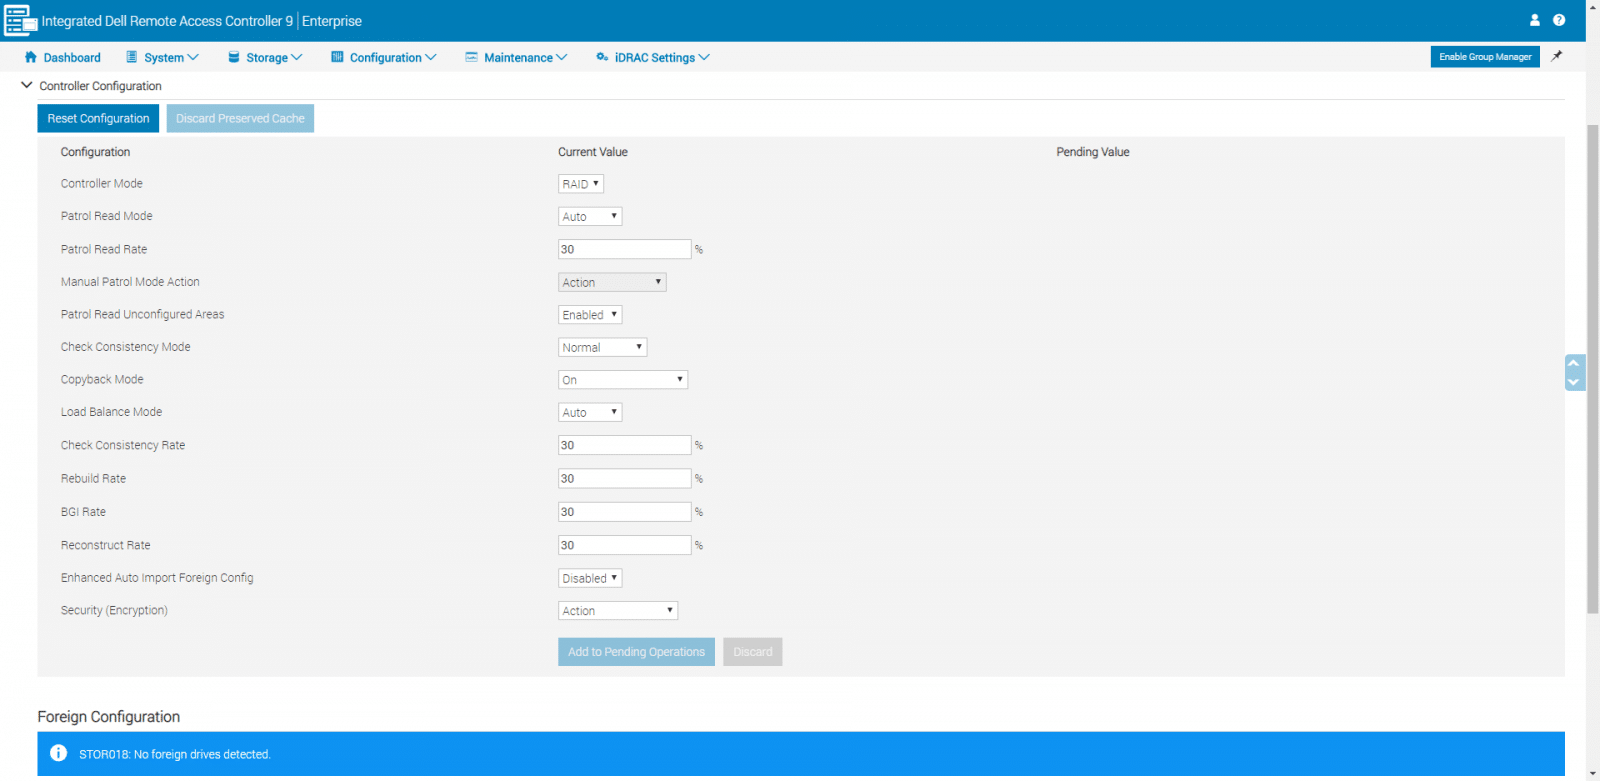
Expanding on Controller Configuration, we could configure the RAID controller properties.
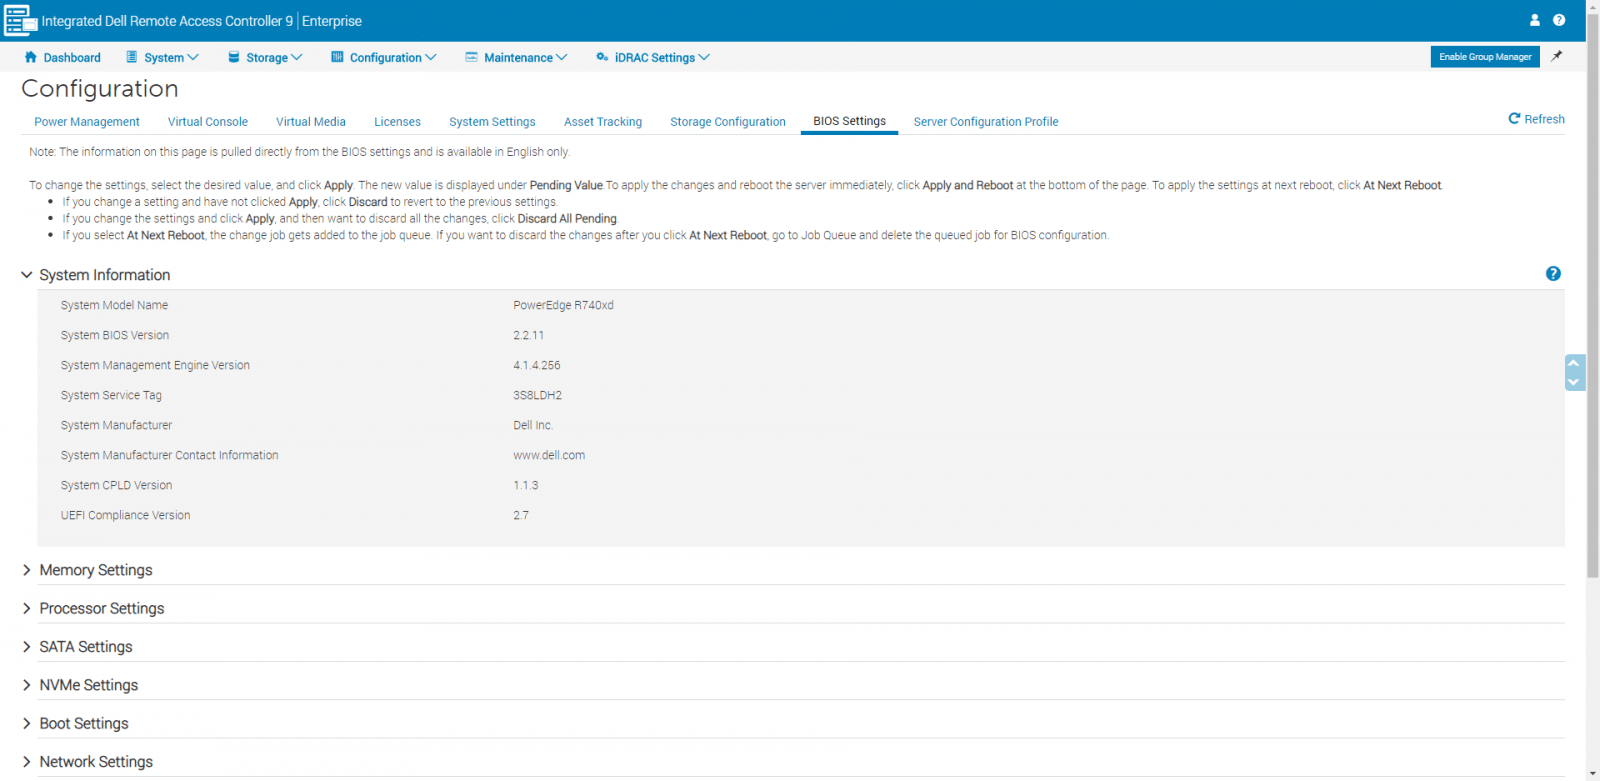
The next page is a mighty one, the BIOS Setting. Here we can configure almost all the items from the BIOS, that usually are done accessing the server locally.
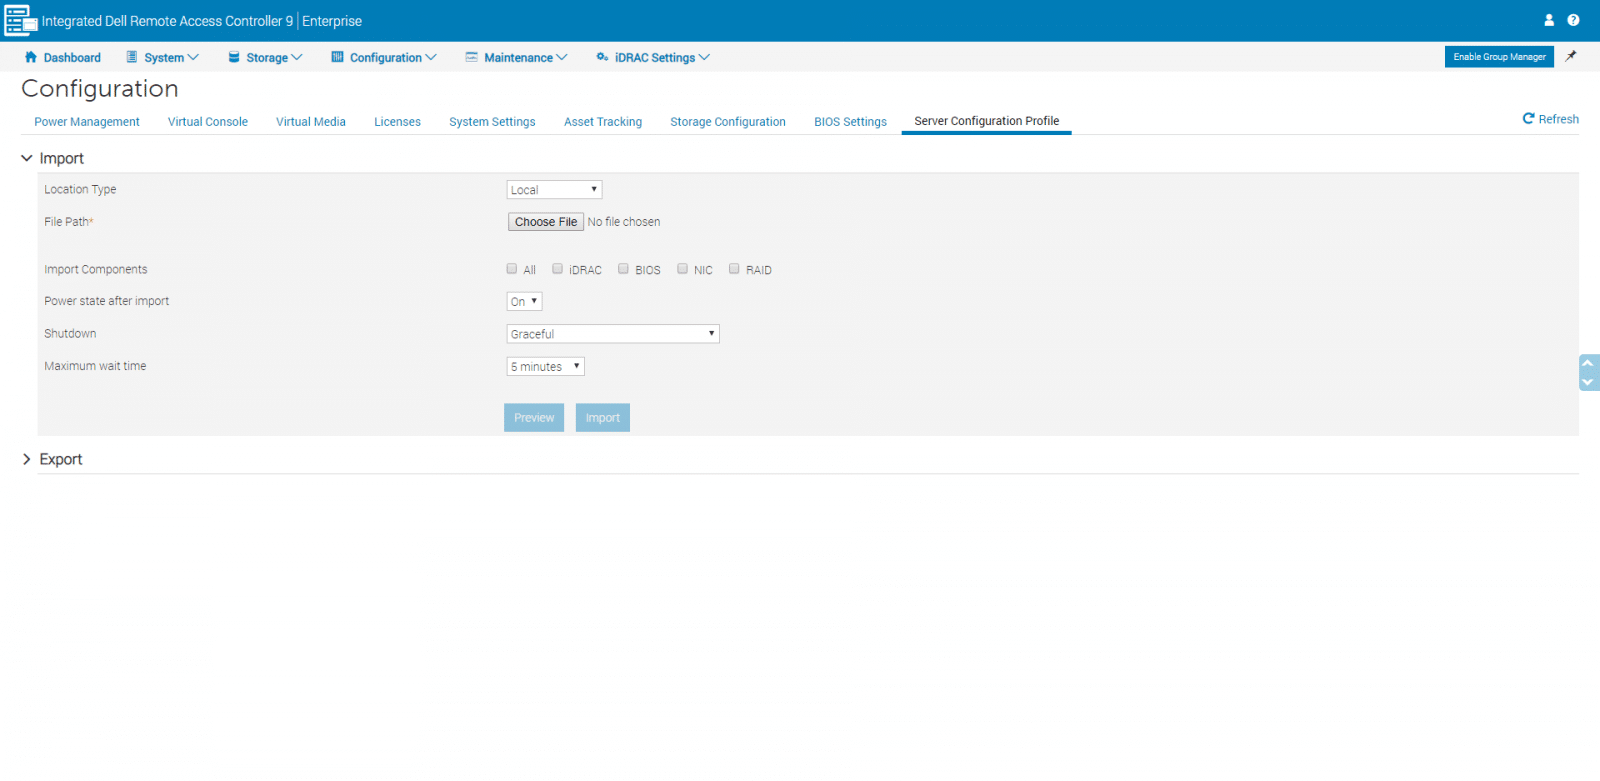
The last page is the Server Configuration Profile, under Configuration. This option is practical to import and export server configuration profiles.
One more time, we move back to the main menu, and this time, we take a look at Maintenance. The first page available here is Lifecycle Log, where we can view and export the Lifecycle Controller log entries

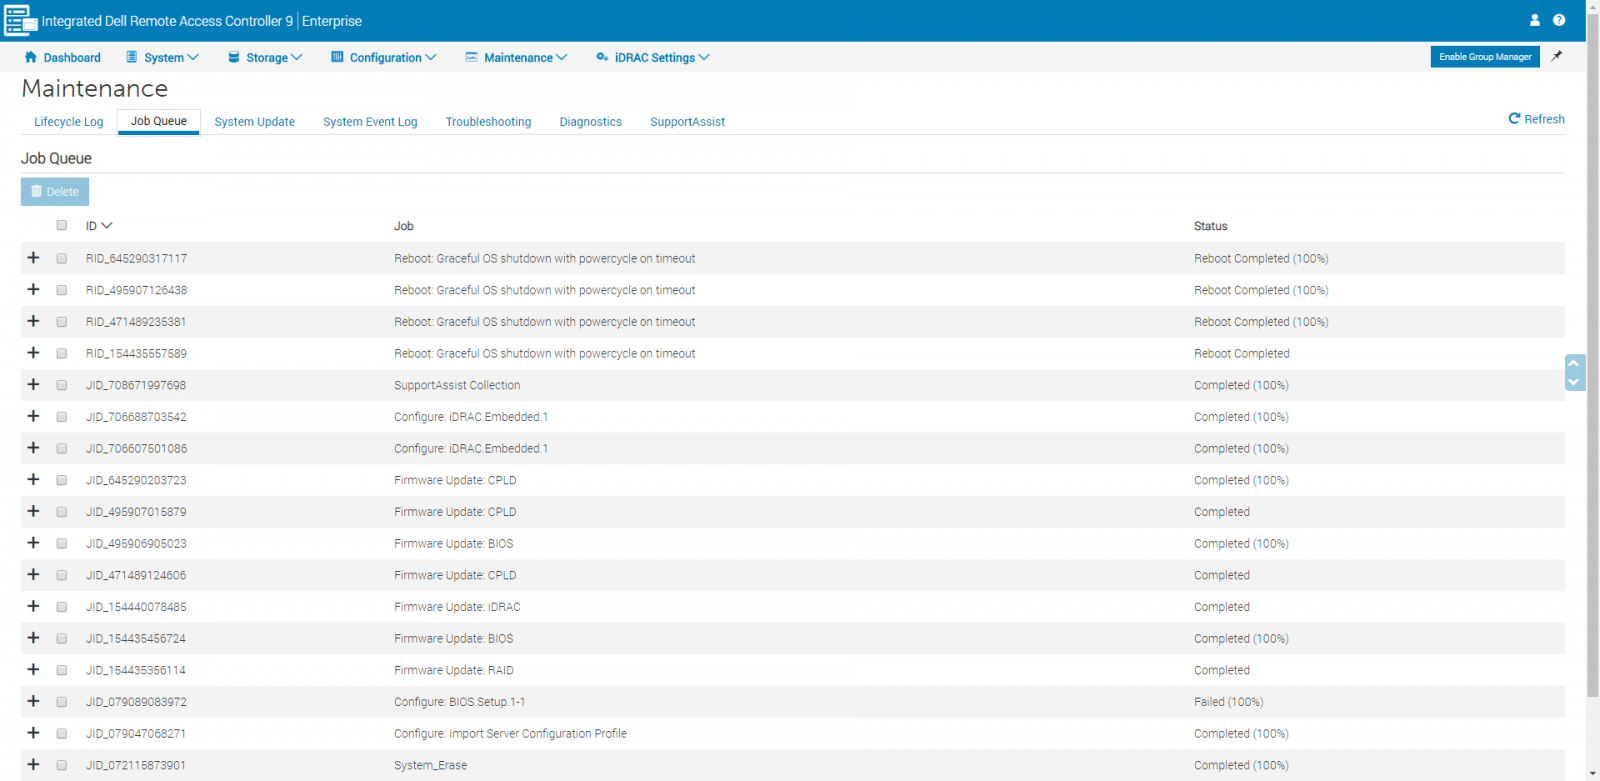
Next, under Job Queue, we can view the scheduled firmware update jobs. If we have any failed job, we could be deleted here, as well as not started or completed jobs.
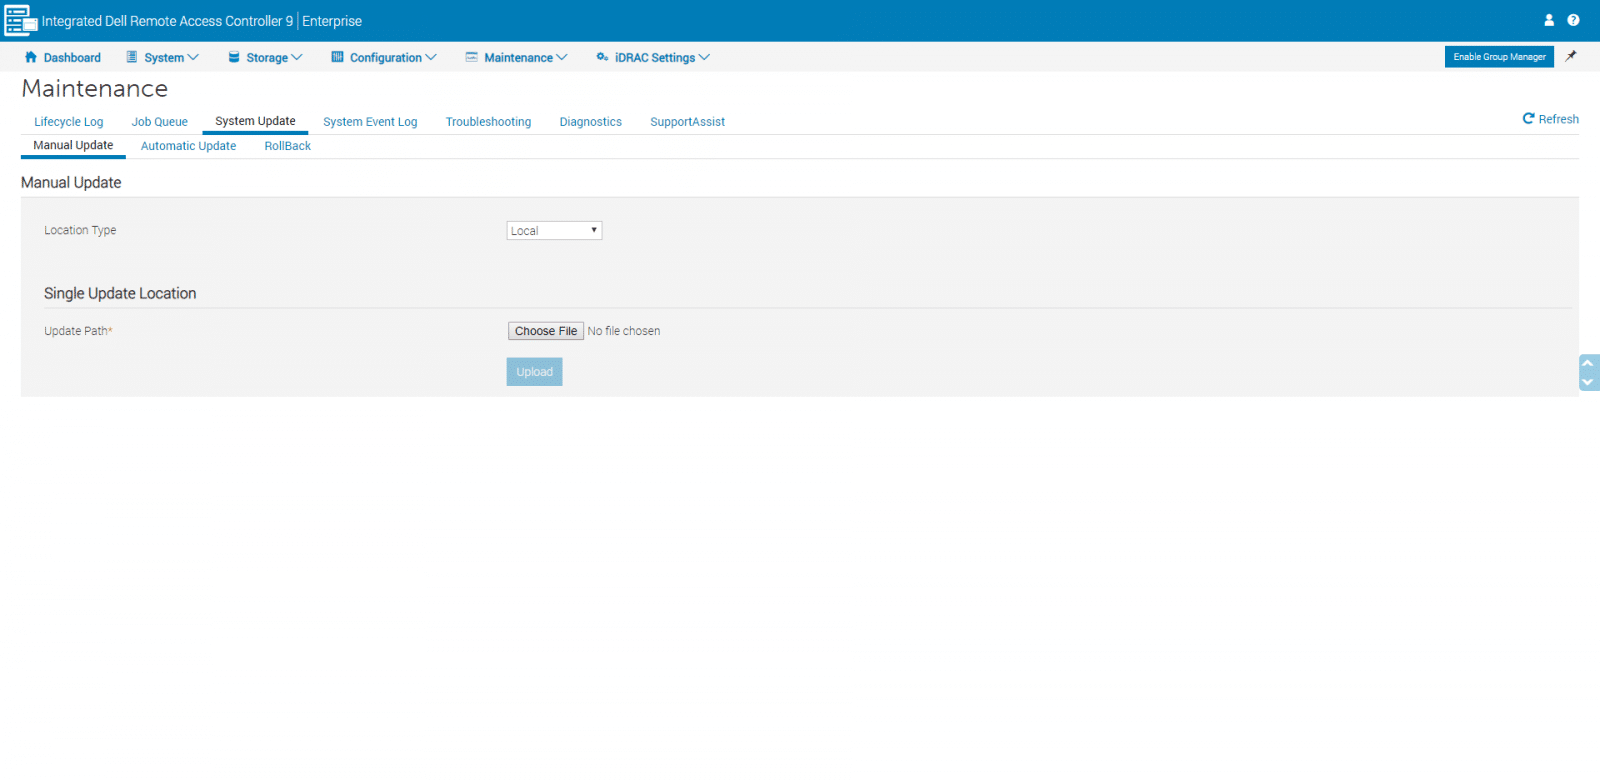
From System Update, one can update firmware for iDRAC, BIOS, and any supported device through Lifecycle Controller in a single system reboot. On this page, we can perform actions such as Manual Update, Automatic Update, or Roll Back.
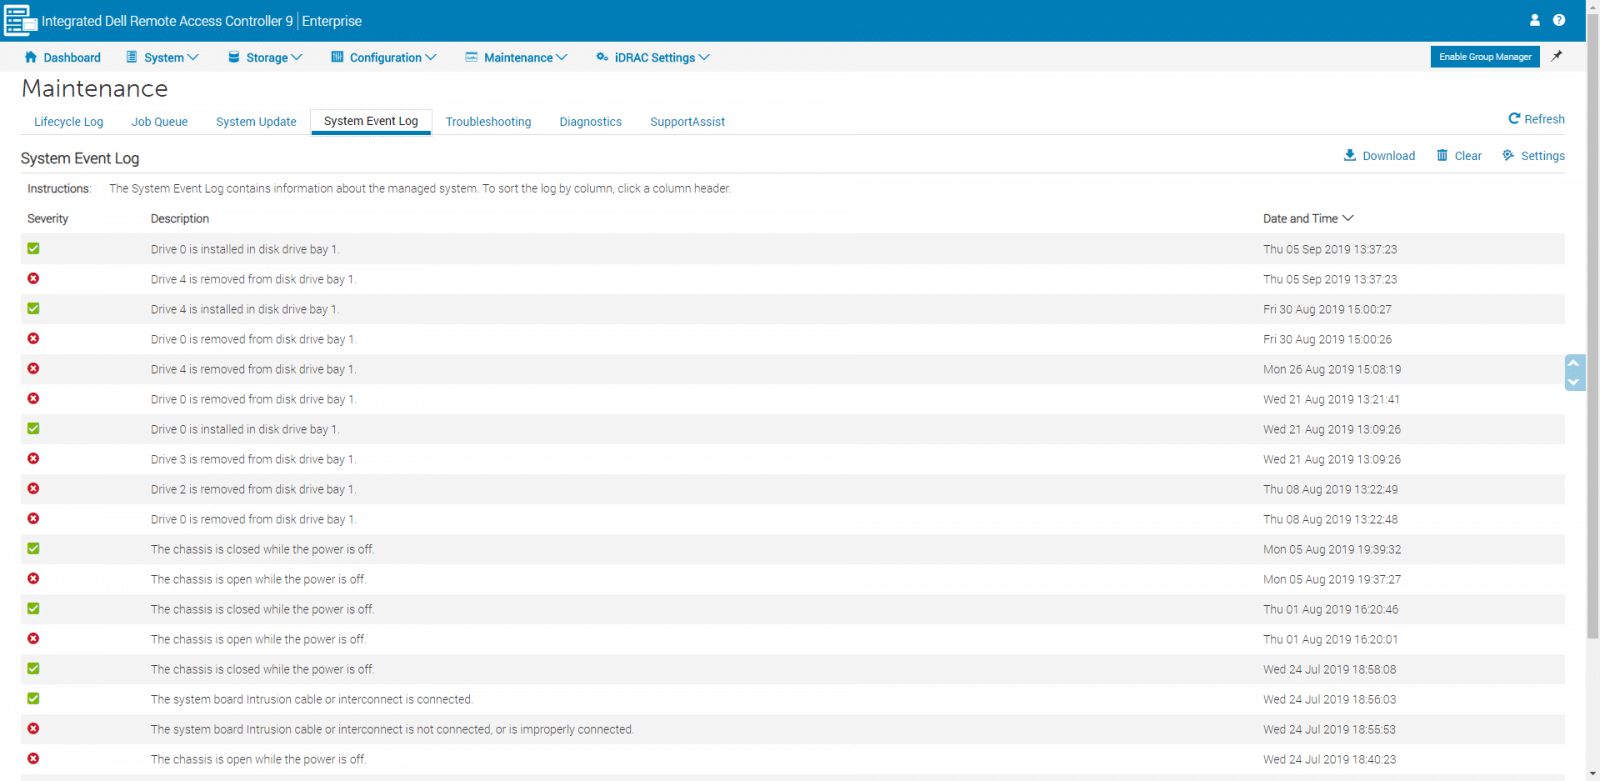
On the next page, System Event Log, we could view, clear, or save the log events that occur on the managed system.
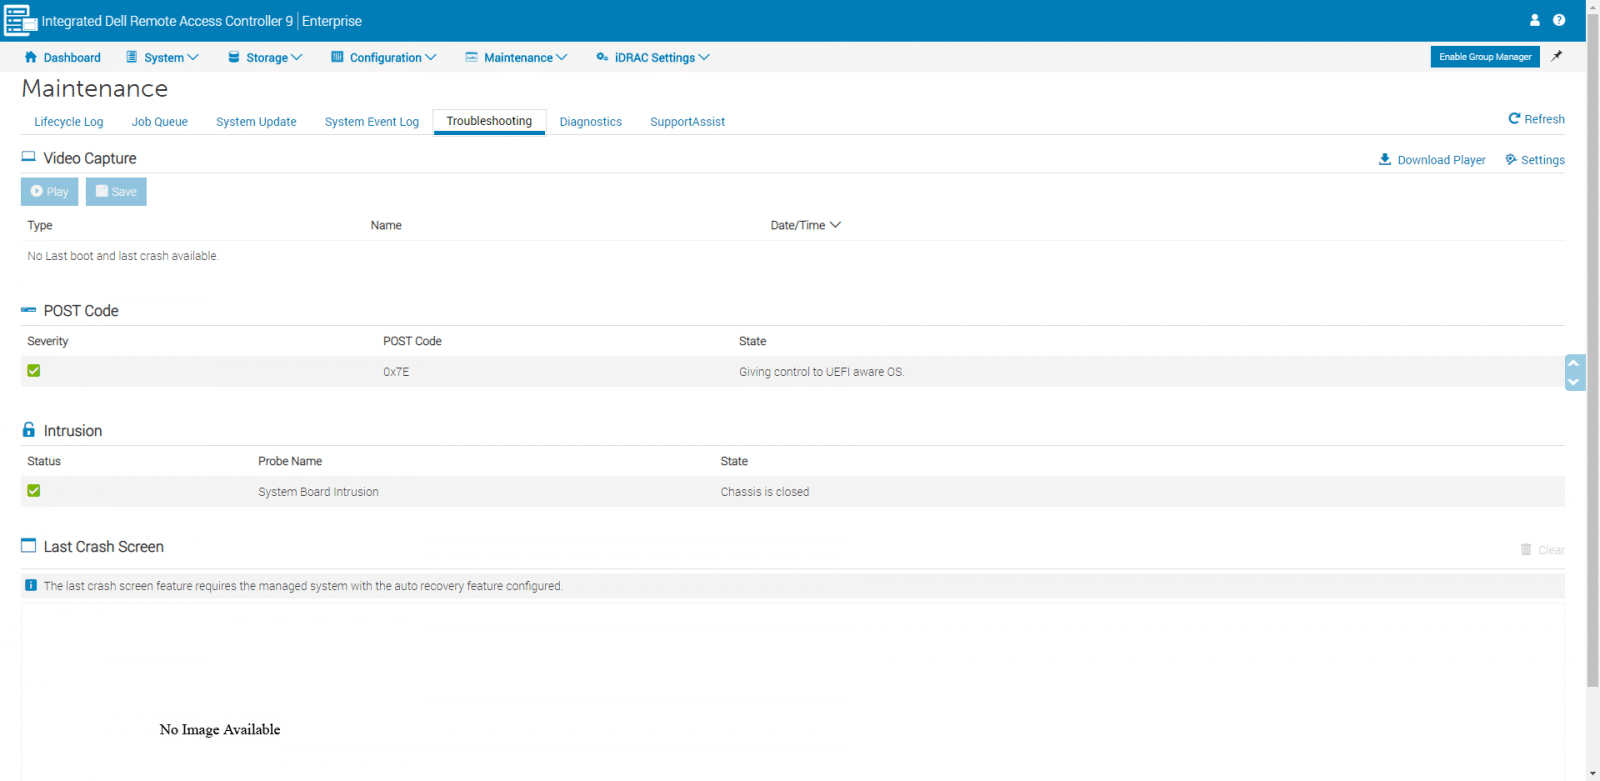
The next option, Troubleshooting, we see three main areas, Video Capture, POST code, and Last Crash Screen. This last one is convenient to view the most recent crash screen, which provides information about the events leading to the system crash.
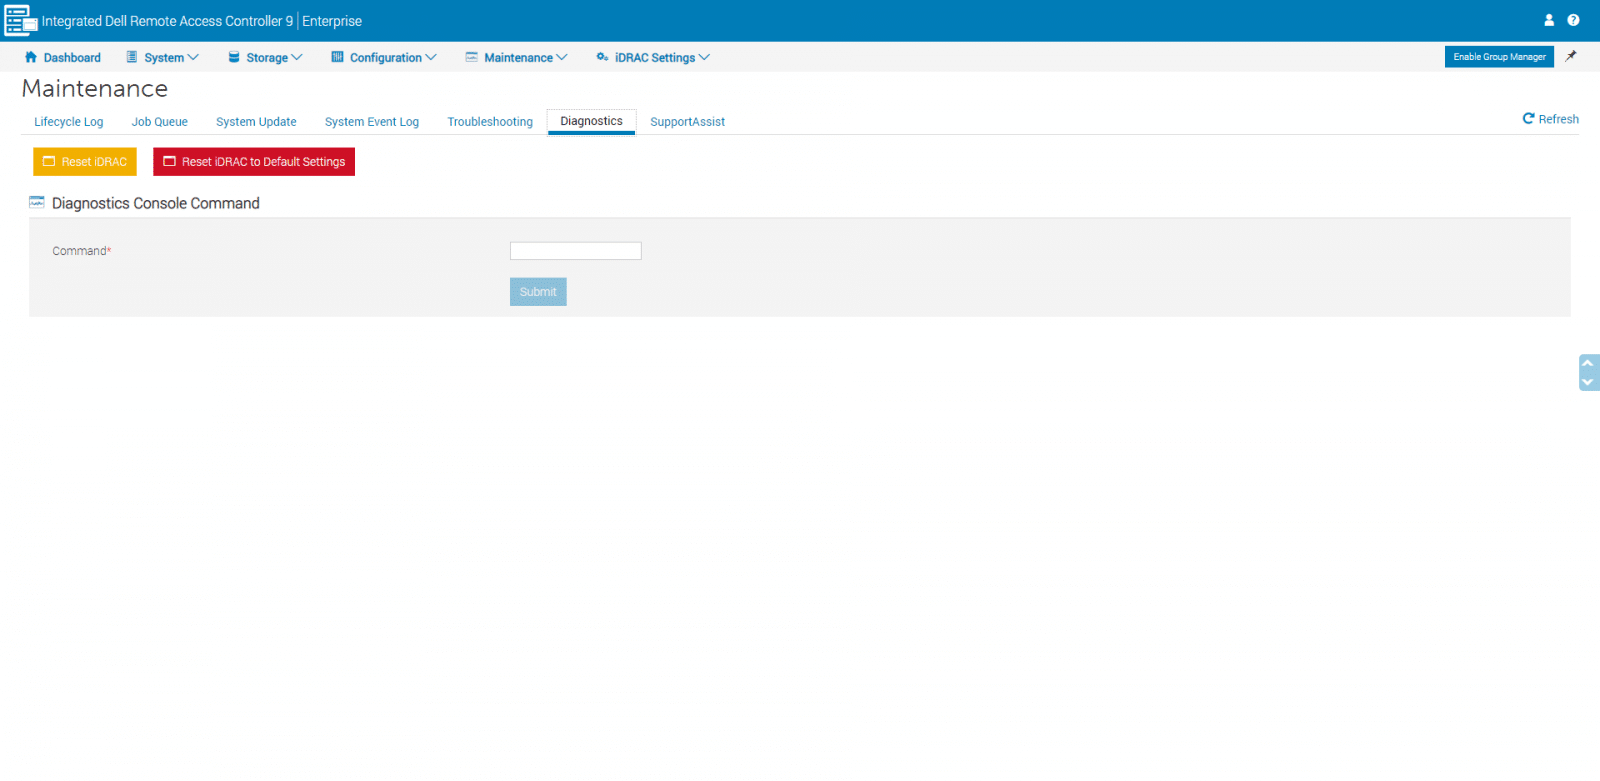
Under Diagnostics, one can reset the iDRAC and reset the iDRAC to the default settings.
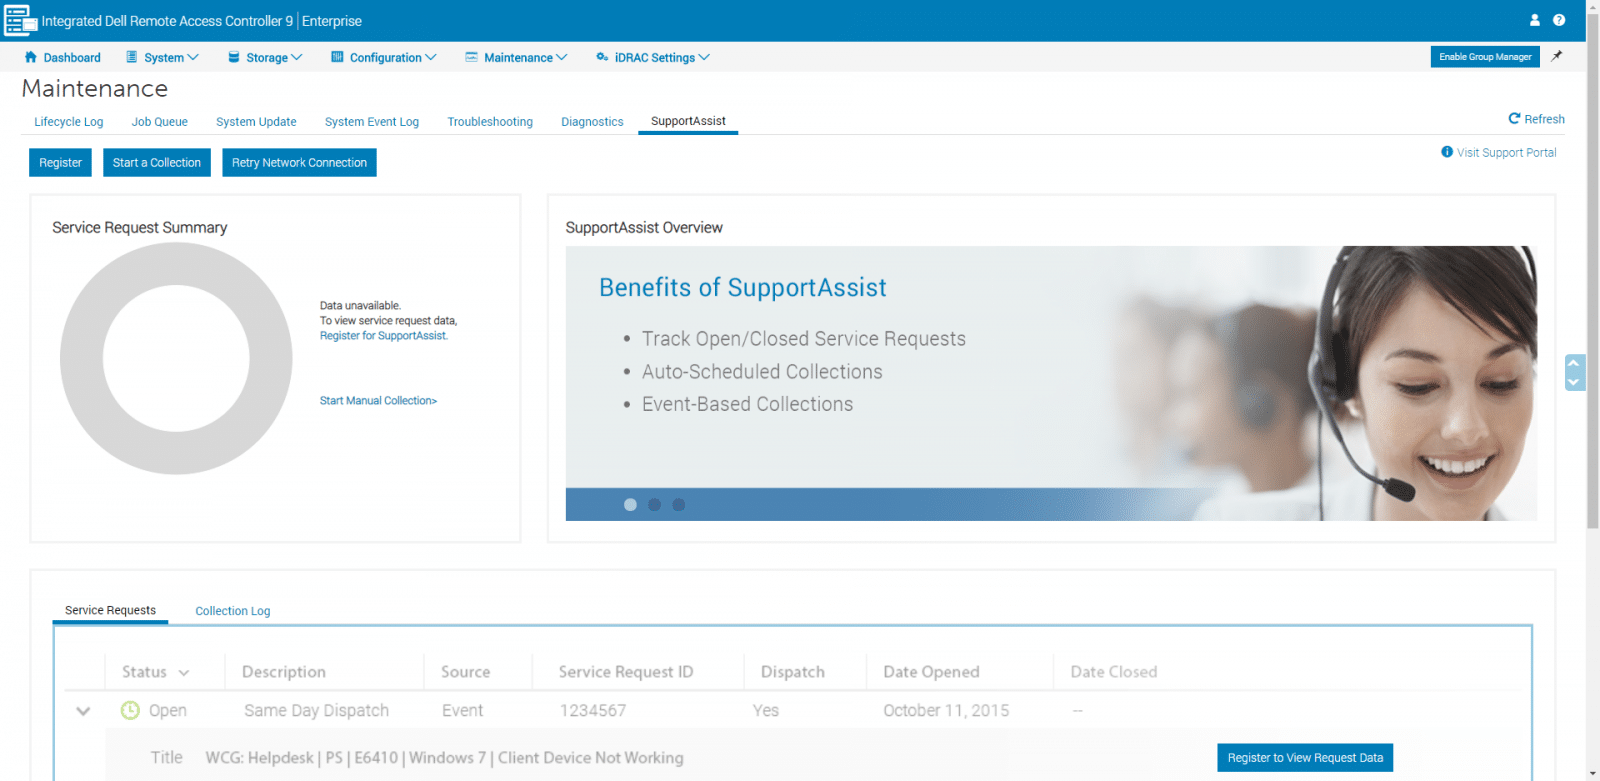
The last page under Maintenance is SupportAssist; we can use this area to create SupportAssist collections. iDRAC provides an application interface for gathering platform information that enables support services to resolve platform and system problems.
We move one more time to the main menu, and here check our last item, iDRAC Settings. This last option allows to view and edit iDRAC settings such as network settings, IPMI, services, users, export and import server profile, and others. The first page we see is Overview, where we can take a glance at iDRAC details, network settings, and IP settings.

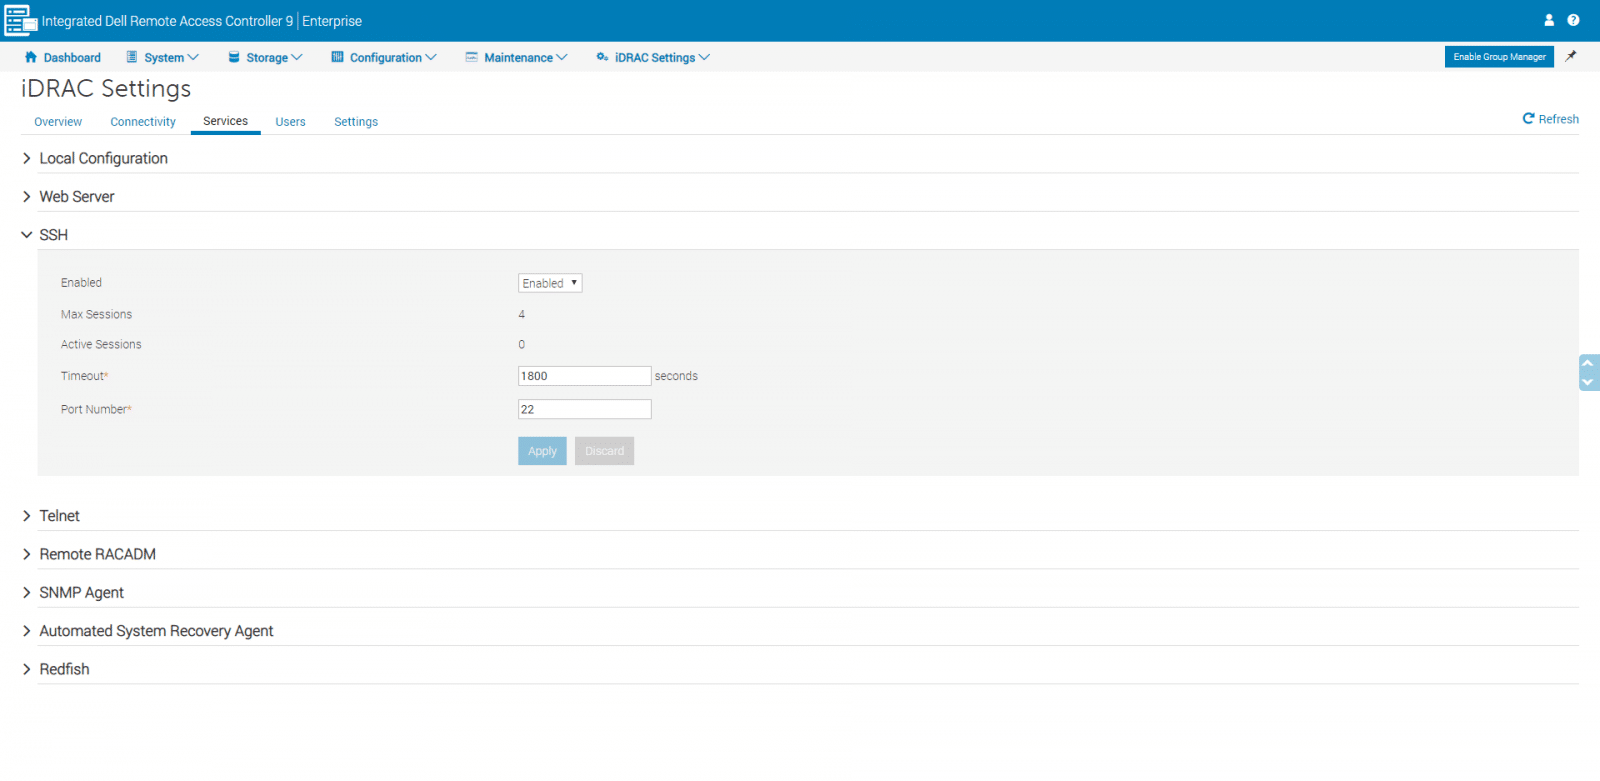
Other options under iDRAC Settings include Connectivity, to configure all network properties, and Services, useful to view or change the interface settings for local configuration, Web server, SSH, Telnet, and others.
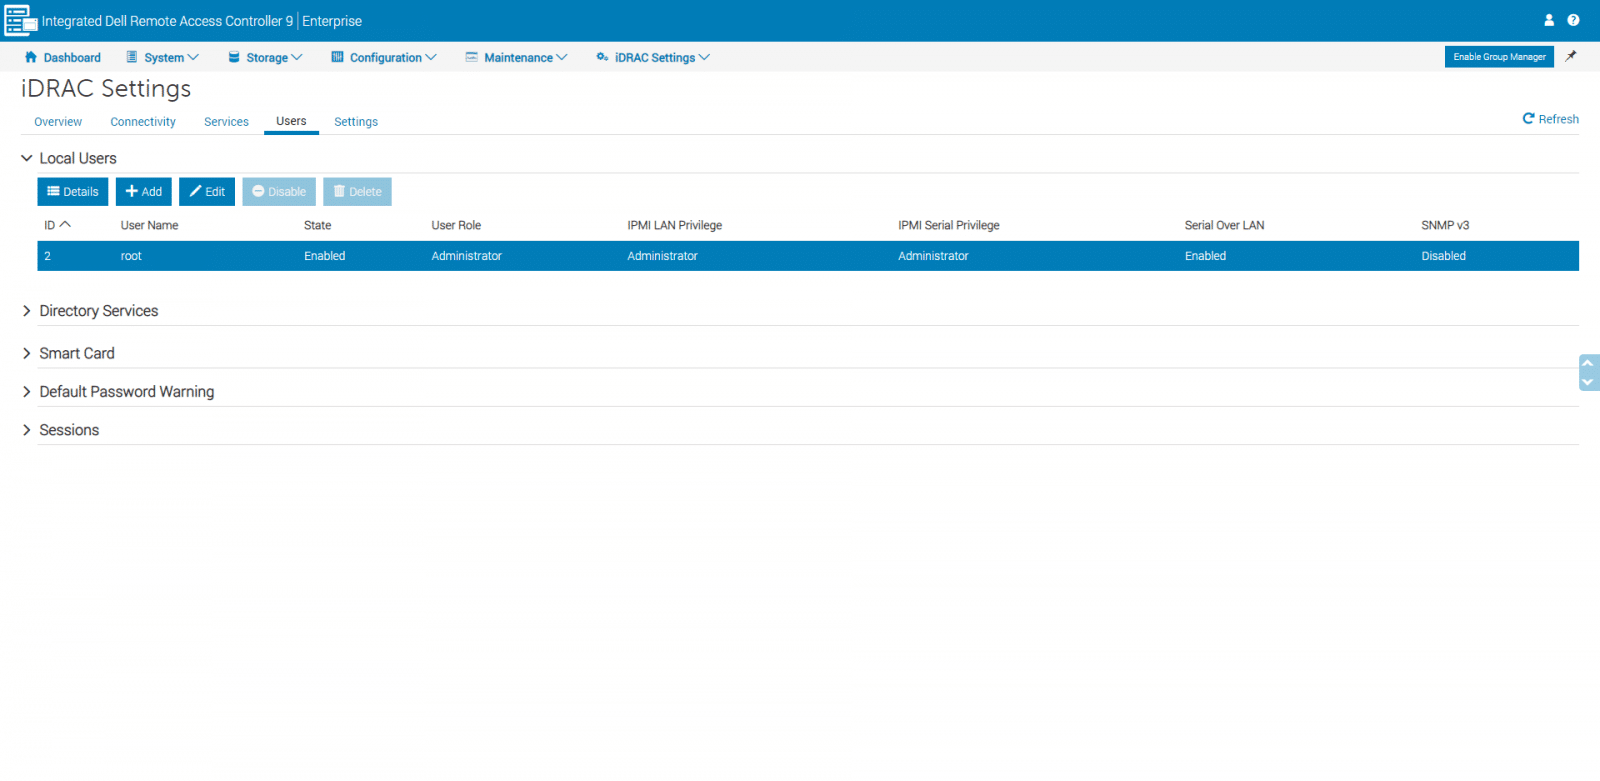
Under Users, we can add or edit users, configure directory services and log in methods, view active sessions, and other options. This page is vital to improve security by controlling user access and capabilities.
The last page to check is Settings. From here, we can create server settings, create automated backup tasks, or import server profiles. From backup and Export, one can create a backup of the entire server configuration, including the firmware version information for the various components such as BIOS, RAID, NIC, iDRAC, and Lifecycle Controller.

OpenManage Mobile
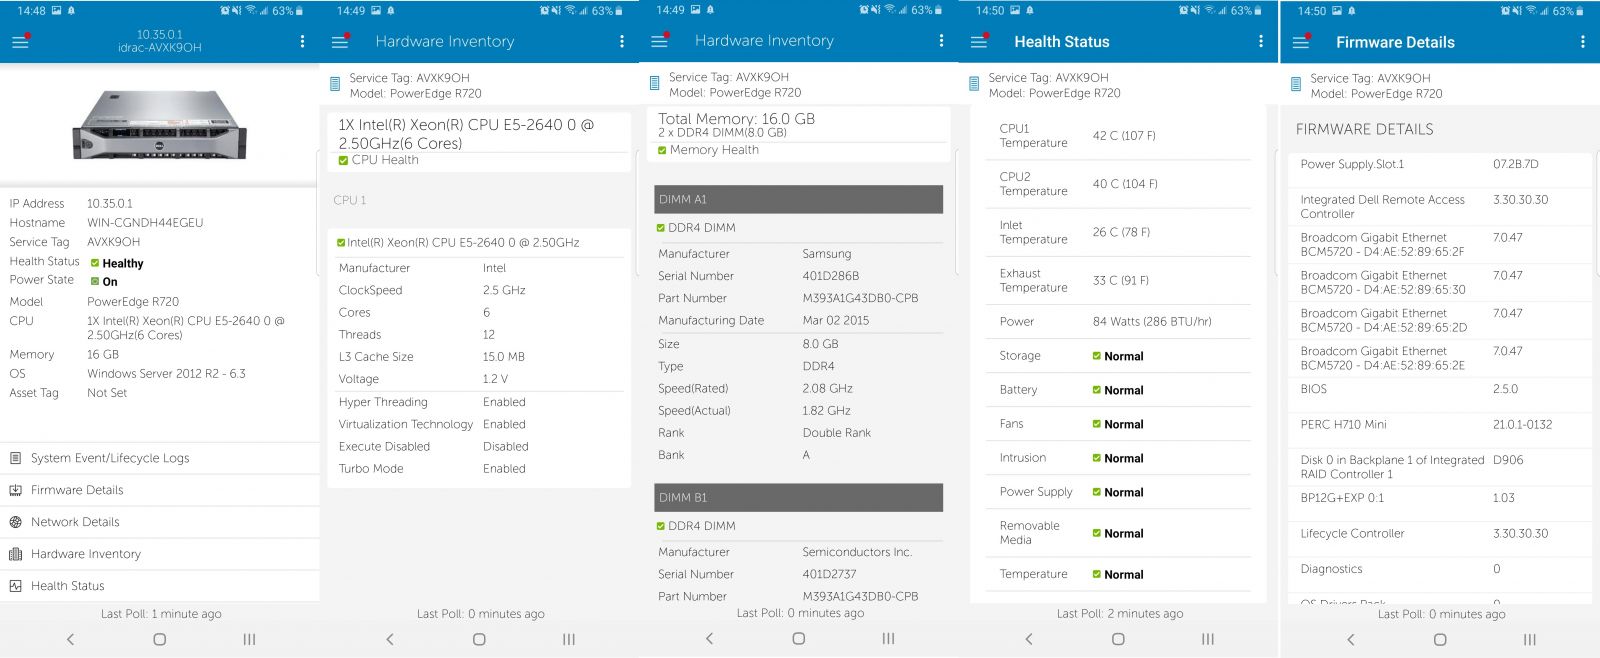
OpenManage Mobile, from Dell, is an app that will allow administrators to remotely and securely perform a subset of data center monitoring and remediation tasks from a smartphone or tablet. Dell mentions this app can be used in four simple steps: Connect, Configure, Monitor, and Act.
With this mobile app, we can connect to the iDRAC interface of PowerEdge servers, handy to quickly troubleshoot and take actions. This app is out of the scope of this review but is worth to mention and show some of its capabilities. Below, some captures from the demo app.
Conclusion
In modern data centers, managing servers remotely requires powerful management tools to aid System Administrators to monitor, configure, and troubleshoot. These tools must support essential functions, including power on, power off, system updates, and other configurations. All the major server vendors provide some level of management tools, from free basic low-end tools to enterprise-class offerings. The iDRAC9, from Dell, with Lifecycle Controller, is designed to accomplish these enterprise-class management requirements.
While the iDRAC is the remote access card that gives access to the hardware status, the LCC will be useful for initial system configuration, local deployments, and firmware updates. iDRAC is embedded in every PowerEdge server, and there is no need to install extra software. Mainly, managing the iDRAC takes place in its web-based interface, which at first glance, can be truly overwhelming. The system is loaded with a lot of options that one can notice once navigating in menus and submenus. iDRAC also includes a mobile app to troubleshoot and take general actions from everywhere easily. All these tools, in the hands of system administrators, increase availability, improve productivity, and secure data center environments.


 Amazon