

After having a chance to work with and review various VDI clients, we thought we would see what it takes (and if it makes sense) to create our own VDI client using a low-priced small form factor computer and VDI client software. This review will be different than our other reviews as we will cover how to assemble a system to act as a VDI client software, and then we will review that system as a VDI client.
Intel NUC (Next Unit of Computing) is a small form factor computer that just contains the bare essentials for computing, but that isn’t to say that NUCs cannot be powerful computers – Intel can, in fact does, pack a lot of power on a 4” x 4” motherboard. For example, the NUC8i7BEH that we use as a test Kubernetes server has a quad-core i7 processor, two internal drives, and supports 32GB of RAM. However, as we were looking to create a low-cost VDI client, we opted for the less expensive NUC7CJYS.
The NUC7CJYS is a low-priced NUC geared towards supporting users that don’t need the power of Intel’s more powerful NUC offerings. The NUC7CJYS is still very usable as it has 6 USB ports and is powered by a dual-core Intel Celeron processor with integrated Intel HD Graphics 600. It supports dual Ultra HD 4K displays via two full-sized HDMI ports. All of this is packed into a little 4.5” x 4.5” x 2” case.
For the VDI client software, we will be using Dell Wyse Converter which installs on Windows 10. Although all the major VDI vendors provide software for VDI clients that can be installed on Window and/or Linux, we wanted to use a software solution that supports all the major VDI vendors (not just one), which Wyse Converter does.
Intel NUC NUC7CJYS Specifications
| Client type | Repurposed PC |
| Form factor | Small |
| OS | Windows 10 Home |
| Supported remote display protocols | Wyse Converter supports VMware Horizon, and CITRIX HDX |
| CPU | Intel Celeron J4005 Processor |
| GPU | Intel HD Graphics 600 |
| Memory | 4GB DDR4 SO-DIMM (upgradable to 8GB) |
| Embedded storage | 32GB on-board eMMC |
| Internal storage options | one SATA3 port for connection to a 2.5" HDD or SSD |
| Display | two HDMI 2.0a ports with 4K @ 60 Hz supporting 8 channel audio |
| Power consumption | 19V, 65W AC-DC power brick adapter |
| Ports | 2 x HDMI 2.0a 2 x USB 3.0 2 x USB 2.0 2 x USB 2.0 (internal header) |
| Multimedia | TOSLINK audio jack 3.5mm audio-in jack 1 speaker HDMI port supporting 8 channel audio |
| Network connectivity | 1Gb LAN Intel Wireless-AC 9462 Bluetooth v5 |
| Physical size | height 2” x width 4.5” x depth 4.5” |
| Compliant standards | the product meets numerous safety, regulations, EMC/RF, and environmental standards |
| Warranty | 3-year |
Design and Build
The Intel NUC comes packaged in a heavy box, with the device itself being wrapped in an electrostatic plastic bag. The box also contains a 19V, 65W AC-DC power brick adapter and a VESA mounting plate.
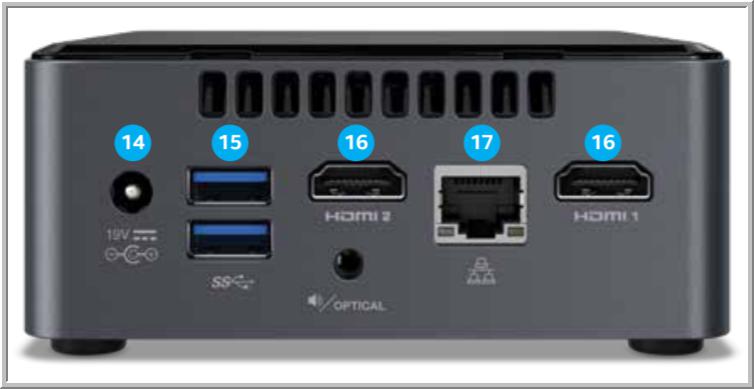
On the rear of the device are two HDMI ports, two 2.0 USB ports, a RJ45 port, a 3.5mm speaker jack, and the main power connection.
The front of the device has a power button, TOSLINK audio jack, two 3.0 USB ports, and a power on indicator light. The side of the device has a Kingston lock, and an SD card slot.

The sides and top of the device’s case are made of strong plastic with ventilation holes on the two sides and the back. The bottom of the device is made of metal and has two threaded holes where the included VESA mount can be attached. On the side of the device are slots for a Kingston lock and an SD card. The top of the device is easily removable. Overall, the case on this device is very durable and should hold up well in an office or datacenter environment.
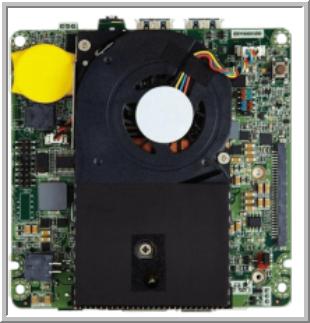
The bottom of the case is attached by four captive Phillips-head screws. By removing these screws, you will expose the motherboard of the device, which is well made. The bottom of the device has a ventilated metal slot that can house a 2.5 HDD or SDD drive. The CPU/GPU of the device is not visible as it is mounted on the underside of the motherboard. The motherboard has a single ADATA 4GB PC4-2400T-SC0-11 SO-DIMM installed on the system, however it does have a slot for an additional 4GB DDR4 SO-DIMM. All the visible components and ports are surface-mounted to the motherboard. The build quality of the device is above average.
First Boot and Configuring the NUC
To test the NUC7CJYS, we connected it to our network via a Cat 6 cable through the device’s RJ45 port. The client was connected via a 1Gb network with a single switch that connected it to the server hosting the virtual desktop and a WAN router. In order to create a controlled environment, we monitored the network during testing to ensure that no other traffic was present during our testing.
Before powering on the device, we connected the NUC7CJYS to a Dell UltraSharp 38” Curved 4K Monitor (U3818DW) through one of the device’s DisplayPorts. The Dell monitor has a keyboard, mouse, and video (KVM) switch built into it. The monitor’s built-in KVM switch was extremely useful during our testing as it allowed us to switch between the VDI client and our laptop with the push of a button. We used a Dell wireless keyboard and mouse (part number KM636) throughout our testing. We plugged the keyboard/mouse’s dongle into the U3818DW monitor’s upstream USB port.
We powered on the NUC and it booted up the Windows 10 Home OS which was preinstalled on the 32GB on-board eMMC. We then used the Windows wizard to do the initial Windows configuration. It took 36 minutes for us to configure the system and download and update the OS to the latest Windows release. We also updated the firmware on the device at this time.
After the system was installed, the C: drive had a little less than 4GB of free space, which was an issue as Wyse Convert requires a minimum of 4GB of space.
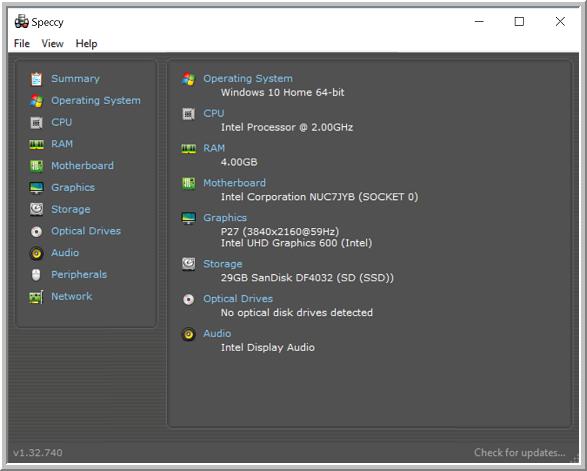
By running Speccy, a program that shows information about hardware and software of a computer, we verified that the device did have a dual-core Intel Celeron J4005 CPU and Intel UHD Graphics 600 GPU.
Introduction to Wyse Converter
Wyse Converter allows you to repurpose an existing Windows 10 or 7 PC into a VDI thin client. Once installed, Wyse Converter can lock down the PC to provide a more secure platform for the VDI clients and lets you manage the device using Dell Wyse Management Suite like other Dell Thin Clients. Wyse Converter for PCs comes with a default 45-day trial license, which begins when you install in on the device.
Installing Wyse Converter
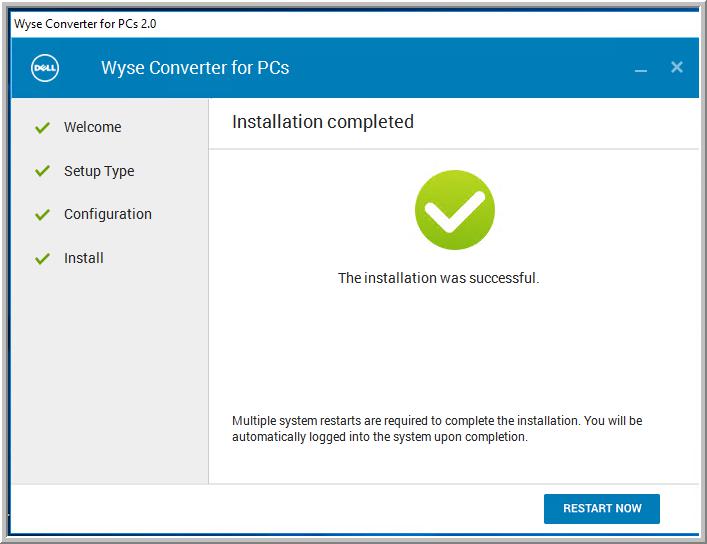
After we downloaded Wyse Converter, we began the installation process by double-clicking the downloaded package which brought up an installation wizard; after a short wait, it displayed the issues that we needed to address before Wyse Converter could be installed on the system.
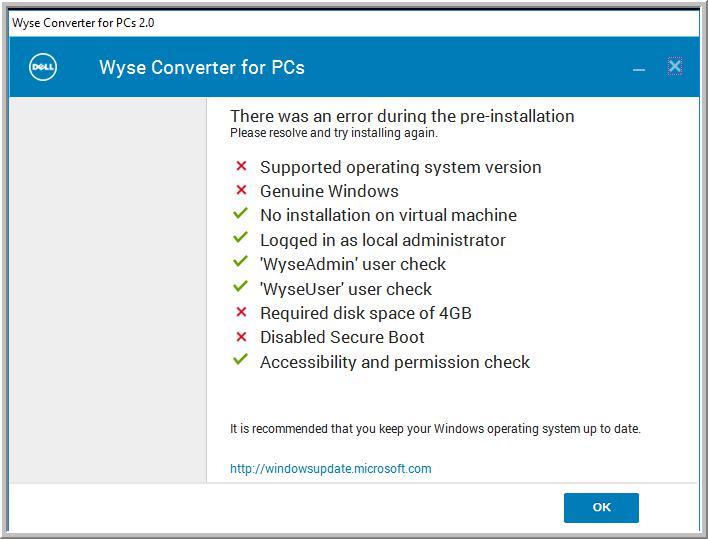
In order to get around these issues, we disabled Secure Boot, installed a 240GB SSD (SanDisk SSD PLUS 240GB Internal SSD USD) and Windows 10 Enterprise LTS (Version 1809), and updated the Intel drivers. Additionally, while we had the box open, we installed 8GB of RAM (Crucial 8GB Kit 4GBx2 DDR4 2400 MT/S) in the NUC.
We accepted all the default values when we installed Wyse Converter 2.0. This installed VMware Horizon client, Citrix Receiver, Citrix HDX Real Time Media Engine, and TightVNC Server for connectivity to your VDI environment.
During the installation process, the system creates an administrator account (WyseAdmin) and a user account (WyseUser).
Kiosk Mode
In order to secure the PC to be used as a VDI client, Wyse Converter allows the PC to be placed in Kiosk Mode which, once enabled, only displays the Wyse shell and makes the traditional Windows interface inaccessible.
When we configured the device to be in Kiosk Mode (using the Wyse Easy Setup wizard), we selected the Sound,Background, Date and Time, Network Status, Allow Shutdown, and Allow Restartcheck-boxes. Doing this allowed these functions to be accessed and changed by the users of the device.
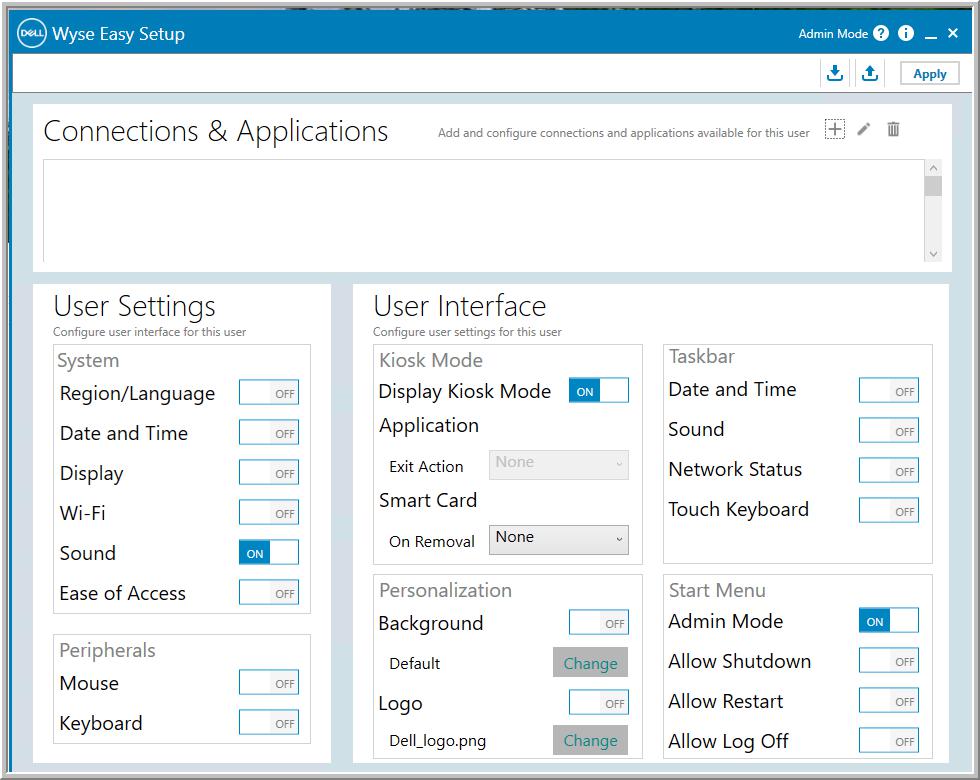
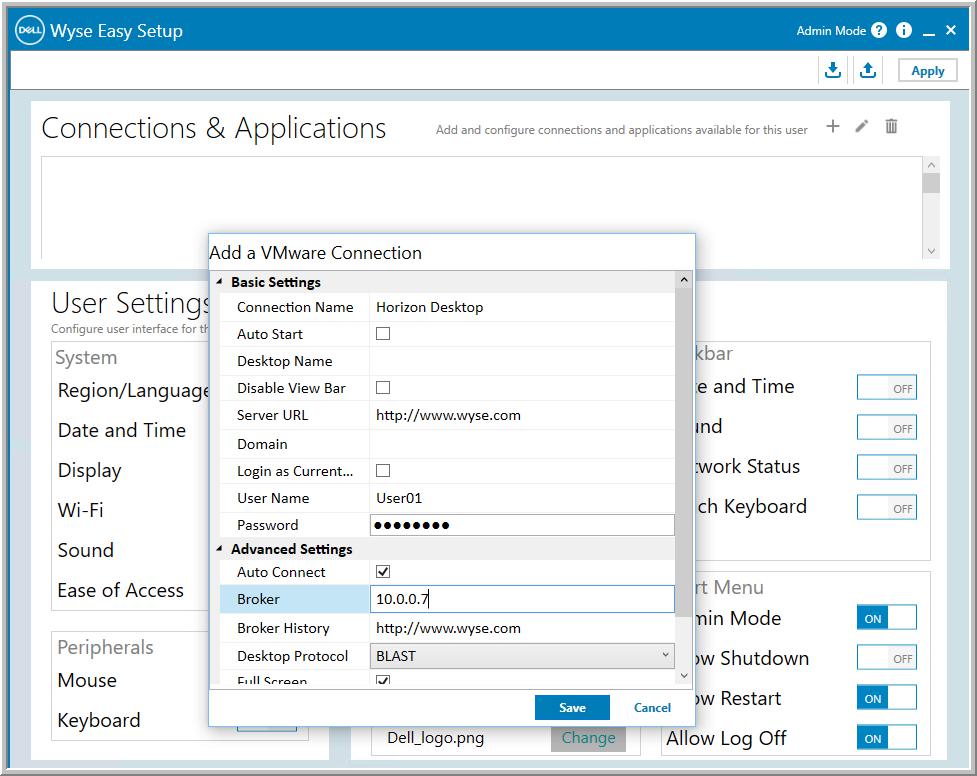
We then clicked Connections & Applicationsand set up a connection to our VMware Horizon Connection broker and an RDP connection.
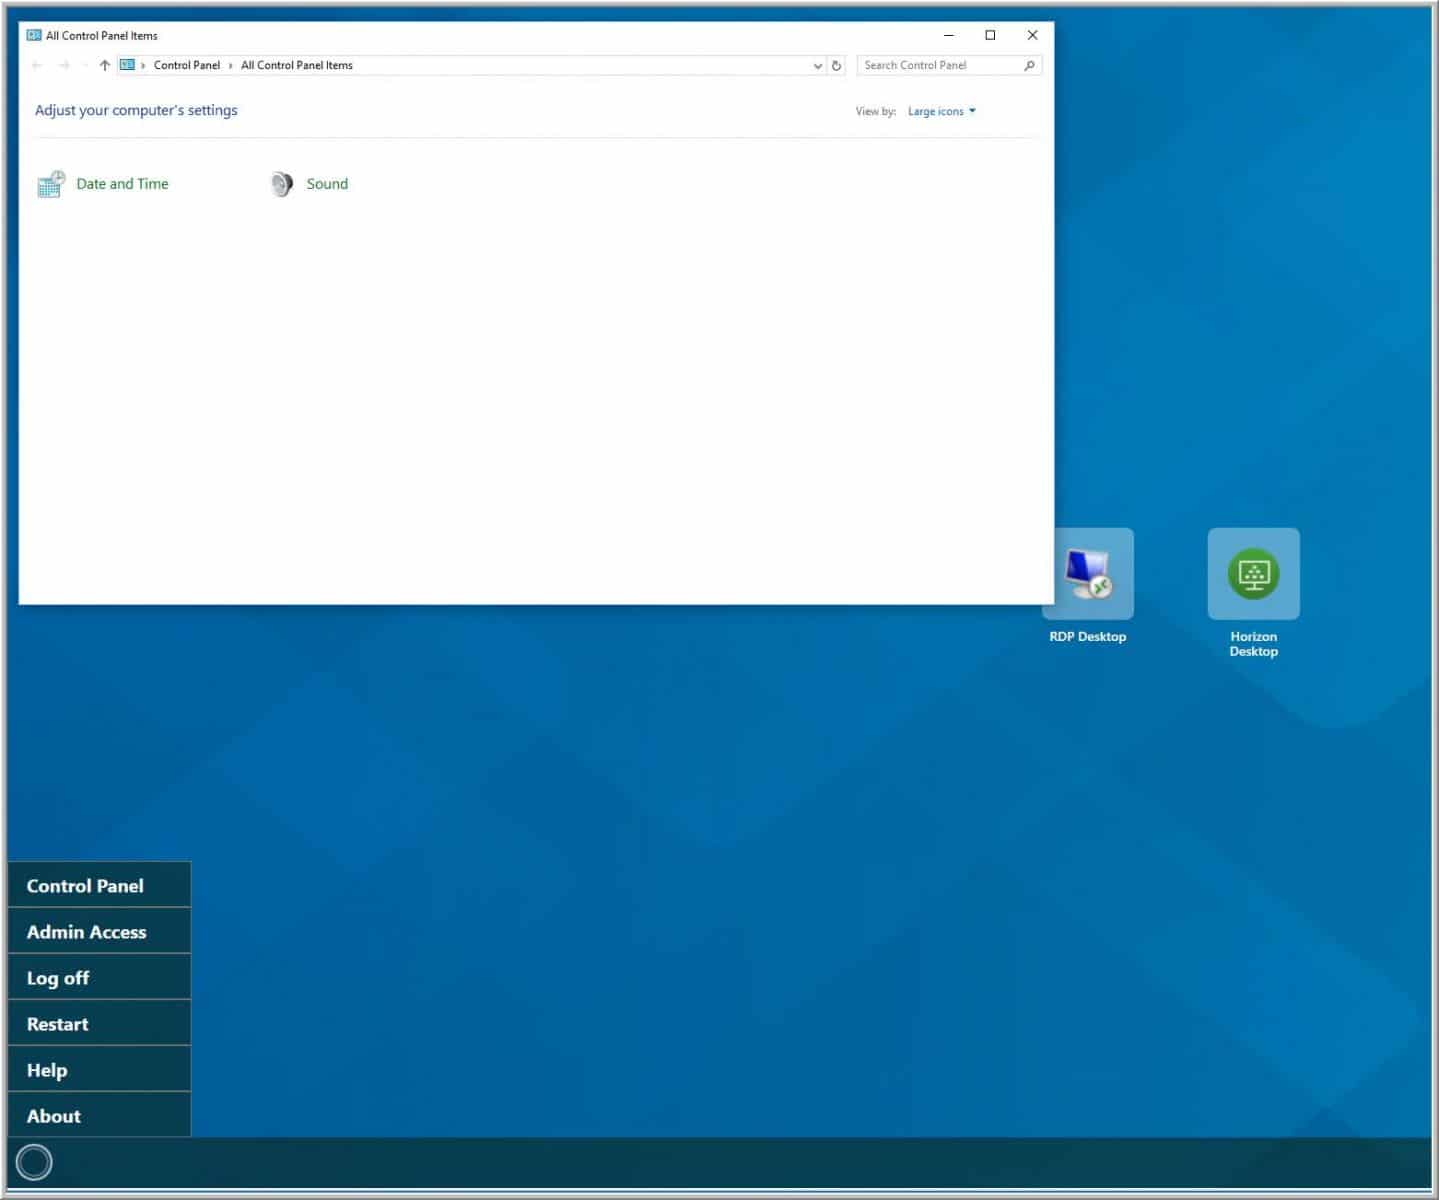
Once the device was configured as a kiosk, we logged in as WyseUserand verified that we only had access to the features in the Control Panel that we specified and that the two desktop connections were displayed on the screen.
Usability
I used the client for three weeks as my personal desktop to test its usability. Below are the key results I noted during this time.
I logged on to the device as WyseUser, and the screen that appeared had icons for the VMware Horizon and RDP clients that we had previously configured. I double-clicked the Horizon Client (version 4.8), which connected me to my Horizon virtual desktop.
Local Horizon Desktop
For the remainder of the three weeks that I used the device, I used a local Horizon virtual desktop for my daily tasks. The virtual desktop that I used ran Windows 10 (1607), had 2 vCPUs, 8 GB of memory, and 50 GB of NVMe-based storage, and was hosted on a local vSphere server.
The first test I conducted using my local virtual desktop was to use VLC to play a video (1280 x 720 @ 712kbs) that was stored on the virtual desktop. First, I played the video using a quarter of the display, and then did so once again in full screen mode. In quarter-scale, the video played without any frames dropping; in full screen mode, however, the video was jerky and frames were being dropped. I believe the dropped video frames were a result of the virtual desktop and not the client or network. The audio played flawlessly through a headset plugged in to the 3.5mm jack when the video was displayed in both quarter-scale and full screen modes. 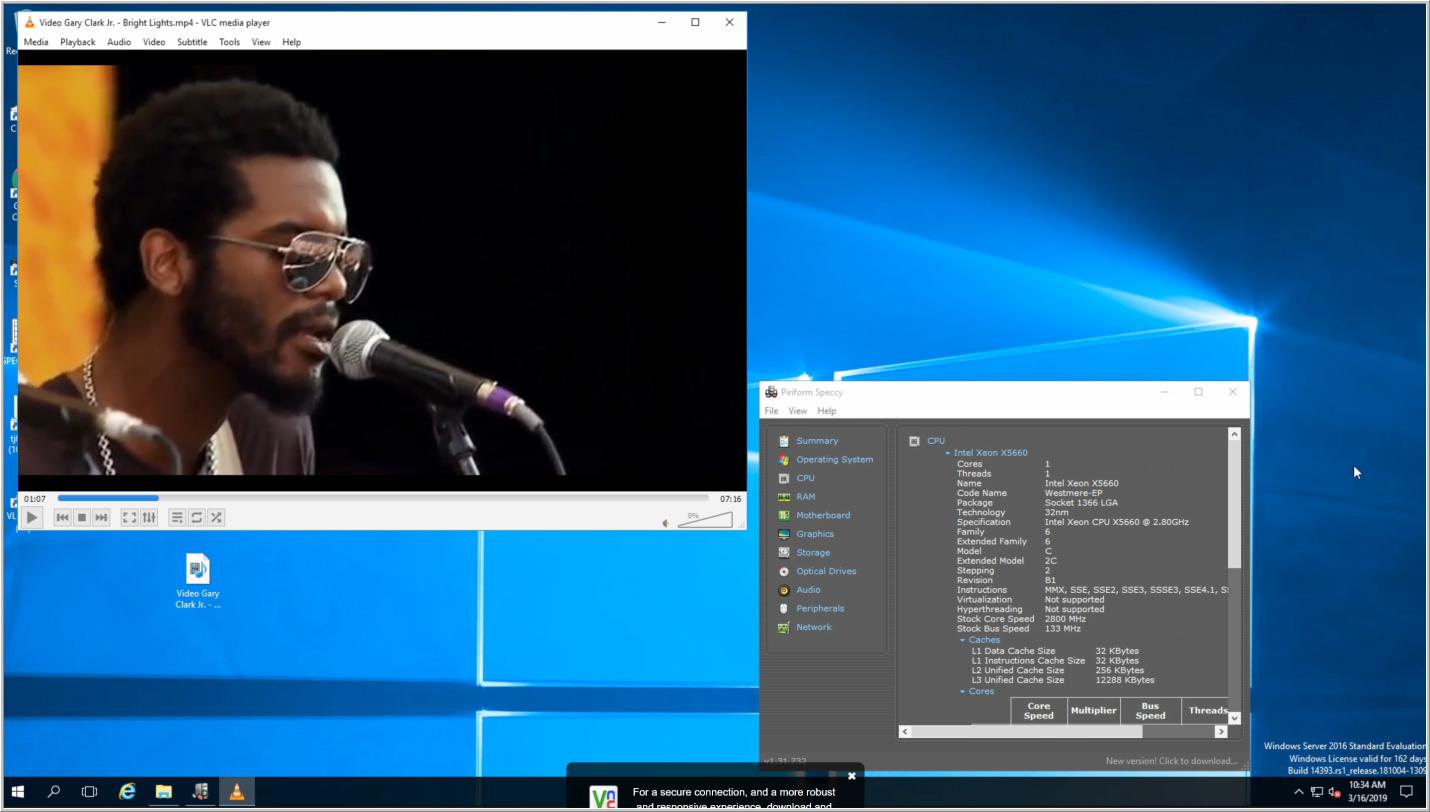
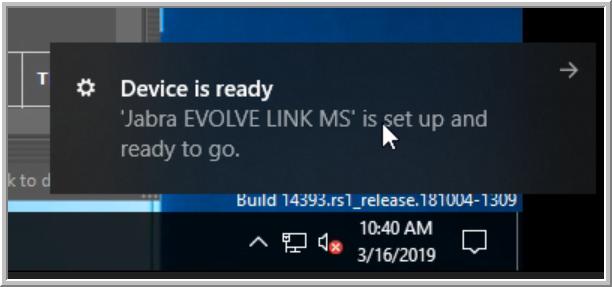
To further test the device, I connected a Jabra Voice 150 headset to a USB connection on the device which was discovered by the virtual desktop and worked without any issues.
During these three weeks, I used the client for my daily activities: using Microsoft Office applications, Chrome web browser, and playing internet-streaming music, among other tasks. During this time, the device performed without any issues.
Other Configurations
As this is a basic, rather than extensive, review of a VDI client, we only tested it using one VDI client protocol; we did not test the device for the following circumstances: adverse network conditions, using multiple monitors, using software communication software such as Skype, accessing local storage, or using any of the advanced features of the device.
Conclusion
We were surprised by how much power Intel packed into this small form-factor and low-priced computer. We were also pleased with how easy Dell Wyse Converter was to install and how capable it was as a VDI client. However, the question is, does it make sense to “roll your own” VDI client? The answer, as it is with many questions in IT, is it depends. If you can get a NUC at a good price point or repurpose an existing PC, have access to Windows 10 Pro or Enterprise licenses, then yes—it maymake economic sense to build your own VDI client using Wyse Converter.
The VDI client that we put together would have had an MSRP of around $400 USD, but the street price of the components could cut that price to around $200. You could eliminate the cost of a Windows 10 Enterprise license for the NUC by installing Linux as the operating system on the eMMC, this would also eliminate the need for an additional SSD drive (Ubuntu Desktop only requires 10GB of disk space). However, by doing this, you will lose the ability to run Wyse Converter on the device and use Wyse Management Suite to manage it.


 Amazon