

As someone who doesn’t have a very large budget to spend on my homelab, the HP t730 thin client is actually perfect for homelab use. Lucky for me I was able to win one during a recent StorageReview giveaway on their sub-Reddit. The t730 has enough RAM and CPU to be flexible enough for many use cases, while not being overkill. Whether that be hosting Pi-Hole, using it as a PfSense Router/Firewall, or in this case, connecting it to Docker Swarm.

If you are unfamiliar with Docker or containers as a whole, you might think of them as lightweight VMs that run on almost anything. While this is a major oversimplification, it gives you enough information without being overwhelming. Swarm is an extension of Docker. It provides a simple and built-in way to “orchestrate” containers, deploying them across multiple nodes, managing resources, and other things of that nature.
In my existing infrastructure, I already had 5 nodes running in Swarm. Four Raspberry Pi B4s and one Dell Optiplex 7040. This provides an excellent base to get started. But you only need a single node to follow along with this Docker Swarm tutorial. It should be noted that while I got this one for pretty much nothing, they can be found for $200 or less on eBay if you search and haggle some.
Docker Swarm Install Operating System
To start, I installed my Linux distribution of choice, that being Debian Buster, on the HP t730. Next, I needed to flash the Debian installer onto a USB flash drive. A good option for flashing the image is Balena Etcher, which is free and simple to use. Once that is done, we will begin the installation process.
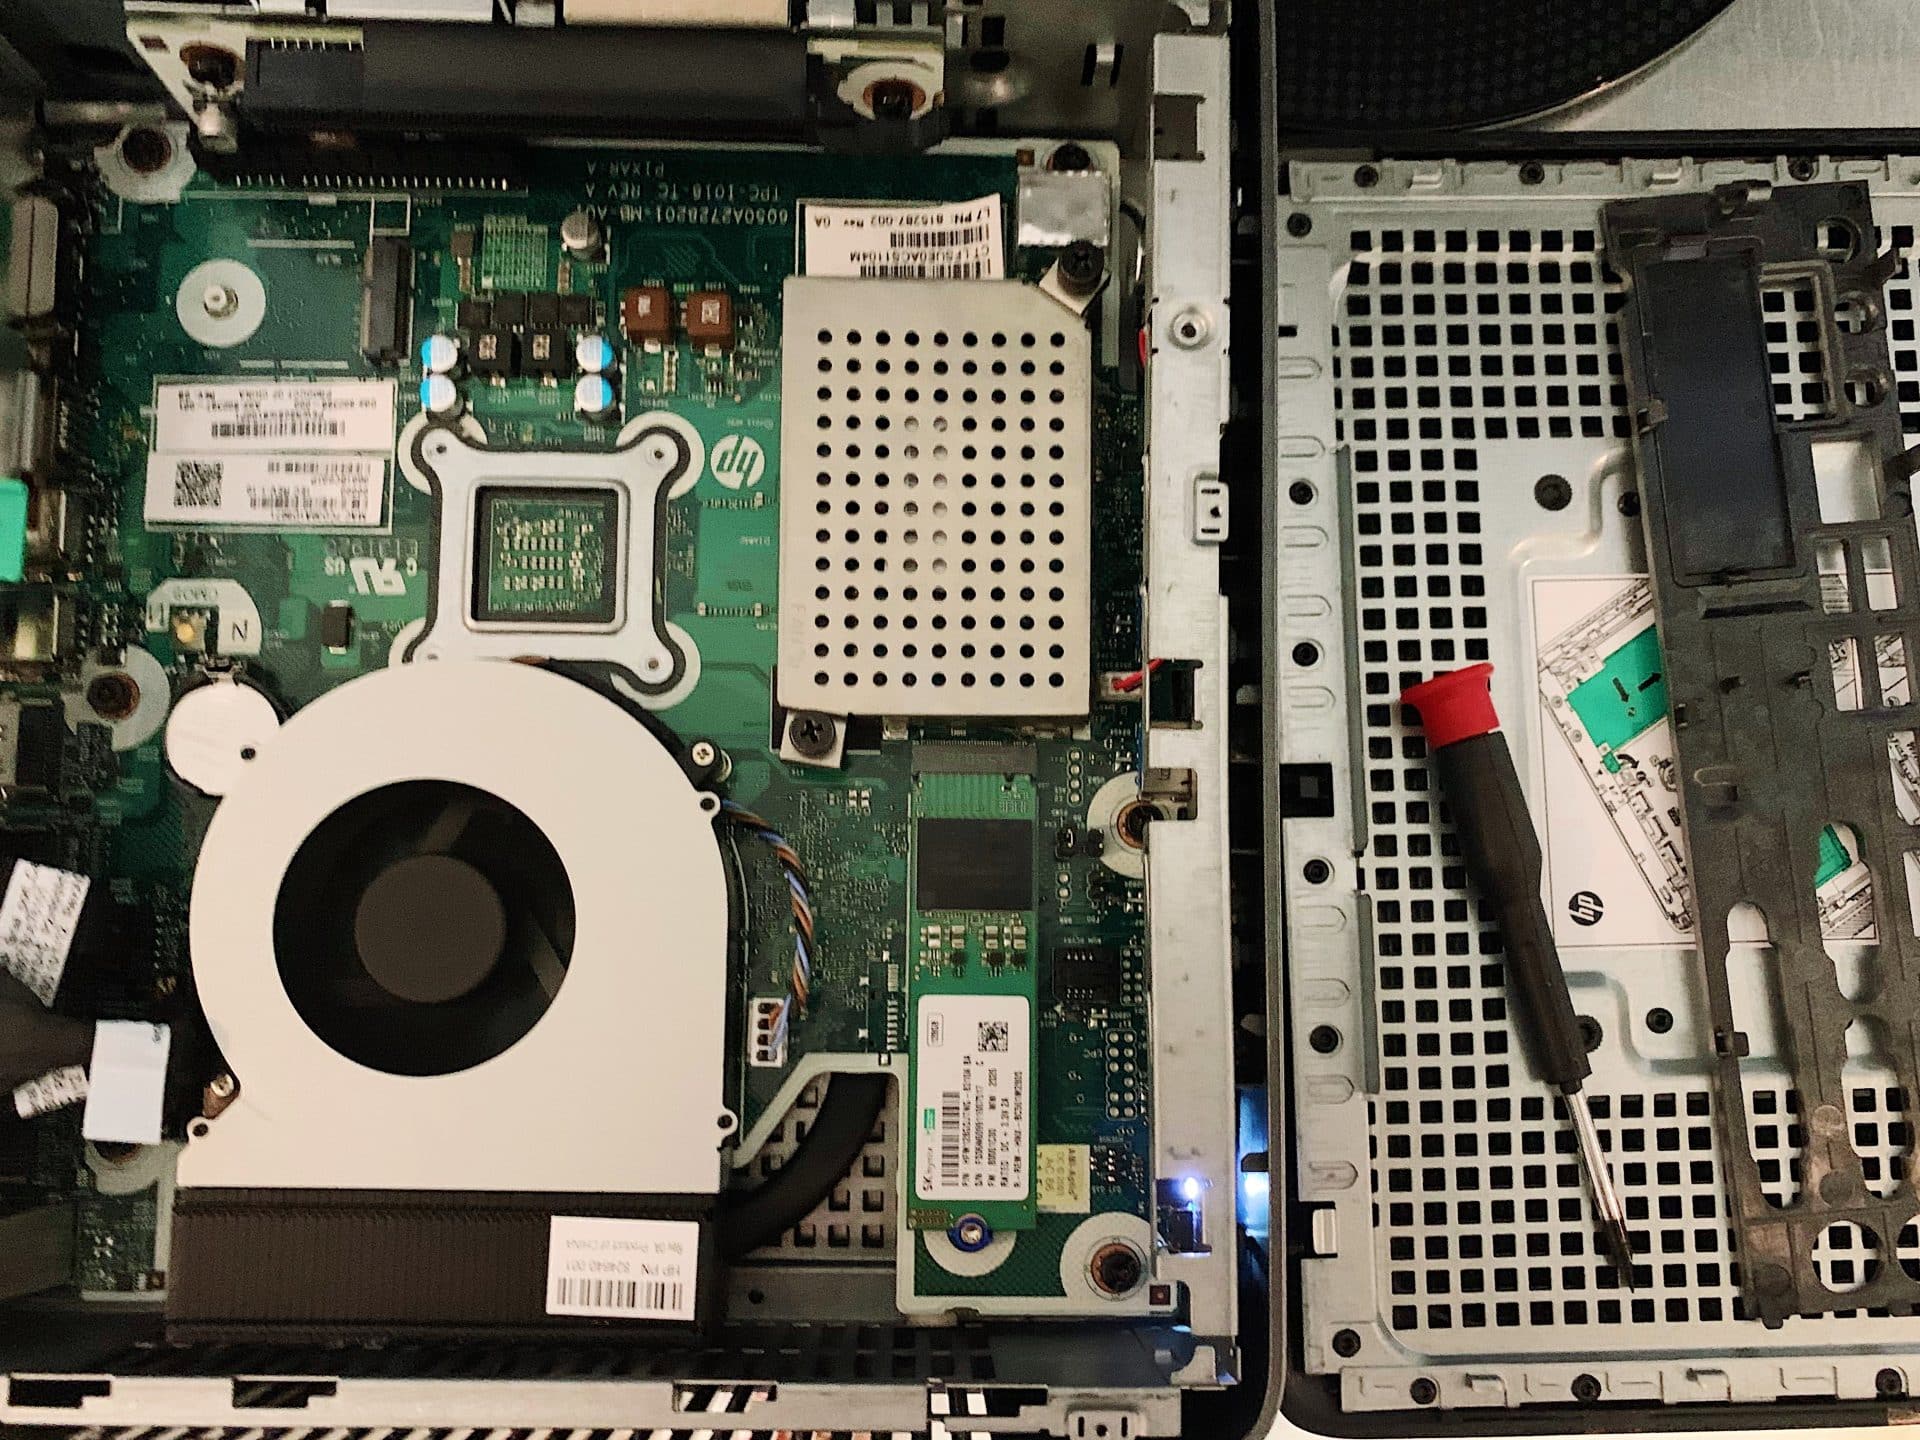 Figure 1: Installing the new SSD
First, I replaced the 32GB SATA M.2 drive in the t730 with a 256GB drive. But, unbeknownst to me at the time, that would eventually cause issues. You see, some firmware interfaces are buggy and sometimes do not work with non-vendor drives. The drive I happened to install is one of those drives that do not work. To get around this, when installing Debian I had to set Grub to install as removable, you may or may not encounter this depending on the drive you install.
Keep in mind 256GB is not necessary for what we are doing today, I just had it on hand. I recommend at least 64GB, but that may limit how much data you are able to store on the drive.
After I installed the drive, I booted up into the Debian install screen. I went through a basic installation, choosing the language, keyboard layout, etc. For the user configuration, I do something specific. I do not input a password at all for the root user, that disables the account. And I create a new user named administrator that has an extremely long password I save in a password manager. This keeps the system as secure as possible.
For partitioning, I chose a pretty simple layout, 1GB boot partition, and the rest of the drive allocated to the root partition. I chose FAT32 and ext4 respectively for the filesystems, I prefer ext4 over something like Btrfs because of the stability and speed, even if it lacks some of the cutting-edge features of the new filesystems.
When I reached the choosing base packages screen, I deselected everything but the OpenSSH server. My reasoning for this is I want the base system to be as light as possible, and it is also headless, as in it does not have a GUI. But, to complete this tutorial, all you need is the OpenSSH server, you may install any additional packages you need.

Figure 2: Packages being installed
If you encounter the EFI firmware bug I mentioned earlier, the Debian wiki has a good guide on how to solve it. After Grub is installed, we will reboot and unplug the USB stick. If all goes well you will boot into a TTY or a GUI, depending on what you chose to install.
Post Install Configuration
After the installation is complete we get started configuring the system. I wrote an ansible playbook that automates this process. For the sake of keeping this guide simple, we are going to run through the commands manually.
# This installs packages needed to complete fuure stepssudo apt updatesudo apt install gnupg ca-certificates apt-transport-https curl lsb-release -y# this adds the key apt needs to verify the signatures on the Docker packagescurl -fsSL https://download.docker.com/linux/debian/gpg | sudo gpg –dearmor -o /usr/share/keyrings/docker-archive-keyring.gpg# And to add the repository that installs Docker run this:echo “deb [arch=amd64 signed-by=/usr/share/keyrings/docker-archive-keyring.gpg] https://download.docker.com/linux/debian \ $(lsb_release -cs) stable” | sudo tee /etc/apt/sources.list.d/docker.list > /dev/null
Once that is done, we need to install Docker itself and enable the service.
sudo apt install docker-ce
sudo systemctl enable –now docker
Now we are ready to use Docker to run services!
Using Docker Swarm On The HP t730
The first time using Swarm requires that you initialize the swarm. Let’s go over the commands below. If you already have a swarm, skip over this step.
sudo docker swarm init
If you want to verify it worked, paste this command into your terminal:
if [ “$(sudo docker info | grep Swarm | sed ‘s/Swarm: //g’)” == “inactive” ]; then echo false;else echo true;fi
If your host is running in Swarm mode then that command should return ‘true’.
Running Our First Service
With Swarm, there are two ways to create services.
- docker service create this is similar to docker run
- docker stack deploy this is similar to docker-compose
Generally, you want to use docker stack deploy because you are able to easily reproduce the stacks.
But just to verify it works, using docker service create is fine.
sudo docker service create -p 3000:80 httpd
It may take some time to finish, but after the command is done you can go to the IP of the node on port 3000. If you do not know what your IP is, run hostname -I. In my case, I had to go to 192.168.19.73:3000. You should see a screen that says It works!
Closing
The HP t730 is a great little machine for beginner or veteran homelabbers, it supports many different use cases and is pretty powerful for what you pay, which in my case was nothing more than the $15 for shipping (thanks StorageReview!). I hope everyone got something out of this article, whether that be learning about new technologies, or be inspired to start your own homelab.
-Ethan Edwards


 Amazon