

Ansible is a great way to mass deploy changes across multiple machines. For example, I have used it to do some basic setup on a new machine and to update multiple hosts simultaneously. It is also important to keep in mind that Ansible is not only used in homelab environments, but it is also very popular in corporate environments, which makes it a very valuable skill to have.
Setting up Ansible on a New Machine
First, we need to install the `ansible` package, it should be as simple as:
`sudo apt update && sudo apt install ansible`
And we need to create our Ansible directory to work out of:
`mkdir ~/ansible && cd ~/ansible`
You should now be in the Ansible directory on your local machine.
Ansible Overview
We use the two main features of Ansible, inventories, which store all of your hosts, and playbooks, which contain the “instructions” to execute on the hosts. In order for Ansible to read our playbook and execute the actions, it has to know where the hosts are, that is what the inventory file is. It is just an “inventory” of all the hosts.
Now we have the playbooks themselves, once Ansible has read the inventory and is aware of all the hosts, it starts looking for what to do. That is the playbook, which is just a simple YAML file, which utilizes “modules” to perform the tasks. Documentation on said modules can be found on the Ansible website. If there is something that is not clear, this [beginner Ansible video] by NetworkChuck does a good job at explaining things.
Creating our Ansible Inventory
Now that we have a basic understanding of Ansible and how it functions, we can create our inventory. The format can either be in YAML or INI, for the sake of keeping it simple, we will use INI and only add one host.
Here is an example file:
inventory.ini:
“`ini
[powerful]
192.168.1.78
“`
Name it `inventory.ini` in your `ansible` directory. This file creates a “group” of `powerful` with a single host of `192.168.1.78`. We can use this in our playbooks later. You can give it whatever group name and IP you want, depending on your setup. You can also add more hosts to the group if needed.
Deploying Ansible Playbooks
First, we want to verify that Ansible is working:
Keep in mind our ssh public key must be in the authorized_keys file on the host we are trying to reach. If not, this command will fail. We are using the group `powerful`, but use whatever you named yours.
`ansible -i ./inventory.ini -m ping -u administrator powerful`
If that works we can provision our playbooks on that node.
The playbook we are deploying simply updates the system, reboots it, and then waits for it to come back online. If you have multiple nodes in the group, it will go through each node one by one, waiting for the previous one to come back online before restarting the next. This gives the services on the node adequate time to shut down and migrates if you are using something like Docker Swarm.
update.yml:
“`yaml
– name: Upgrade all nodes and reboot
gather_facts: no
hosts: “{{ variable_hosts }}”
become: yes
serial: 1
tasks:
– name: Updating and Upgrading | {{ inventory_hostname }}
apt:
# force backwards compatibility
force_apt_get: yes
update_cache: yes
upgrade: ‘yes’
– name: Reboot | {{ inventory_hostname }}
reboot:
# how long it waits for the node to come back online after reboot
reboot_timeout: 300
# how long to wait to reboot after the previous task (apt) is finished
pre_reboot_delay: 60
– name: Ping | {{ inventory_hostname }}
ping:
– name: Pause | {{ inventory_hostname }}
pause:
minutes: 5
“`
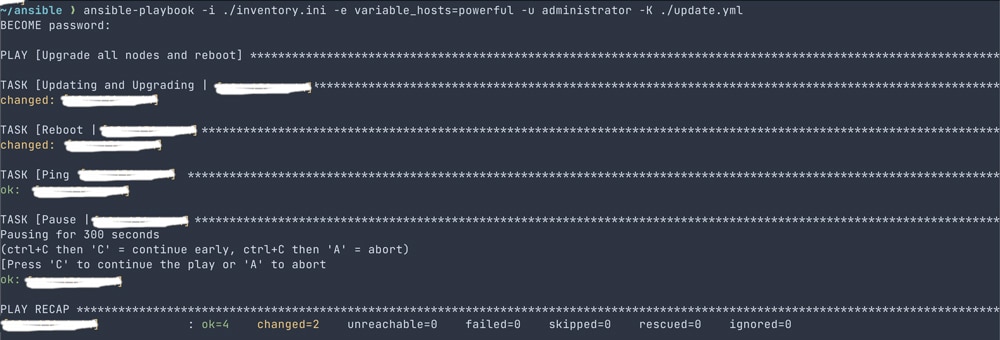
`ansible-playbook -i ./inventory.ini -e variable_hosts=powerful -u administrator -K ./update.yml`

Explanation of the flags:
– -i: Specify the inventory file.
– -e: We have to specify the host, in the playbook we have a variable `variable_hosts`, which is what gets passed to the playbook.
– -u: This is the user used to run the commands on the host.
– -K: This tells the playbook to prompt the user for the sudo password, otherwise the playbook will fail.
Closing Thoughts
Ansible is an incredibly powerful and versatile tool that can be used for a variety of things. We barely scratched the surface with this article, but you should continue experimenting and automating tasks to learn more about it. Whether that be automating Kubernetes deployments, or just updating your systems like we did today.
-Ethan Edwards


 Amazon