

We are going through a transformational change in the workplace and working from home (WFH) is no longer an option or a “nice to have.” It is a requirement. Fortunately, for the past two decades, we have been developing virtual desktop infrastructure (VDI) to enable this transformation. When people think of VDI, they often think of virtual machines and the big players, namely VMware, Citrix, and Microsoft. However, VDI isn’t about the backend computer, it’s about displaying a computer (either physical or virtual) video, audio and peripherals to a remote user over the network and remote users expecting the same experience as they had with a local system.
A highly respected leader in the IT industry and an innovator and leader in the VDI field is HP. What many people don’t realize is that HP’s remote connection software, HP ZCentral Remote Boost (previously branded as HP Remote Graphics Software – RGS), is included, license-free, with all HP Z Workstations, HP ZBooks, and HP VR Backpacks–and you have the right to use it. ZCentral Remote Boost can also be used on other physical or virtual x86 systems at a very reasonable cost and HP has a 60-day trial offering that allows you to evaluate it on any system.
ZCentral is more than Remote Boost, as HP recently released ZCentral Connect, a light-weight connection manager geared specifically for ZCentral Remote Boost. With ZCentral Connect, HP has become the only IT company that is the single product line source for all the hardware and software for a virtual desktop infrastructure (VDI) environment. The entire VDI stack has been designed from the ground up, and perhaps more importantly supported by HP. Having a single vendor can eliminate finger-pointing and lead quicker resolution of problems, if they occur. We will have more to say about ZCentral Connect later, but let’s first focus on Remote Boost.
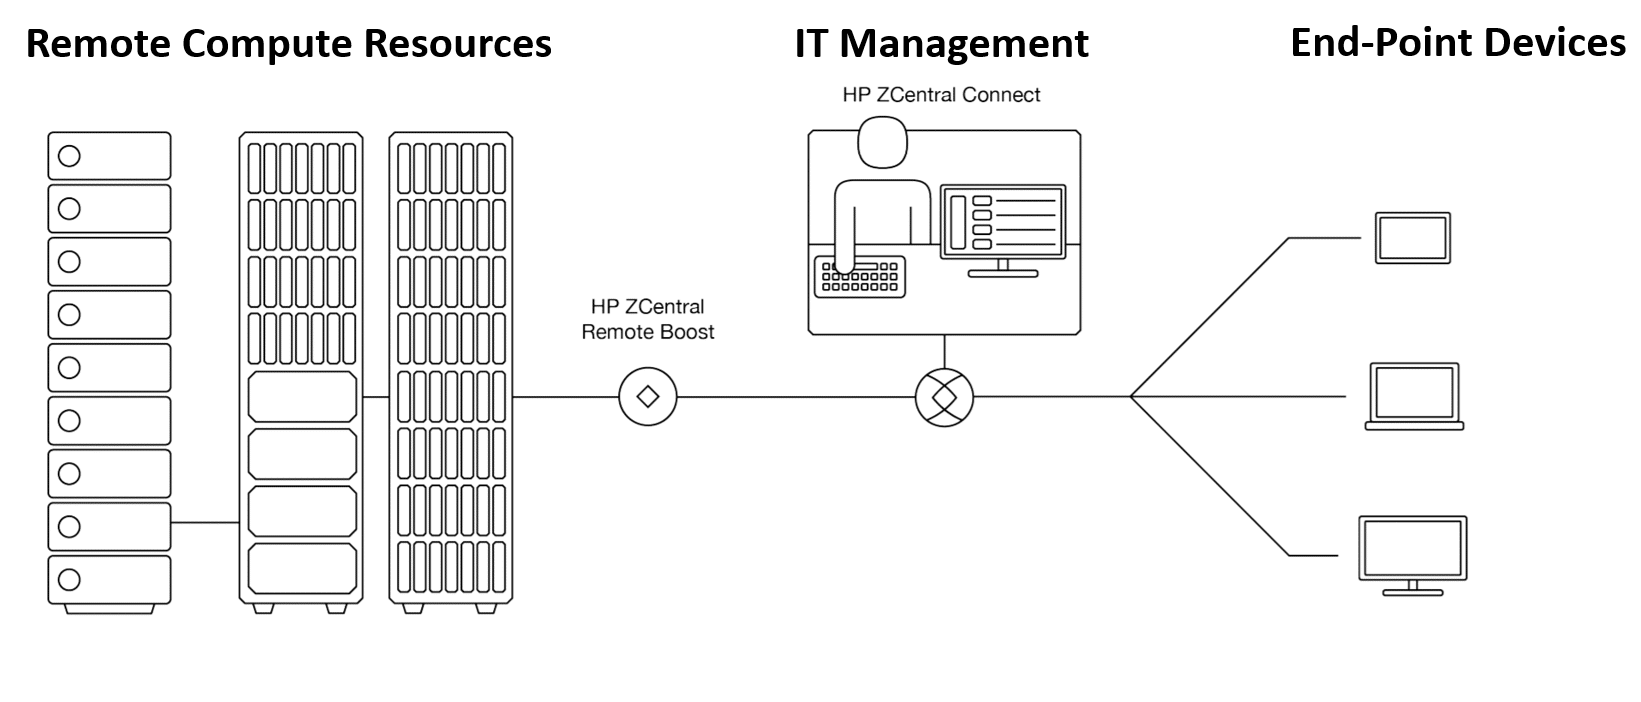
Remote Boost is an interesting play on the current VDI paradigm, as it has been designed for use with physical workstations rather than virtual machines (VM). Although it can be used on VMs, by designing it this way, it makes it simple to set up and maintain a ZCentral VDI environment. ZCentral is geared towards users that need the full power of a workstation rather than a task worker who only needs to run an application or two from a VM. Power users, on the other hand, tend to use the full resources of a workstation and any overprovisioning of a workstation’s resources can be detrimental to a worker’s efficiency. Users can access their workstation regardless if it resides in a data center, data closet, or even at the desk where the user used to be located. If the Receiver can contact the Sender system over the network, the compute resources can be fully remoted even in a WAN environment when VPNs are present.
Back in 2003, HP realized a need to extend a computer’s keyboard, mouse, and video across miles or hundreds of miles. To accomplish this, they developed HP Remote Workstations Software, which over time evolved to HP Remote Graphics Software (RGS) and today’s current incarnation ZCentral Remote Boost 2020. It has been one of the industry’s best-kept secrets for the past 17 years, and a critical infrastructure mainstay for those HP customers in the know. Yes, many people in energy, media, engineering, and other verticals have been using it, but for the most part, it really hasn’t gotten the visibility that it deserves. However, HP is determined to change that and as part of that effort – they have rebranded RGS as HP ZCentral Remote Boost, part of a solution suite of HP hardware and software pulled together under the HP ZCentral umbrella.
There are many reasons to access a system remotely, but the most important reason is security. Having a workstation safely locked away greatly reduces the chances that the data that it is working with can be, intentionally or unintentionally, compromised or stolen. With Remote Boost, any remote protocol data sent over the network is encrypted. The second reason people give for remote workstation access is the need for any time, anywhere compute. If you need to access the system or the information on the system, you can do so from an office, home office, or even a boardroom, whether you are working a few hundred feet or a few hundred miles away from the physical system. On top of that, a strong case can be made for cost savings and efficiency. Having workstations located in a central repository greatly reduces the cost of maintenance, infrastructure, and allows systems to be shared as needed. Remote Boost has the added benefit of not needing any special graphic drivers or does not require any special security or access configuration, users are able to access their systems as they always have.
In the remainder of this article, we will look at both HP ZCentral Remote Boost and ZCentral Connect.
HP ZCentral Remote Boost – The Direct Connection
HP RGS got its start in one of the most demanding use cases imaginable: sending photos from NASA’s Mars Rover back to earth back in 2004. These transmissions had to be extremely efficient without sacrificing the quality of the images. HP has been steadily perfecting this technology ever since.
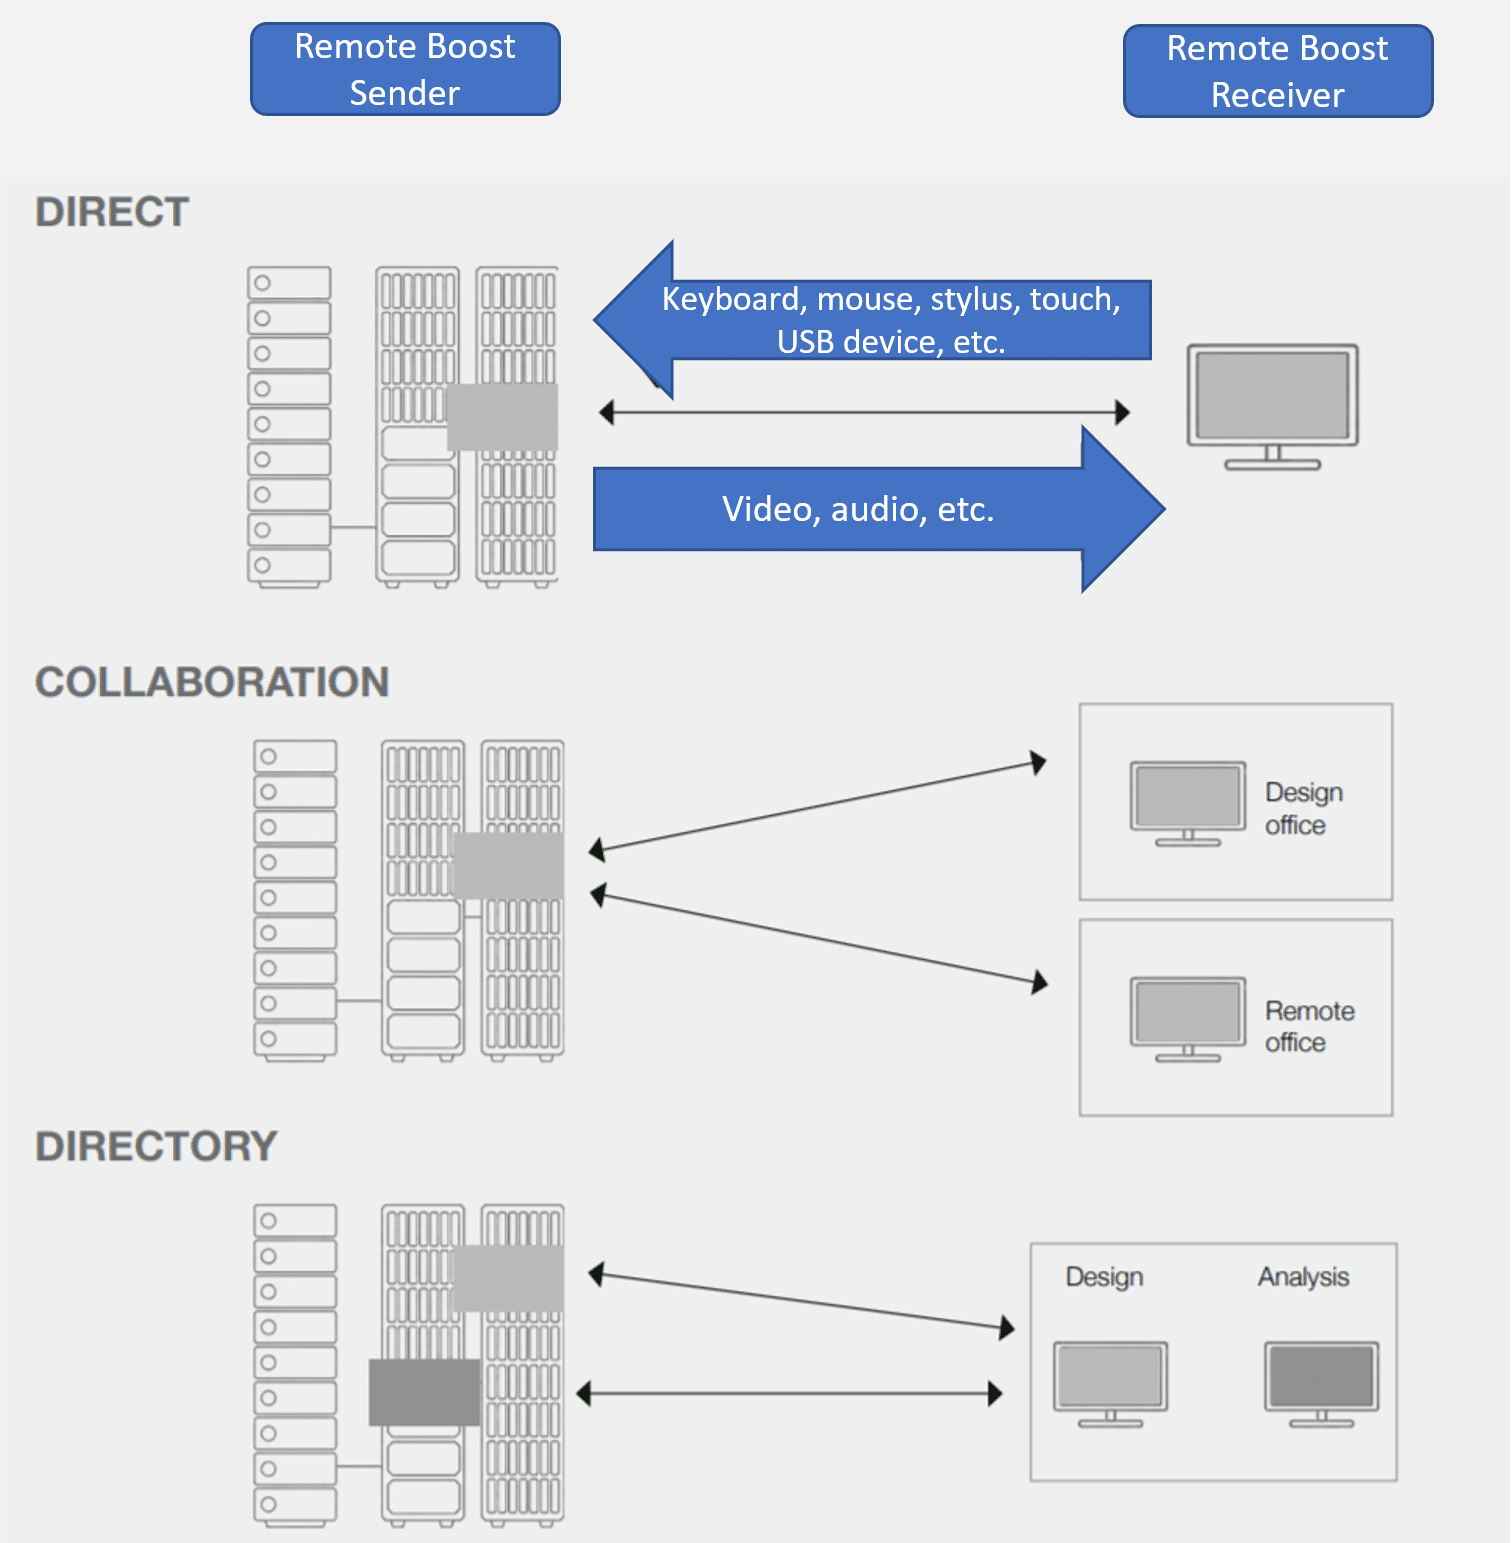
Remote Boost topology is like other VDI solutions, as the physical or virtual system doing the computing has a Sender (agent) installed on it and the remote system has a Receiver (client) installed on it. The Remote Boost Sender can be installed on a Windows or Linux system, while the Receiver is supported on laptops, desktops, tablets, or VDI clients running Windows, Linux, HP ThinPro, or MacOS. ZCentral Remote Boost Sender and Receiver are backward compatible with previous HP RGS versions for basic connectivity.
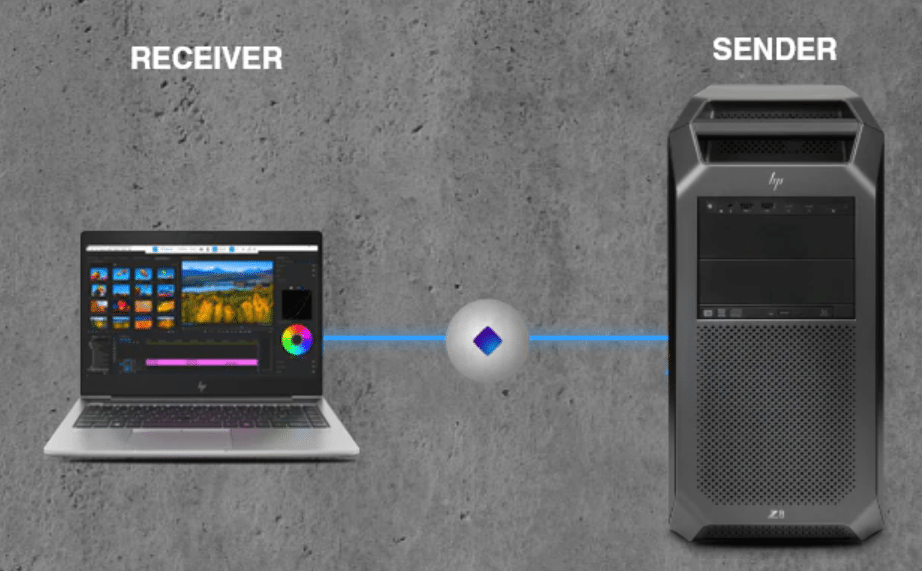
The system running the Remote Boost Sender does all the processing with OpenGL or DirectX rendered locally on the Sender system, and Remote Boost takes the changes to the images or if needed the entire image, applies compression and then it, along with any audio output, is sent to the Receiver system. The Receiver system displays the image, plays the audio, and sends back the keyboard, mouse, and other interface peripherals (like 3D Mouse or pressure-sensitive tablet input) and touch gestures back to the Sender system.
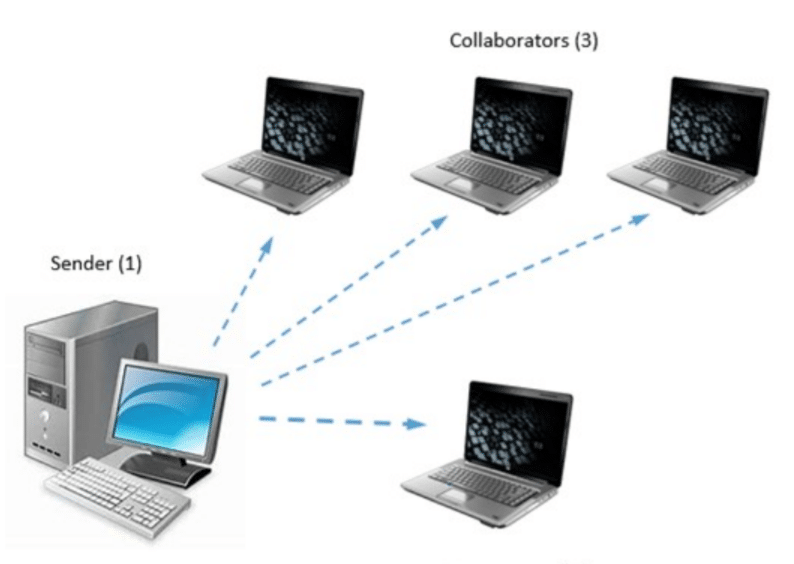
A Remote Boost Receiver can be used to connect to a single Sender (Direct mode) or multiple Senders (Directory mode, batch open). Multiple Receiver Sessions can also be launched as needed. HP ups the game a bit with its Collaboration mode that allows two or more users to view and more importantly, interact on the same Sender session desktop from multiple remote systems running Receiver, following existing security already established for a given Sender device, via Active Directory or local accounts.
ZCentral Remote Boost has all the features of a modern remote display protocol and a few features that are not available on other VDI solutions. The Remote Boost Sender supports workstations (physical or virtual) with any GPU and has specific experience enhancements for NVIDIA GPUs, and its highly efficient protocol can handle low-bandwidth networks. It supports 4K monitors and multiple displays, touch gestures, and passing USB devices on the Receiver to the Sender.
A Remote Boost session can be used with HP’s Advanced Video Compression (AVC) feature when working with video or fast-changing images (like model rotation) to decrease bandwidth without sacrificing quality. Remote Boost also has HP’s Velocity feature that is optimized for WAN to help mitigate latency and packet loss by optimizing communications between the Sender and Receiver.
Remote Boost can connect directly from a Sender to a Receiver or you can use ZCentral Connect to manage user connections with machines they are entitled to.
Setting Up HP ZCentral Remote Boost
To get a better feel for Remote Boost, we installed Sender on a VM and a workstation. We connected to these systems by installing the Receiver on a Laptop and an HP mt45 thin client.
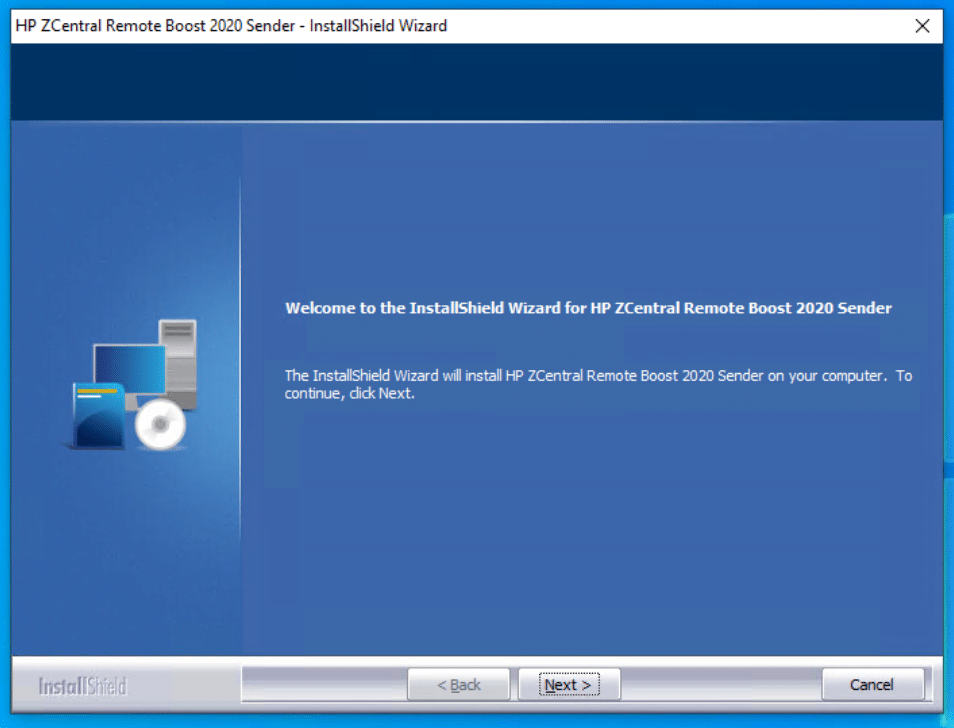
We downloaded ZCentral Remote Boost Receiver and Sender, with a 60-day trial license and installation guide from hp.com/ZCentraland hp.com/zcentralremoteboost.
The first system that we installed Sender on was a Windows 10 VM with 4 CPU cores, 8GB RAM and a 128 GB NVMe backed disk. Installing the Receiver was straight forward; we double-clicked SenderSetup64.exe which brought up a wizard that we worked through accepting all the default values. When installing Sender, we were asked if we wanted to install the license on the system itself or if we wanted to use a license server; we chose the former. NOTE: If the Sender was being installed on a Z system, we would not have been asked about a license. The ZCentral Remote Boost Sender software is license-free for all Z systems and the Receiver never requires a license.
After Sender was installed on the VM, a reboot was required. After the machine came back up, we saw that the ZCentral Remote Boost Sender Service was running.

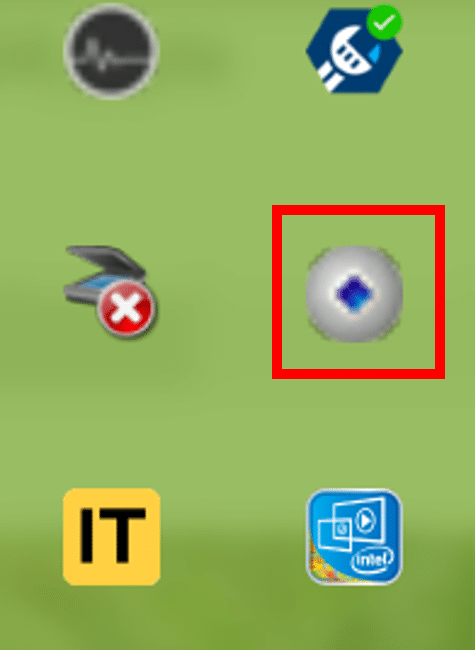
We noticed a Sender Icon in the system tray indicating that it was ready for a Receiver connection.
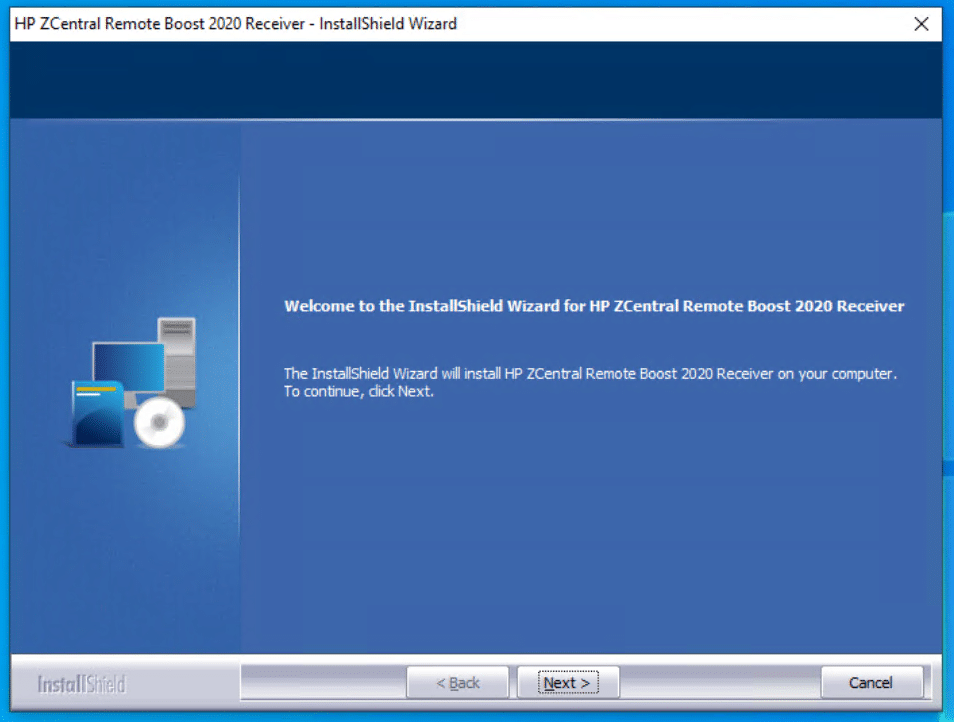
The first system that we installed the Receiver on was an HP Dragonfly Windows 10 Laptop connected to two 4K monitors: A Dell U3219Q and a Lenovo P27. Installing the Receiver was also very straightforward; we double-clicked ReceiverSetup64.exe which brought up a wizard that we worked through accepting all the default values. After the Receiver was installed, a reboot of the laptop was required.
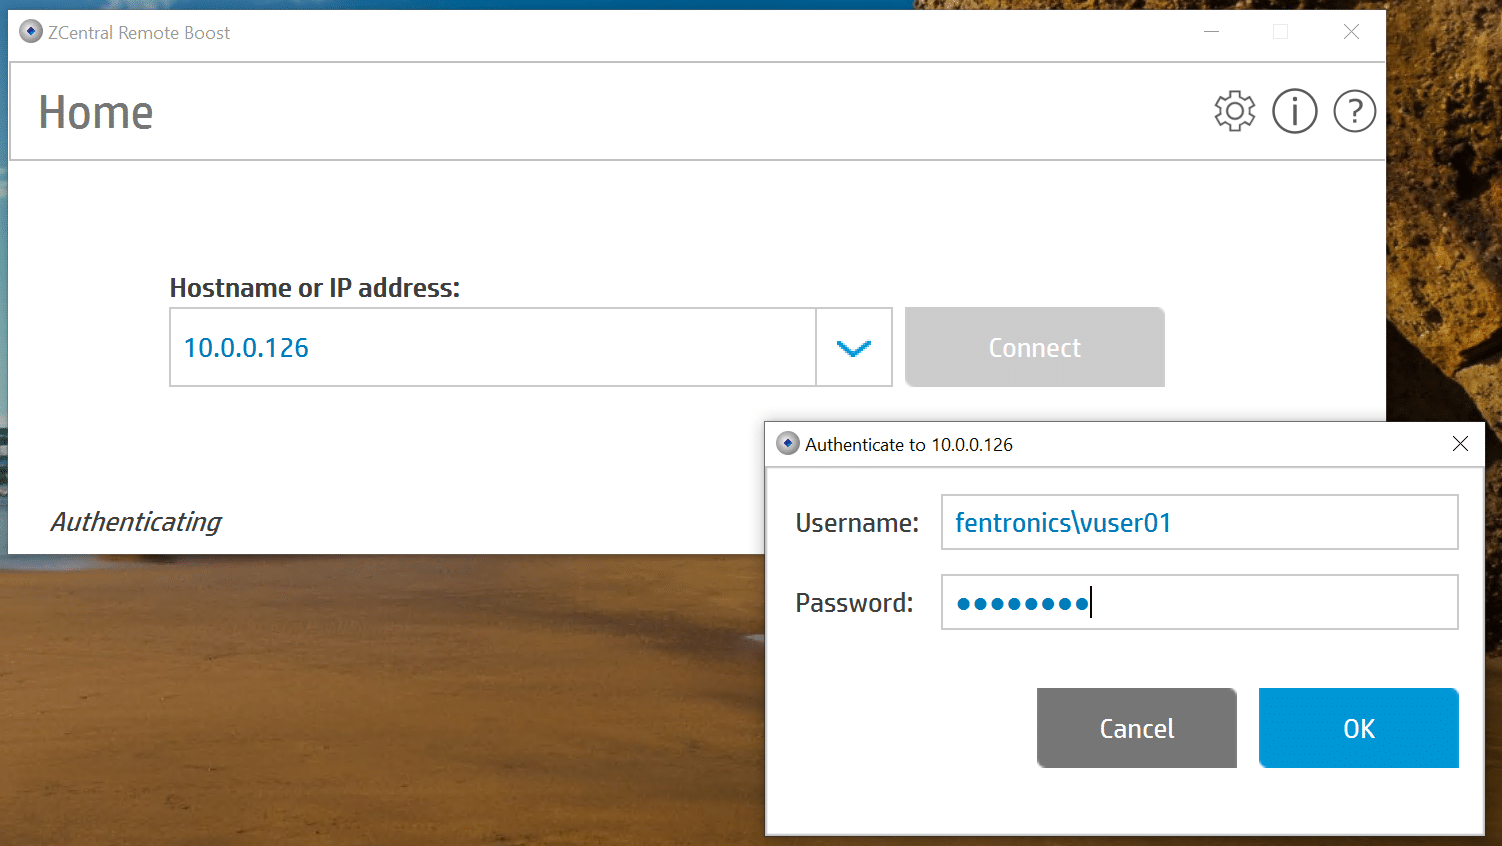
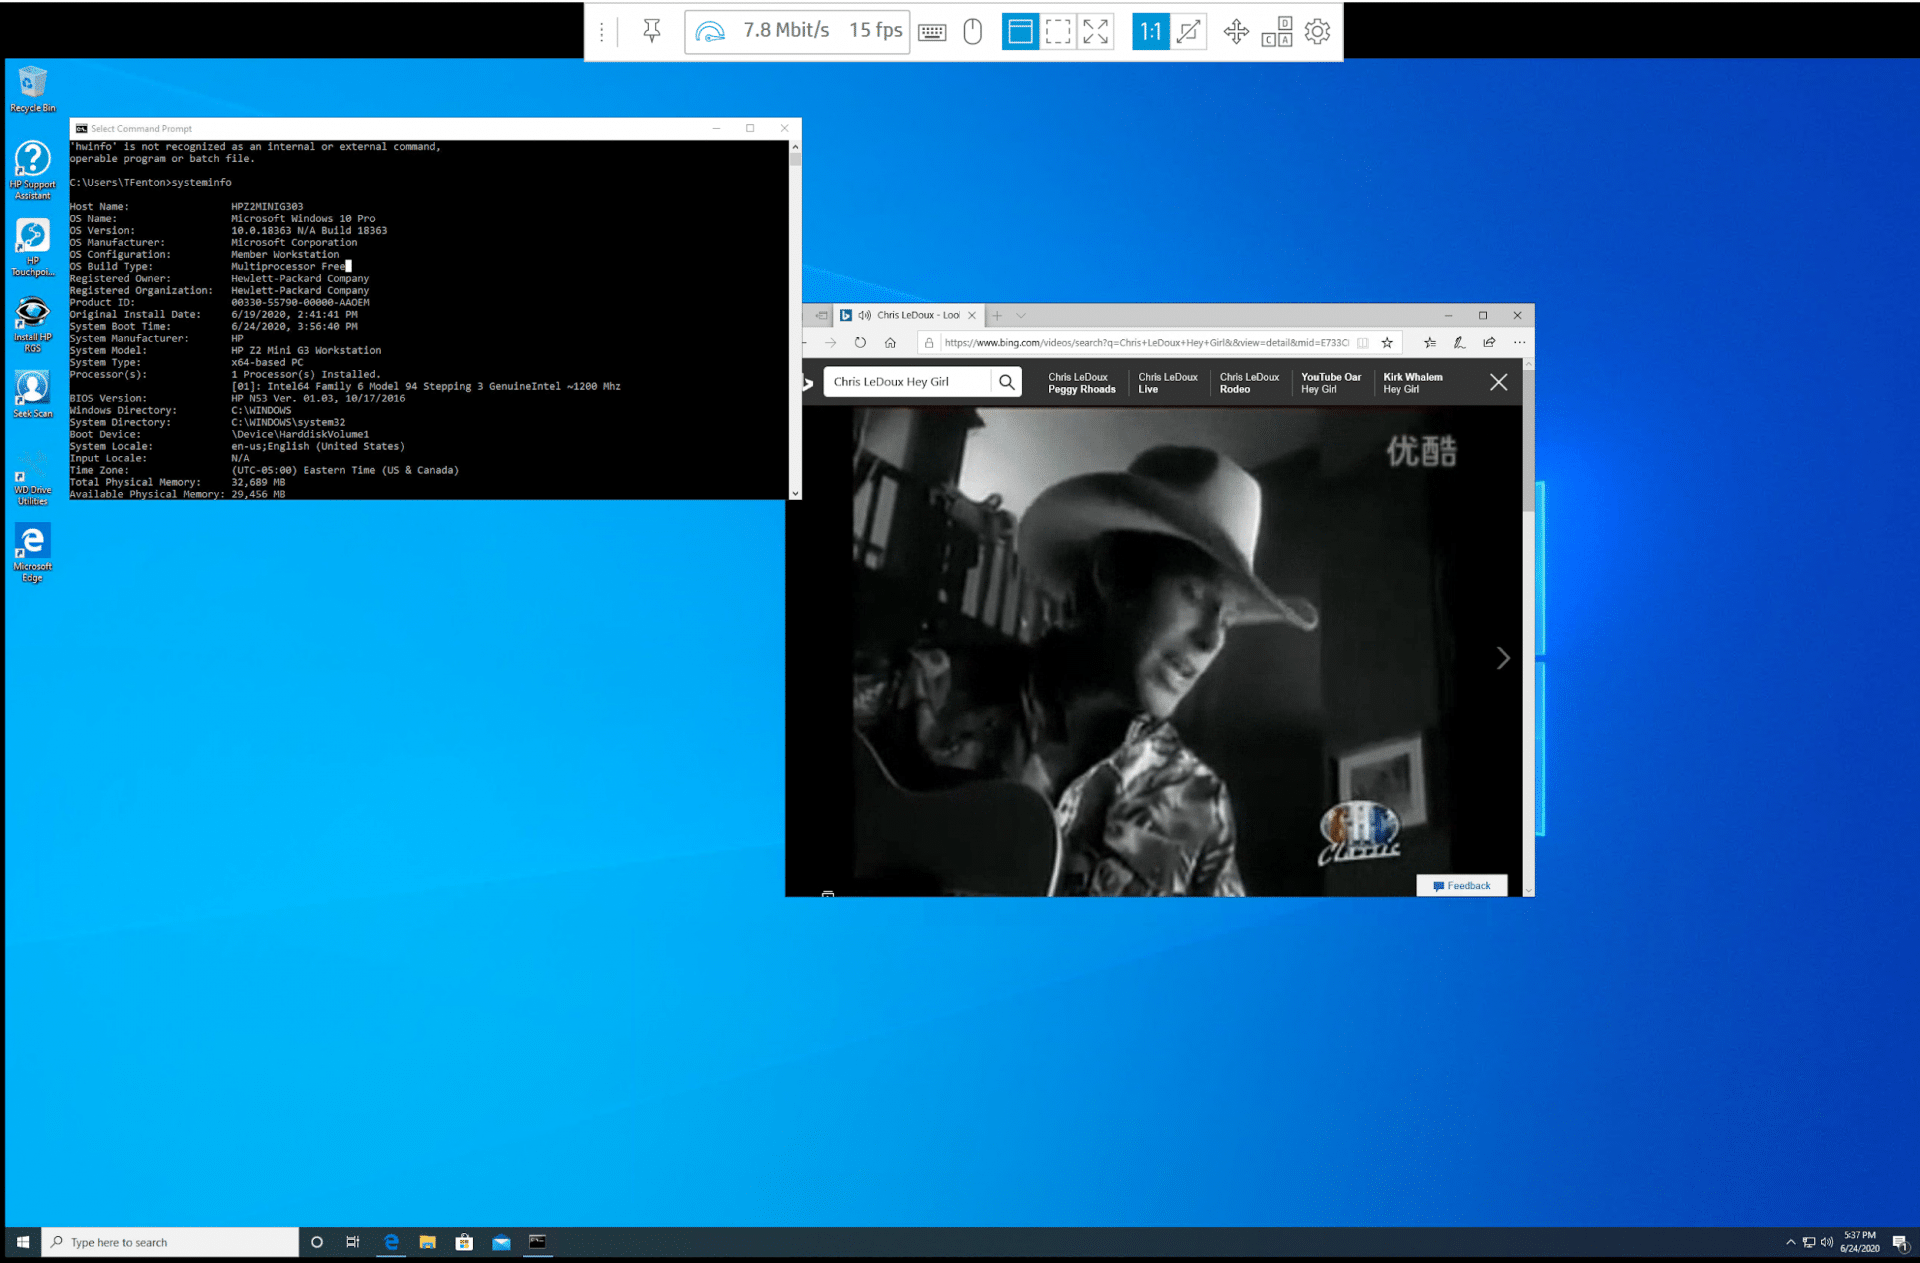
After the system rebooted, on the Receiver side system we selected HP ZCentral Remote Boost Receiver from the Windows start prompt. This brought up a dialog that prompted us for the IP address or the hostname of the target system we wished to remote into. After the initial connection was established, we were prompted for the username and password of the system we were trying to connect to.
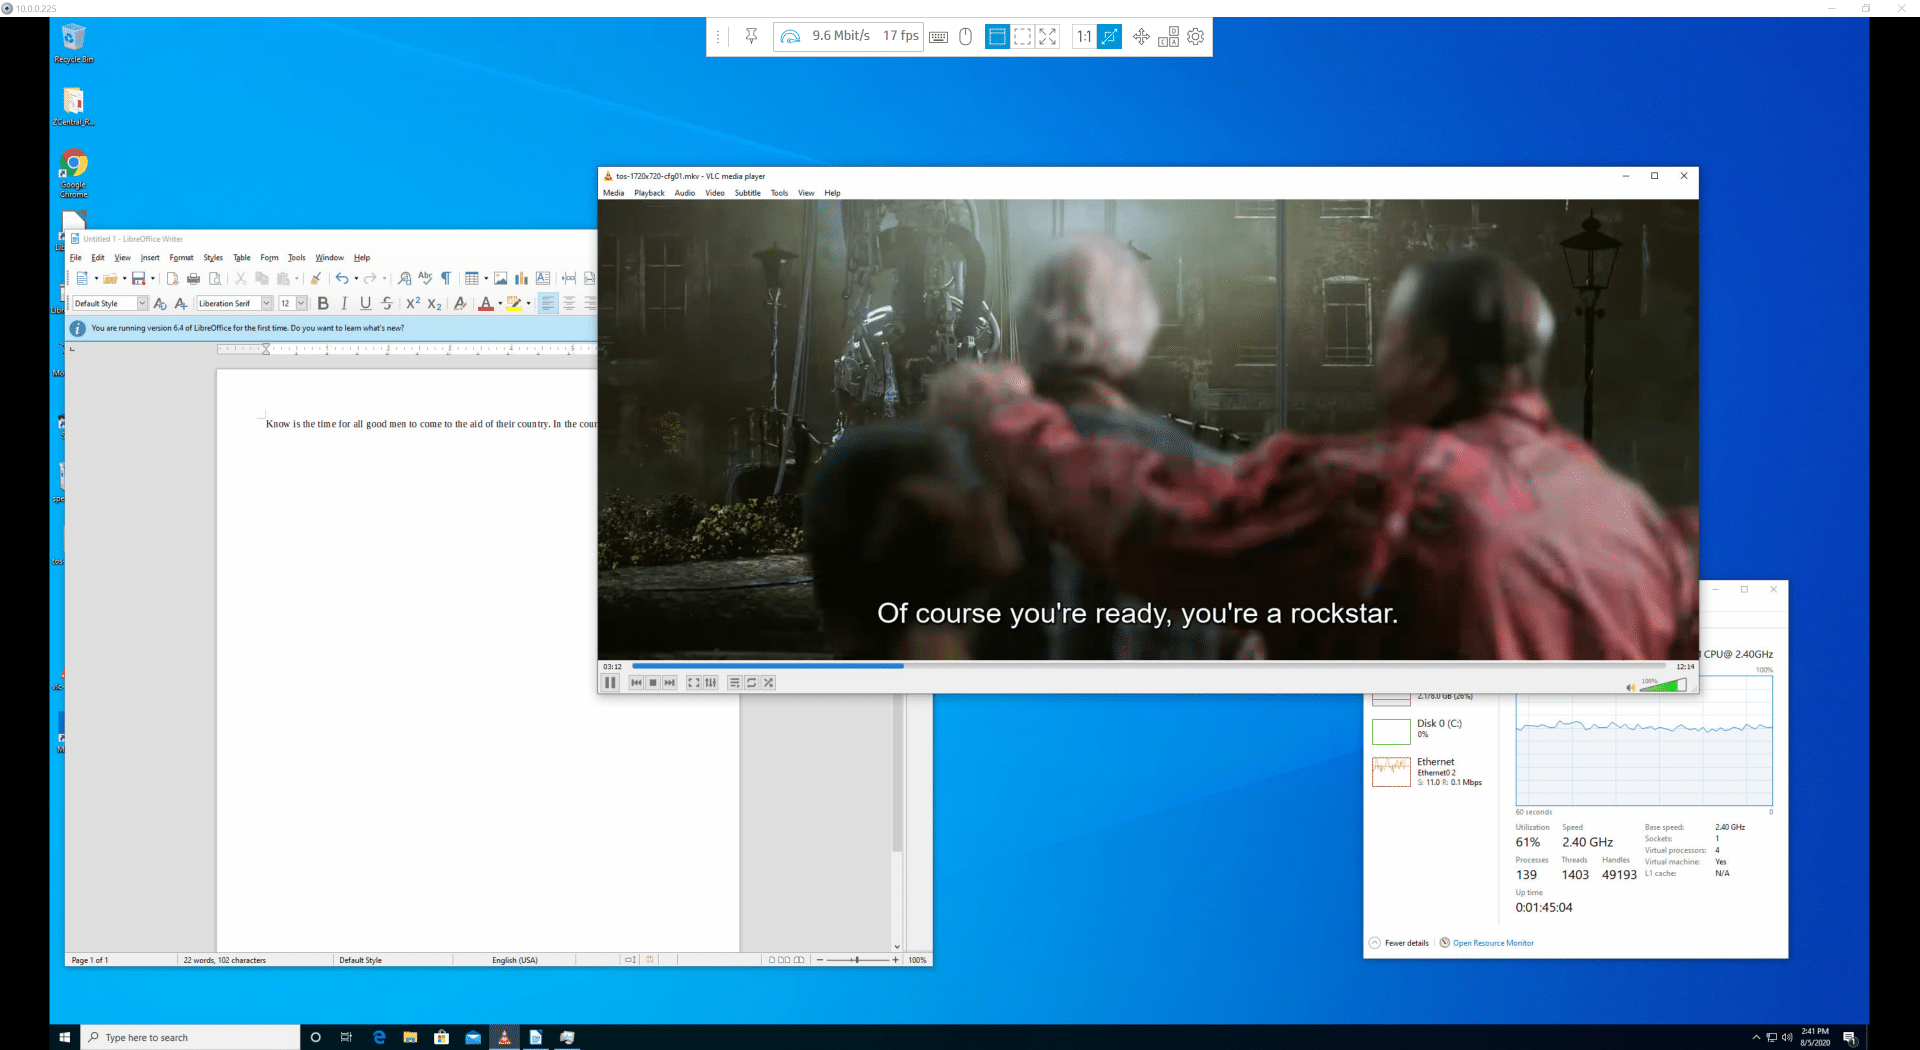
We connected to the system at the resolution that the Sender system was set to (2844 x 1644 @ 64 Hz) The Remote Boost toolbar showed that when we were actively using the system it was using 16Mbps at 60 fps and when not in use was using only 1kbit/s. The toolbar displayed other information that would be useful for troubleshooting experience issues with bandwidth, latency, and real-time quality changes.

We then brought up and worked with Office documents while playing a 1720×720 @ 24 FPS video in the background. While the video was playing, we were able to work with our documents without any issues. The audio was clear, and the video played smoothly. The bandwidth that was being consumed varied between 8 and 14 Mbit/s while the video was playing.
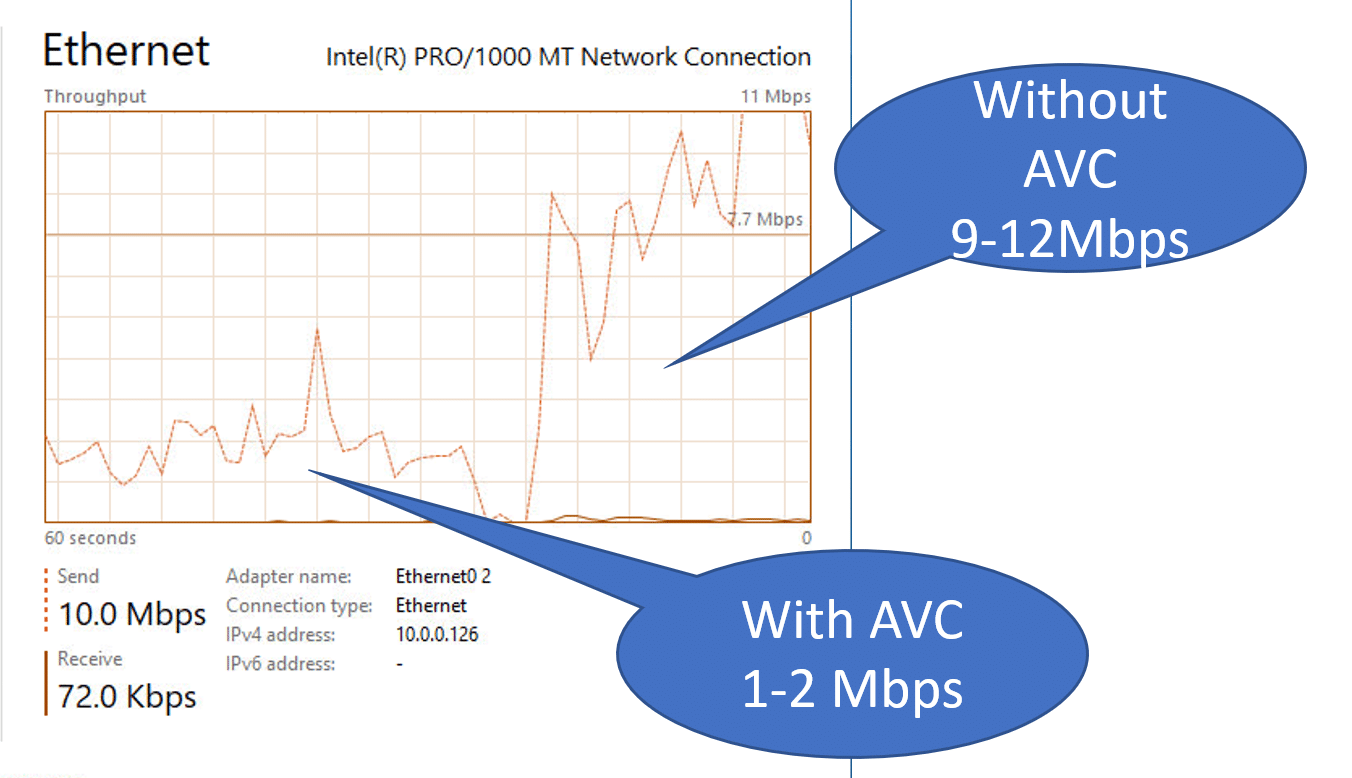
We then ended the connection and enabled AVC. When running in the AVC mode, the pixel compression ratio is switched from about 25:1 (HP3, default CODAC) to 225:1 for information (pixel changes, before encryption) sent from the Sender to Receiver.
The same instance showed that the system was now using 1-2Mbps, but we didn’t notice any change in video or audio quality.
To remove the constraints on the performance of Remote Boost from the machine that the Sender was running on, we installed Sender on an Intel NUC 9 Pro workstation. The Intel NUC 9 Pro that we used was a NUC9VXQNX, which came preconfigured with an eight-core Xeon processor, a discrete NVIDIA Quadro GPU, 32 GB of RAM, 2TB of NVMe storage, and a license to run Windows 10 Home Pro. It has multiple video outputs, multiple USB connectors, two PCIe slots, two 1Gbps ethernet ports, and 2.4Gbps Wi-Fi. We felt that this would be a system that would be a good example of a non-HP system that some may use with Remote Boost.
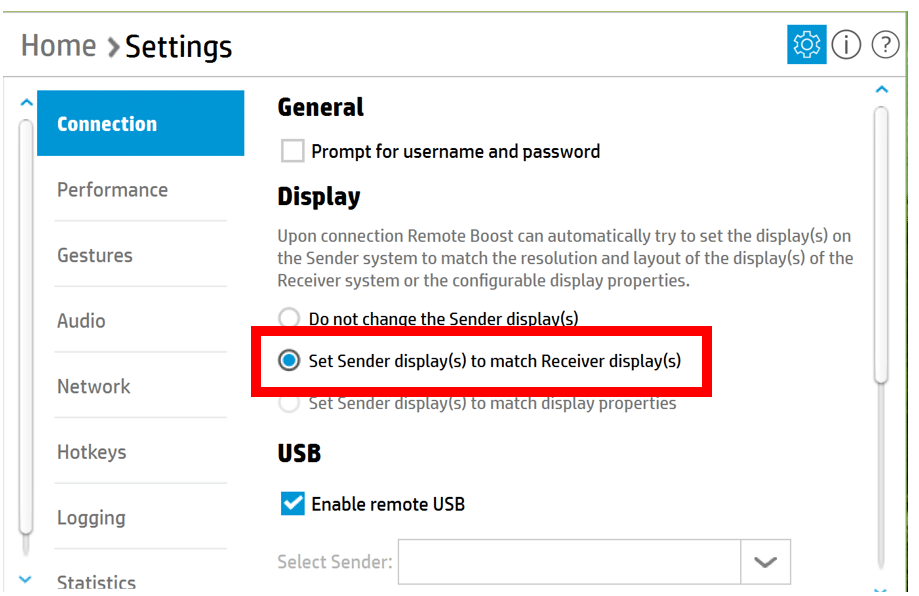
When installing Sender on the NUC 9 Pro we choose to do a custom install and enabled remote USB, clipboard, and single sign-on. We also choose to set Remote Boost to have the Sender (NUC Workstation) match the displays on our local Receiver system. From an experience point of view, this was just like connecting the two displays on our Receiver system directly to the NUC, running the Remote Boost Sender – the NUC automatically changed the display settings to match.
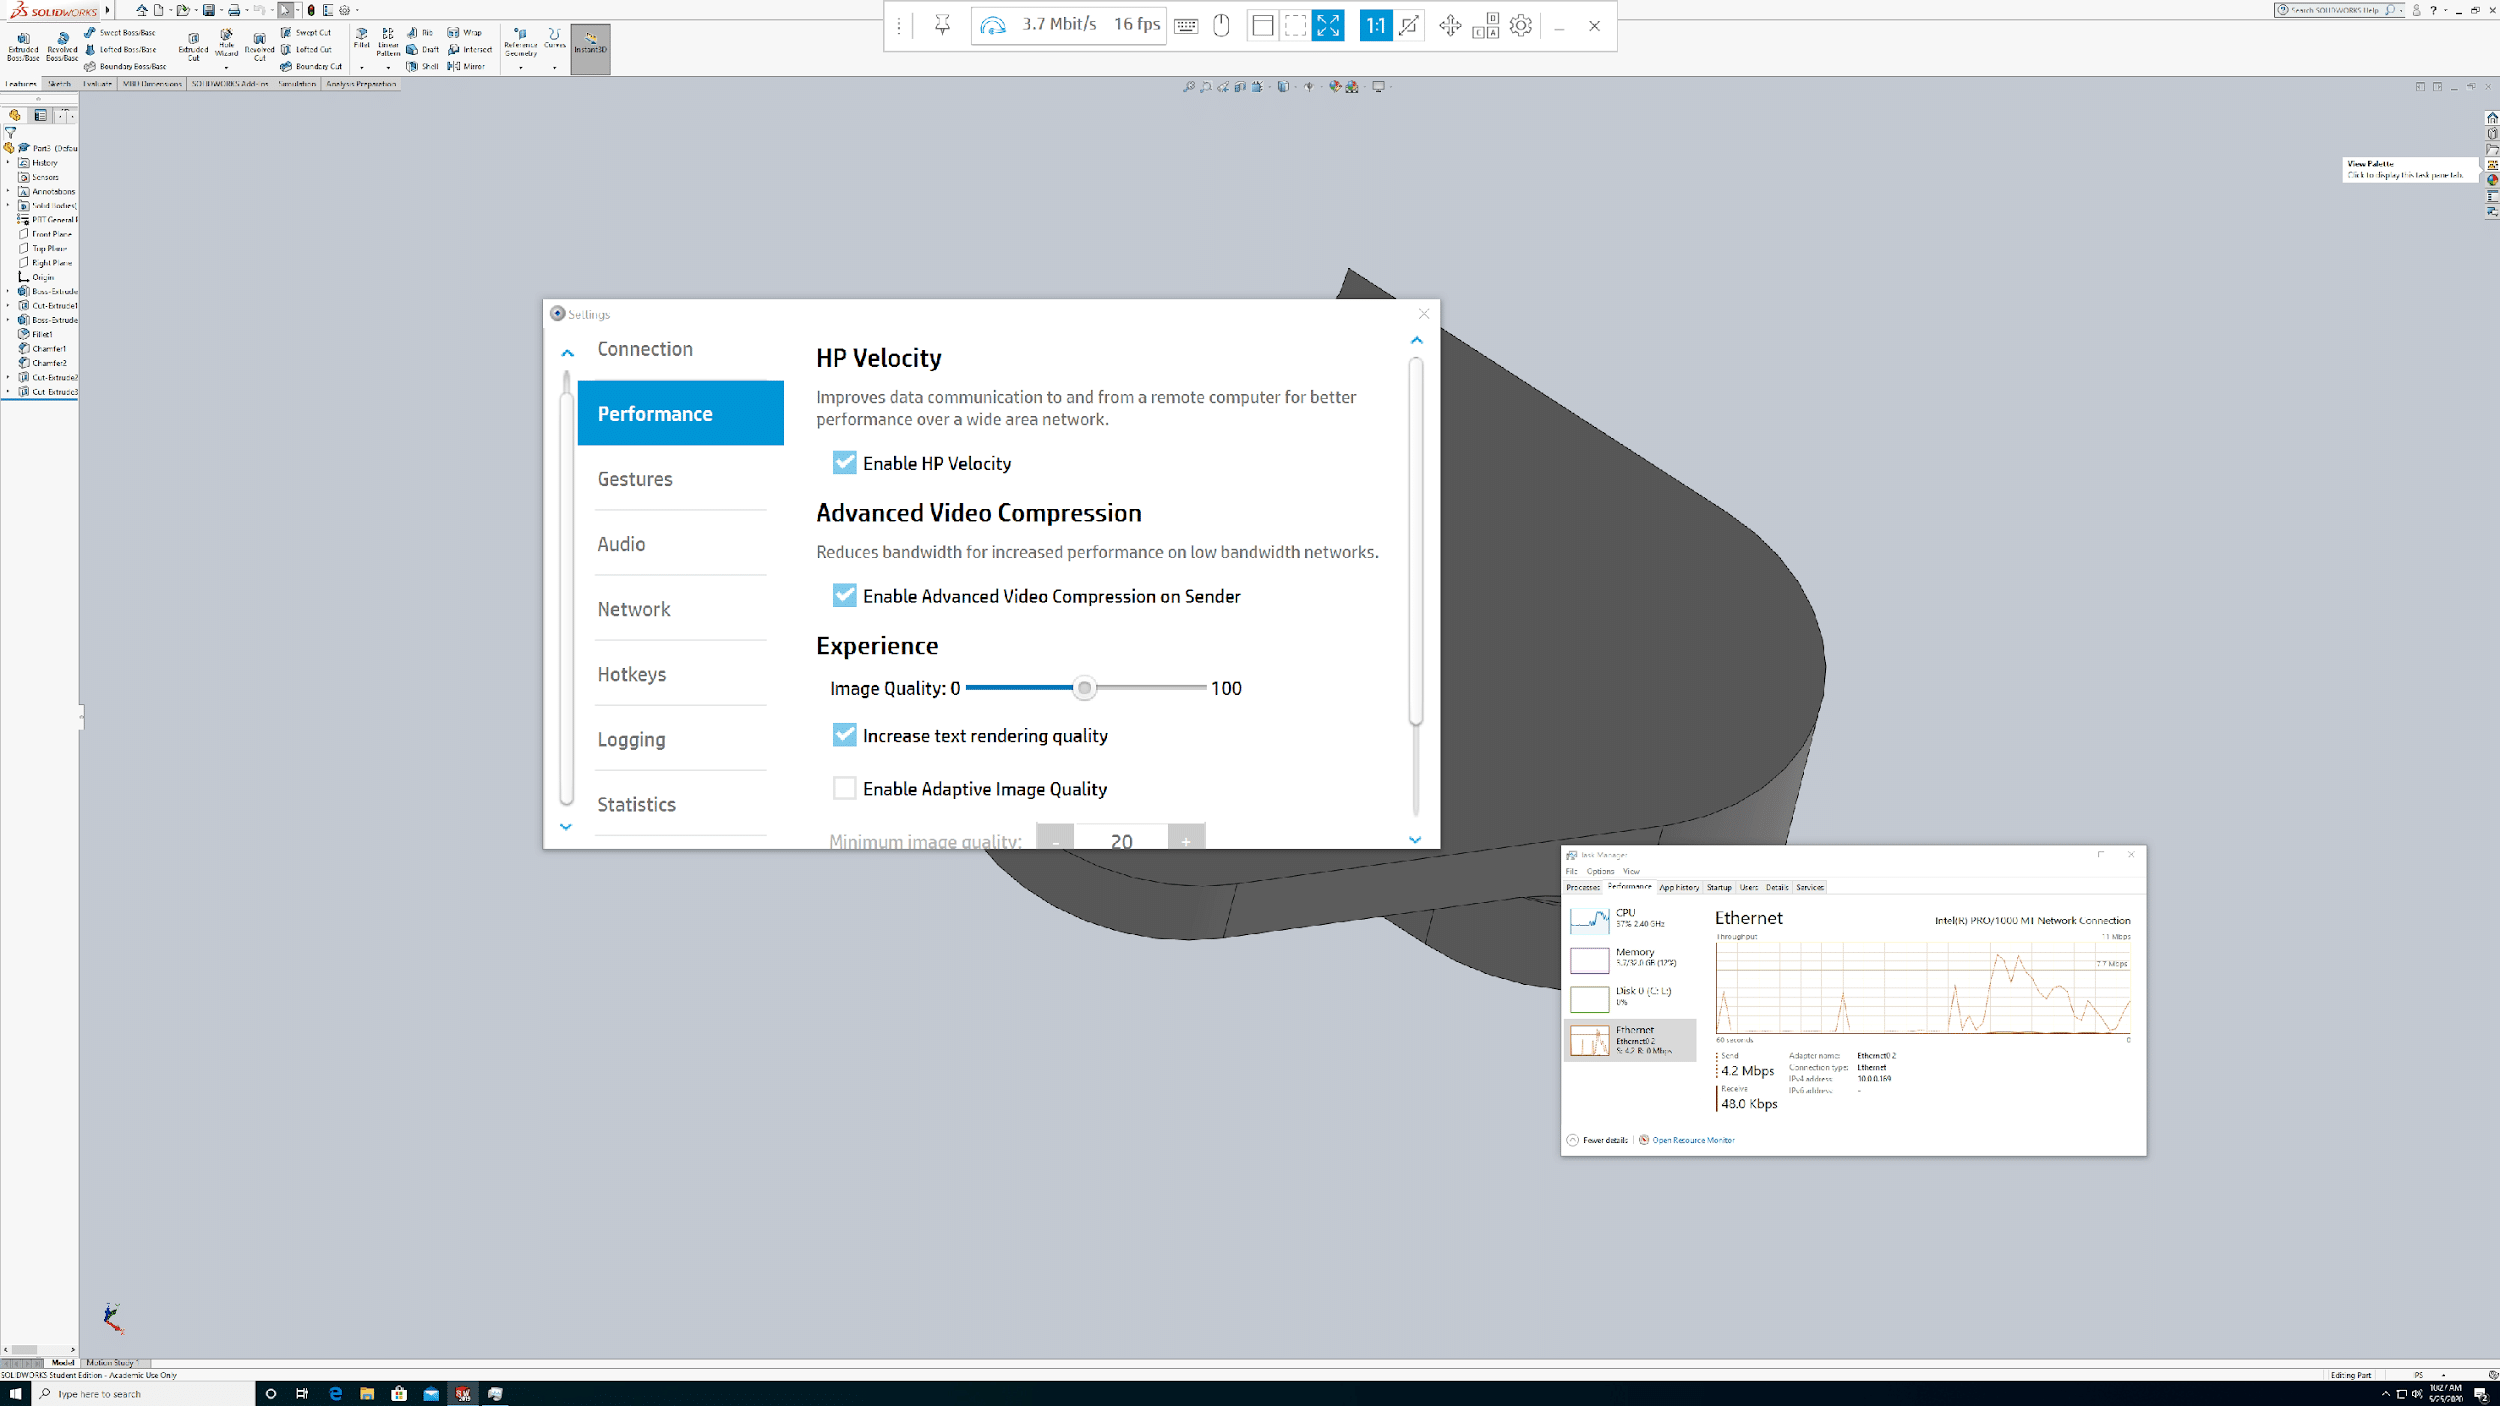
When connected to the remote system, it correctly identified and used our two 4K display monitor setup. We displayed the video on one display and ran SolidWorks (a CAD program) on the other. The experience we had was indistinguishable from what we had from working directly on the system. During our testing with the default HP3 encoding mode, we noticed that it was consuming ~100Mbps of bandwidth due to the larger overall screen resolution and pixels being sent.
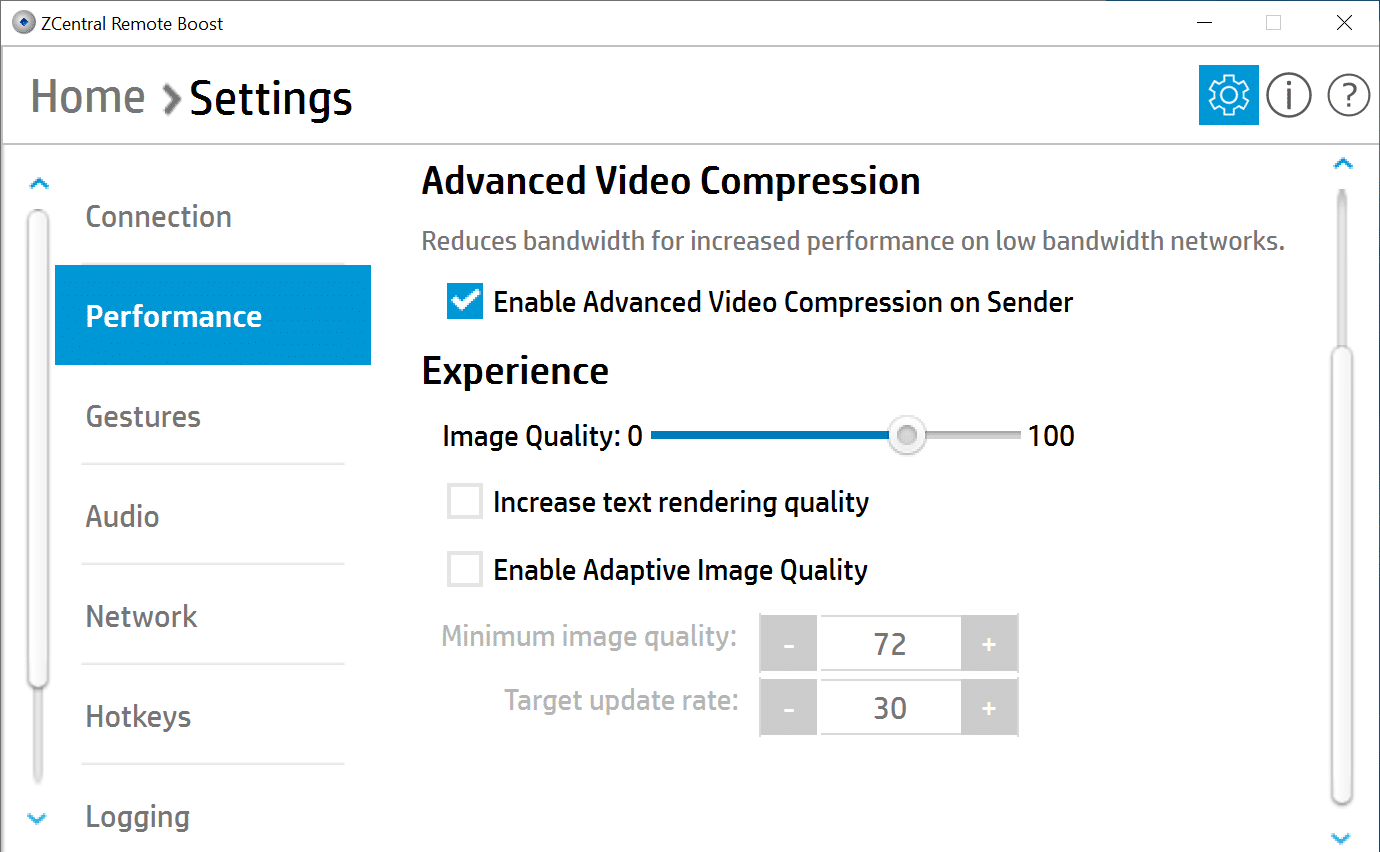
We then brought up its settings and increased the Image Quality from 60% to 100%.
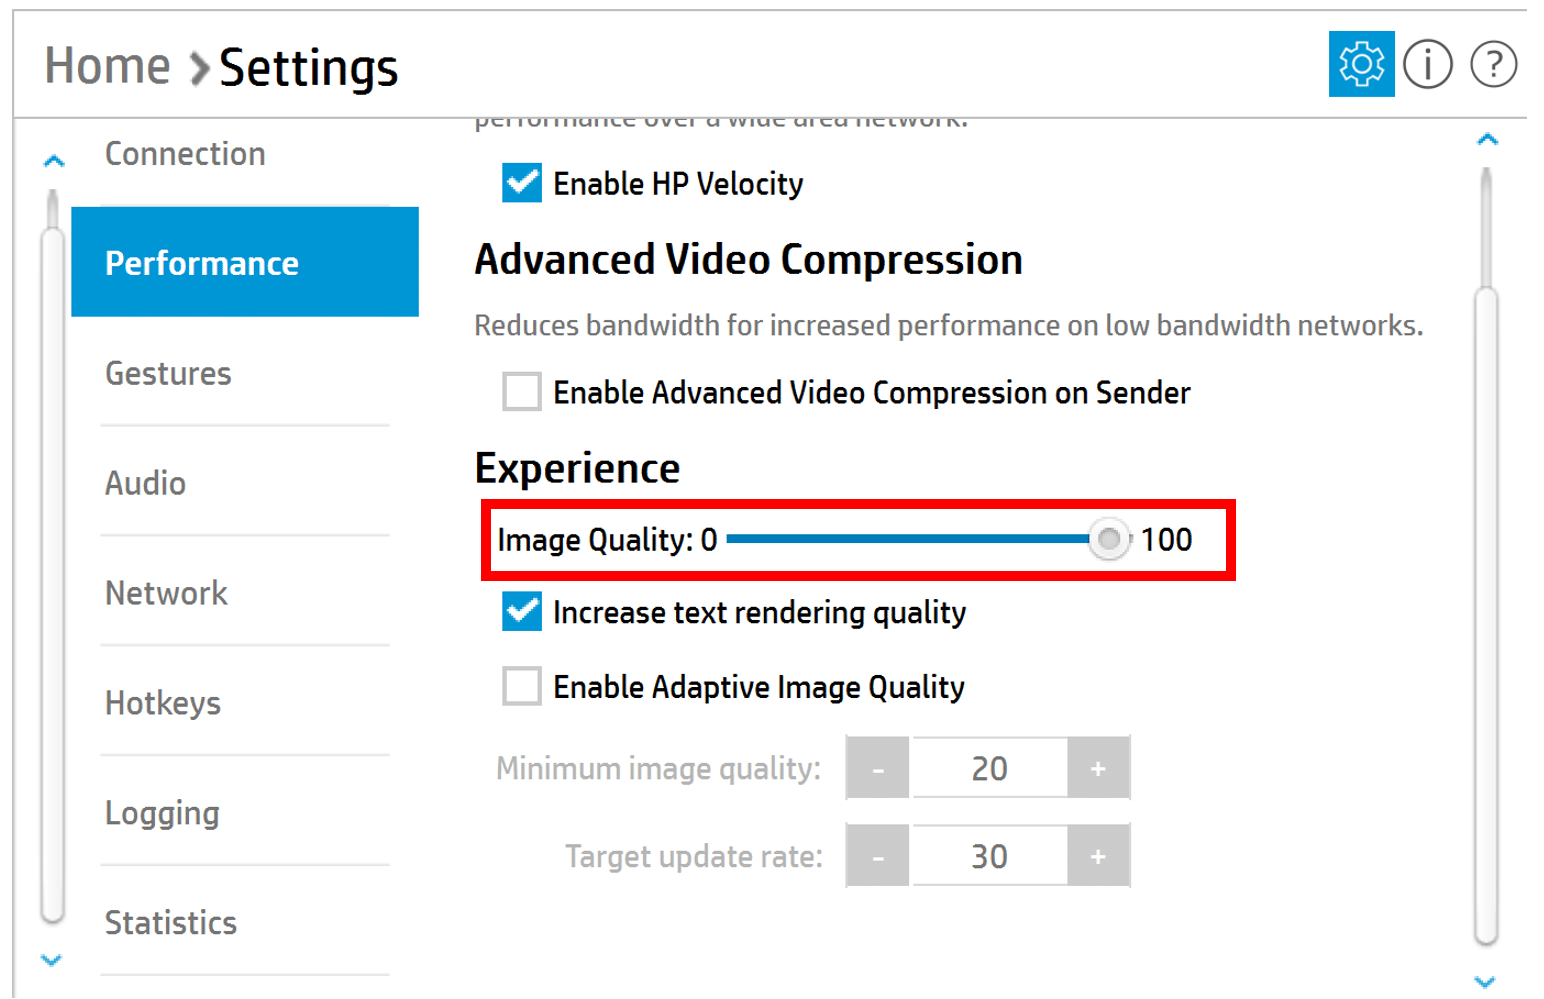
We now consumed over 200Mbps of bandwidth but did not notice any change to the quality of the images that we were viewing.
We then changed the Remote Boost Receiver setting to take advantage of the NUC Nvidia card for hardware acceleration for the AVC feature.

We brought up Solidworks and manipulate a 3D model with Remote Zoom set to 60% Image Quality and did not notice any flicker or lag. We set Remote Zoom Image quality to 100% Image Quality and again did not notice any flicker of lag when we manipulated the model.
We then tested the different ways ZCentral Remote Boost can be optimized for performance on bandwidth-constrained networks. The Remote Boost Receiver has a drop-down toolbar that can be found by hovering the mouse at the top middle of the Receiver window and then clicking on the pin icon to prevent it disappearing. The toolbar is a great quick reference to the bandwidth being used and to access the optimization settings that can be changed in-session.

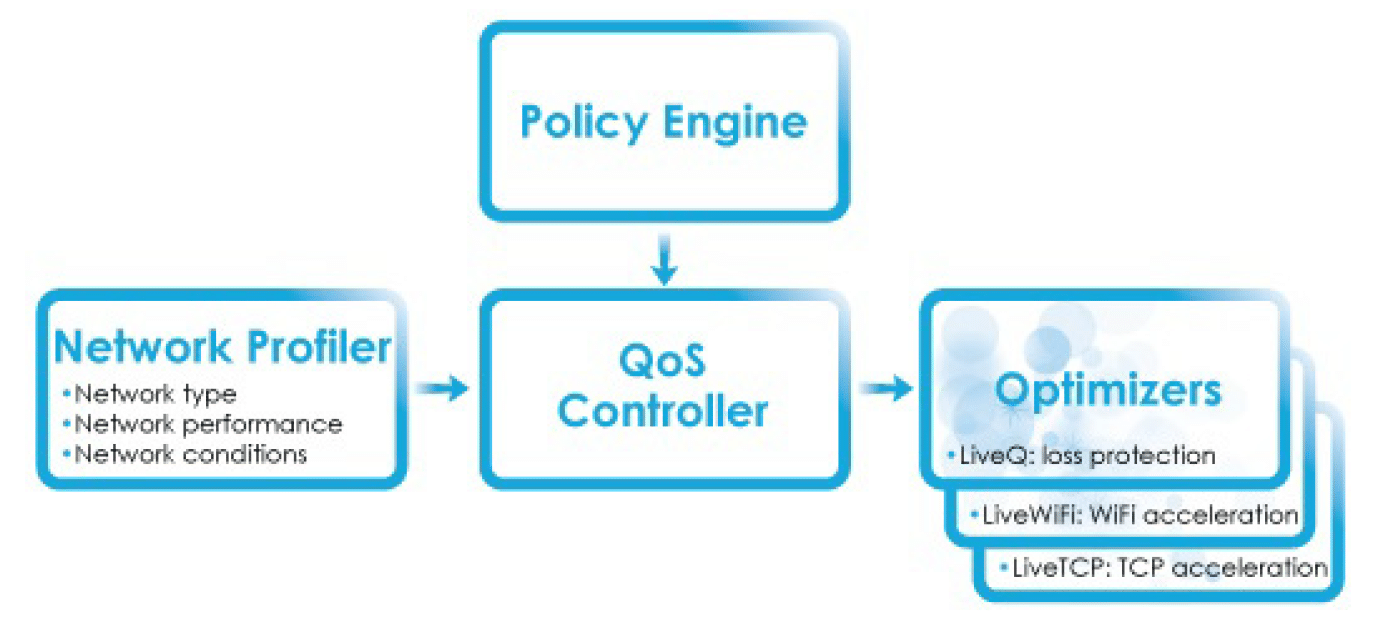
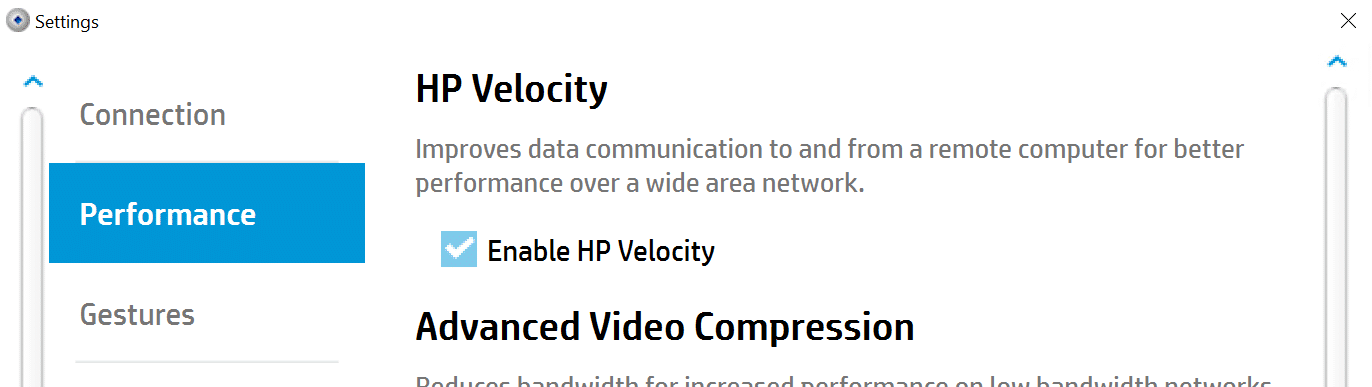
On the Receiver, we brought up the Settings dialog and selected the Performance tab. We noticed that HP Velocity was enabled by default and the Image Quality slider was set to about 80. HP Velocity provides increased network performance by optimizing communications between the Sender and Receiver. The user can choose to put the encoding burden on the CPU or GPU with AVC mode. HP Velocity uses a sophisticated policy mechanism and will continually monitor and adjust itself if needed to ensure a quality experience for the end-user.
HP mentions that AVC is not ideal for content with fine lines such as 3D movement of wireframe images, but we did not notice any degradation in image quality when we used it.
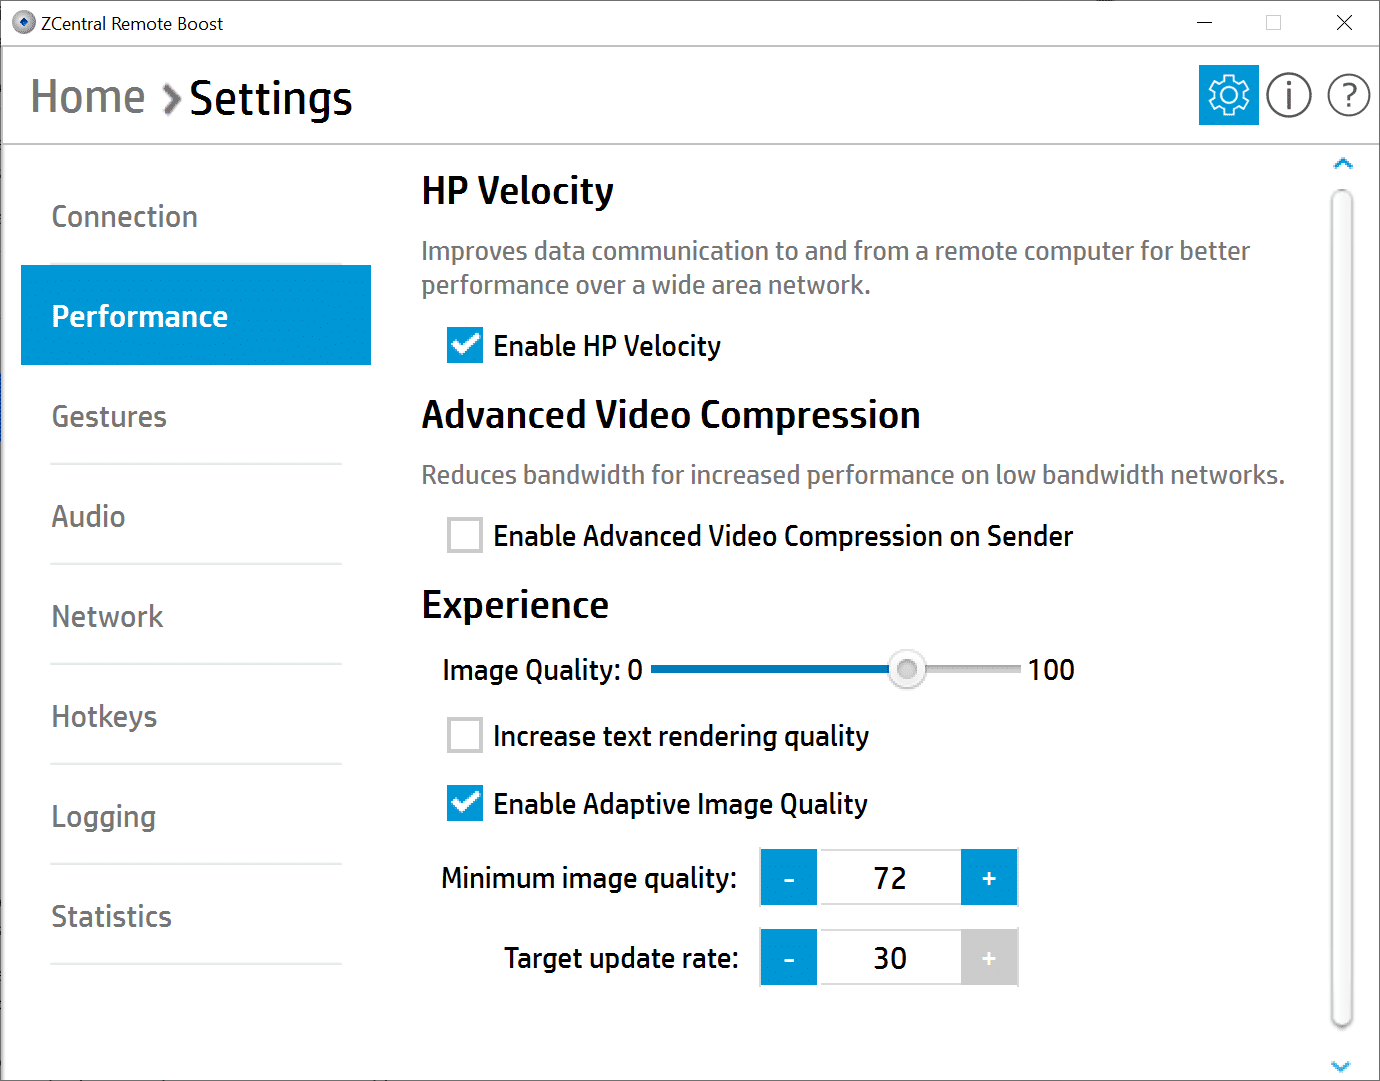
The Receiver can set the minimum image quality and update rate. When Enable Adaptive Image Quality is selected, the sender will begin to degrade the image quality down to the Minimum image quality setting (from 0–100) anytime the updates-per-second value falls below the Target update rate (from 0–30 updates per second). These options are disabled when Advanced Video Compression is enabled.
These settings are useful in situations where image quality is of critical importance, say in a medical environment, or where a short-term loss in image quality due to network traffic is preferred over a frame rate drop.
Using Remote Boost with a Mobile VDI Device
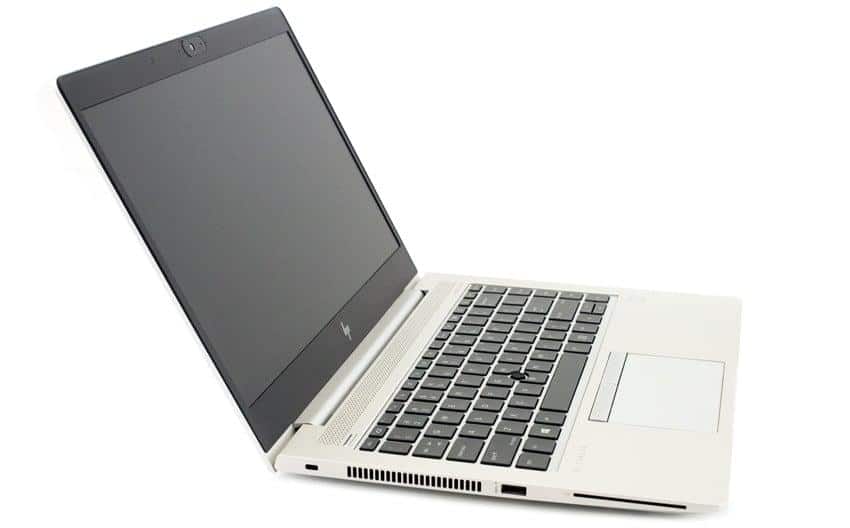
One of the advantages of a VDI environment is being able to access a desktop from anywhere with network connectivity. To test this, we used an HP mt45 VDI client. During this testing, we opted to use the device’s 1Gbps Wi-Fi for network connectivity.
The mt45 is a VDI client in a laptop format that has a 14” screen, multiple ports, and is powered by an AMD Ryzen 3 PRO 3300U CPU with onboard Radeon Vega 6 Graphics. The CPU is a 4 core, 4 thread, 6 GPU core chip that has a base frequency of 2.1GHz and a boost frequency of 3.5 GHz. The monitor is a 1920 x1080 @ 60MHz. It can run HP ThinPro or Windows 10 IoT enterprise operating system. Our device had Windows installed on it. The device supports all major VDI environments including HP Remote Boost.
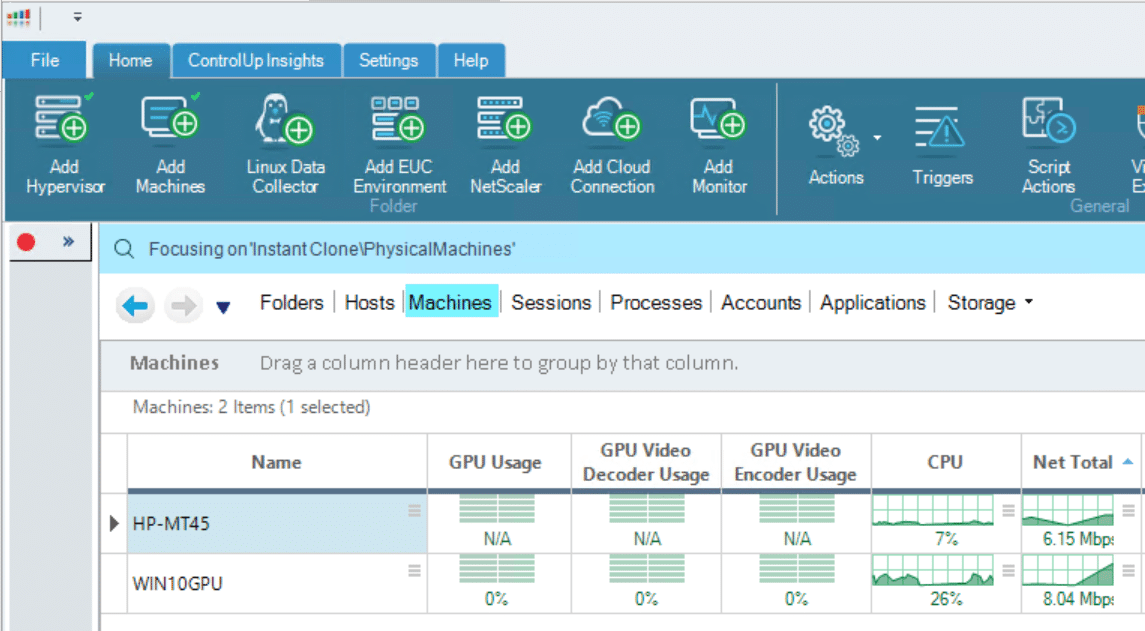
We used the Receiver to connect to our GPU enabled VM. It connected with the m45’s monitor resolution (1920×1080). We used the ControlUp Console to monitor both the Sender and Receiver machines. We worked with our SolidWorks model without any issues and noticed that the highest bandwidth we saw was 8MBps.
Collaboration
Collaboration allows many Receivers to join the same Sender session, but Collaboration requires each joiner to have unique login credentials (domain or local account) on the Sender. The update rate of all collaborators is limited by the lowest update rate of any one collaborator. Collaborators with low update rates can use the Performance panel in the Receiver settings to improve their update rate, which will improve the experience for all collaborators. To collaborate in a session that has AVC or Velocity enabled, each collaborator must have the same settings on their Receiver, or the connection will be refused.
We tested Collaboration from the mt45. We clicked the Sender icon in the system tray and enabled Collaboration mode. We connected to the running session by bringing up Receiver from our Dell laptop and connecting to the GPU machine. On the mt45, we were asked if we wanted to allow the user to join our session and if we wanted to allow the user mouse and keyboard access.
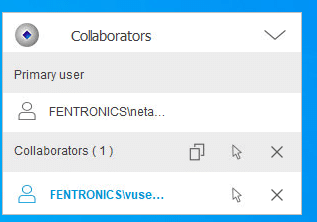
When we joined the existing session, we were able to manipulate the SolidWorks model with the same user experience that we had on the mt45 system. We were able to disconnect and rejoin the session from the laptop. When we disconnected the session from the mt45, the session on the laptop ended as well as the mt45 was the primary user.
One of the defining features of ZCentral Remote Boost 2020 is its scaling feature that allows Receivers with different resolutions to be used during collaboration. To accomplish this, it uses the GPU HW and GPU Shader programs on the receiver system to up or downscale the pixels as needed. Scaler mode is enabled by clicking the scaler icon on the toolbar.

Using HP ZCentral Remote Boost With VPN
As many users will need to go through a VPN to connect to a physical workstation, we set up three different HP workstations in our Midwest testing lab and connected to it over a VPN. Where other VDI solutions have their own VPN solutions, Remote Boost allows you to use the VPN of your own choosing.
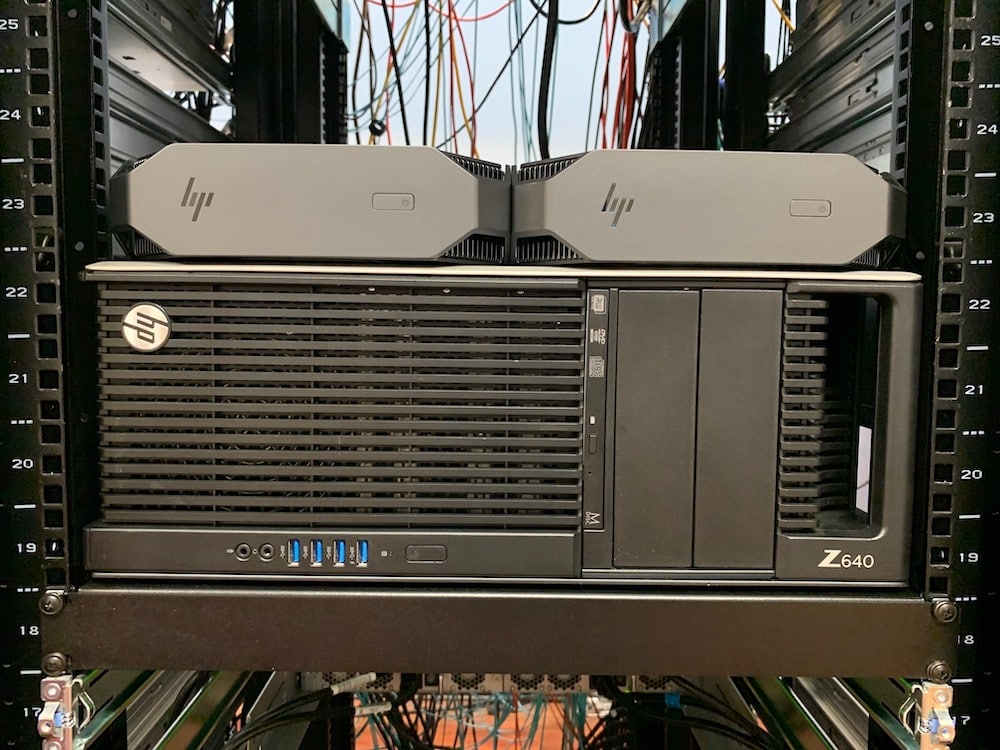
The three workstations that we connected to were an HP Z640 Workstation, HP Z2 Mini G4, and an HP Z2 Mini G3 Workstation. All three systems ran Windows 10 Pro. When we installed ZCentral Remote Boost Sender on them, we didn’t need to license them as the software identified them as HP workstations.
After instantiating a VPN connection, we used Remote Boost Receiver to connect to each of them. The following information is from our connection to the Z640 Workstation, but we had similar experiences with the Z2 Mini G4 and G3 workstations.
From the virtual desktop, we used Chrome to browse the Internet and LibreOffice to edit documents with virtually the same experience as using a local desktop.
We were able to display streaming videos and work with office applications without any issues. When we were streaming videos, the connection took 7.8 Mbps when we had HP Velocity enabled and 11Mbps when we had it disabled. We couldn’t detect any difference in the quality of the videos when we had HP Velocity enabled and disabled.

After disconnecting from the virtual desktop, we pinged the IP address of the server and found that the round-trip time (RTT) was 85ms. Given the fact that the virtual desktop was in a data center located in the Midwest, and the client was running in the Pacific Northwest, we were pleasantly surprised to find that a virtual desktop performed just as well as a virtual desktop that was hosted on-premise.
HP ZCentral Connect – Connection Manager for ZCentral Remote Boost
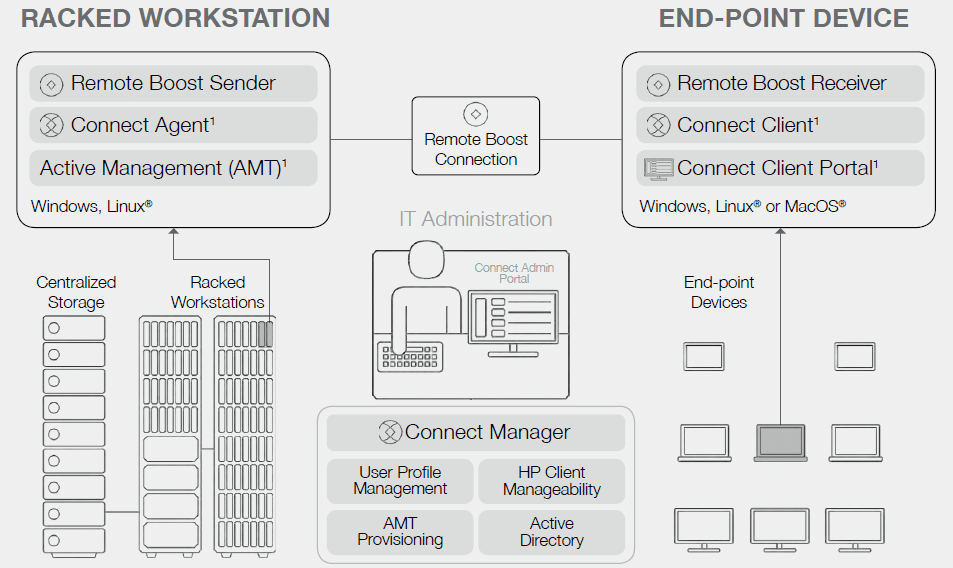
ZCentral Connect is a companion product to ZCentral Remote Boost to provide connection management services by allowing systems running the Sender to be assigned to a user on a system with a Receiver. By doing this, a user can access a workstation from a pool of workstations. Connect also performs other management functions such as powering on and off physical machines to conserve resources and to provide out of band power management.
ZCentral Connect is extremely lightweight, as it only requires a Windows 10 or Windows Server 2016/ 2019 system with 4-Cores, 4GB of RAM, and at least 50GB free space. Due to its single focus, we found Connect simple and intuitive to use. We did not install Connect in our lab but did watch HP install it in theirs and we feel confident that it could easily be set up and running in less than an hour.
Other VDI solutions recommend attending a week-long training class before administering their VDI environments. But due to its simplicity and intuitive interface, a quick read of the manual should be all you need to do before administering it.
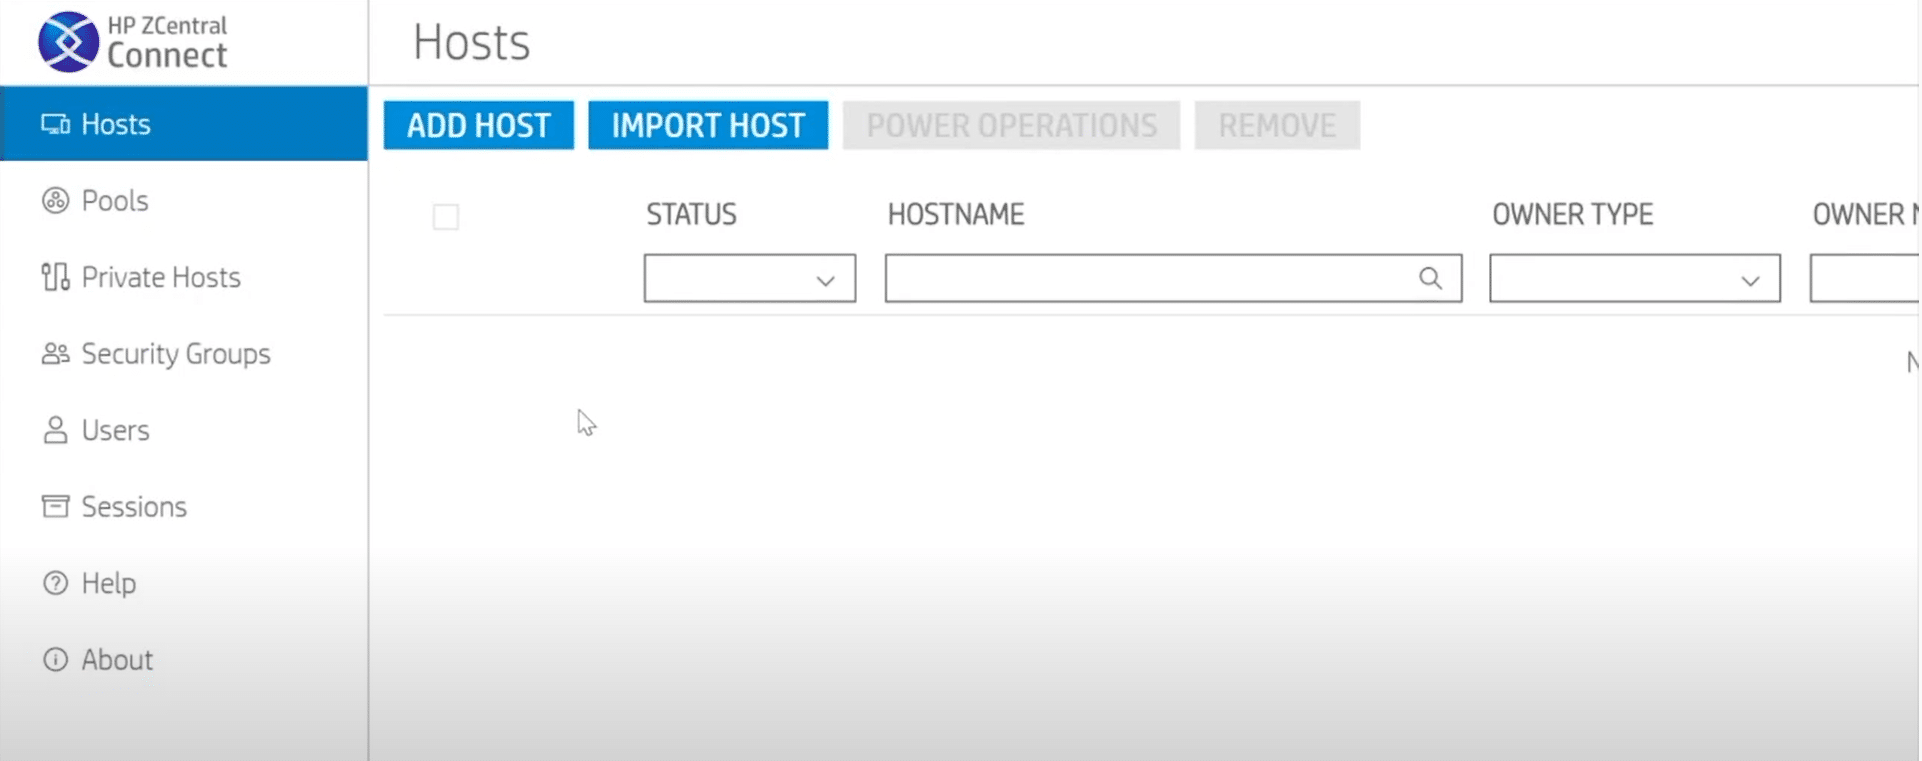
After Connect is installed, the administrator uses a web-based interface to administer it. The initial step is to import host machines and users from the existing Microsoft Active Directory infrastructure. The hosts (Sender systems) can be assigned to a single individual user or be available as part of a pool of users. From the GUI, you can specify if a host is available, disabled, checked out, or in use. You can also specify if you want to use Intel Active Management Technology (AMT) for power management with a supported host (Intel vPRO required on host and AMT must be initially provisioned)
Once a host has been added to Connect, you need to log on to the host and install the Connect agent on it. When installing the Connect agent you will need to specify what Connect server you will be using, and you will need to supply it with an authorization code that is generated from the Connect Admin console.
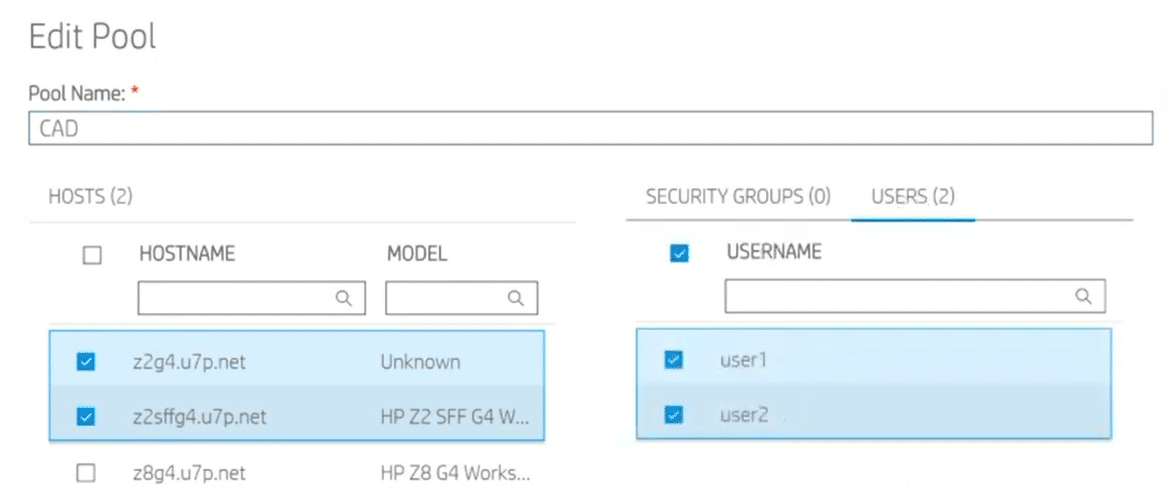
Once a host has had the Connect agent installed, the Connect GUI is used to associate users or groups of users to individual hosts or pools of hosts. The Edit Pool wizard does a good job of showing the users and hosts in a pool.
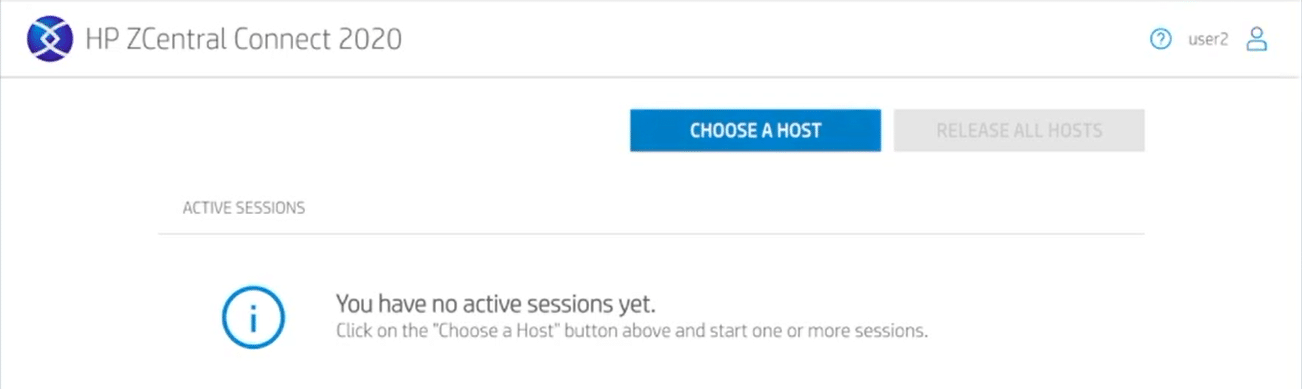
We connected to the Connect Manager via a web browser and then clicked Choose a Host to connect to a host.
We then clicked Choose a Host for Me.
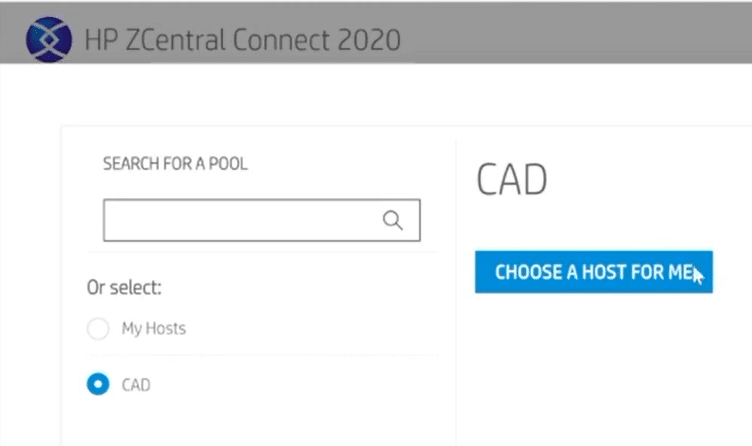
A host was then assigned to start an active session with us. As part of the active session, we were provided the system power state and last time system power was cycled information. We also could force a power Shutdown or Restart during the active session, just like pressing the power button on a system sitting next to use when a freeze or crash occurred.
We click the Connect to Host button and we were automatically connected to it with Remote Boost.

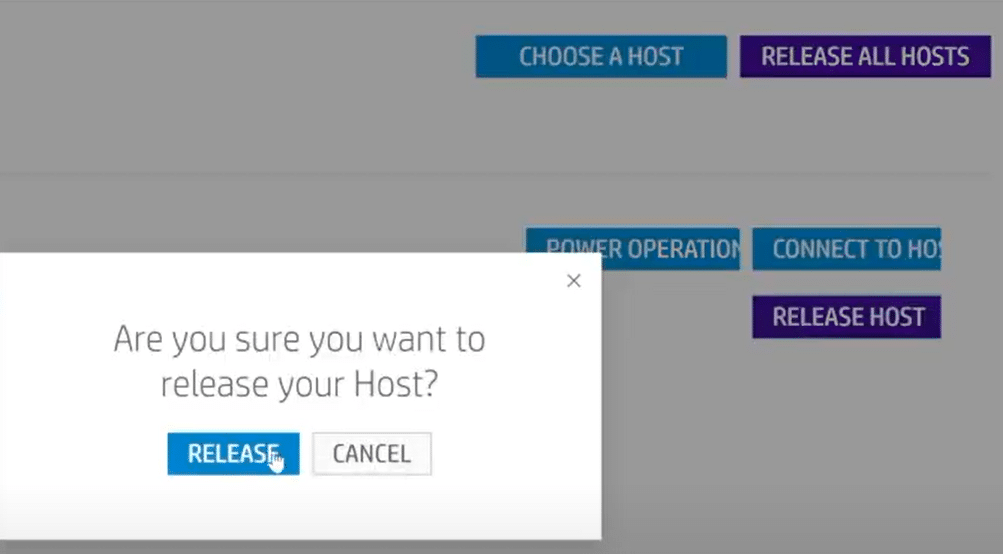
When we were done using the system we logged out and were disconnected from the host and then had the option to free the hosts up for other users.
Conclusion – Remoted and Ready
HP has been steadily developing their VDI story over the years and now with the addition of ZCentral Connect, they can offer a complete HP hardware and software VDI stack to its customers. With this VDI stack you can quickly set up a pool to share workstations among many users and those users can connect to them remotely securely as all transported data is encrypted. A user can connect to a single or multiple remote systems (Directory mode), HP’s solution even allows multiple users to simultaneously attach to a single system in order to collaborate on a project. The user can use native gestures (touch screens) on their endpoint to interact with their remote system.
We found our end-user experience when using Remote Boost exceptional. We also used Remote Boost with CAD work and Video and found the display sharp and crisp. We installed Sender on HP workstations as well as non-HP servers and VMs. We installed Sender on an HP Dragonfly laptop with dual 4K monitors, and on an HP t640 thin client. We used HP Remote Connect to the systems locally and used a VPN to connect to a system with more than 80ms latency. Through all this testing we didn’t notice any appreciable degradation of quality. HP Remote Connect just worked. We can see how using HP Remote Connect is a no-brainer for those with HP workstations in their datacenter. However, due to its low cost and low management overhead, HP Remote Connect should be considered for non-HP systems for those that need remote access to workstations.
ZCentral Remote Boost Sender license is free on Z Workstations and available for a 60-day trial on non-Z systems. Product information and software download can be found at https://www.hp.com/zcentralremoteboost
ZCentral Connect is also available for a 60-day trial in support of ZCentral Remote Boost connection management. Product information and software download is found at http://www.hp.com/zcentral
This report is sponsored by HP. All views and opinions expressed in this report are based on our unbiased view of the product(s) under consideration.


 Amazon