

We have been operating a community Proxmox server that our longtime Discord members can access and utilize for various testing and collaboration projects. This installation started on Proxmox VE 8.XX, which has provided a stable foundation for our virtualized environment over the past few months. With the release of Proxmox VE 9, bringing improved performance, updated kernel support, and new management features, we decided it was time to upgrade.

In this tutorial, we will walk through the in-place upgrade from Proxmox 8 to Proxmox 9, documenting each step along the way. Our goal was to ensure a smooth transition while preserving all existing virtual machines, containers, and configurations. This guide covers verifying system health, updating repositories, performing the upgrade, and confirming the installation afterward, all from the Proxmox Shell.
Proxmox provides official documentation on its Wiki that outlines the same process used in this demonstration. We recommend reviewing it before starting the upgrade to understand the official upgrade notes, prerequisites, and known issues.
Every setup may have a slightly different upgrade path depending on hardware, configuration, or installed software components. For example, Proxmox recommends upgrading all nodes to the latest version of Proxmox VE 8.4 before proceeding. If your PVE-manager version is not at least 8.4.1, confirm that your repositories are configured correctly under Node > Repositories in the web interface.
Whether you are running your own Proxmox lab or maintaining production servers, this walkthrough will help you upgrade confidently and take advantage of everything Proxmox VE 9 has to offer.
Before the Upgrade
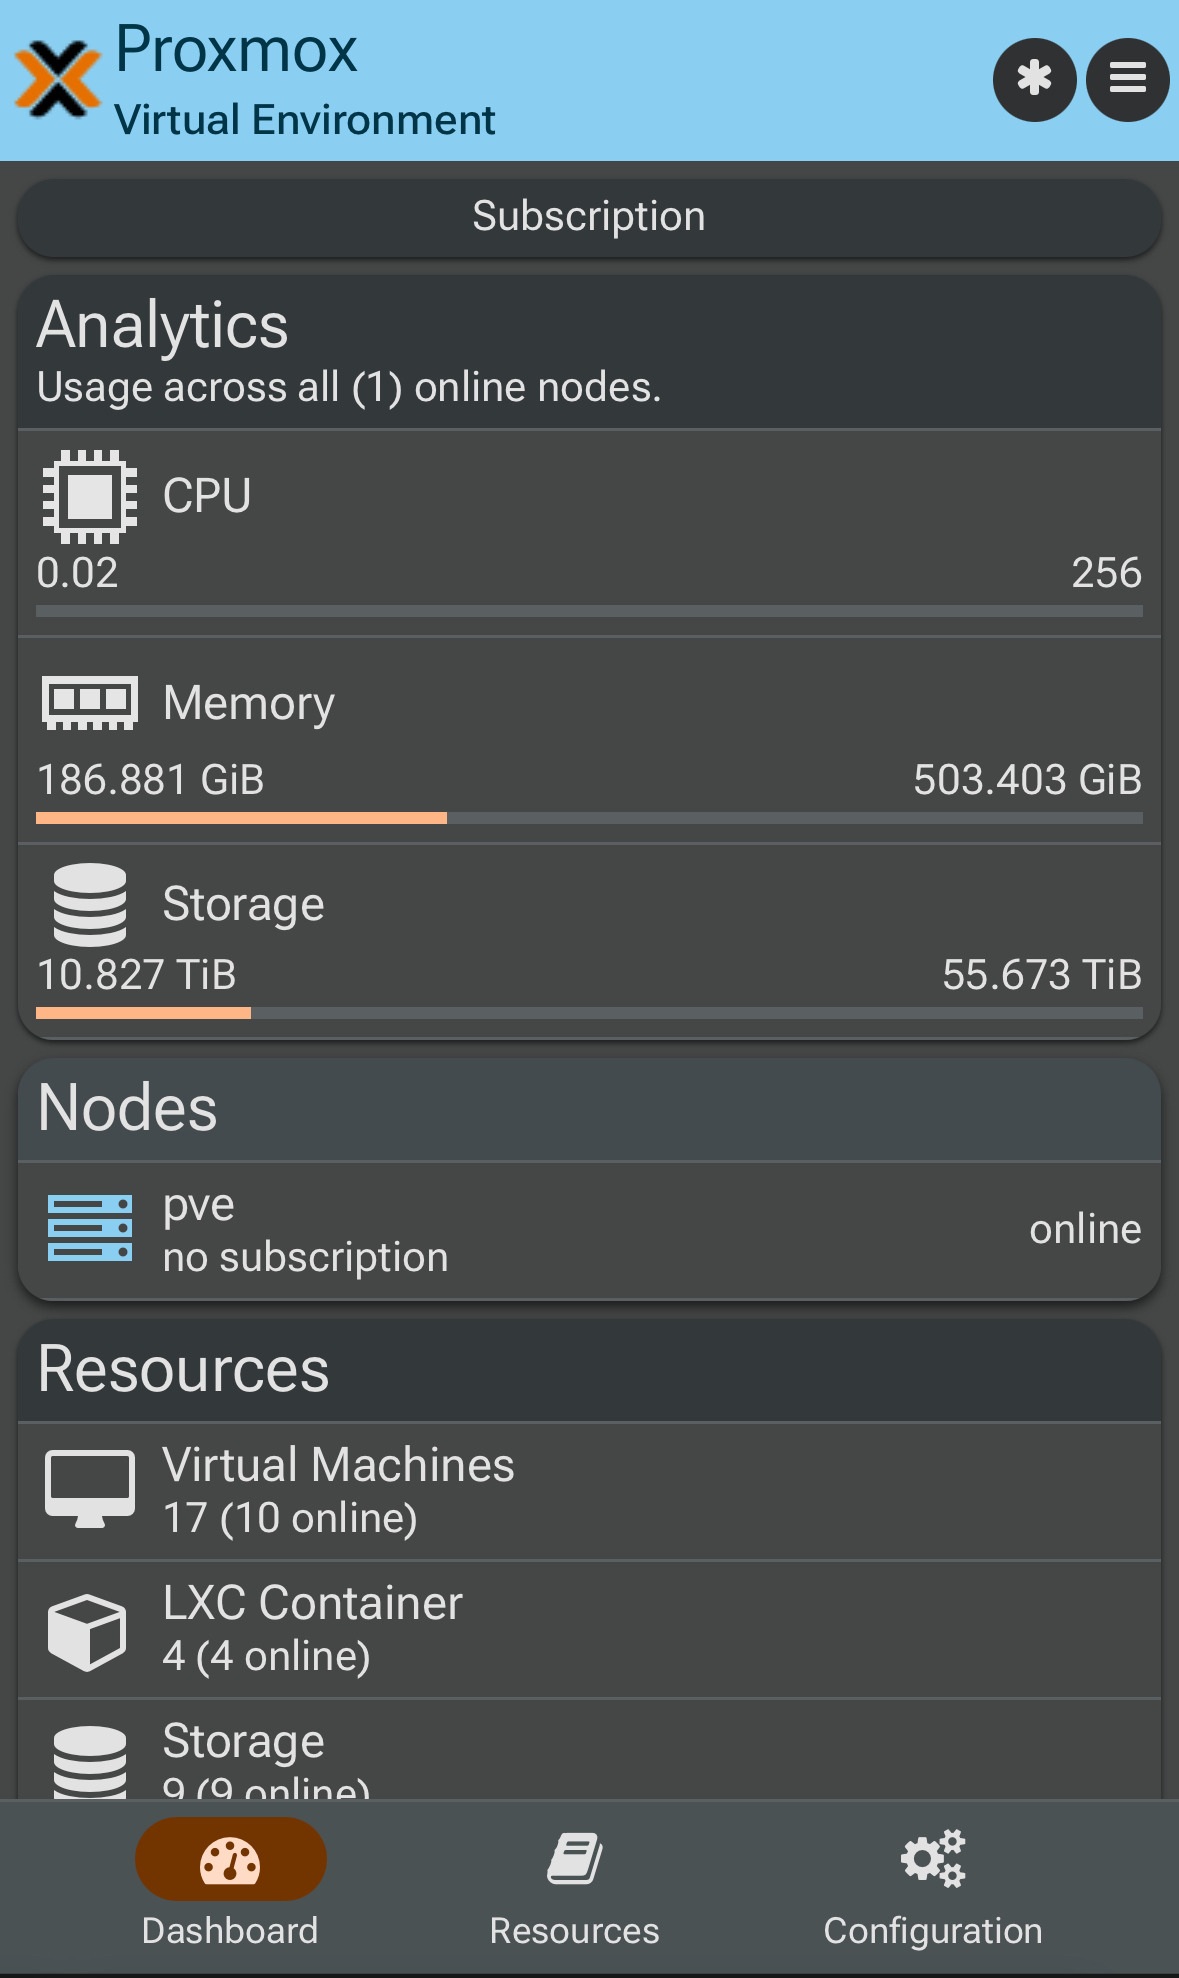
Before beginning the upgrade, we verified that it was running the current version of Proxmox VE 8.4.14. The screenshot below shows the system dashboard for our primary and only node, “pve,” confirming that the environment is fully operational and up to date before starting the in-place upgrade.
At this stage, it’s essential to verify that all nodes are healthy and running the latest version of Proxmox VE 8.4 before proceeding with the upgrade.
 Running the Upgrade Checker Tool
 Running the Upgrade Checker Tool
First, we move to the shell of the Proxmox node and run the following command:
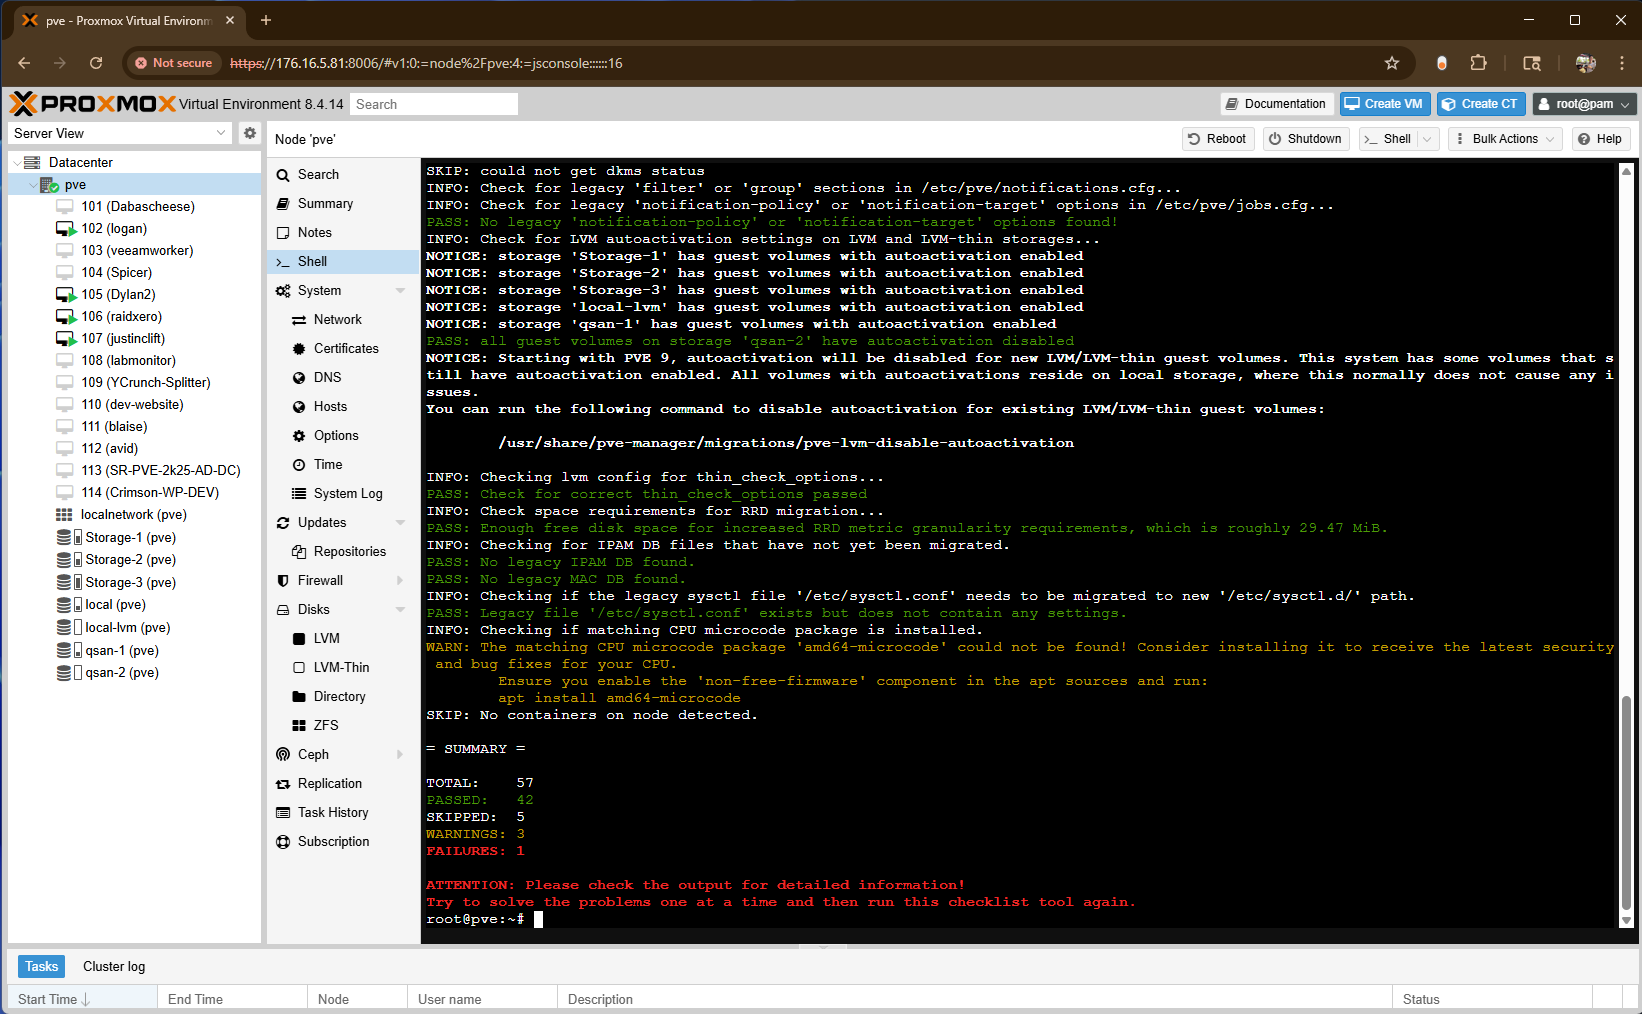
pve8to9 --fullThis command launches the official Proxmox upgrade checklist tool, which analyzes the system and reports any potential issues that must be resolved before performing the actual upgrade.
The following actions must be carried out from the command line on each Proxmox VE node in your cluster. This ensures all nodes are prepared and consistent before upgrading to Proxmox VE 9.
The tool checks repository settings, storage configurations, deprecated options, and available package versions. In our case, the output included several warnings and one failure, highlighted in red, that needed to be addressed before continuing with the upgrade.
Addressing the Failures
After reviewing the upgrade checklist results, the next step was to address the red failures before continuing. In our case, this involved resolving package and bootloader issues identified by the pve8to9 –full report.
We began by cleaning up unused or conflicting packages with the following command:
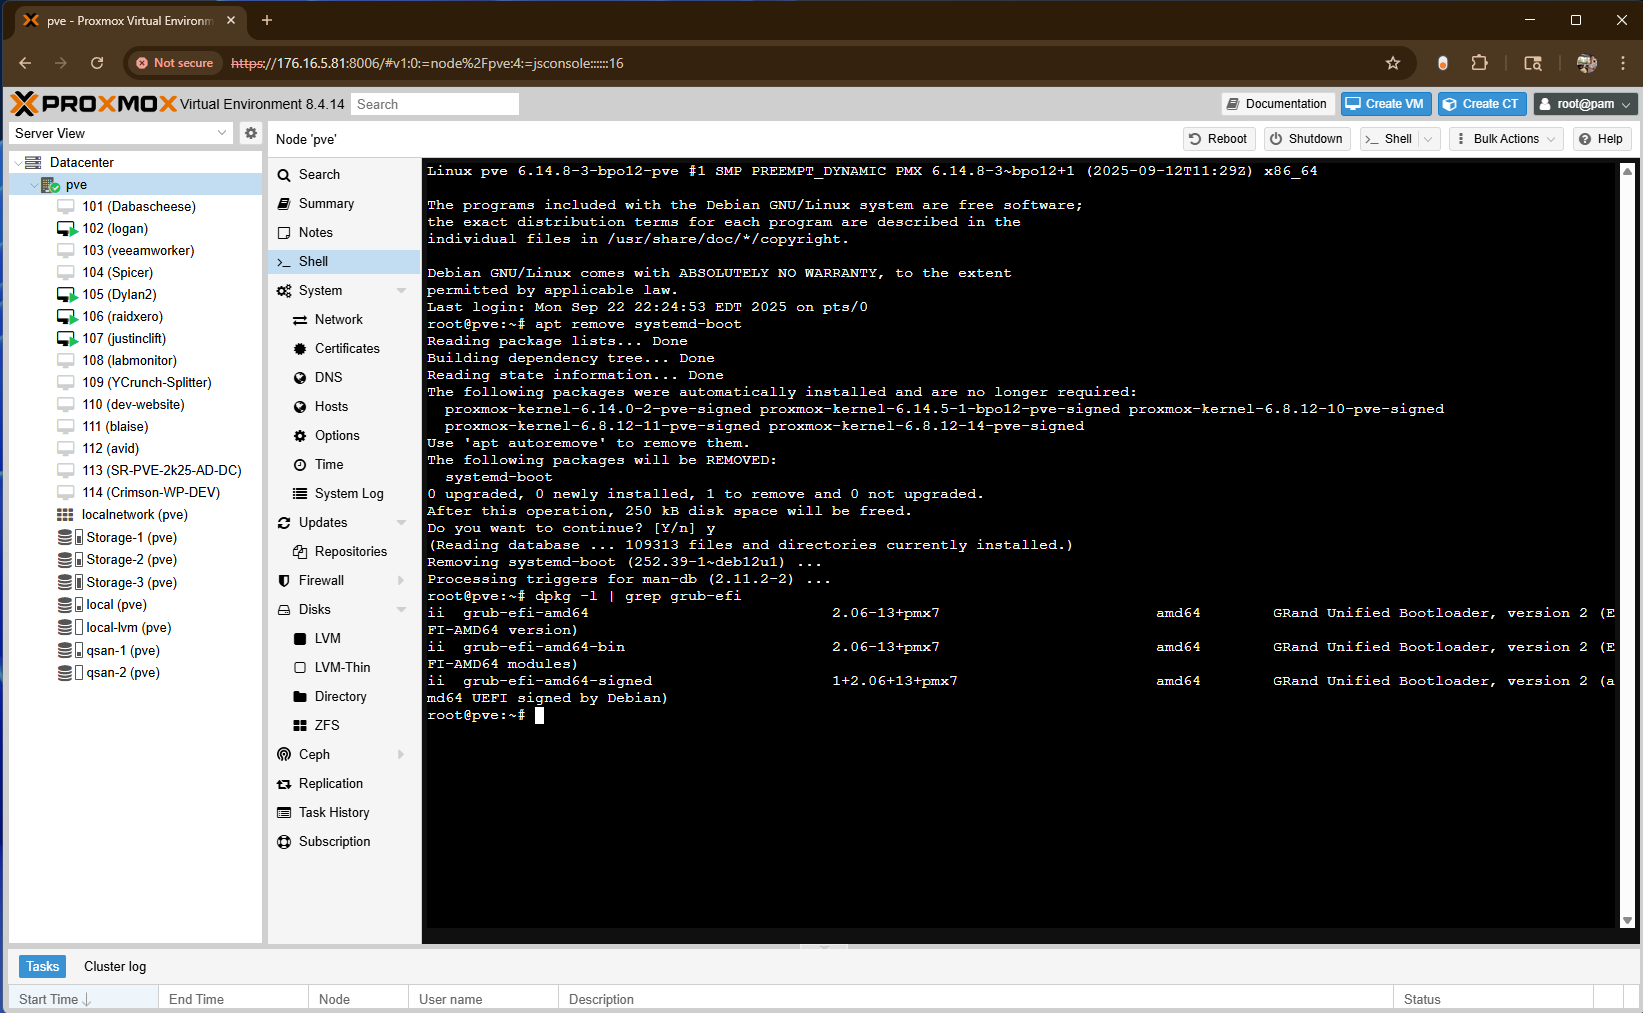
apt remove systemd-bootThis ensured there were no bootloader conflicts before upgrading. Once removed, we verified that the correct GRUB EFI packages were installed and properly configured by running:
dpkg -l | grep grub-efiThe output confirmed that the appropriate GRUB EFI components were in place (grub-efi-amd64, grub-efi-amd64-bin, and grub-efi-amd64-signed), indicating the system was ready for the upgrade.
With these cleanup tasks complete, the failures from the checklist were resolved, and the node passed all critical checks. At this point, the system was considered safe to proceed with the in-place upgrade to Proxmox VE 9
Upgrade Check Re-Check
After resolving the earlier failures, we ran the upgrade check tool once more to confirm that the issues were cleared:
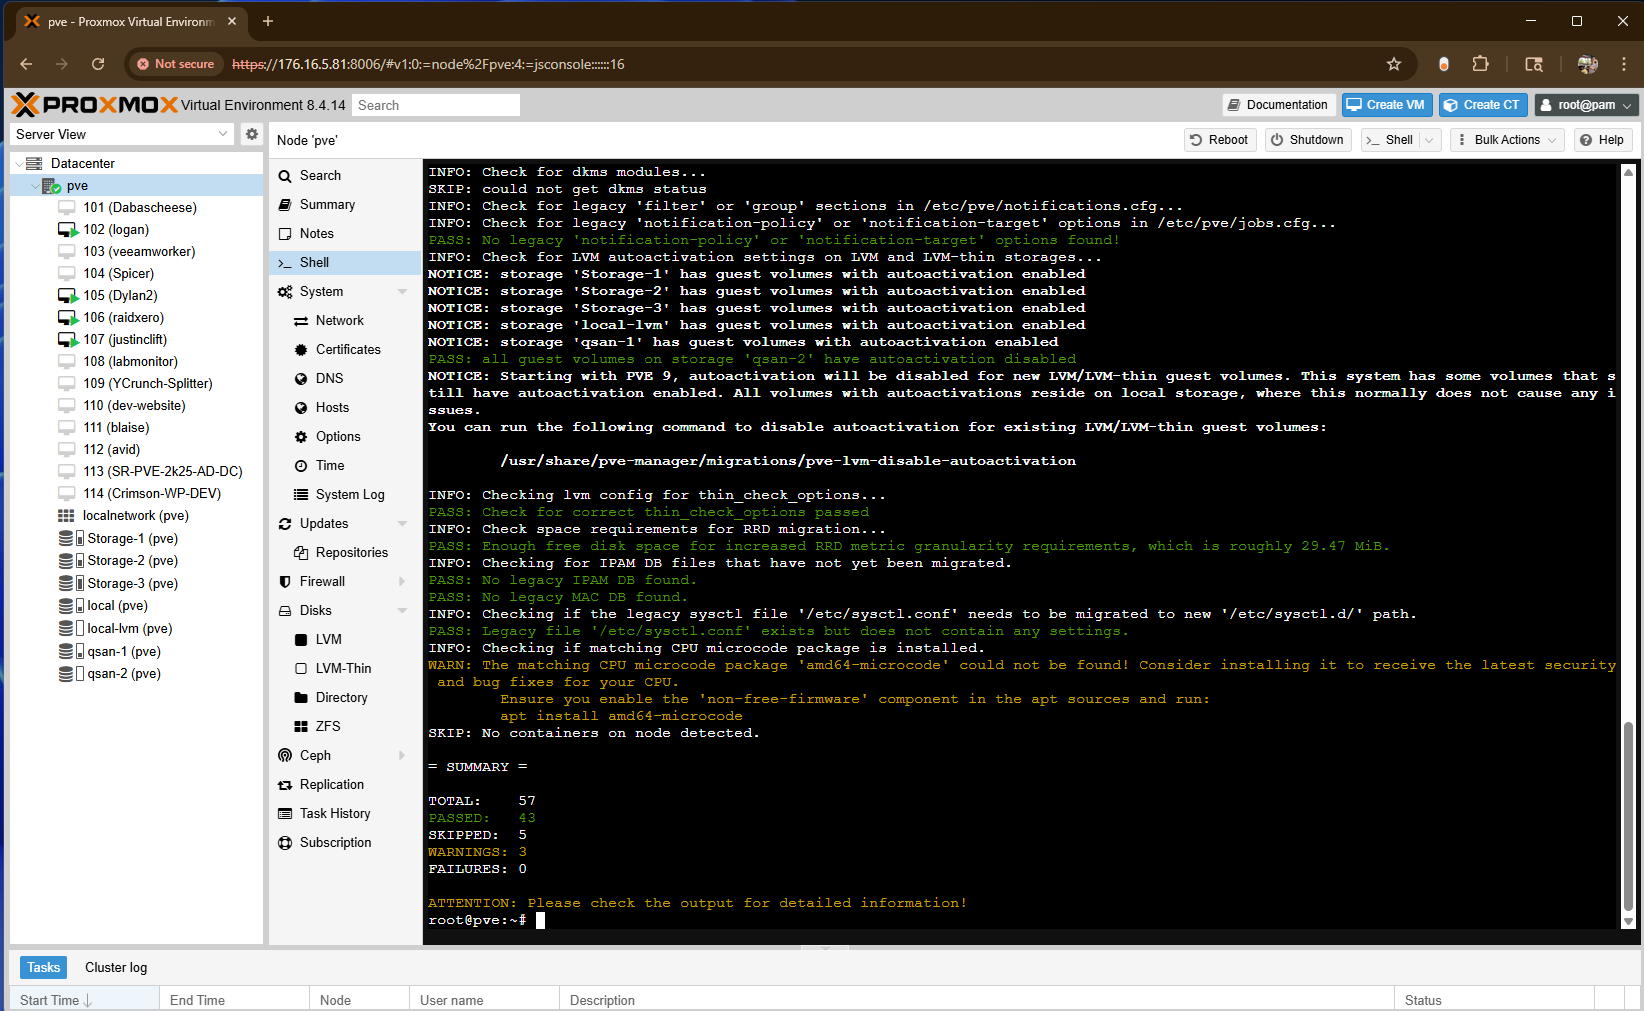
pve8to9 --fullThis time, the report indicated that the failure had been resolved, and the system passed all critical checks. Only a few minor warnings remained, which in our case were not relevant to our environment and were safely ignored.
The successful output confirmed that the node was now ready to proceed with the repository updates and upgrade process.
Verifying the System is Fully Updated
To be 100% sure everything was current before proceeding with the repository changes, we ran another update pass using the following commands:
apt update
apt dist-upgrade
This ensured all packages from the existing Proxmox VE 8.4 (Bookworm) repositories were fully up to date. Keeping the system up to date before starting the upgrade helps prevent dependency or version conflicts during the transition to Proxmox VE 9 (Trixie).
pveversionAt this point, our node was running the latest kernel and package versions available for Proxmox 8, confirming that the system was ready to proceed to the repository update stage.

Updating Repositories for Proxmox VE 9 (Trixie)
With the system entirely up to date on Proxmox VE 8 (Bookworm), the next step is to update all Debian and Proxmox repository entries to reference the Trixie release. This change ensures that the package manager pulls updates from the correct sources when performing the upgrade.
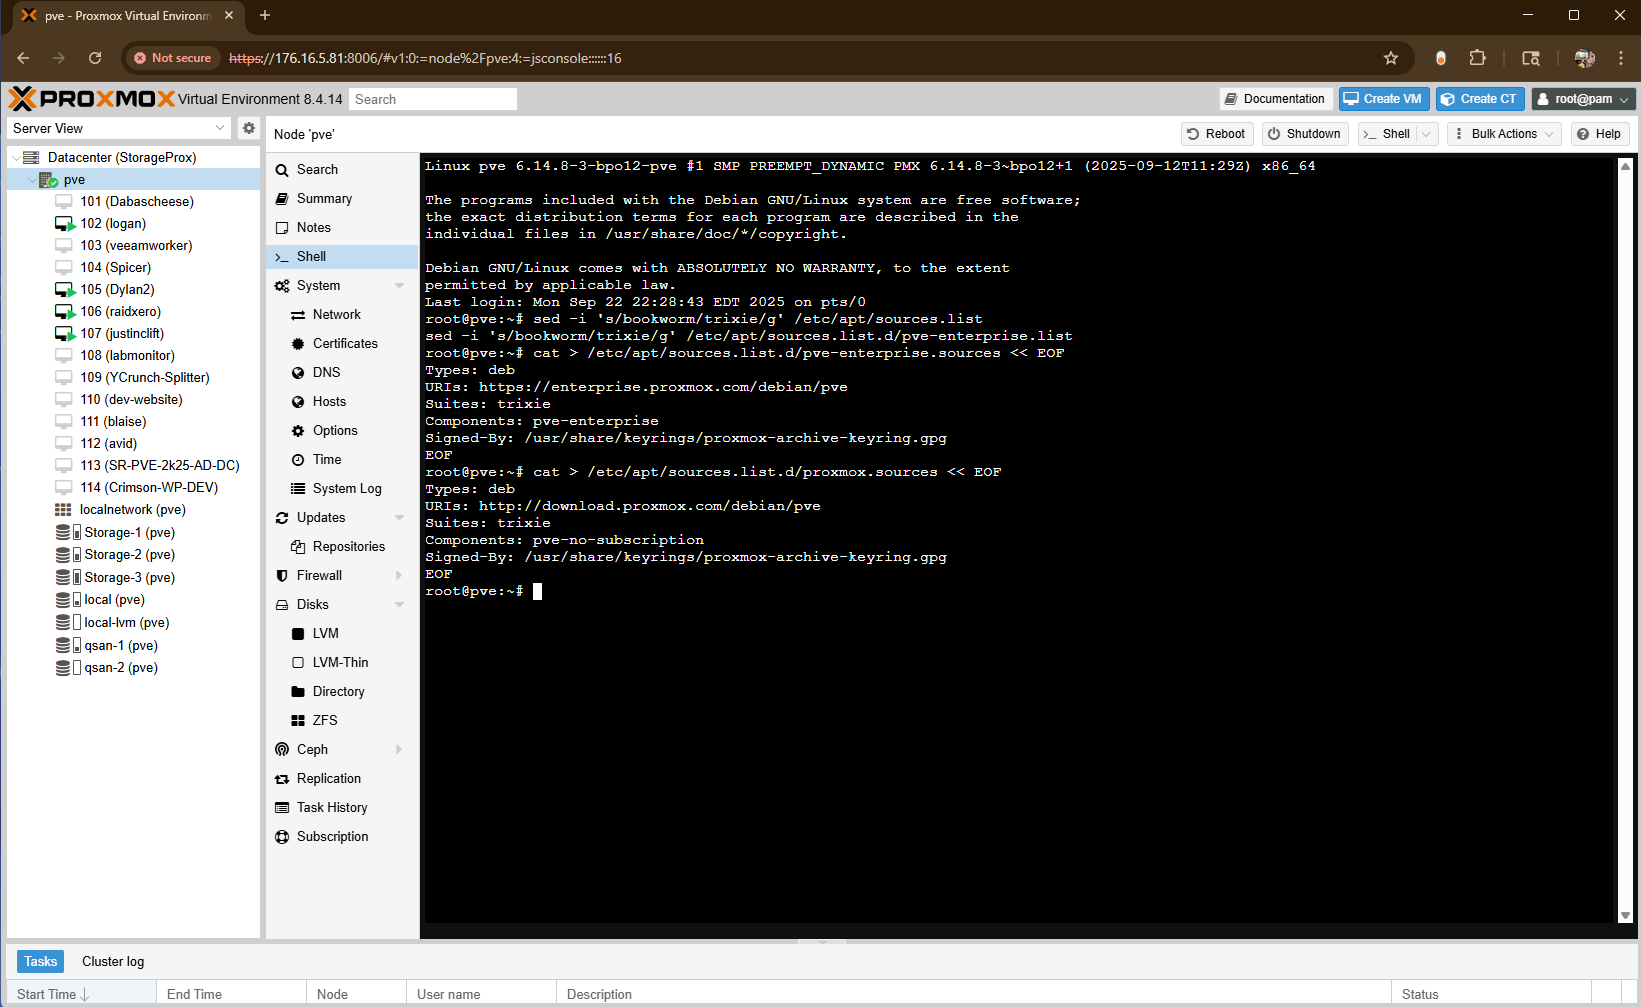
We used the following commands to automatically replace every instance of bookworm with trixie across the system’s repository files:
sed -i 's/bookworm/trixie/g' /etc/apt/sources.list
sed -i 's/bookworm/trixie/g' /etc/apt/sources.list.d/pve-enterprise.list
After running these commands, all repositories are pointed to the new Debian 13 (Trixie) base and the matching Proxmox VE 9 repositories.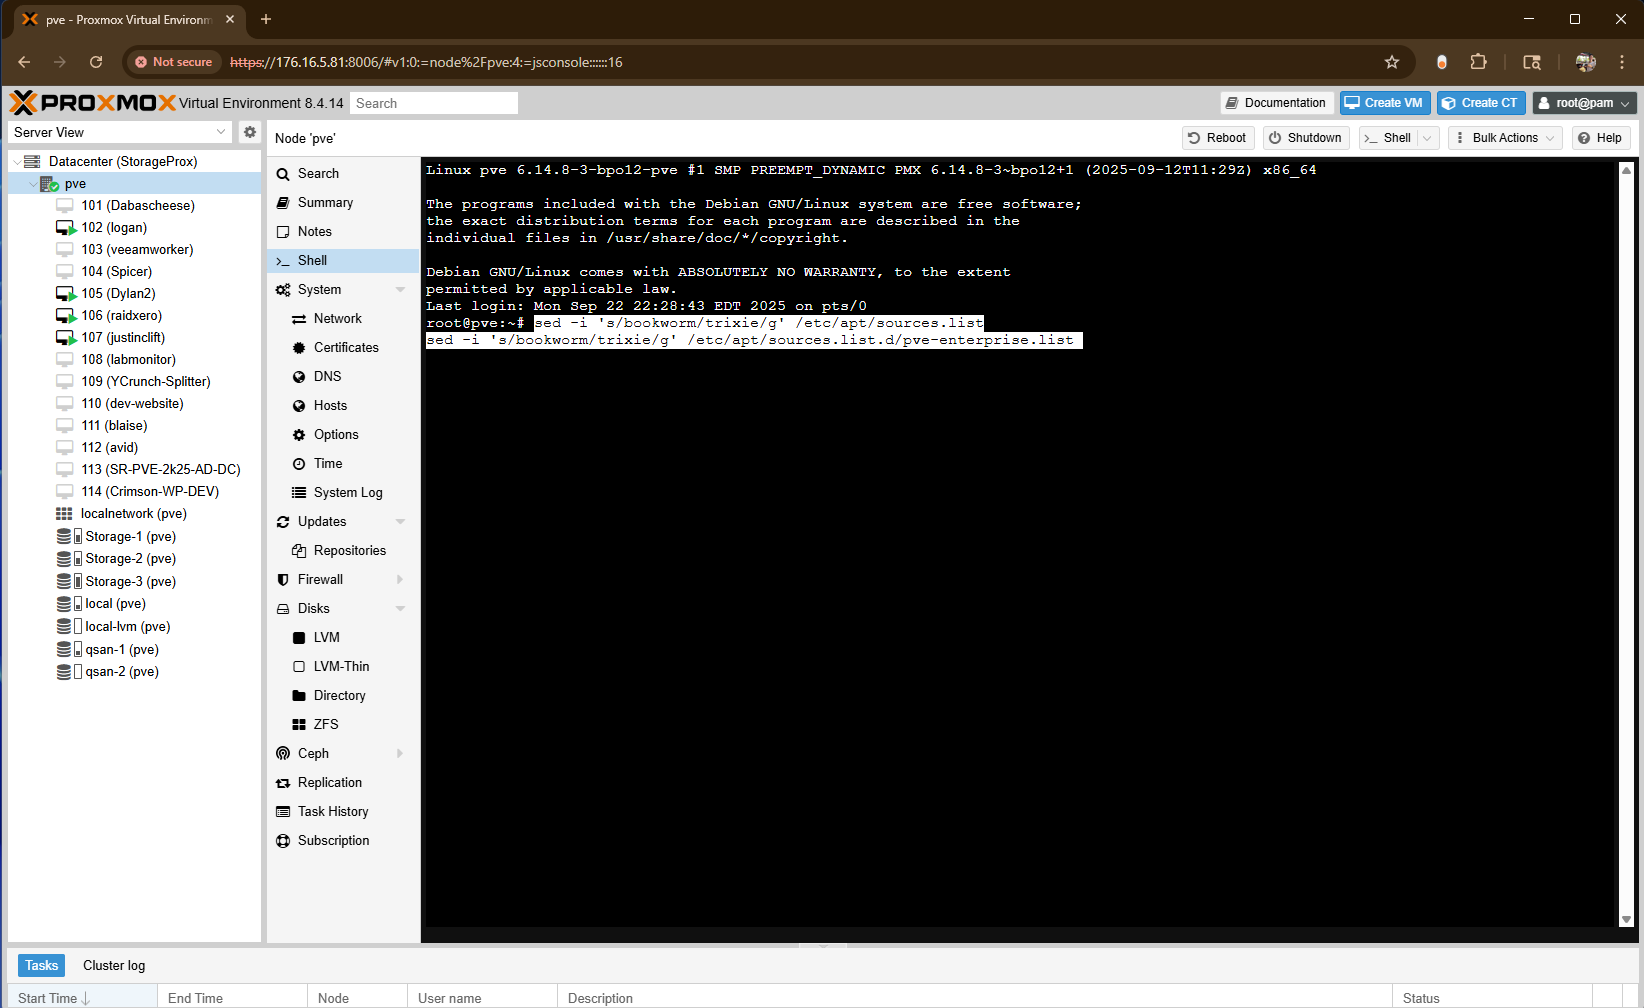
Adding the Proxmox VE 9 Package Repositories
After updating the Debian release references, the next step was to add the Proxmox VE 9 package repositories in the new deb822 format. This ensures the system retrieves the correct packages for the Trixie-based Proxmox VE 9 release.
If you are using the enterprise repository, you can add the Proxmox VE 9 Enterprise repository by creating the following file:
cat > /etc/apt/sources.list.d/pve-enterprise.sources << EOF
Types: deb
URIs: https://enterprise.proxmox.com/debian/pve
Suites: trixie
Components: pve-enterprise
Signed-By: /usr/share/keyrings/proxmox-archive-keyring.gpg
EOF
For environments using the community or no-subscription repository, the following command adds the matching entry:
cat > /etc/apt/sources.list.d/proxmox.sources << EOF
Types: deb
URIs: http://download.proxmox.com/debian/pve
Suites: trixie
Components: pve-no-subscription
Signed-By: /usr/share/keyrings/proxmox-archive-keyring.gpg
EOF
In our setup, we added both the Enterprise and No-Subscription repositories to support flexibility in testing and updates across different environments.
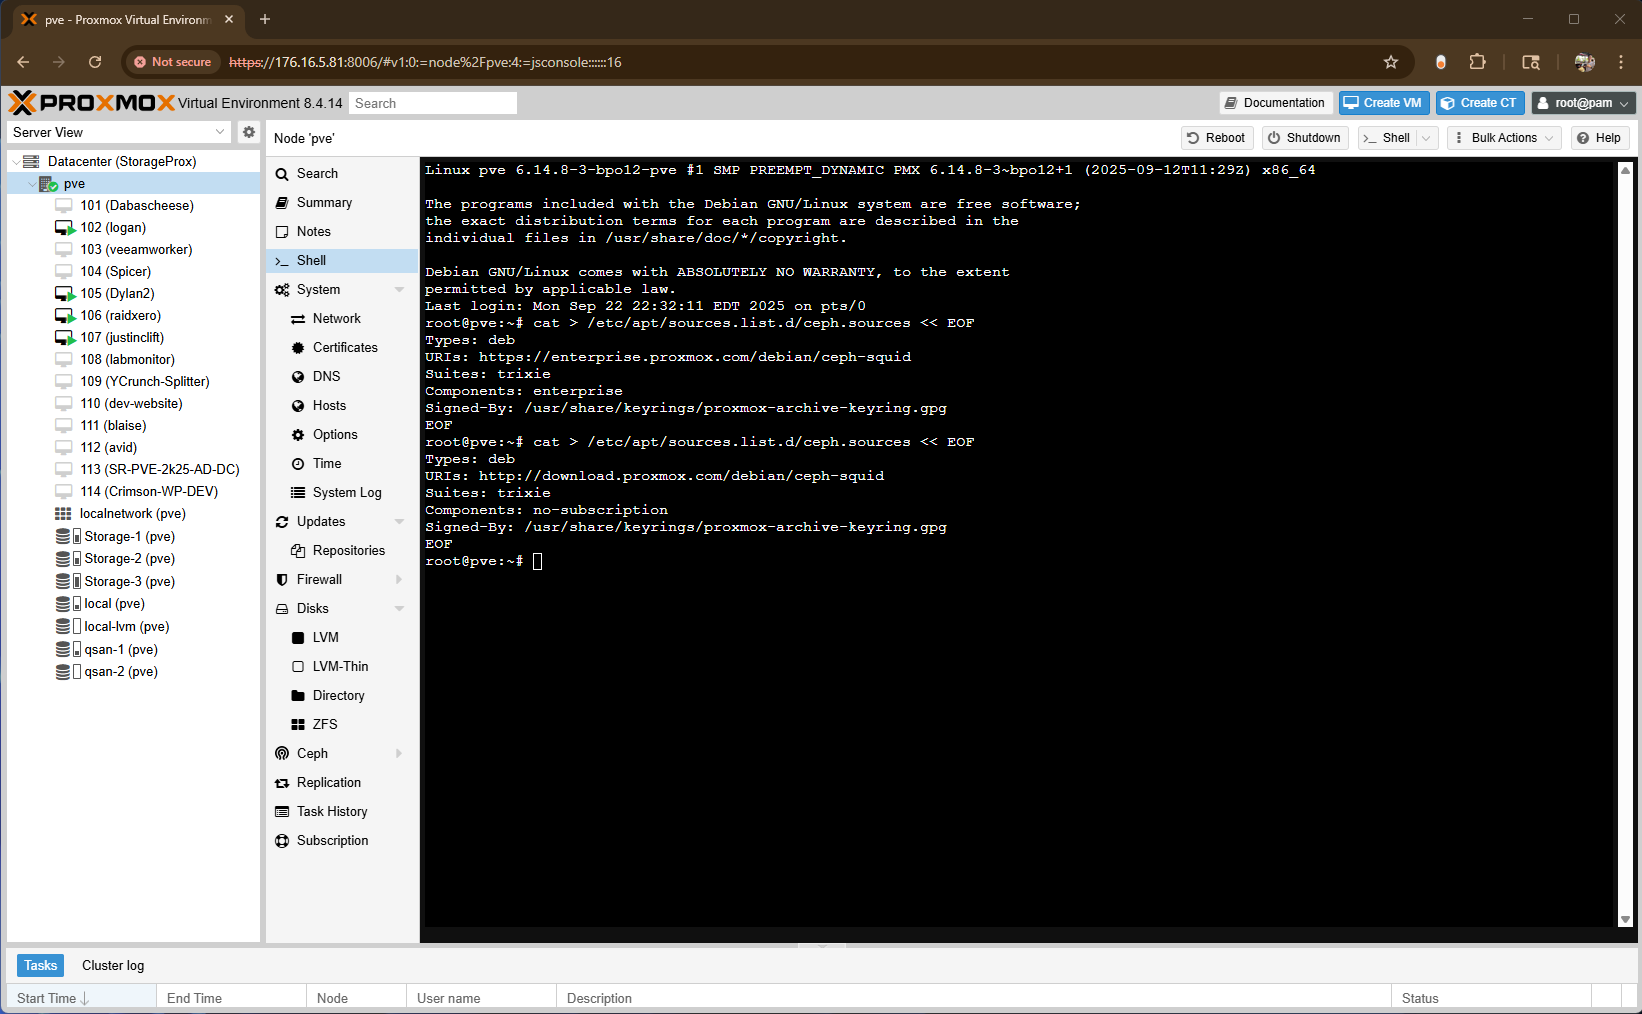
Updating the Ceph Package Repository
With the main Proxmox repositories updated, the next step is to configure the Ceph package repositories for Proxmox VE 9.
If you are using the Enterprise Ceph repository, create or update the following file:
cat > /etc/apt/sources.list.d/ceph.sources << EOF
Types: deb
URIs: https://enterprise.proxmox.com/debian/ceph-squid
Suites: trixie
Components: enterprise
Signed-By: /usr/share/keyrings/proxmox-archive-keyring.gpg
EOF
For environments using the No-Subscription Ceph repository, use the following command instead:
cat > /etc/apt/sources.list.d/ceph.sources << EOF
Types: deb
URIs: http://download.proxmox.com/debian/ceph-squid
Suites: trixie
Components: no-subscription
Signed-By: /usr/share/keyrings/proxmox-archive-keyring.gpg
EOF
With all repositories configured for Debian 13 (Trixie), the system is now fully prepared for the in-place upgrade process to Proxmox VE 9.
Starting the Upgrade
With the repositories updated and configuration verified, you can now begin the upgrade process. It’s recommended to run the following commands from the Proxmox host shell. The first step refreshes package indexes and upgrades the system to the new release:
apt update
apt dist-upgrade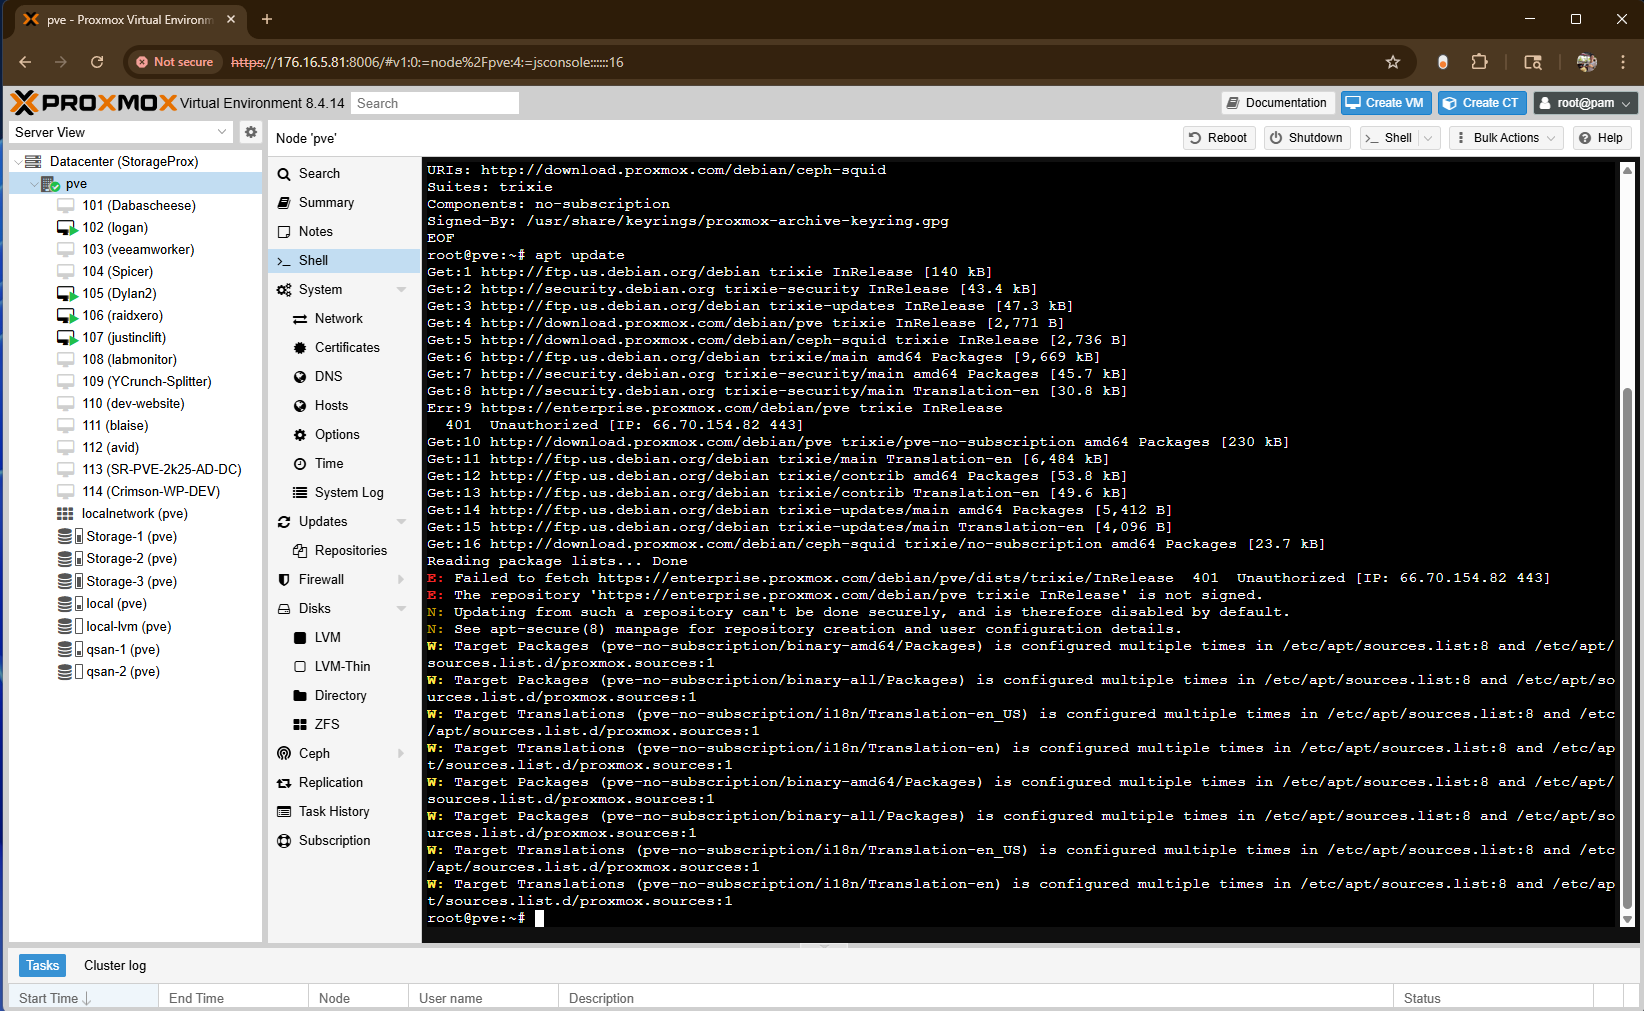
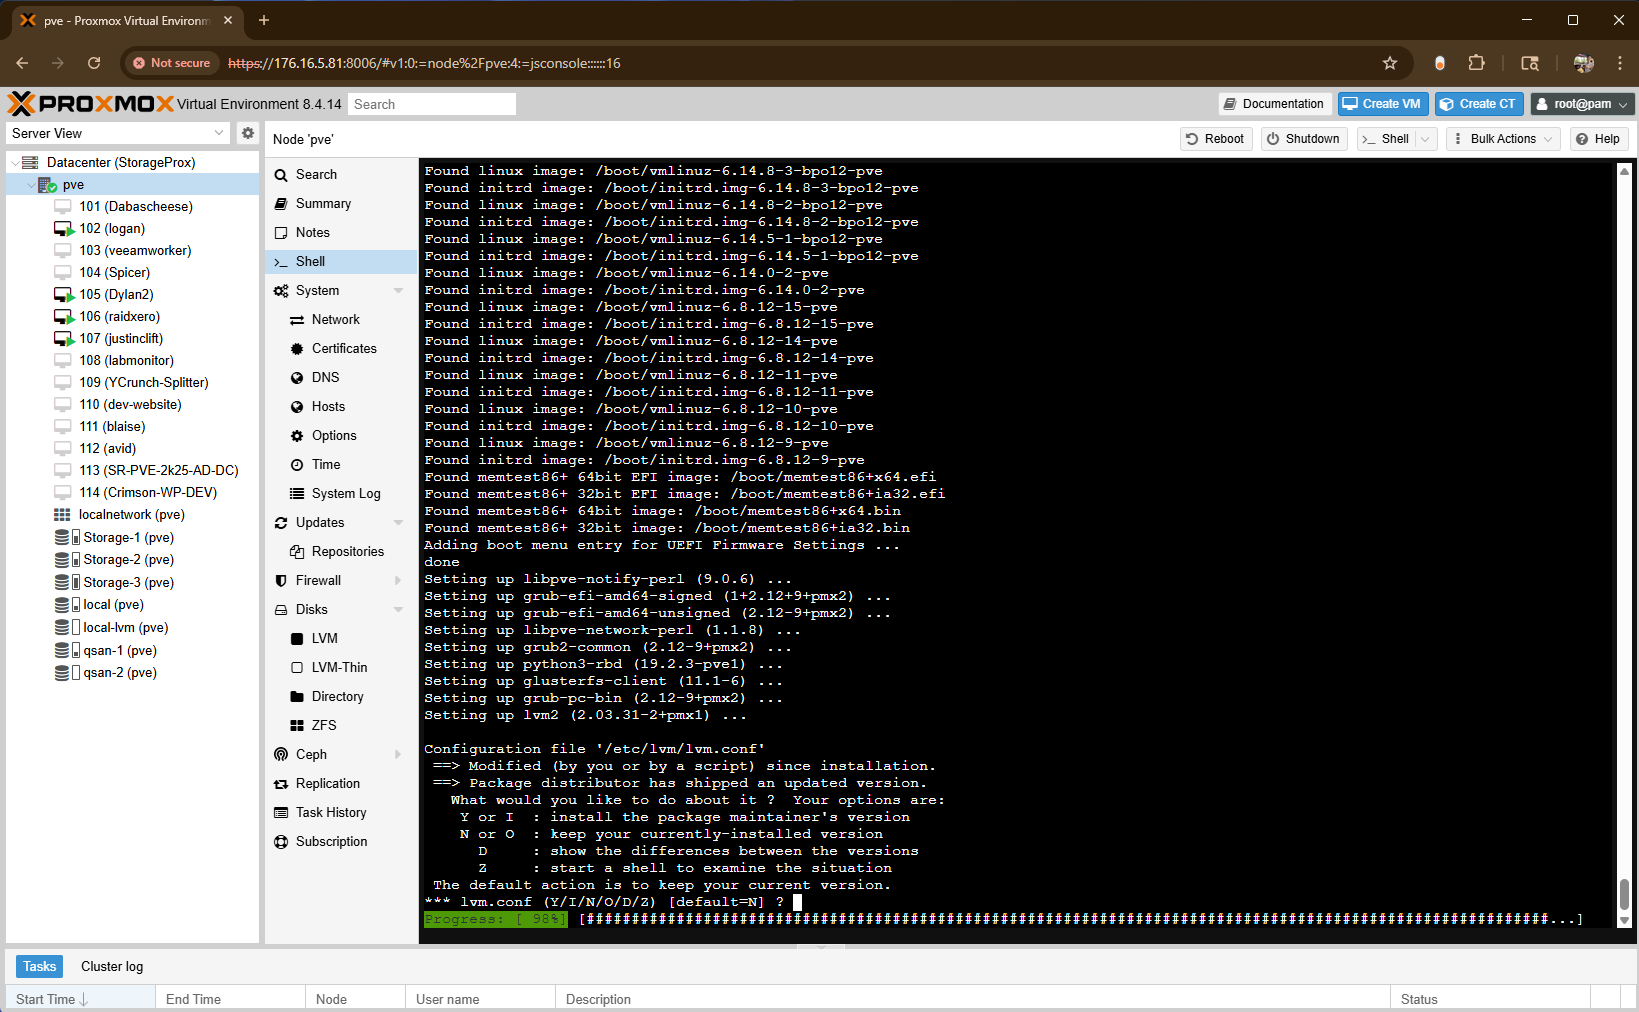
The screenshot below shows the “apt dist-upgrade” command performing the system update and confirming the installation with “Y.”
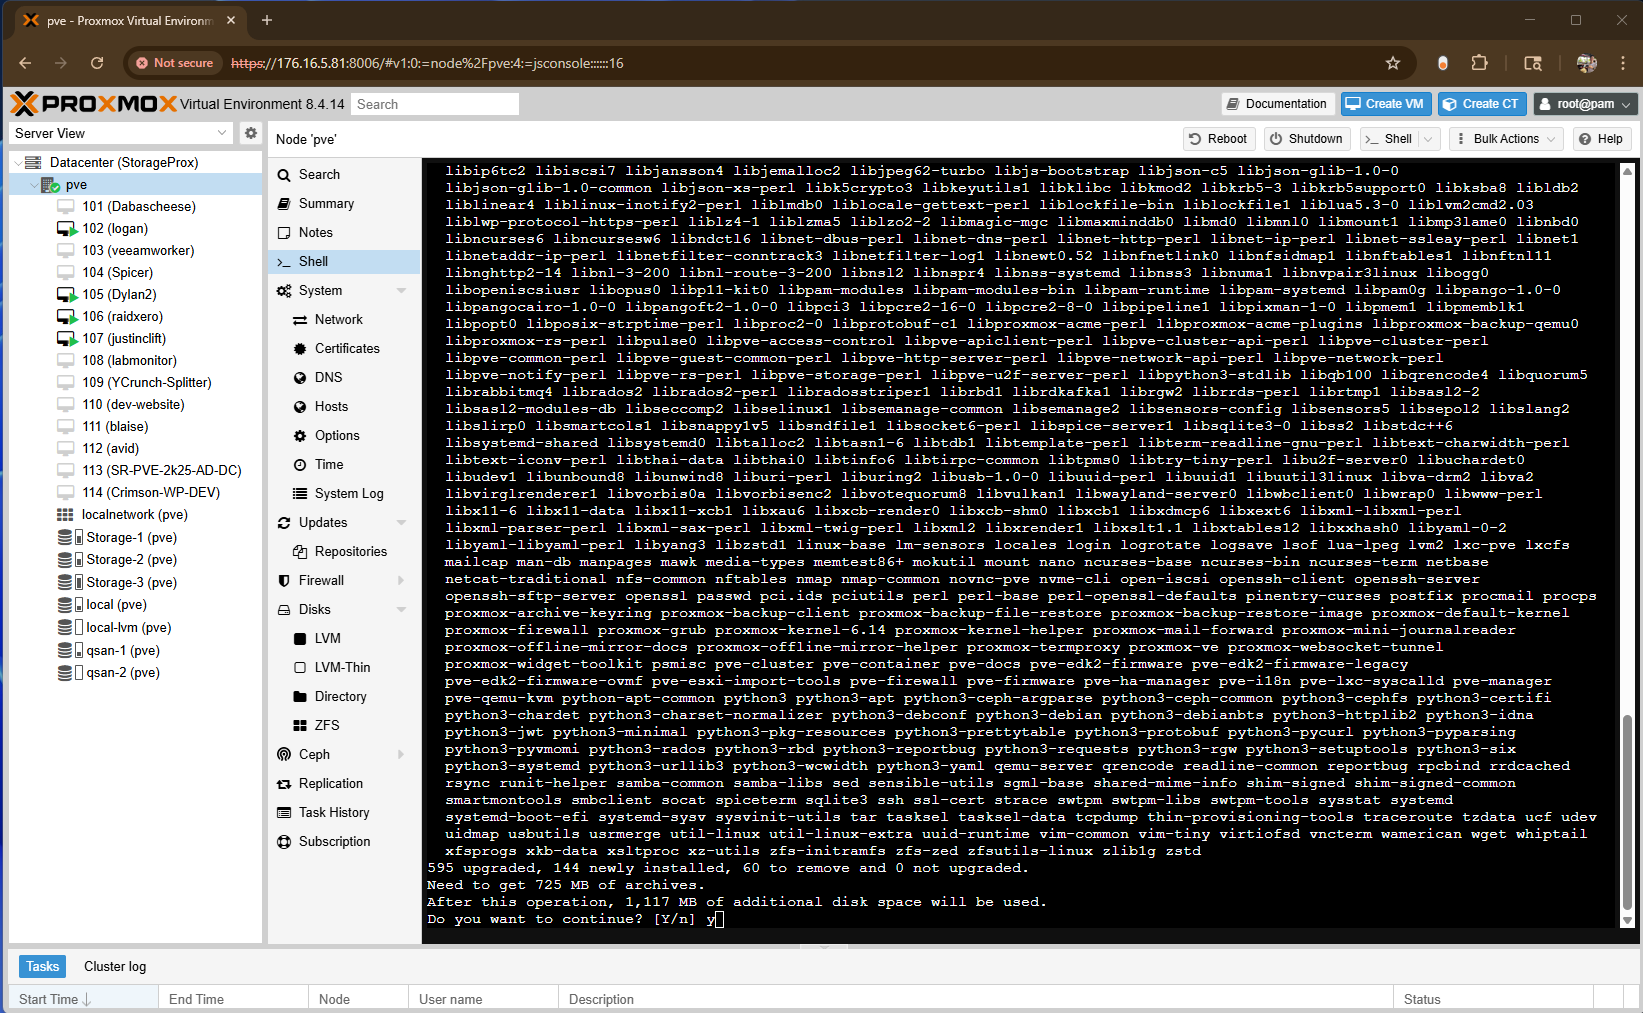
During this process, you’ll be prompted to confirm configuration file changes or service restarts. In most cases, keeping the existing configuration is the safest option unless otherwise instructed by the Proxmox documentation.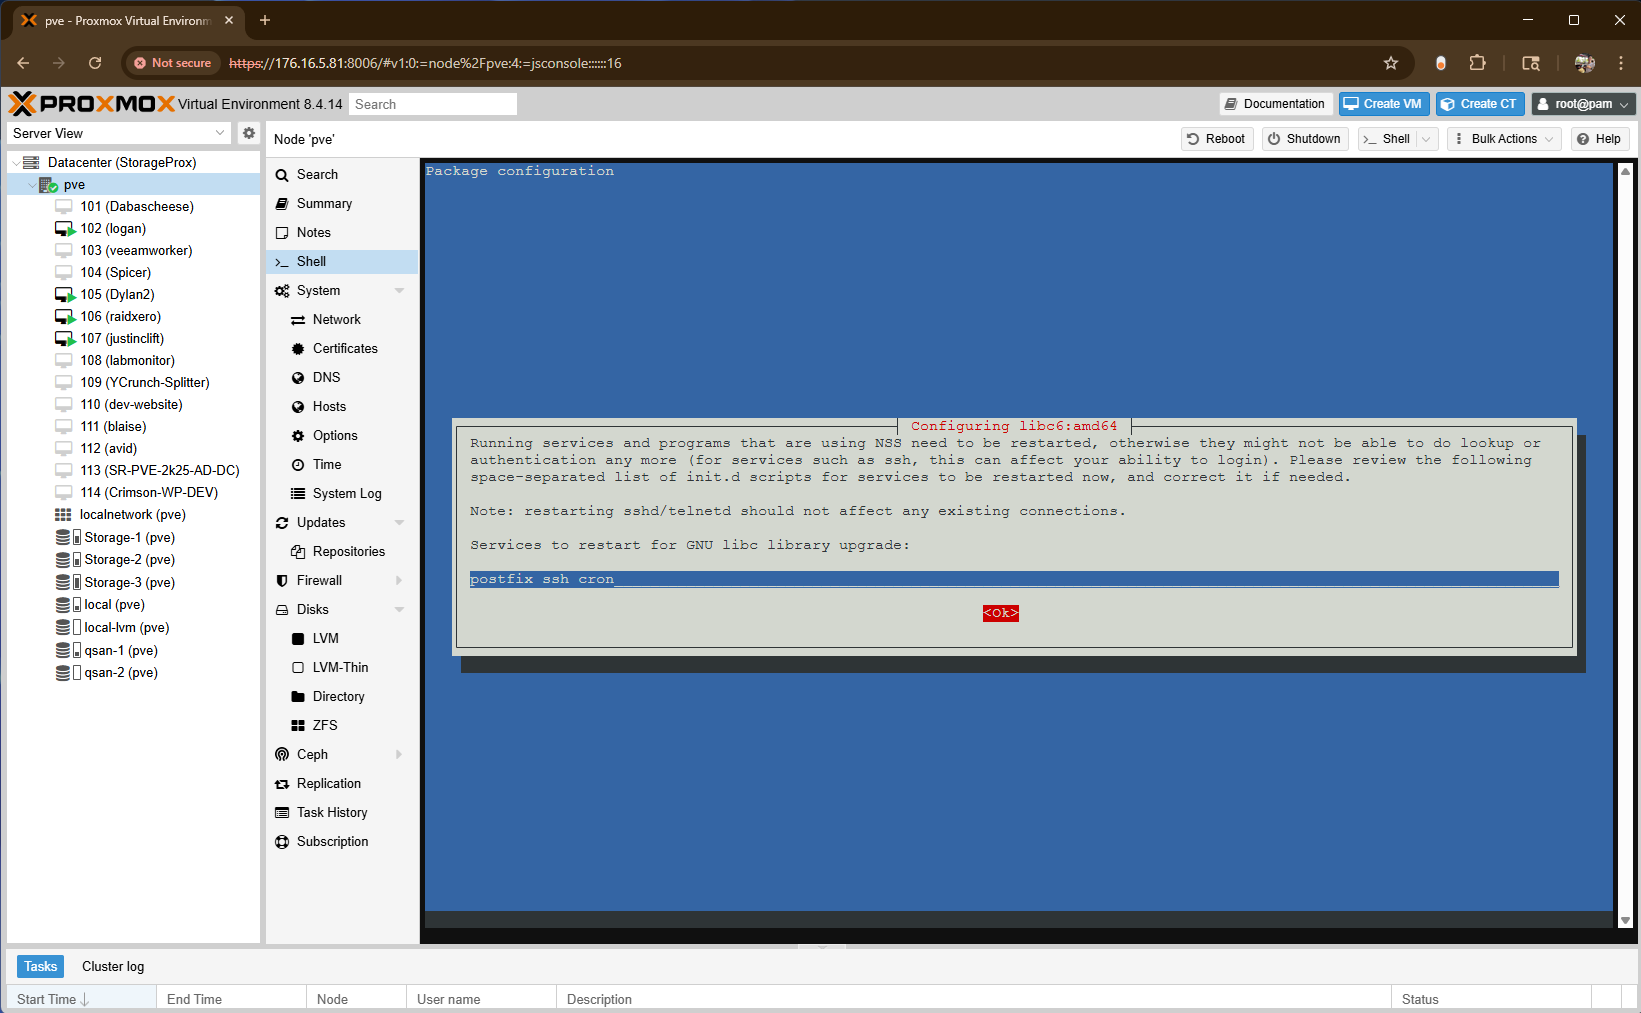
Once the upgrade completes successfully, we recommend rebooting the node to load the updated kernel and services.
Verifying the Upgrade
Once the upgrade process was completed successfully, the final step was to verify that the system was now running Proxmox VE 9 on the new Debian 13 (Trixie) base.
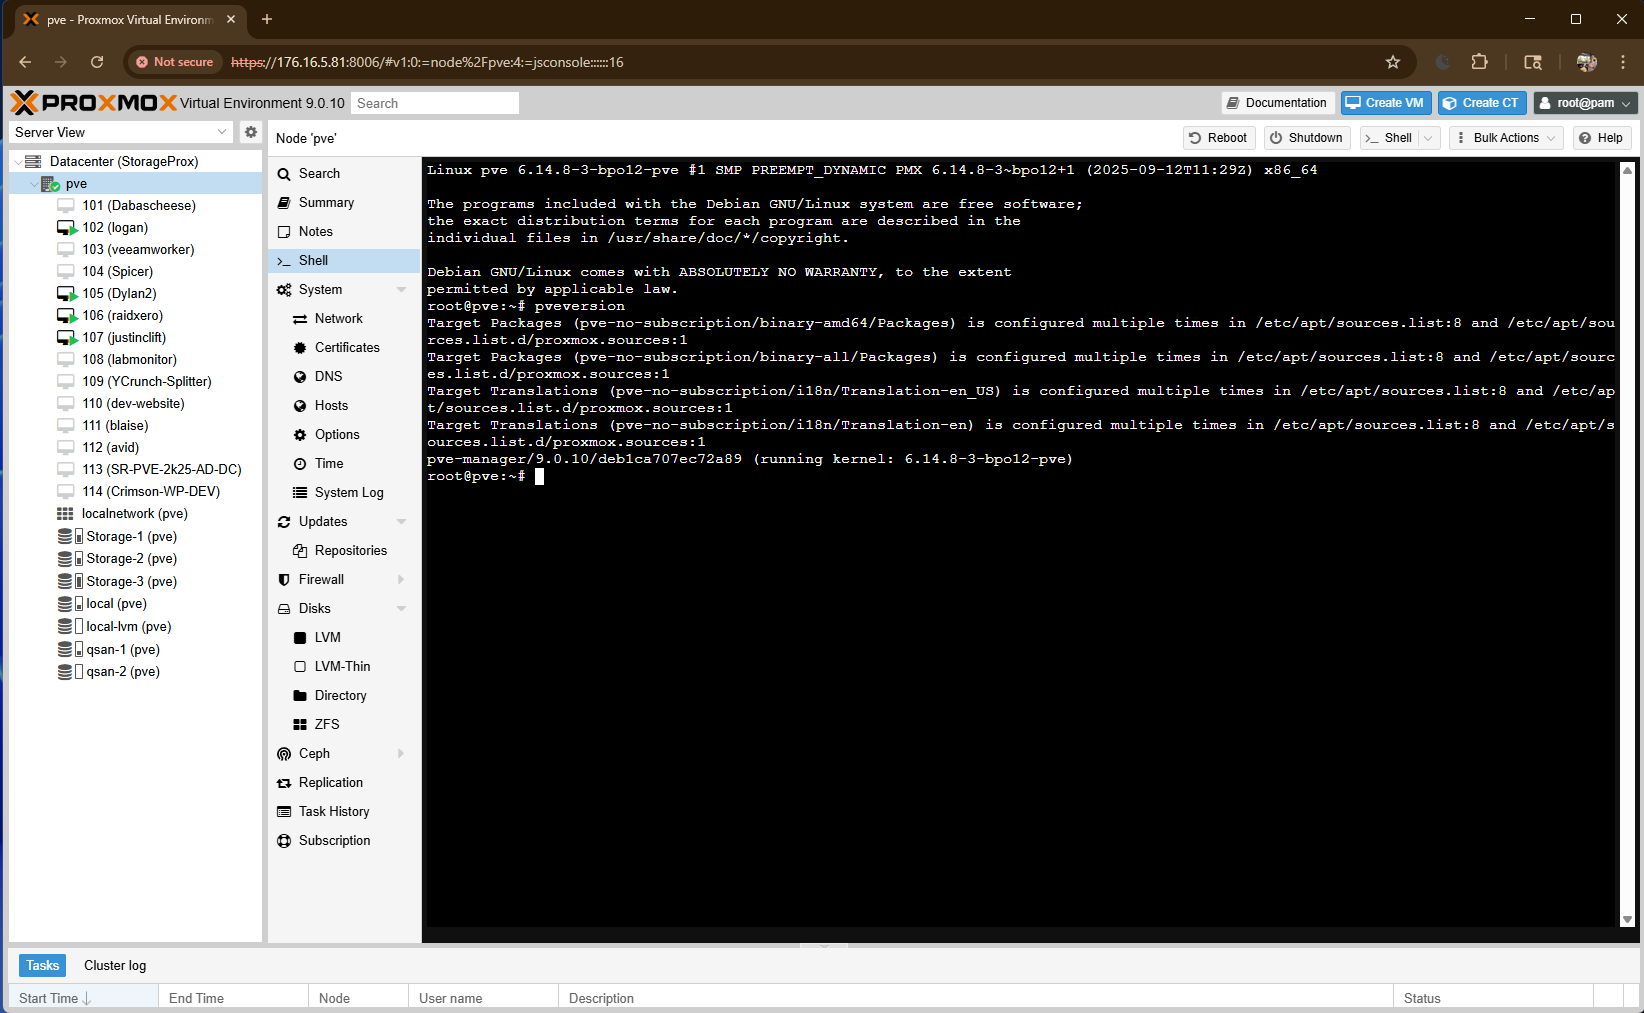
After the system rebooted, we confirmed the upgrade by checking the Proxmox and kernel versions using the following command:
pveversionFrom the Proxmox web interface, the version number under Node > Summary should now show Proxmox VE 9, indicating the environment is fully upgraded.
At this point, our node was running cleanly on Proxmox VE 9, with all virtual machines, containers, and configurations preserved from the previous version.
Verifying the New Web Interface
After confirming the upgrade from the command line, we also verified the Proxmox VE 9 web interface. One noticeable update in this release is the redesigned, mobile-friendly login screen and improved responsiveness across devices.
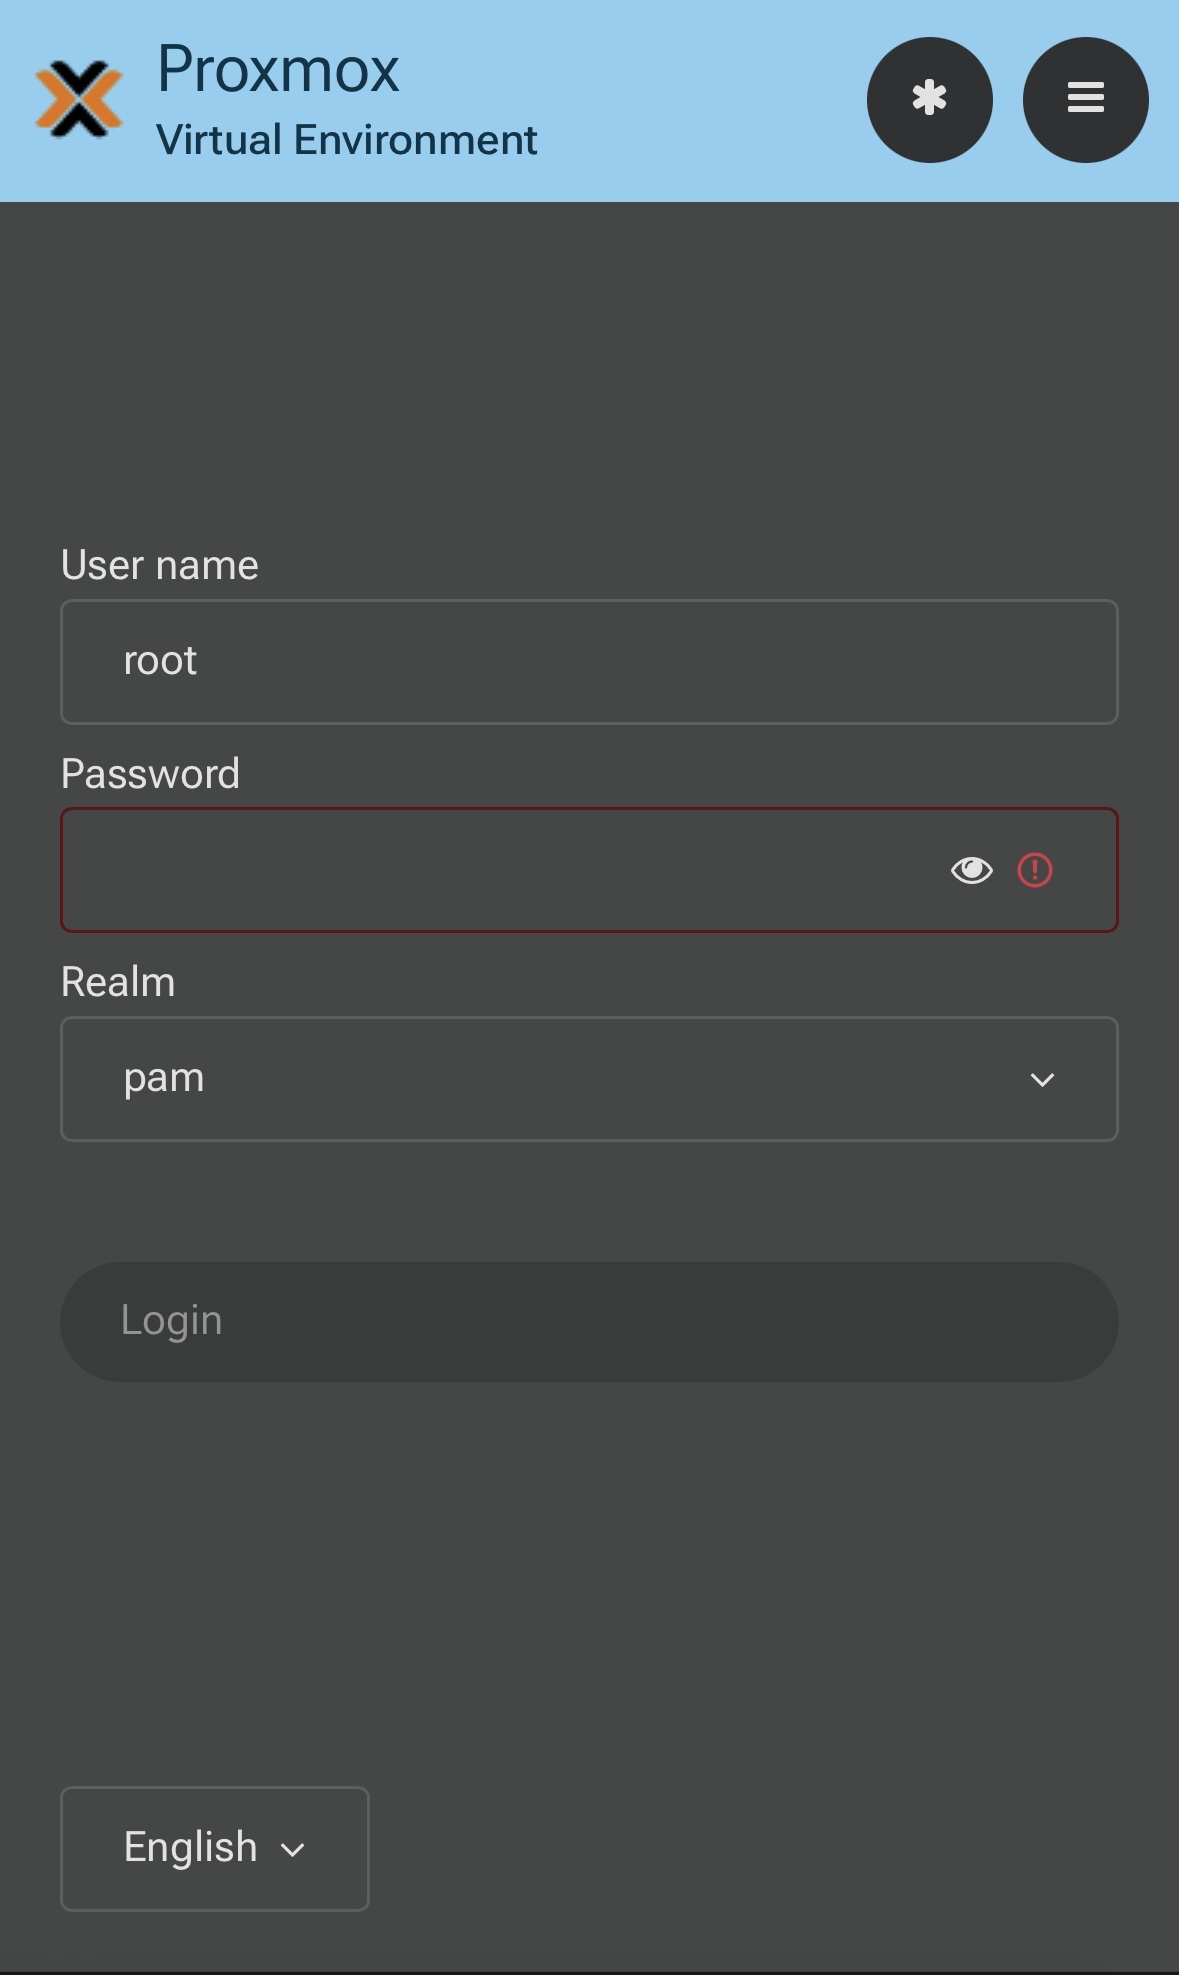
As shown here, the Proxmox VE 9 web UI now adapts seamlessly to mobile browsers, making it much easier to monitor, manage, and perform basic administrative tasks directly from a phone or tablet. The cleaner layout, simplified controls, and modern styling reflect Proxmox’s continued focus on accessibility and usability for administrators on the go.
Summary
Upgrading from Proxmox VE 8 to Proxmox VE 9 can be completed smoothly with proper preparation and verification at each stage. In this walkthrough, we upgraded our long-running Proxmox community server, which many of our StorageReview followers have used for testing and collaboration.
This upgrade illustrates how simple in-place upgrades can be by following the official documentation, proactively addressing warnings, and validating each step. Whether managing a lab environment or production cluster, taking a careful, methodical approach ensures a reliable transition to the latest version of Proxmox VE.


 Amazon