

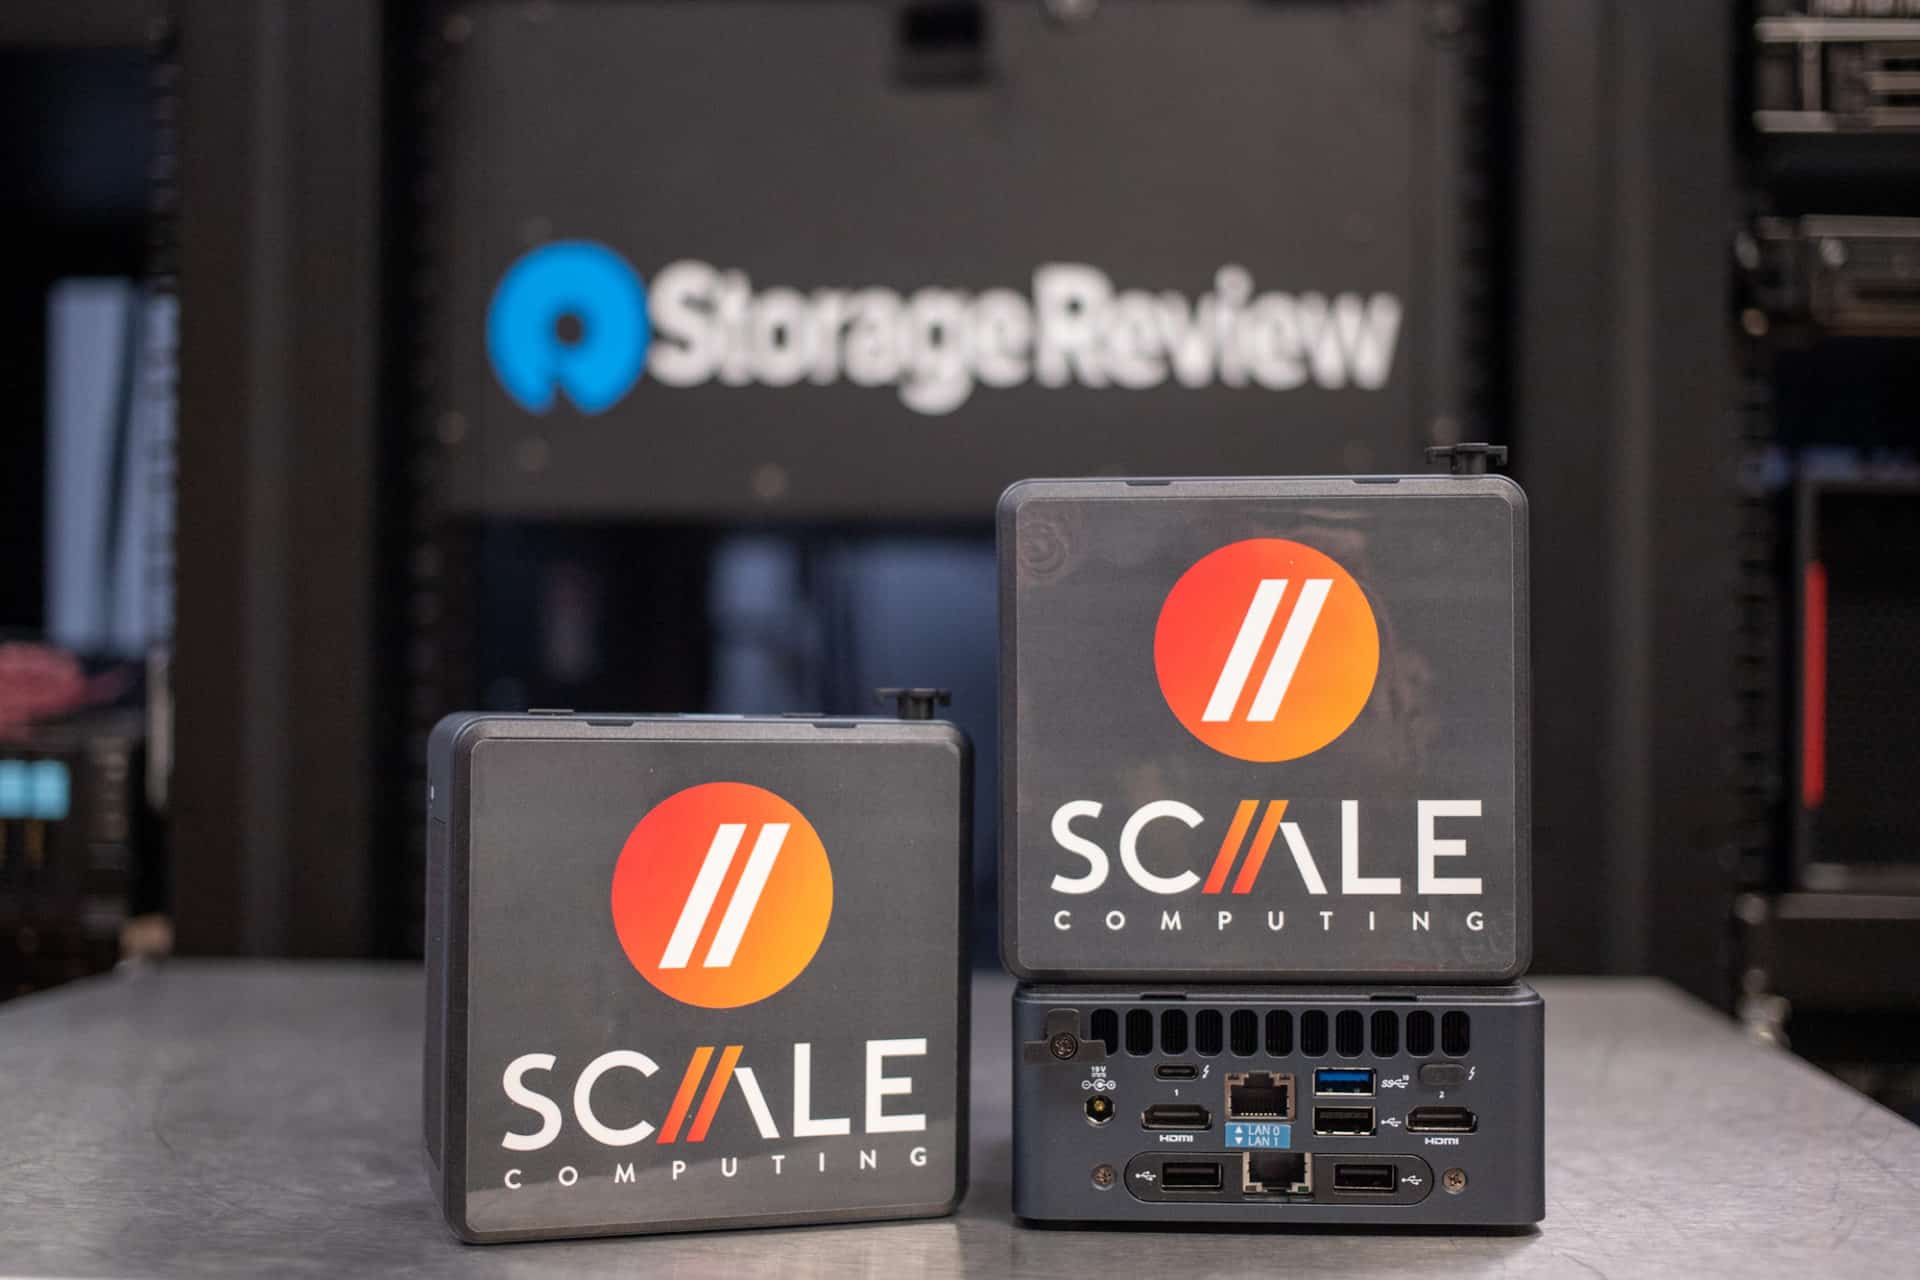
Scale Computing claims to have a solution for HCI that can be installed in minutes, put in production in less than an hour, and is purpose-built for edge locations. A leader in edge computing, virtualization, and hyperconverged solutions, Scale Computing has designed a system that fits perfectly at the edge and can be installed in minutes. StorageReview decided to take them up on the task and document the steps from unboxing to up and running to see if it’s as easy as they claim.
Scale Computing sent a 3-node system, emailed associated datasheets, and set up a support call to walk through the installation if we needed it. This is the same process a typical customer would experience when purchasing a Scale Computing HyperCore cluster.
SC//HyperCore
SC//HyperCore eliminates the need for traditional virtualization software, disaster recovery software, servers, and shared storage, replacing these with a fully integrated, highly available system for running applications. Using patented HyperCore™ technology, the self-healing platform automatically identifies, mitigates, and corrects infrastructure problems in real-time, enabling applications to achieve maximum uptime. When ease-of-use, high availability, and TCO matter, the Scale Computing HyperCore on NUC 11 (the HE151) might be the infrastructure platform for your organization.
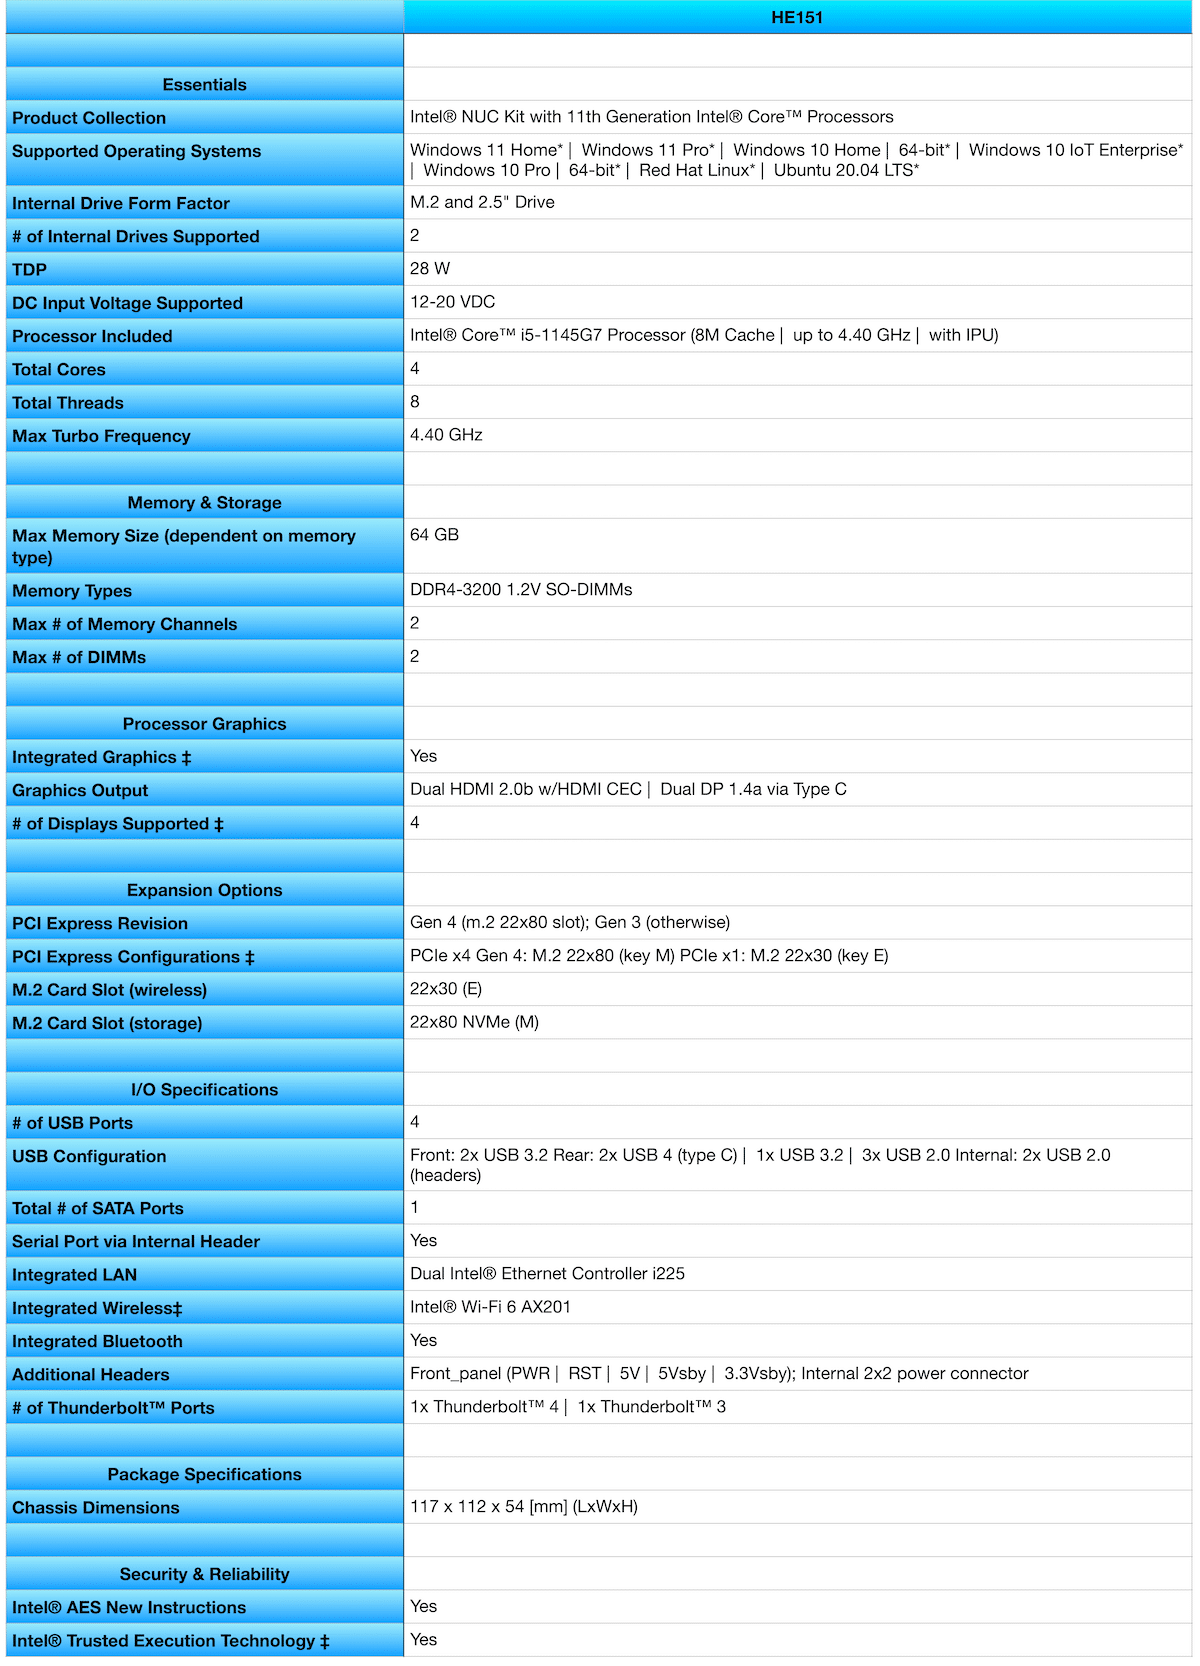
The first thing we noticed during the unboxing ceremony was the size of the HE151. These things are tiny! Based on the Intel Next Unit of Computing (NUC) 11 platform, the chassis measures 117 x 112 x 54 [mm] (LxWxH). Check out the specs for the Scale Computing HyperCore on NUC11 below.
SC//Platform Setup and Configuration
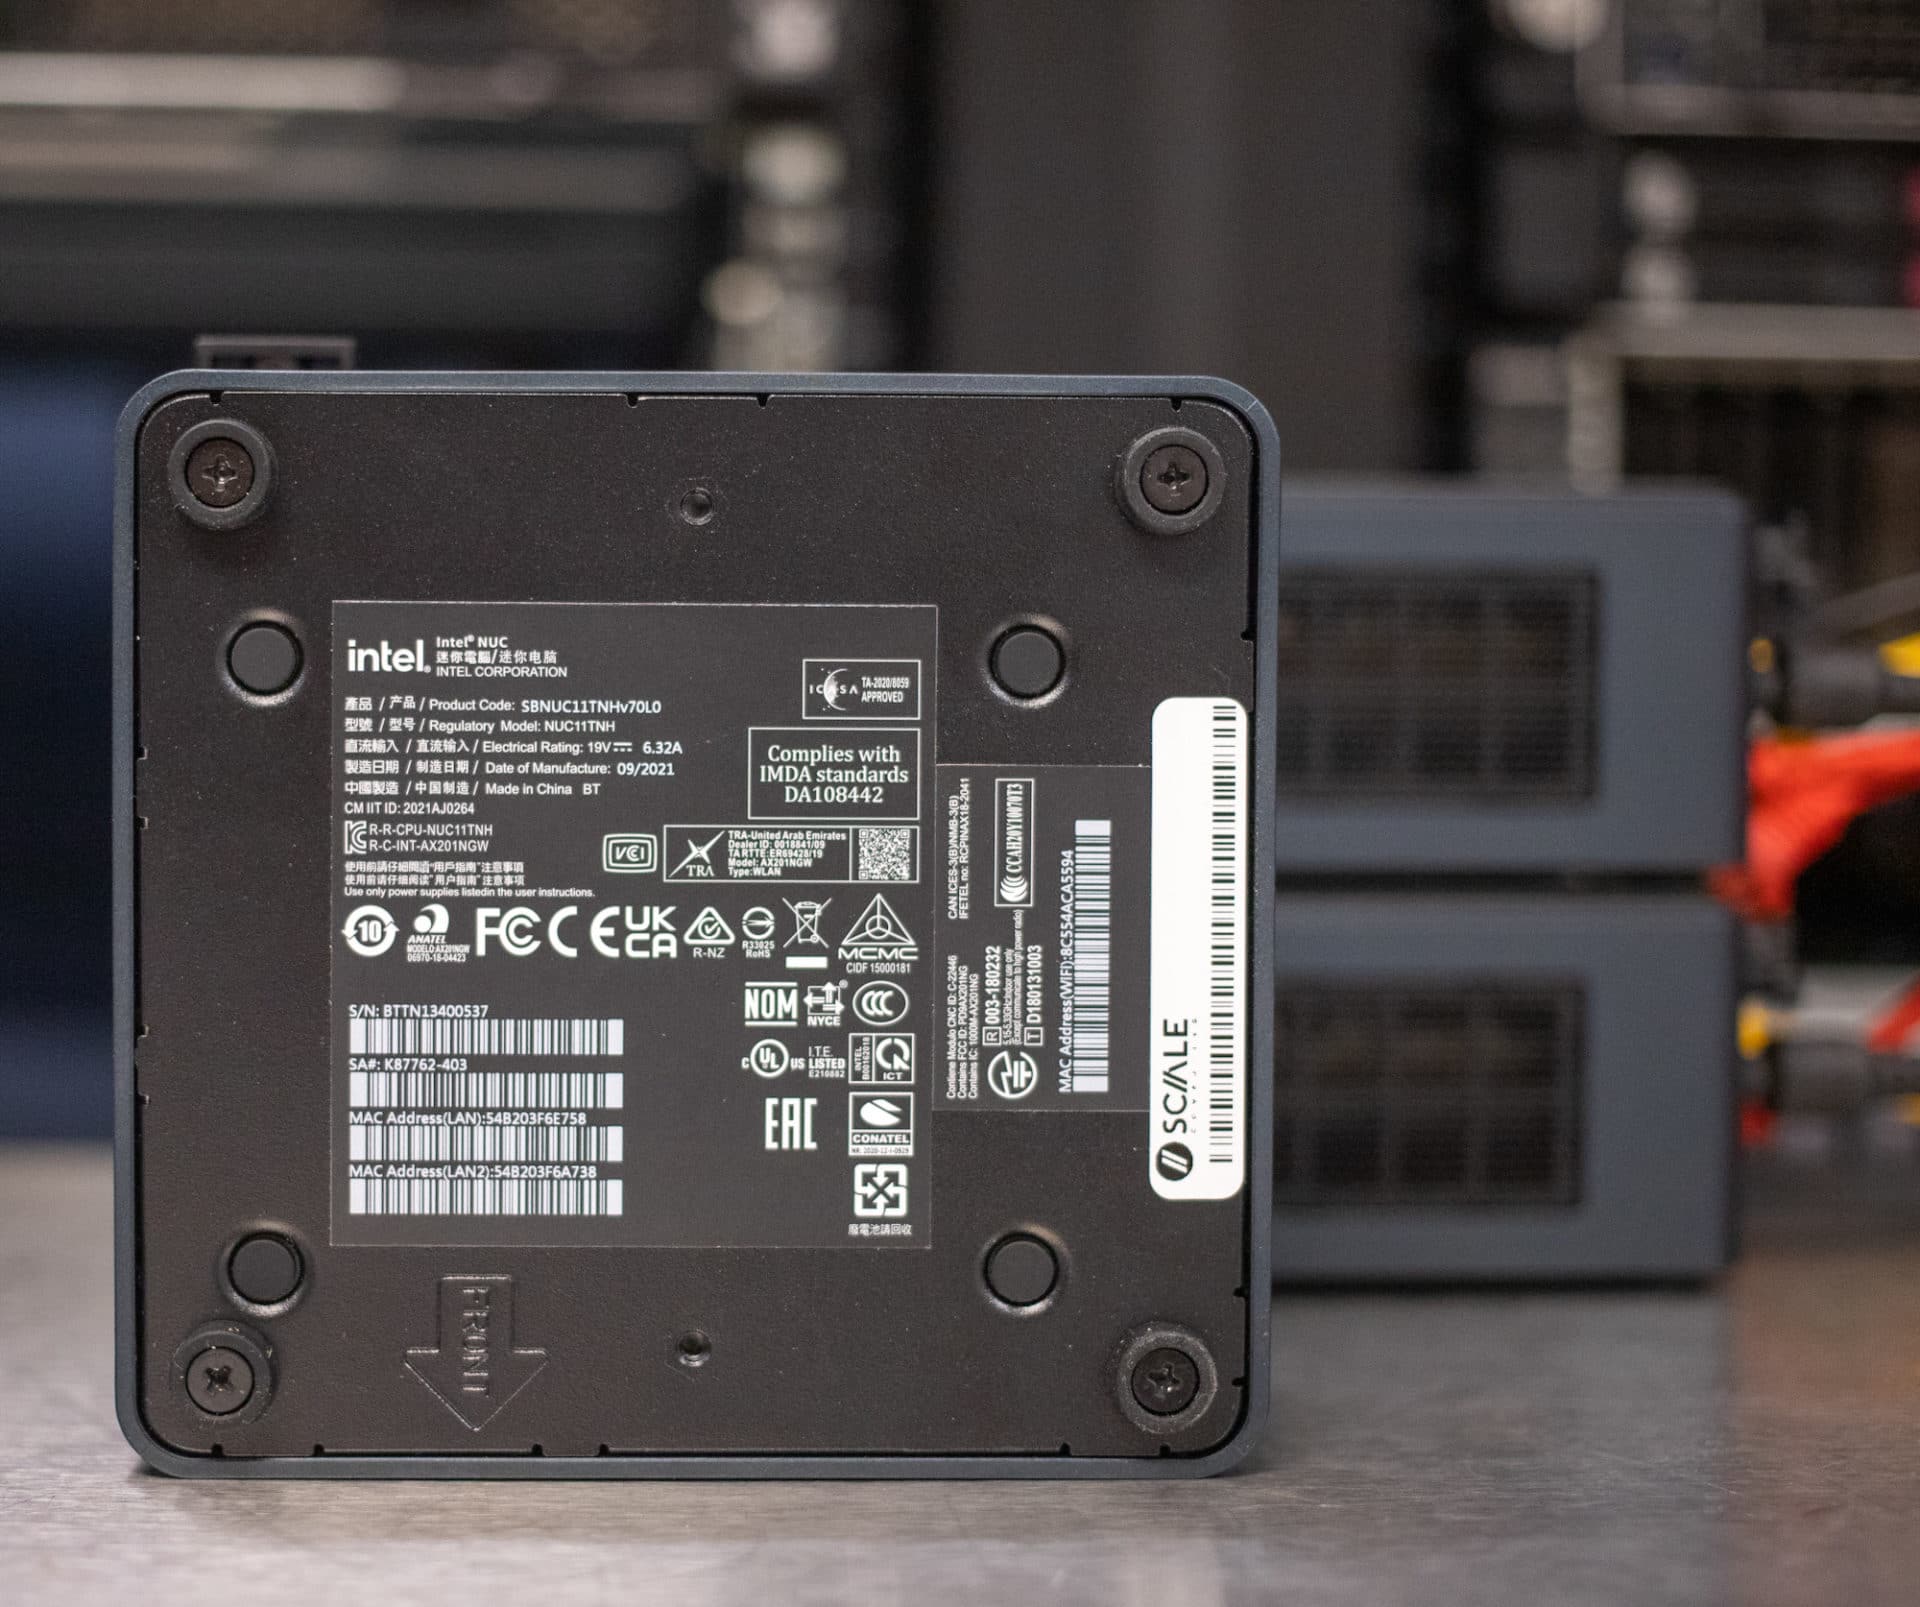
When unboxing the Scale Computing Platform, keeping the node serial number and associated Software Key together will be essential since they will need to match during the initial configuration for the cluster. Following the installation datasheet will prepare you for the next steps in the setup process.
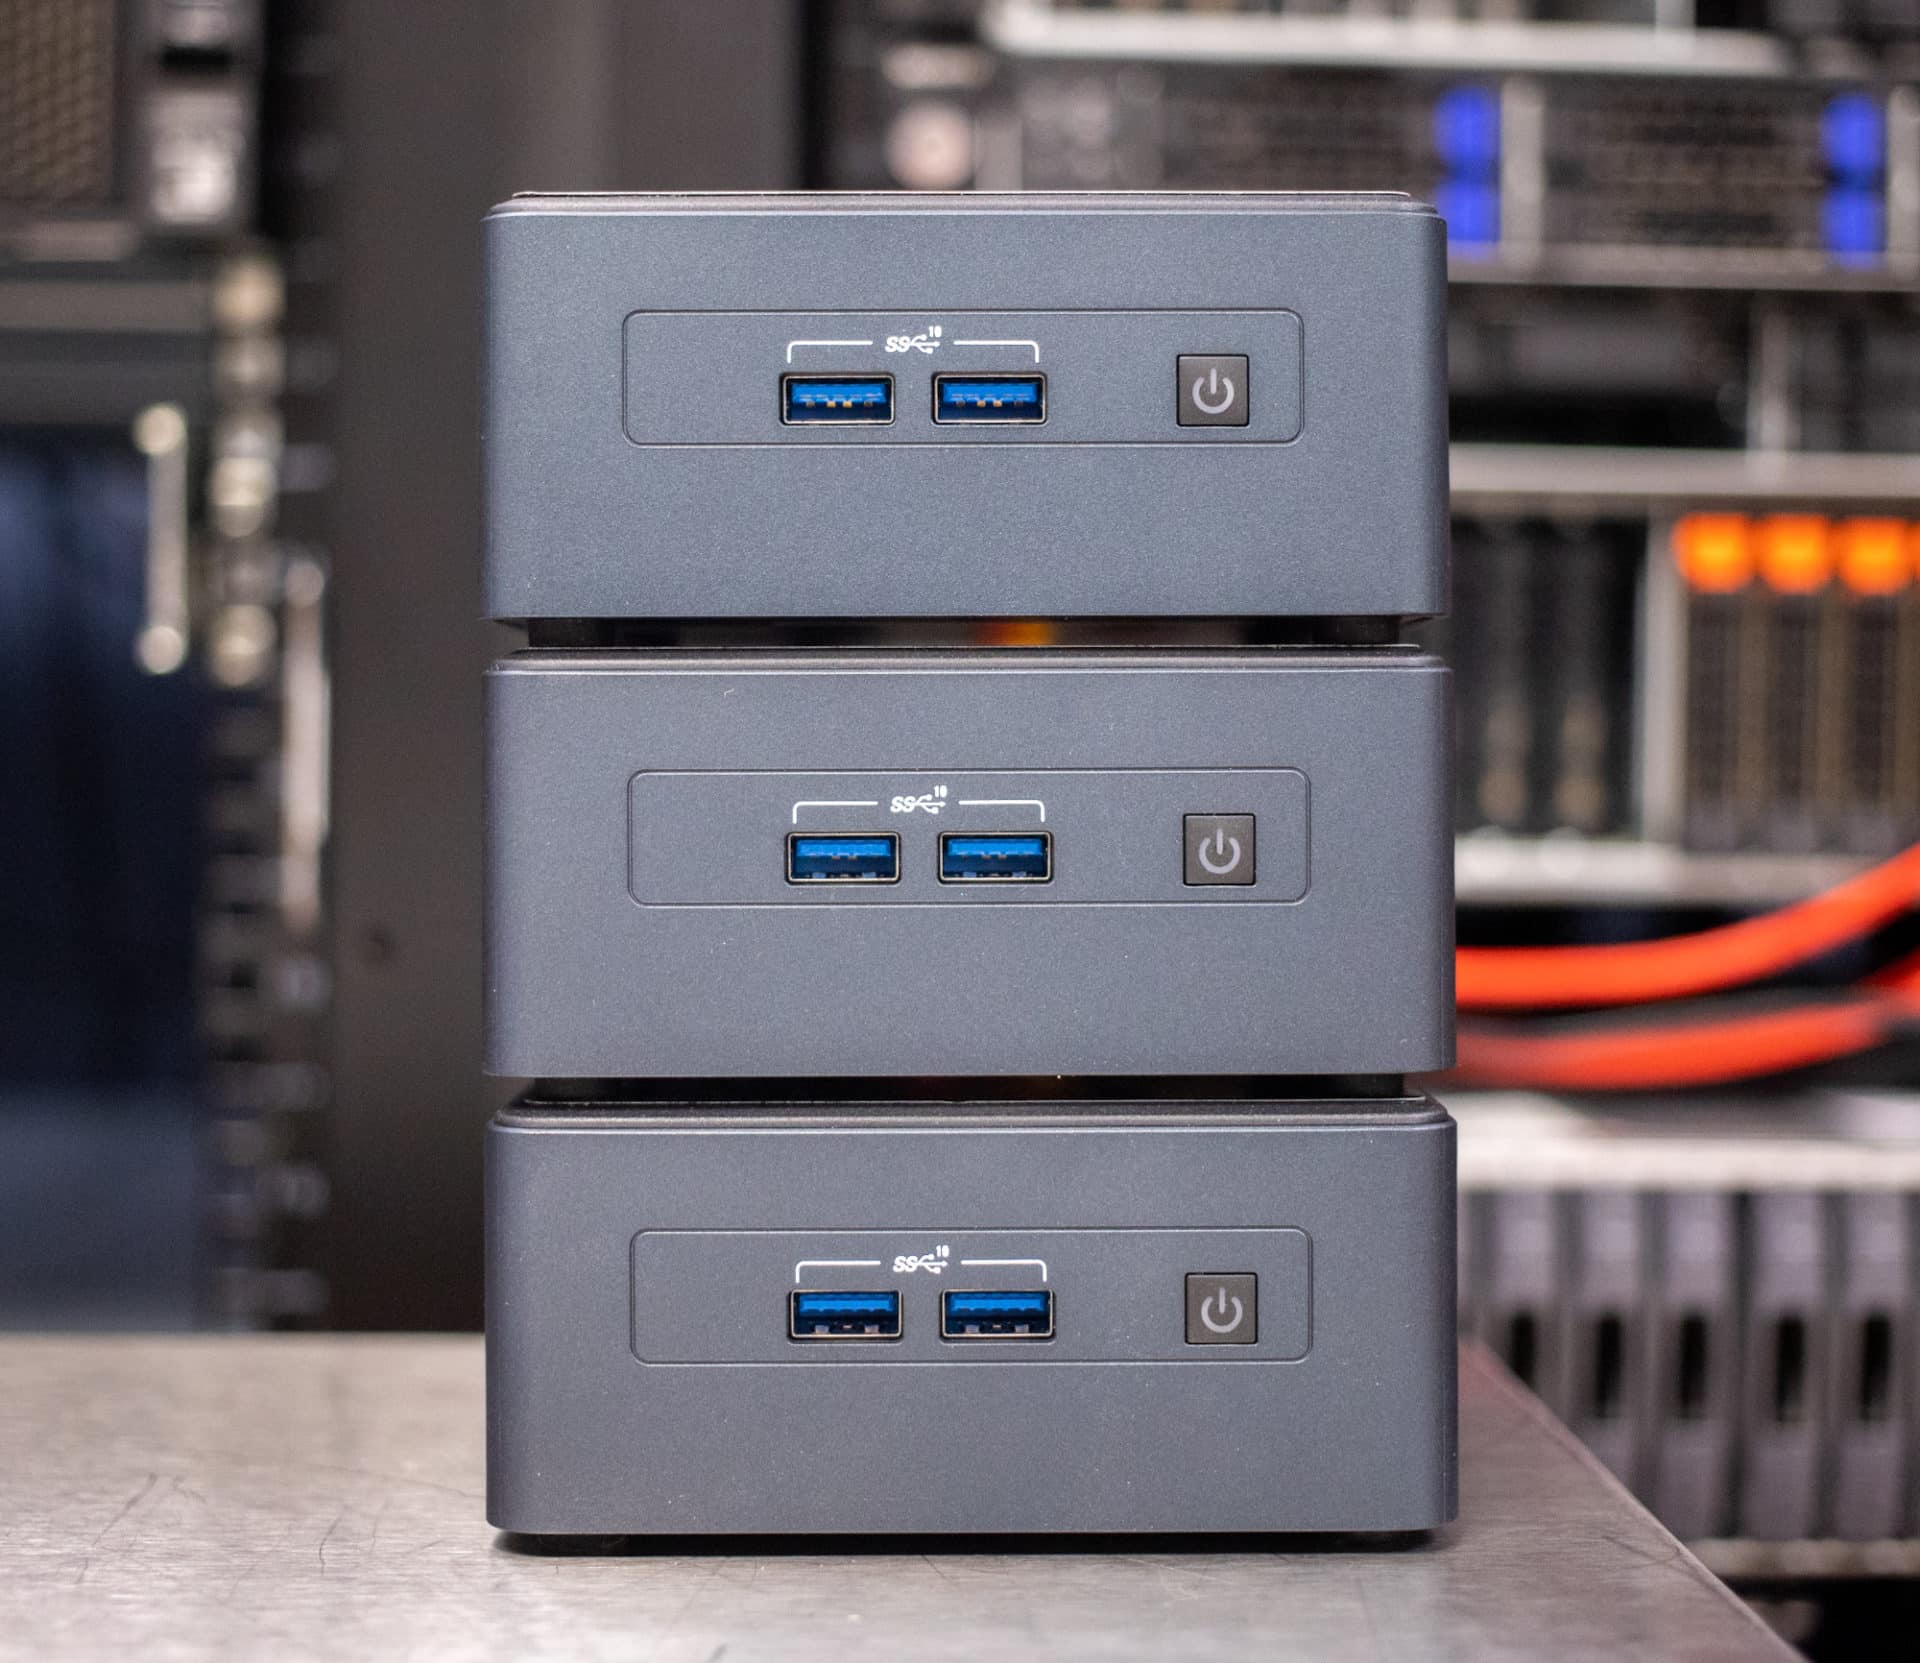
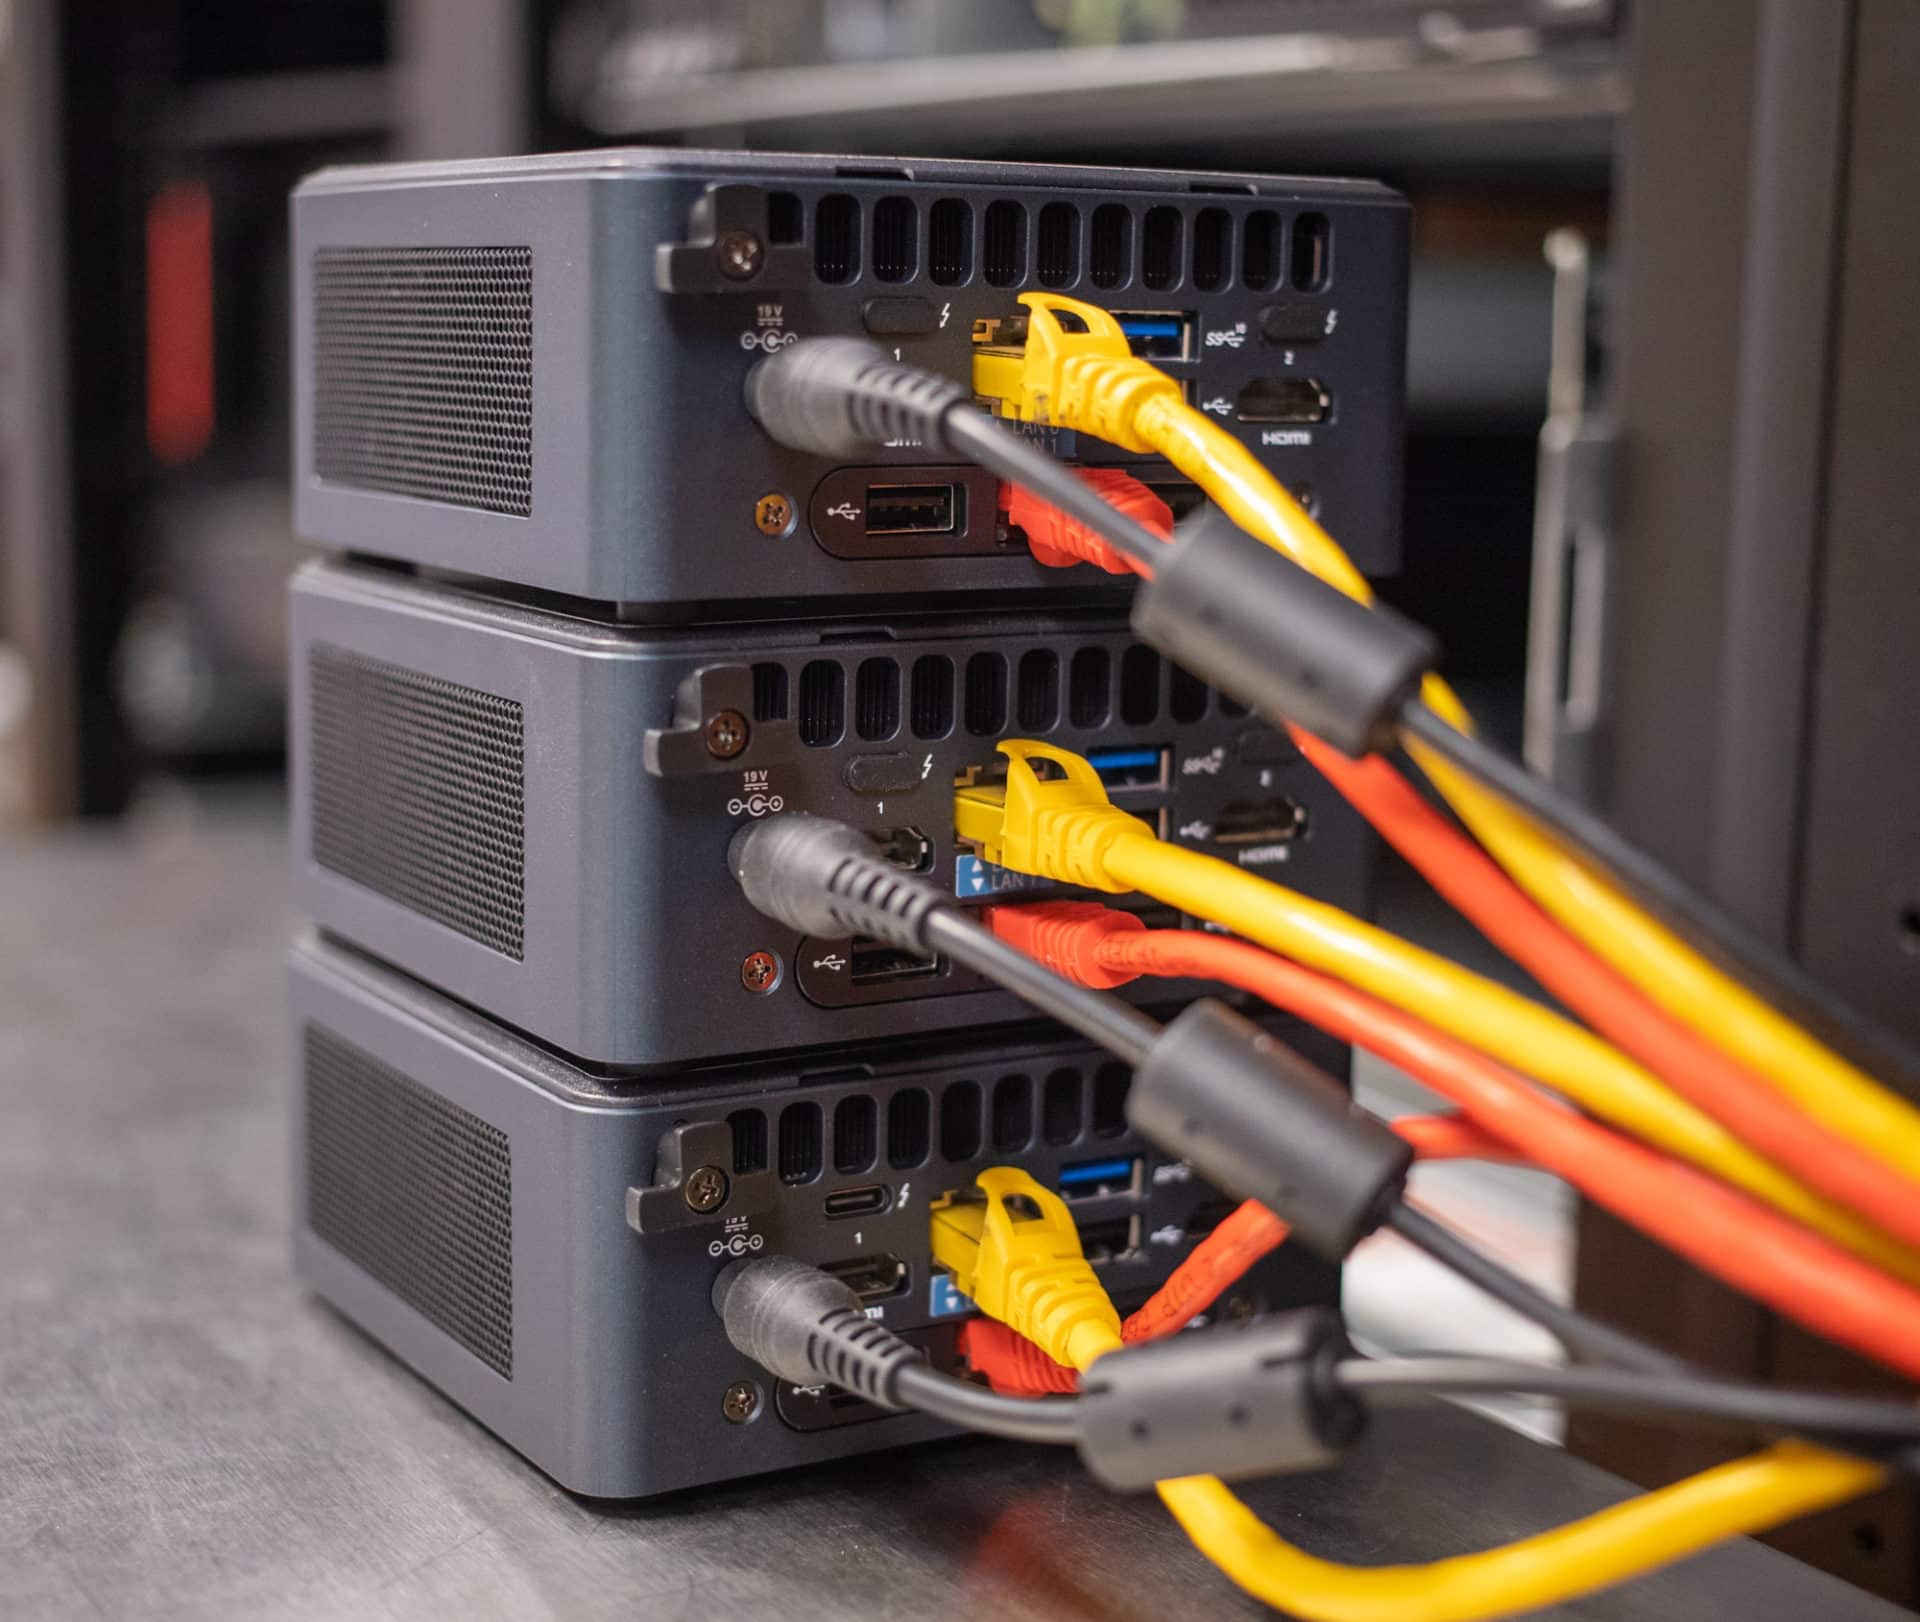
The initial setup is simple. Place the nodes in the desired location, connect to power, and plug in two Ethernet cables. The two Ethernet cables provide redundancy in case of a switch failure or another catastrophe. The nodes will not power up until the power button is pressed on the front of the unit. While the servers are initializing, locate the cards with the serial numbers and software keys for each node.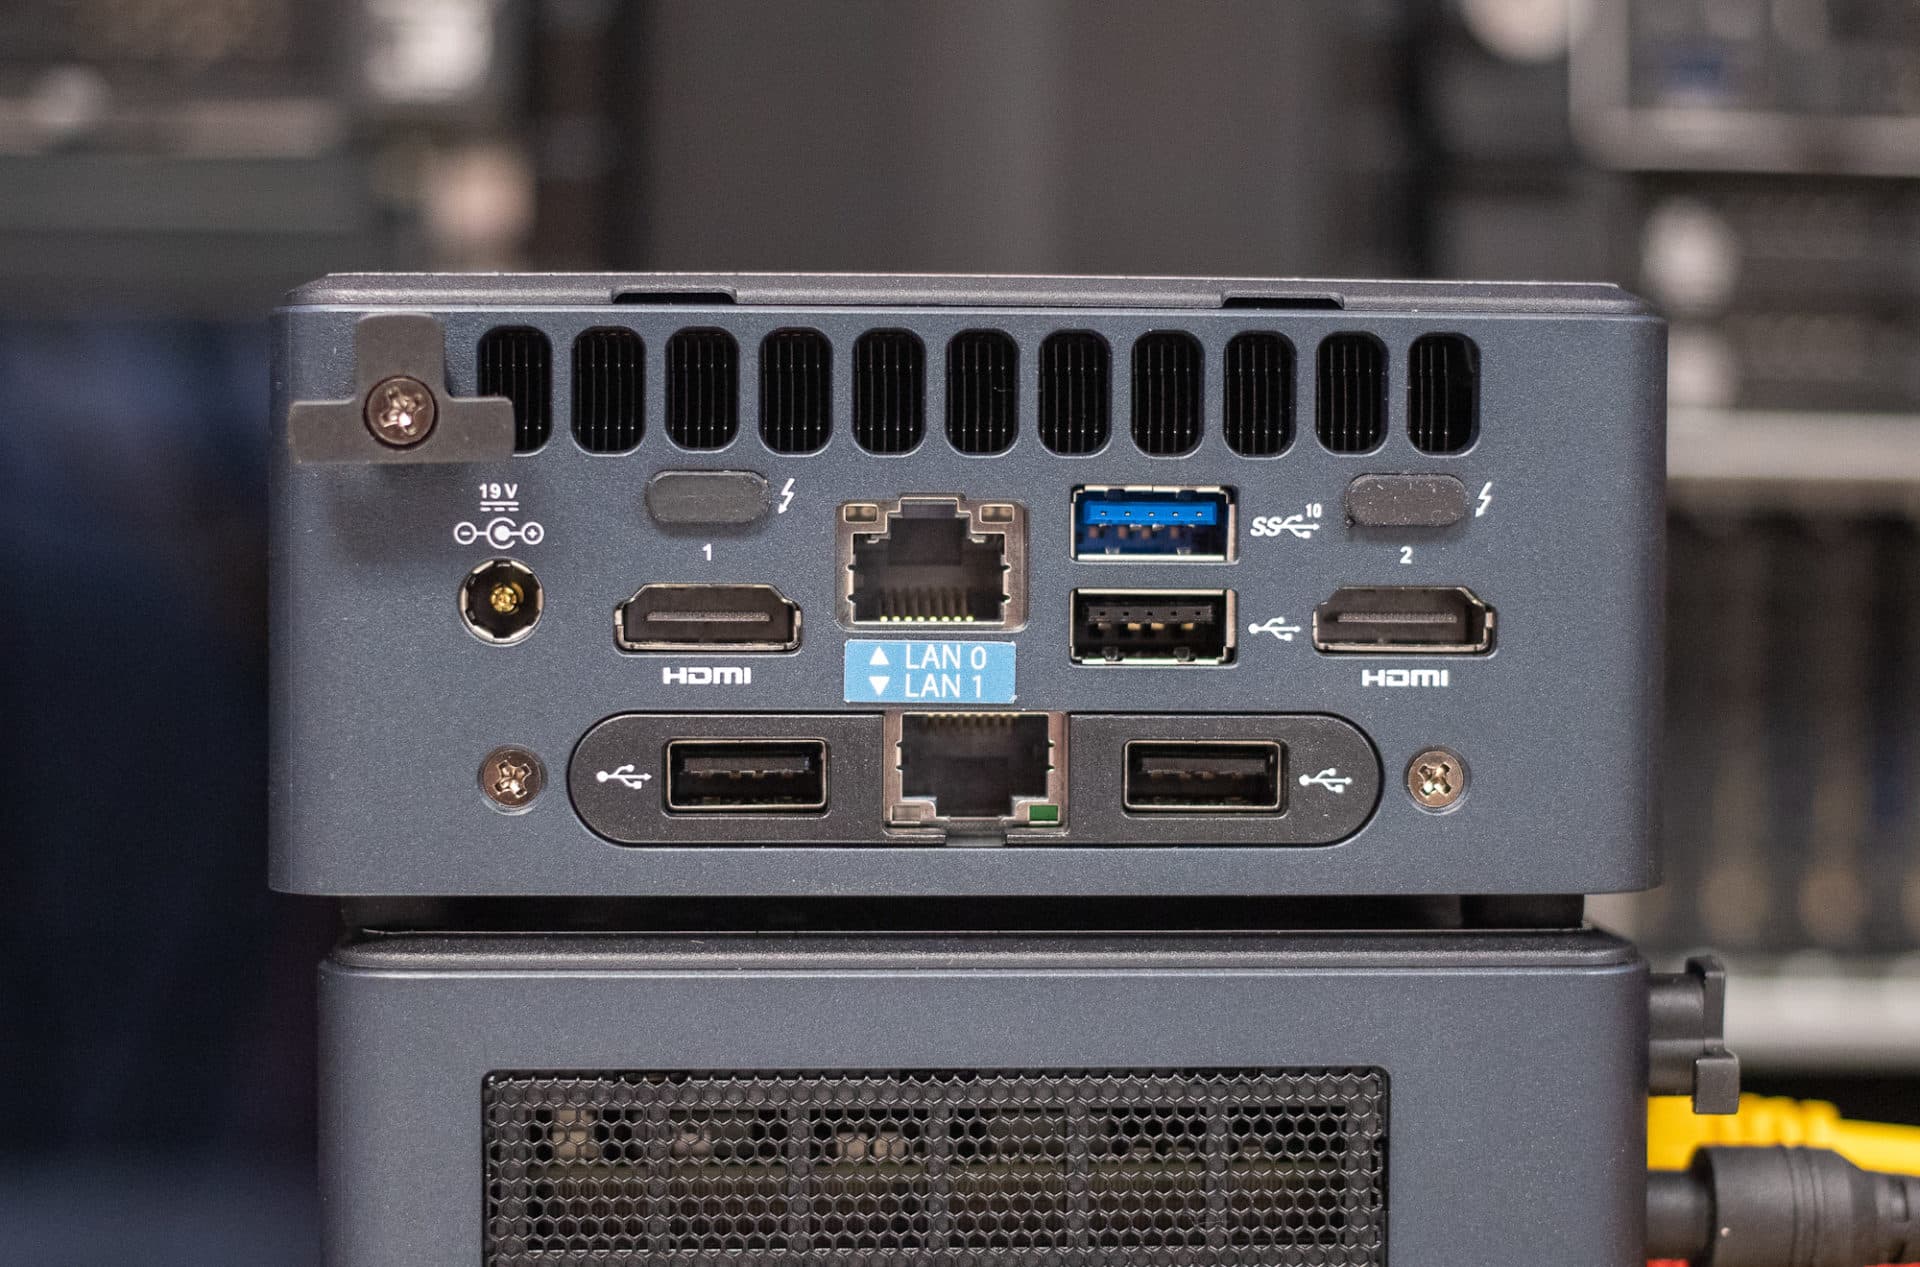
Two HDMI connections are available on the back of the unit. Connect a cable to one of the HDMI ports. Hopefully, there is a monitor on the other end of that cable. After about a minute, the server will ask for the login information. It is important to note that logging into the system via the command line is only necessary during the initial setup.
Once the nodes are initialized, access will be through the Cluster Manager GUI. The default login is admin/admin. Once logged in, the following prompt asks for the IP Address to access the Scale UI (information provided by Scale Computing). Next, enter the node’s IP Address, followed by prompts for the hardware serial number and software key. The hyphens are optional when inputting the key into the node.
That’s it for node 1. Now follow those same steps on node 2 and node 3.
After all three nodes are initialized, log back into each system to enter the commands to initialize the node and the cluster. Once logged in, enter “sudo scnodeinit” to initialize the node. It takes about a minute for this command to complete. Once that command has been completed, enter the second command, “sudo scclusterinit” to instruct the node to join the cluster when the other nodes are active. The cluster command takes about five minutes to complete for a small installation. A larger cluster environment will take longer to initialize.
Once initialized, the cluster will be accessible through the Scale Computing UI. Log in to the Scale Computing UI using the same login information for the nodes (admin/admin). At this point, the cluster is ready to load the desired operating system. If installing Windows Server 10, the appropriate drivers will install automatically.
Scale Computing Cluster Manager
Scale Computing has made the cluster manager as easy to use as installing and creating the cluster. There are two methods to manage the Scale Computing Cluster: local cluster manager and Fleet Manager cloud access. The local cluster manager is a graphical user interface through the installed cluster. We only had a local three-node cluster, so this would typically be the method to manage a small installation such as ours.
Fleet Manager is a cloud option to manage clusters installed in remote locations and the management tool to access installed clusters from anywhere. The Fleet Manager is accessed through the Scale Computing cloud.
When you purchase a system from Scale Computing, it will be necessary to set up an account on Scale Edge for support, open tickets, software access, etc. That login information is used to access SC//Fleet Manager and is specific to your installed cluster(s).
Local Cluster Management
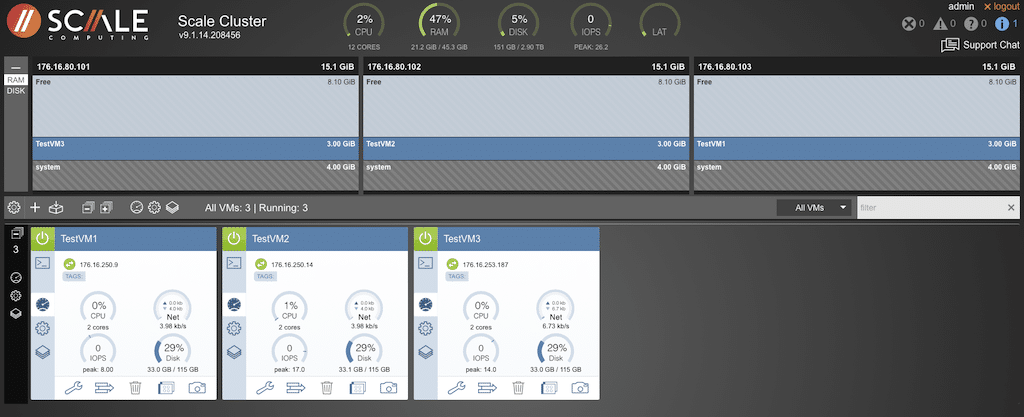
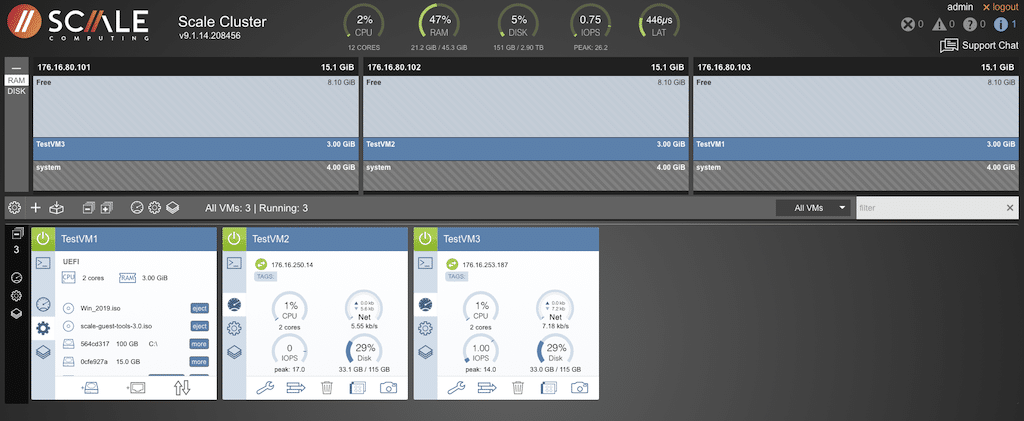
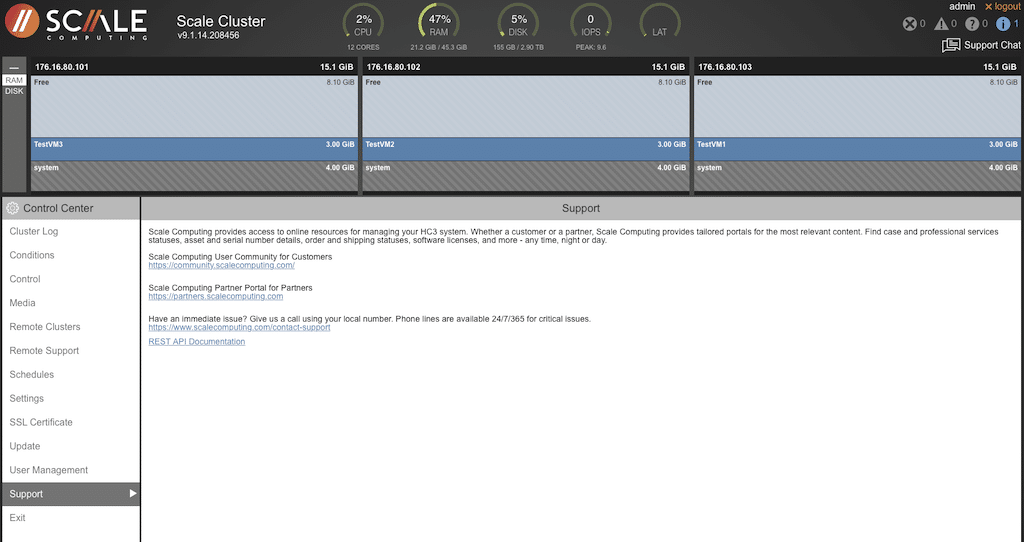
The following are screen captures from our local cluster. Access to the GUI is provided by connecting to the IP address of the local cluster, typically from the same network. The interface is intuitive and easy to use.
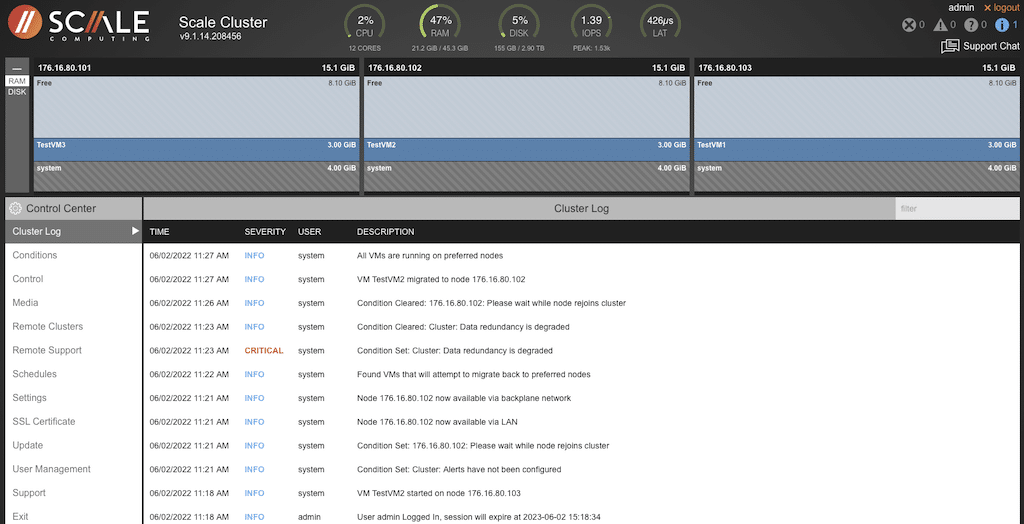
The details for each node in the cluster are displayed for easy identification. Warning messages are highlighted on the top right of the display, along with the user name and the option to log out. There is even an option to chat with ScaleCare Support directly from the management window.
Because our installation was pretty basic, the information may not be too exciting, but this is a valuable tool in a production environment. Display options are available down the left side of the screen to get the health details of the cluster and nodes.
The display is split, showing either RAM or DISK information in the top half. When the RAM view is selected, the top section will also display the specific VM with allocated, used, and free memory details. Double-clicking the VM in the top section will take you to that virtual machine and the installed OS.
The section below is based on the configuration specific to that virtual machine. Across the middle of the display is the global access to the VMs in that cluster. The same is true for the icons down the left side of the lower portion of the display. Icons within each VM window will affect output for that VM only.
Selecting the gear icon will display the configurations for all VMs in the cluster.
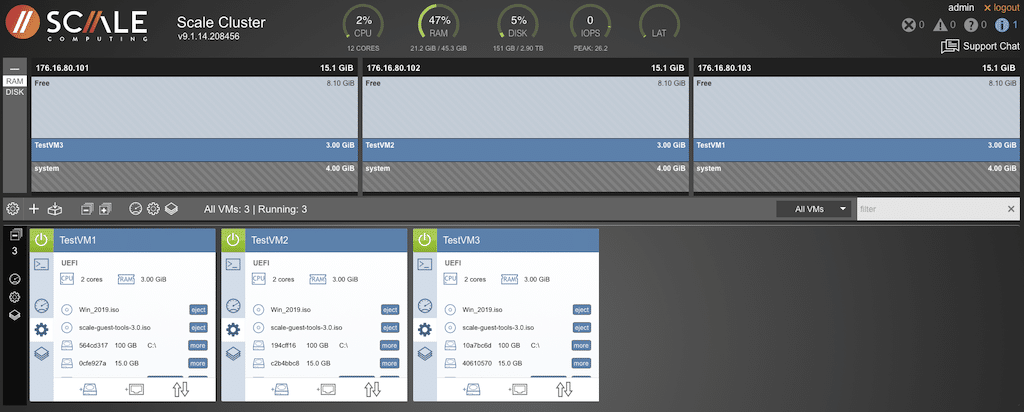
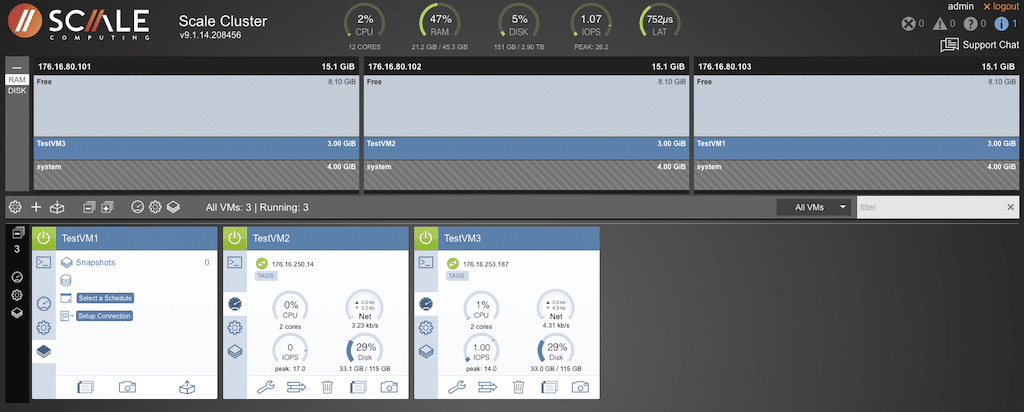
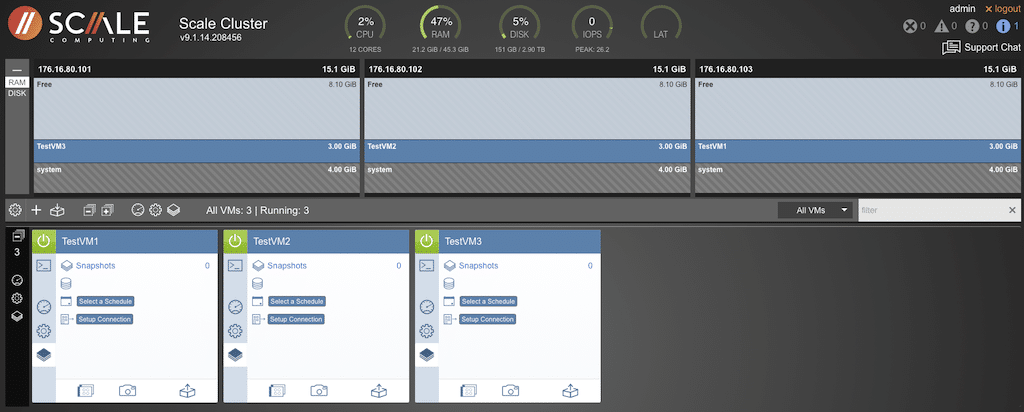
It is possible to select tools specific to the individual node and components and view the cluster. Selecting the gear icon within the VM view provides access to the file system and installed OS, with the ability to eject specific disks. Depending upon the configuration of each node, there is the ability to scroll through each node to get file system details. 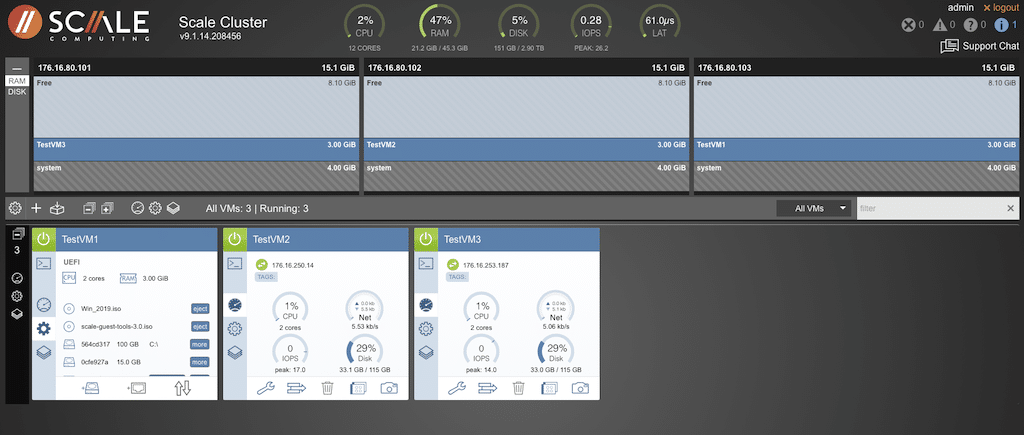 The stack icon will give you details on any snapshots and options to do an immediate snapshot.
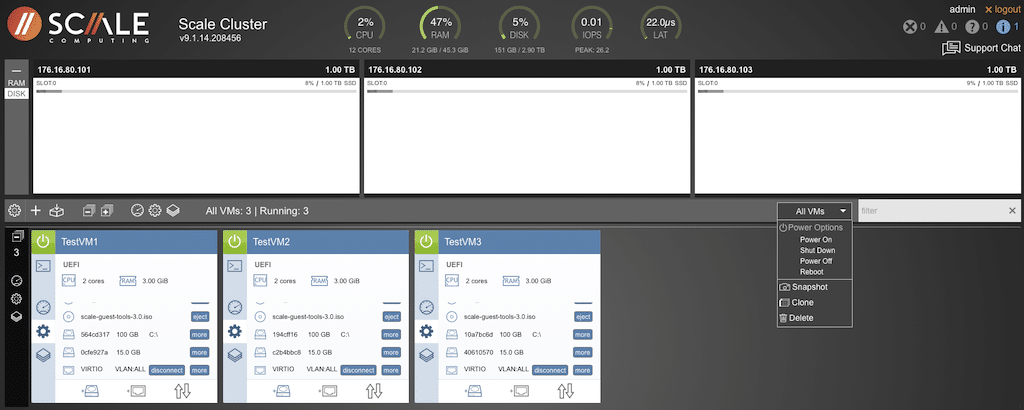
Changing the view from RAM to DISK on the top section of the management window will change the display in that section. There is also an option to perform functions across all nodes in the cluster simultaneously by clicking the ALL VMs detail and selecting the action from the drop-down menu.
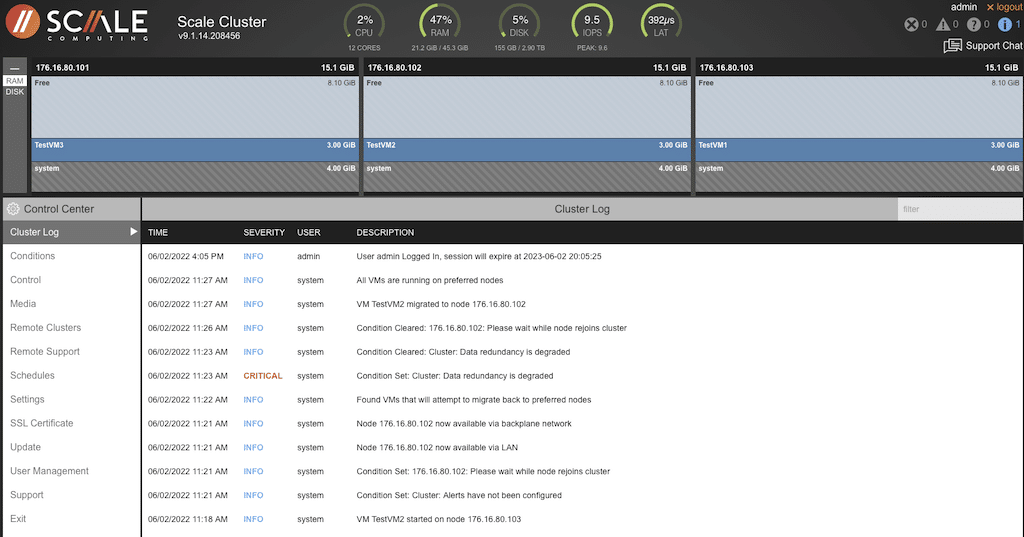
Selecting the gear icon on the middle bar will provide more options specific to the cluster. Each of those options will provide more detail. The screen below details the cluster log.

Selecting one of the icons specific to the VM makes it possible to change that node’s display output without affecting the displays across the remaining cluster. Selecting the gear icon on a particular VM provides the option to perform tests, power cycle, check disk targets, etc.
Moving a VM is Fast and Easy
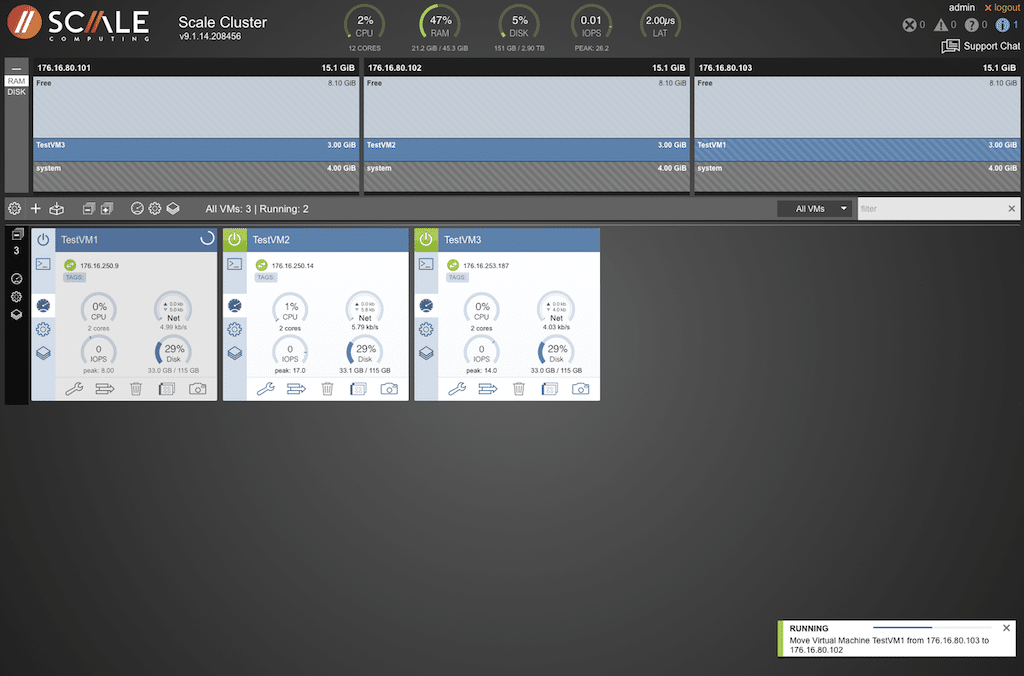
Moving a VM is as simple as drag and drop. Within the node display, select the meter icon. The icons at the bottom of the node display change and provide options for user maintenance, moving a VM, deleting a VM, cloning, and snapshots.
Select the move icon (which looks like a stack with a portion sticking out to the right) to move a VM. Selecting that will change the top half of the manager and provide the available node to move that specific VM. Select the node to move the VM.
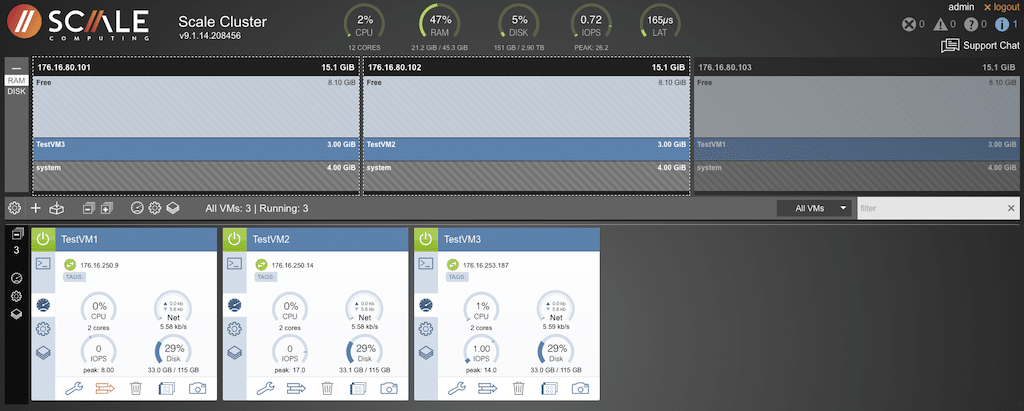
A pop-up is displayed along the bottom right with information regarding the move.
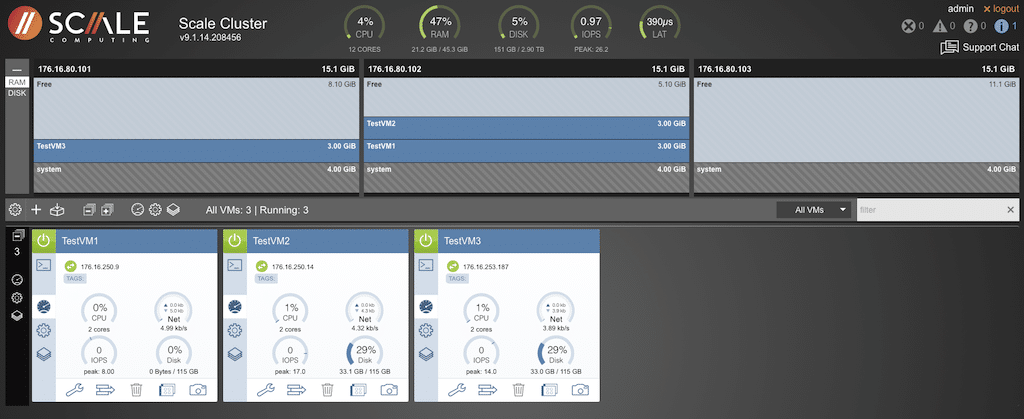
When the VM has moved, the display will show the new location with details for that node.
Moving the VM back to the original location is just as simple.
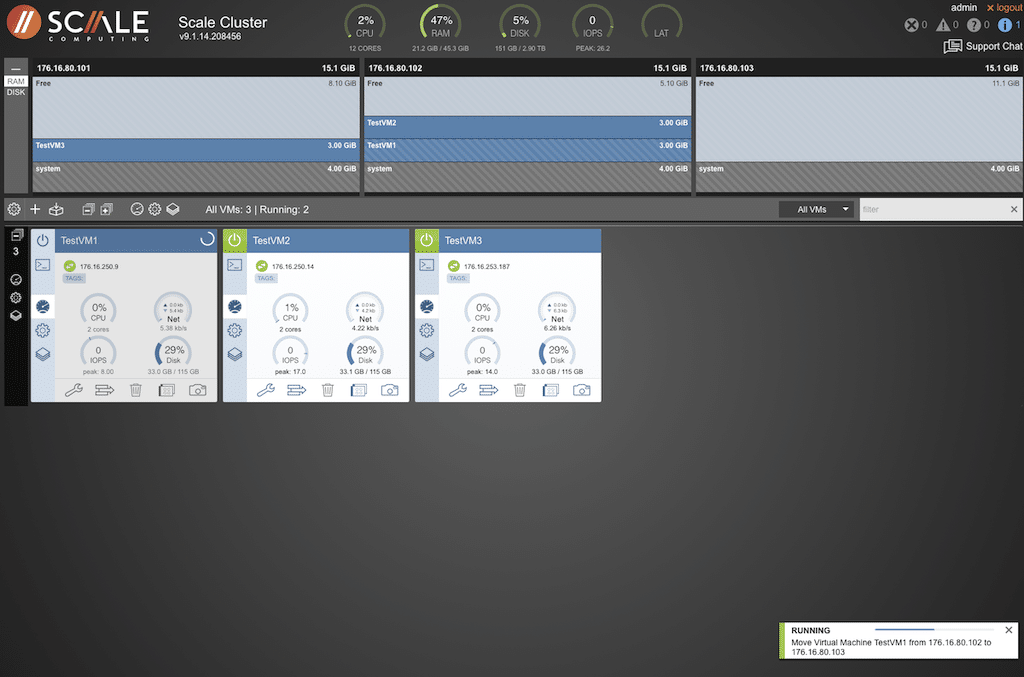
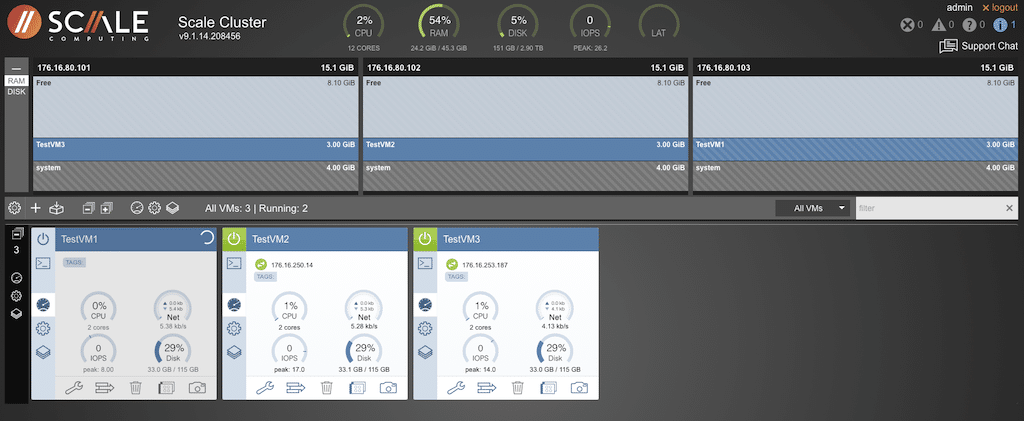
The display will indicate the changes made when the VM has moved to the selected location.
Several options exist to make life easy with the node view of the VM. Need to make a clone of a VM? Select the icon next to the “camera” to display a pop-up with all appropriate fields to clone a VM.

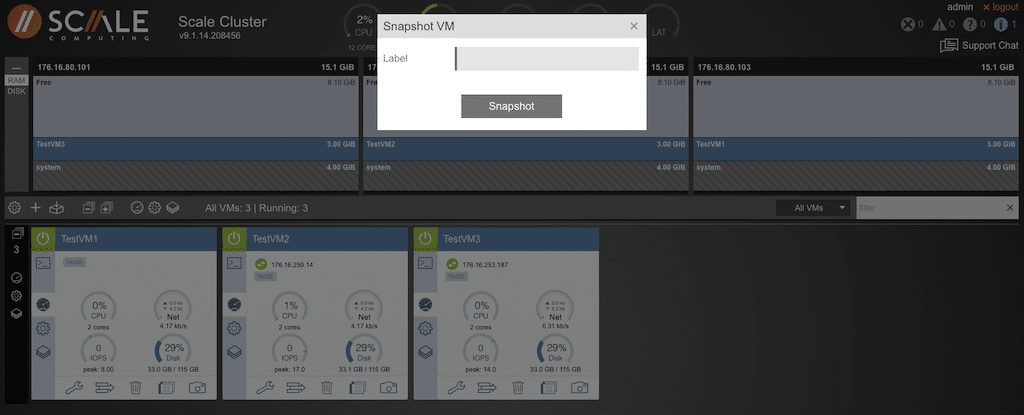
Snapshots are just as simple. Click on the camera and take a snapshot. The pop-up provides an opportunity to give the snapshot a label.
Editing the VM is quick and accessible. Selecting the wrench will display an edit box to change VM parameters, name, boot type, etc.

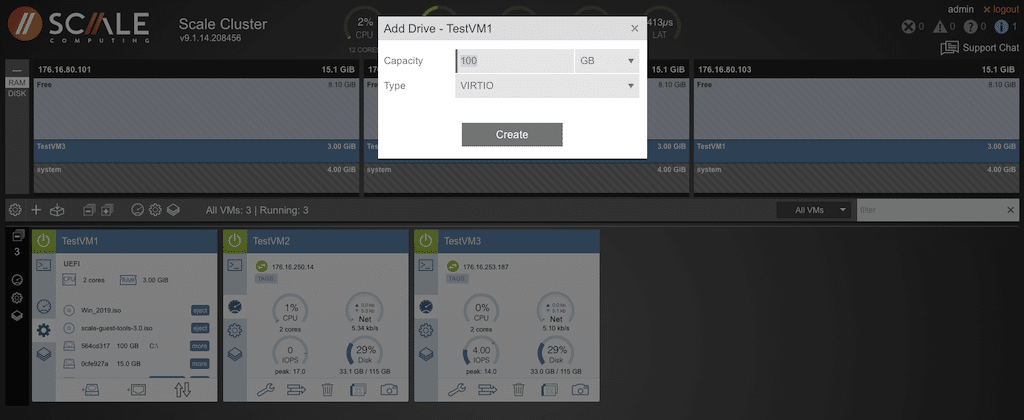
Selecting the gear in the VM view will provide options to add disks and configure network ports.
Click the icon that looks like an external disk and provide the necessary information to add a drive.
The last icon in the VM node view gives options for VM-specific commands.
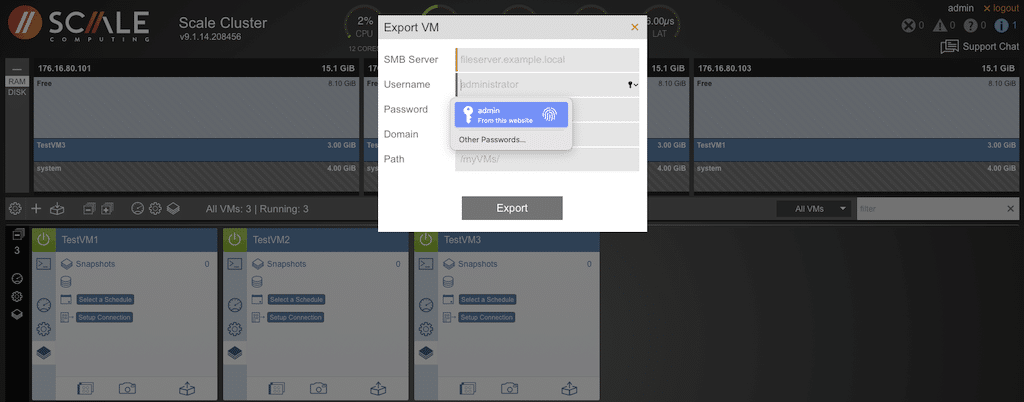
A pop-up is provided to make exporting a VM painless.
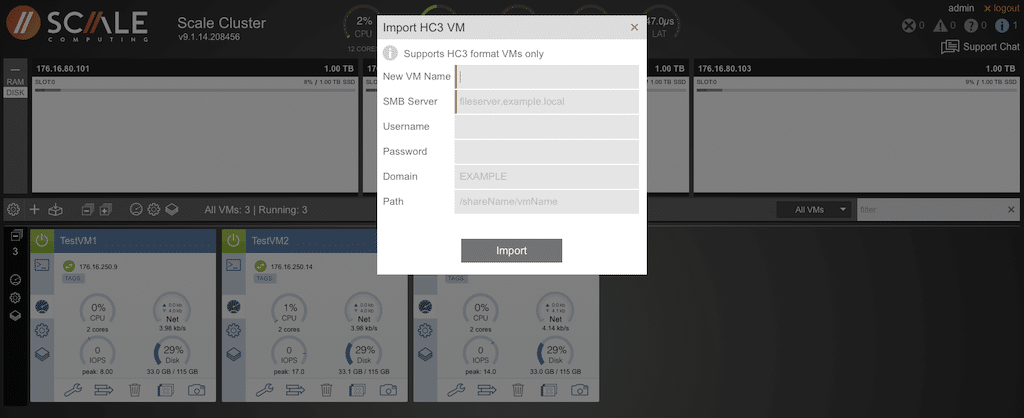
The icon that looks like a box with an arrow pointing to it located on the left side of the center bar will open a pop-up window, providing input fields necessary to import the HyperCore VM.
 The control center menu can be accessed by selecting the gear icon in the center bar. This section of the local cluster manager provides logs, conditions, software updates, etc.
The display is alphabetical, with the first option being the “Cluster Log.” All events will show up in this window. The events shown are from some tests we did earlier. We performed a forced power outage to see what the cluster would do with the VMs. The details will be given further down in the article.
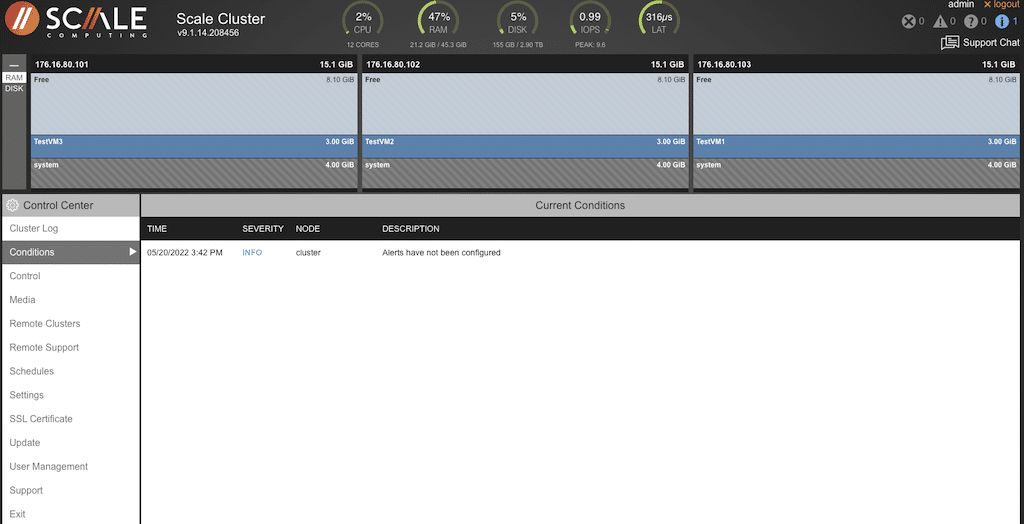
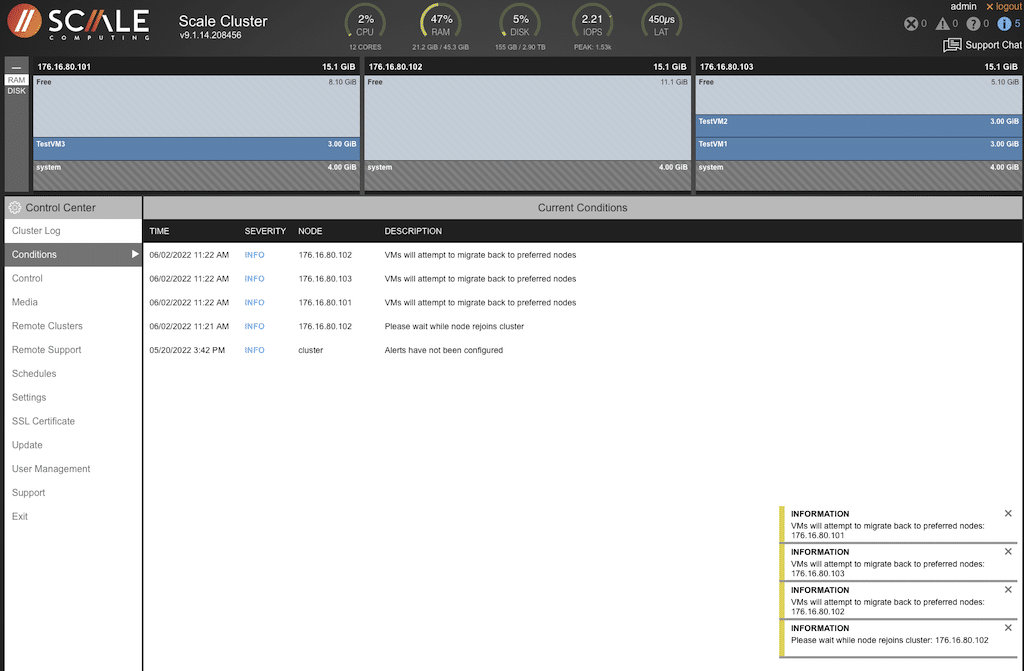
“Conditions” will display any unusual condition within the configuration or cluster.
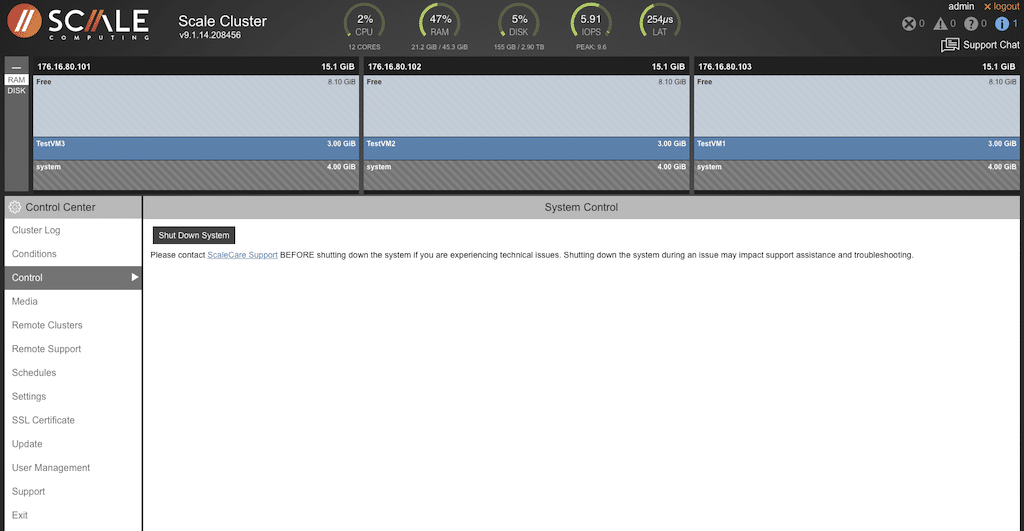
“Control” allows the entire cluster to be shut down with a single click. Scale Computing requests that they are contacted before shutting down because the cluster also communicates with Scale cloud services for remote management and support.
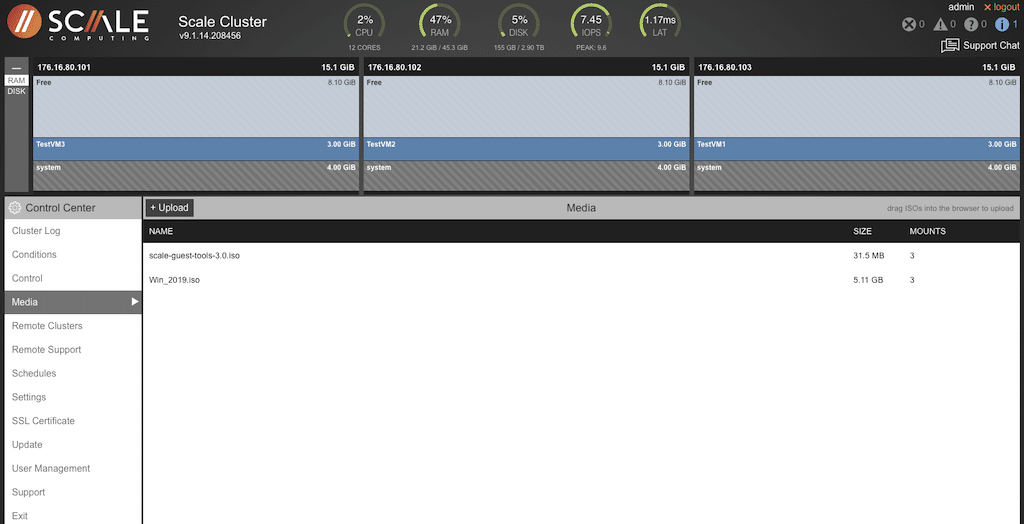
Selecting “Media” provides the ability to see what systems are loaded and running and also the option to upload new ISOs.
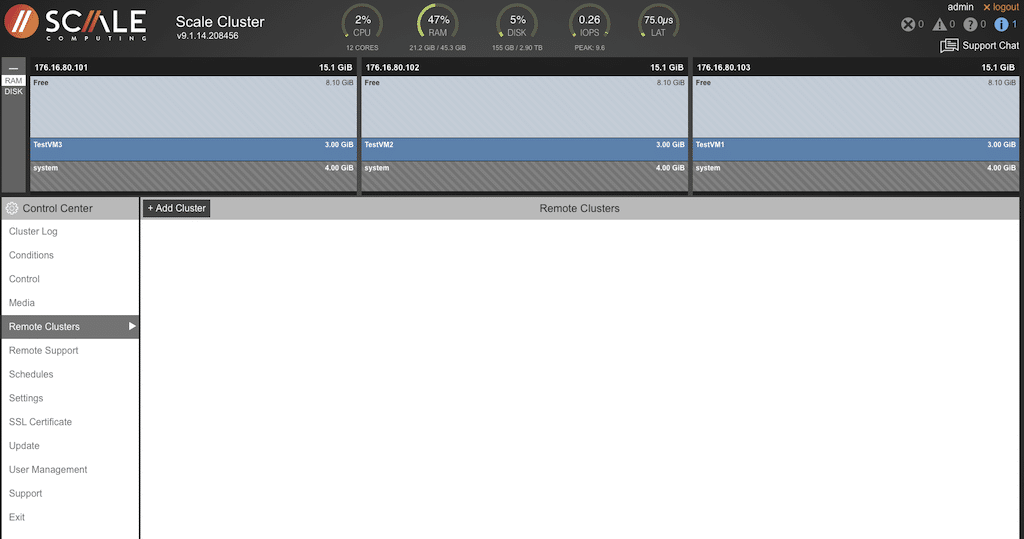
Customers with deployed remote clusters could be accessed and managed from this screen.
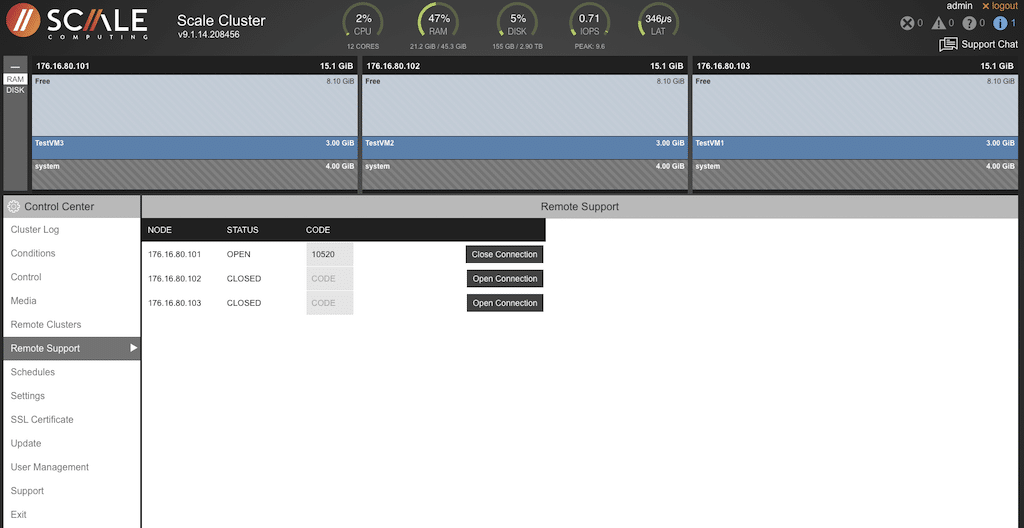
The “Remote Support” screen links to Scale Computing support to connect and troubleshoot clusters.
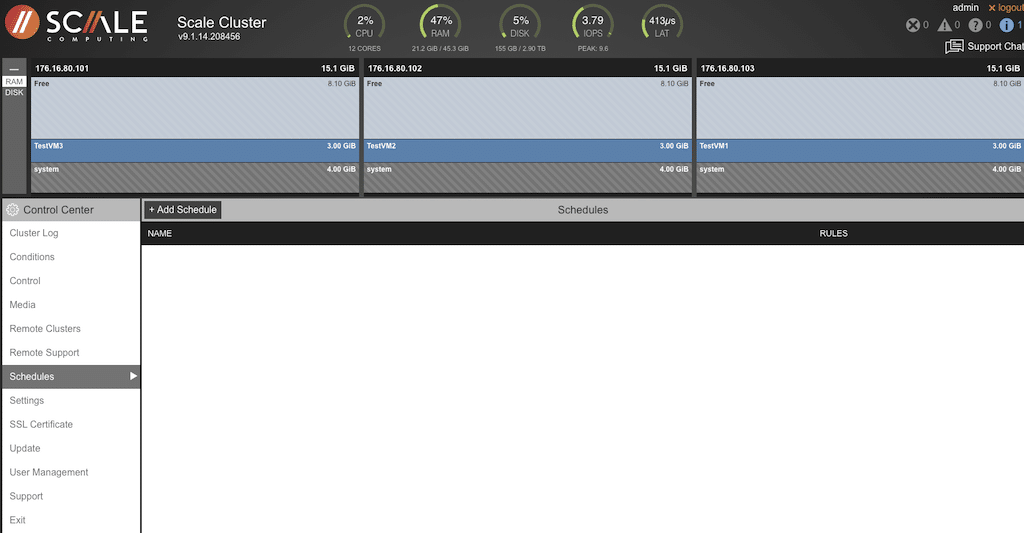
Any system schedules would show up on the “Schedules” screen.
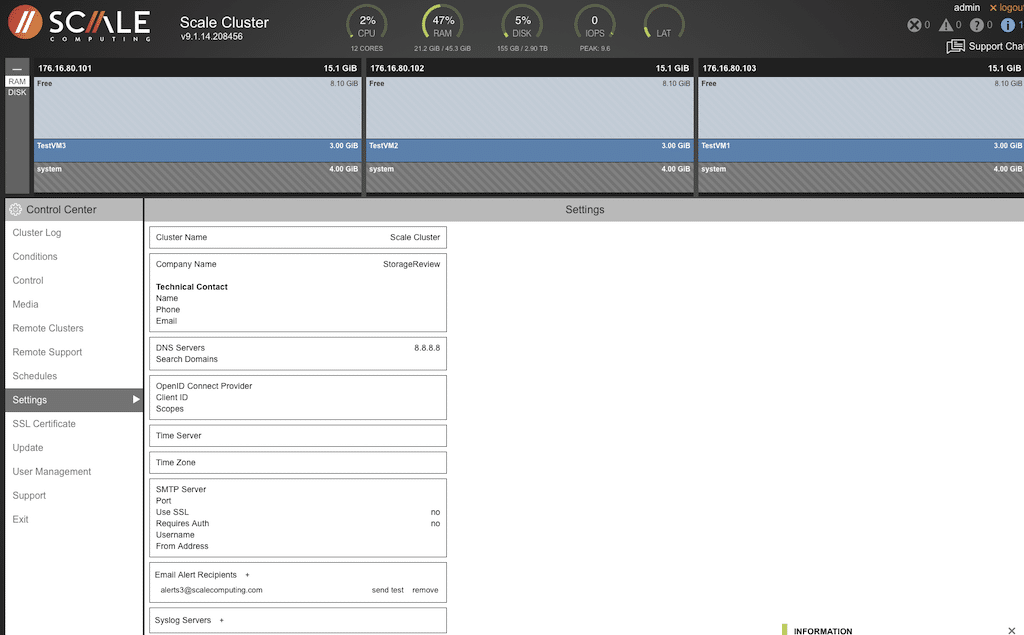
System Settings are displayed on this screen.
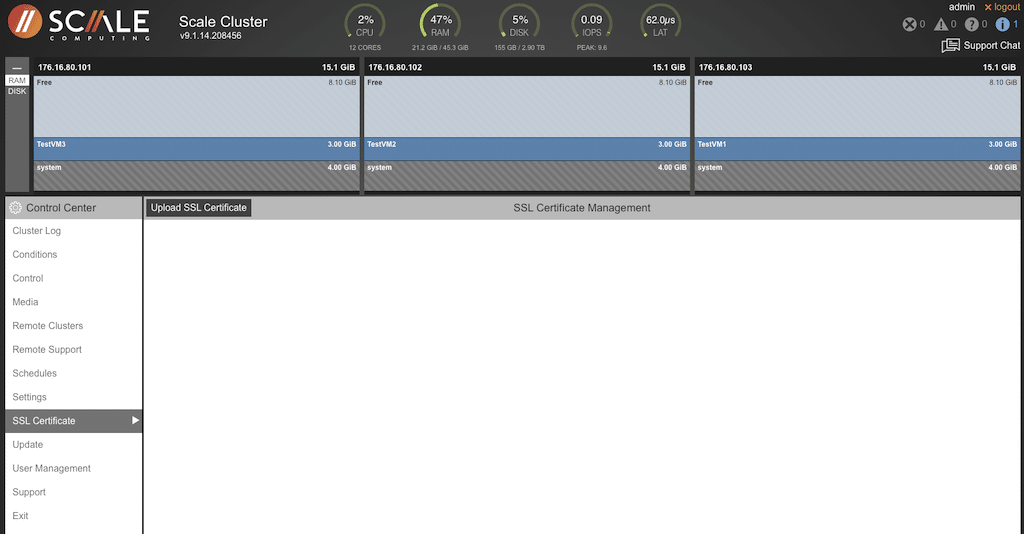
SSL Certificates could be managed from this screen.
If Scale Computing has an update for the cluster, that would be displayed on this screen in addition to an “updates available” prompt near the version number at the top of the screen. It saves an admin time searching for any available updates.
Proactively, the cluster reaches out to Scale Computing to validate that the cluster is running the latest release, ensuring the environment has access to the latest features and enhancements alongside bug and security fixes. With updates being applied in a rolling fashion, applying these is a non-event for the user and any connections into the workloads running on the cluster.

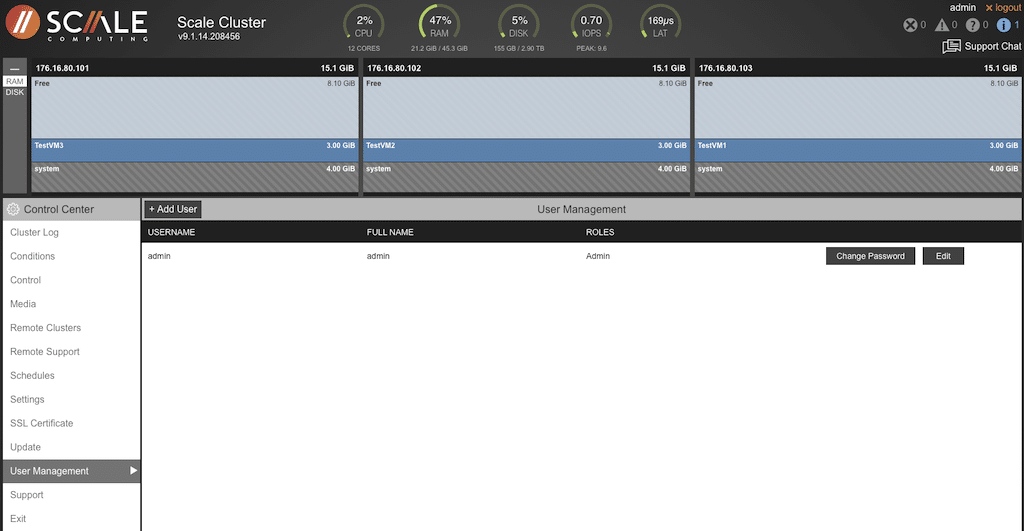
Should the need arise to add or change user information, that can be done from the “User Management” screen.
It is also possible to contact Scale Computing Support from this menu. This includes options to open tickets as a customer or partner, or if an immediate response is needed, the number to dial support is displayed. There are links to documentation and access to the user community.
Scale Computing uses the community concept very effectively. There is a separate web location where users can share information, ask others for assistance, check on configuration options, and more. This is an excellent tool for anyone deploying these clusters.
What Happens if a Node Fails in a Scale Computing Cluster?
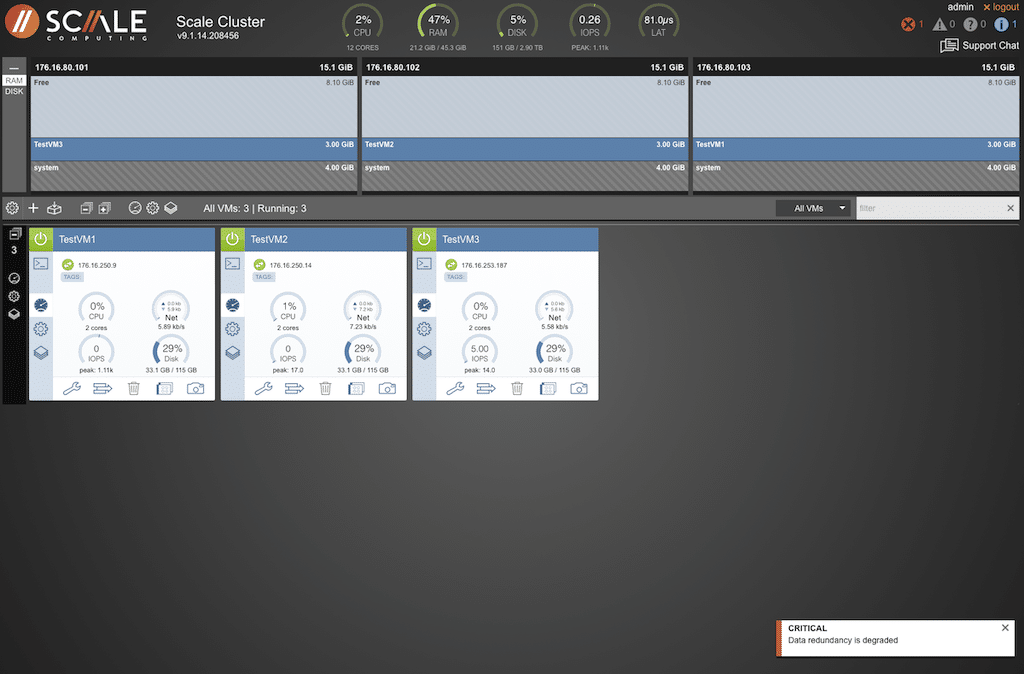
We wanted to see how the cluster would deal with an abrupt power cycle, so the plug was pulled on one of the nodes. We documented the sequence of events, with system messages from power fail to power restore.
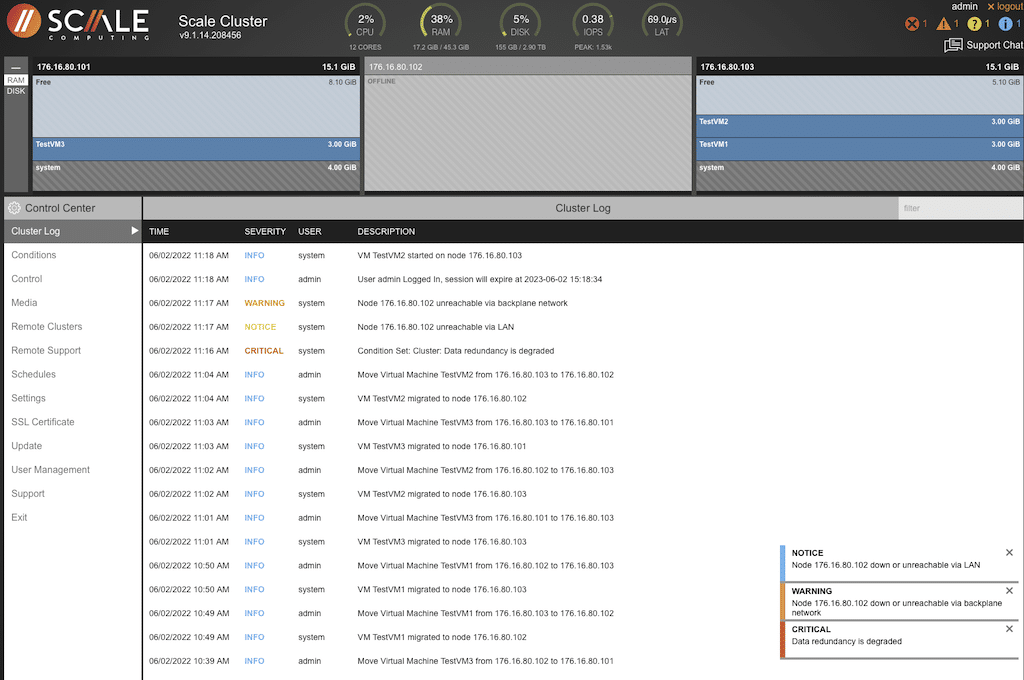
After the plug was pulled on the TestVM2 node, the alarm counter (located in the top right corner of the display) incremented by one, and a pop-up in the bottom right indicated an issue with redundancy.
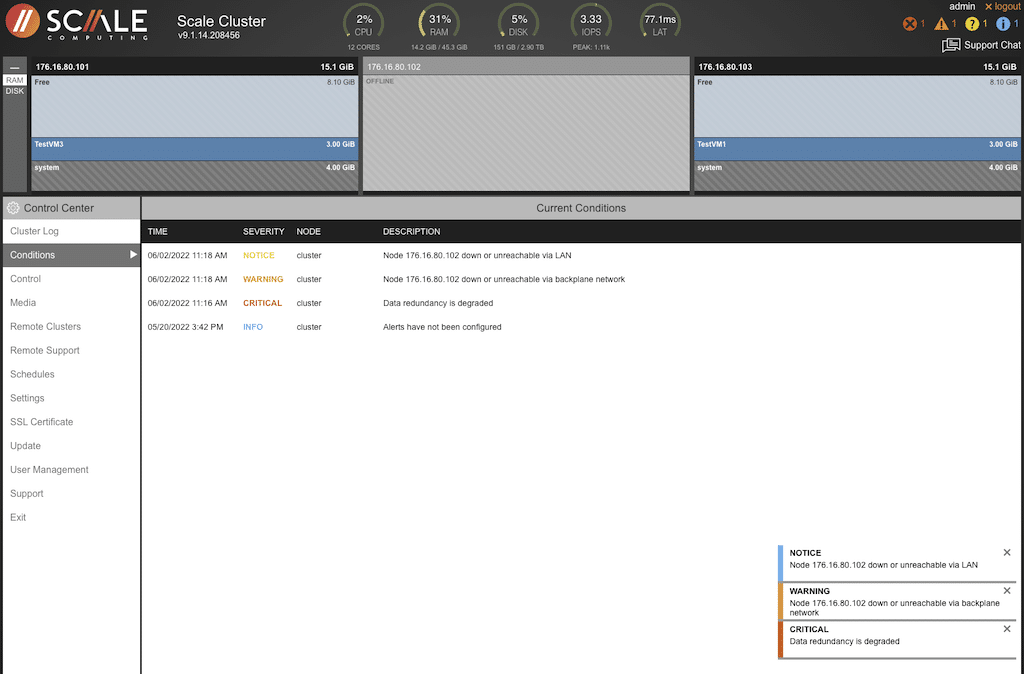
Looking at the cluster log in Control Center, error messages indicated an unreachable node with notice, critical, and warning messages. The SC//HyperCore UI also displayed new messages in the bottom right corner. These pop-ups would display no matter the current screen.
The node view at the top of the manager screen indicated the VM was offline. The error counters in the top right corner also increased, indicating additional errors.

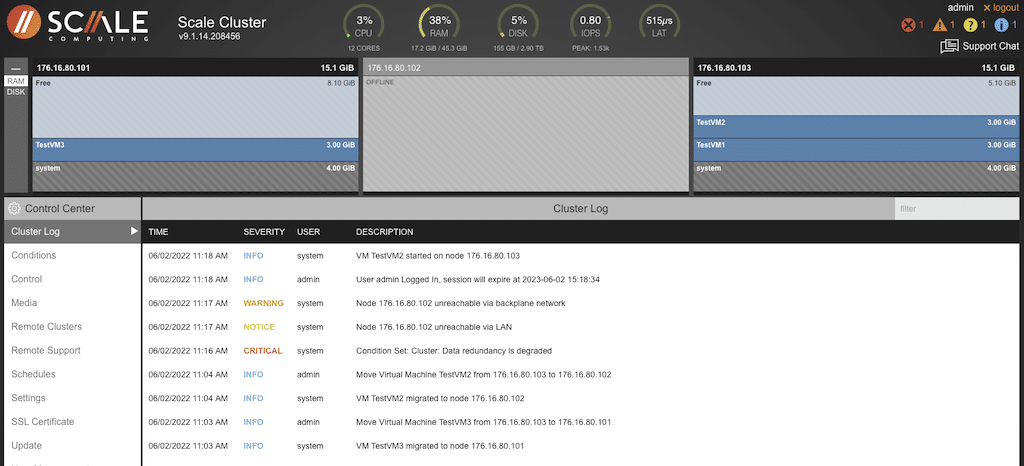
The info alarms were cleared to provide only current alarms to focus on the issue at hand.
This view shows that the VM from the failed node had moved to one of the other nodes. This was an automated process that did not require any intervention. The resources from TestVM1 have been updated to reflect loads, disk usage, and availability.
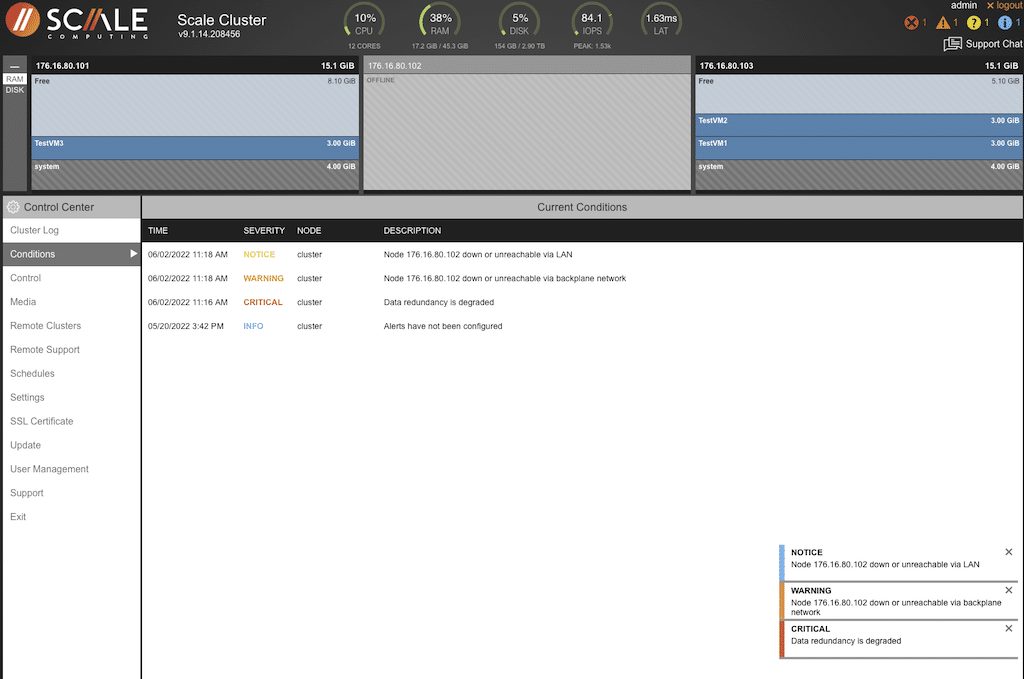
The Cluster log was also updated to indicate the new location of the VM from the failed node, displayed as an information alarm since the VM was back up and running.
Now that the VM had started and was available to users, the “failed” node was plugged in and powered up.
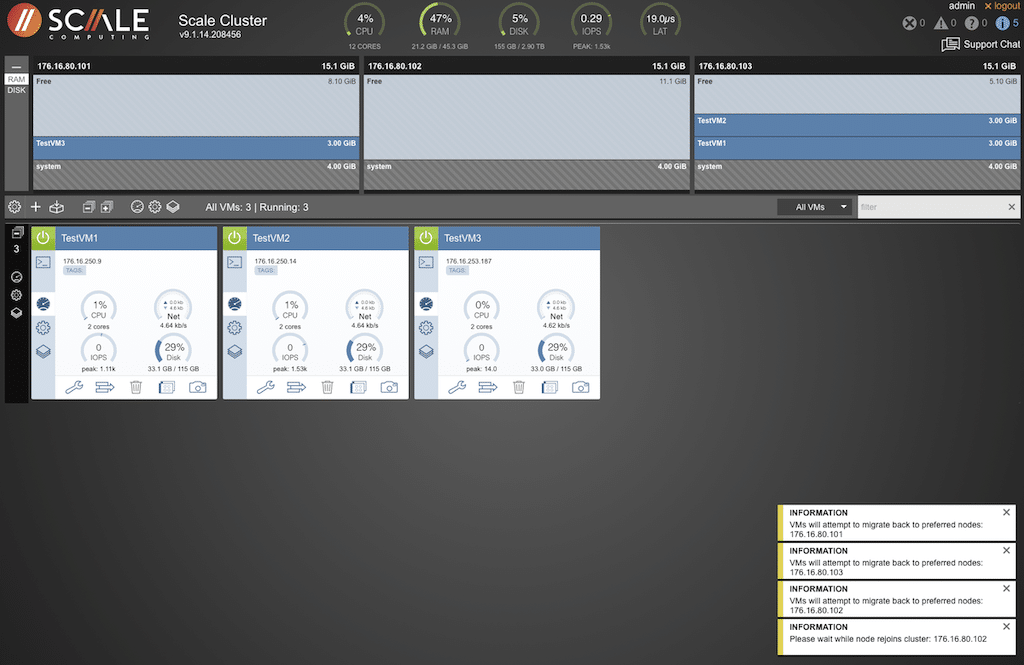
Once the node was available, the Cluster Log indicated the VM would rejoin the original cluster.
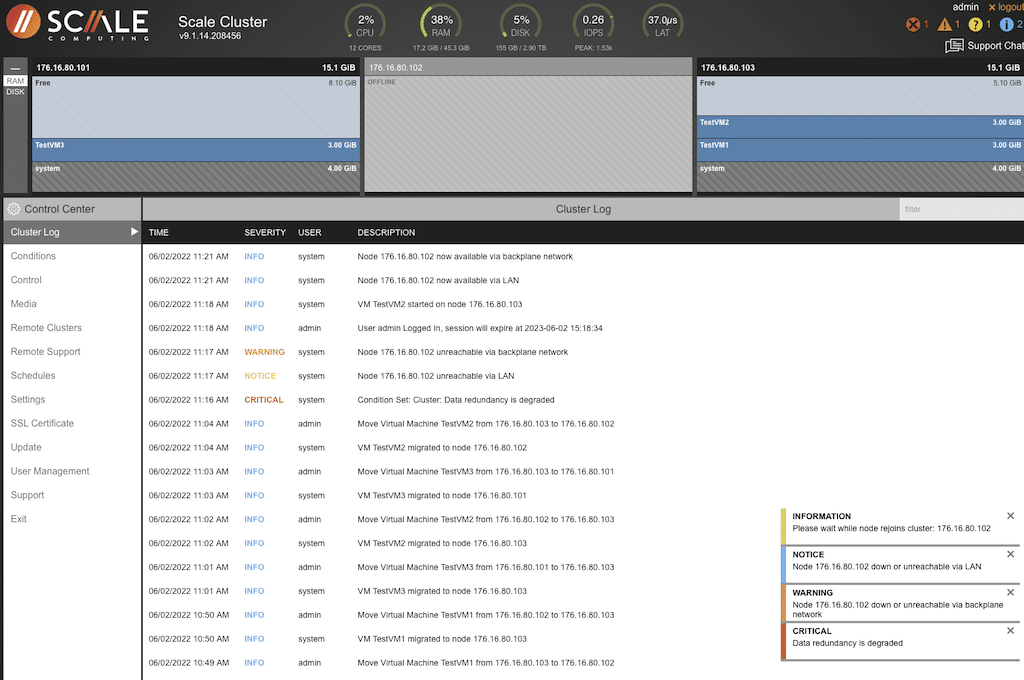
The node is shown as available via the backplane, and the alarms were cleared from the indicators at the top of the manager screen. The pop-ups were also clearing.
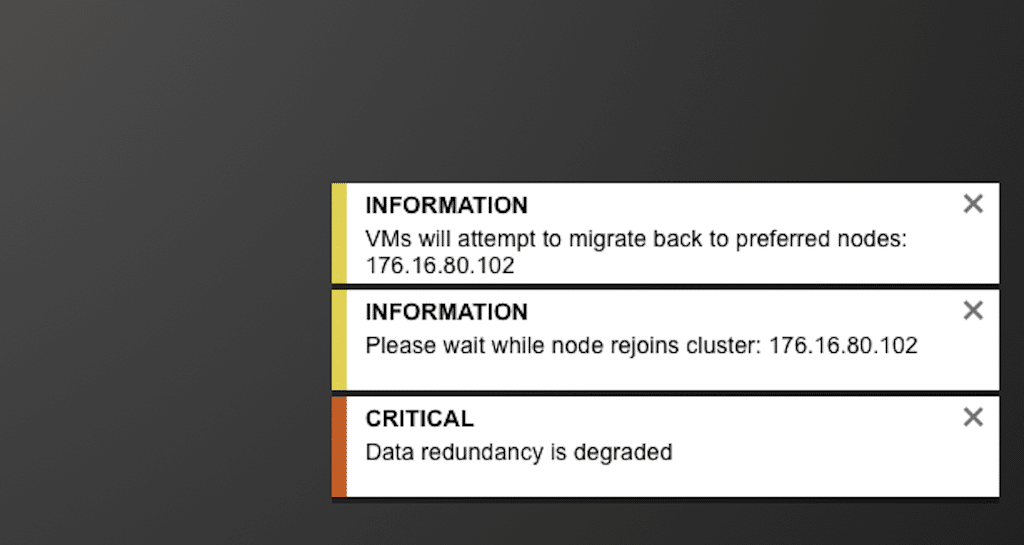
This is a larger view of the information the pop-ups reflected when the VM attempted to rejoin the preferred node.

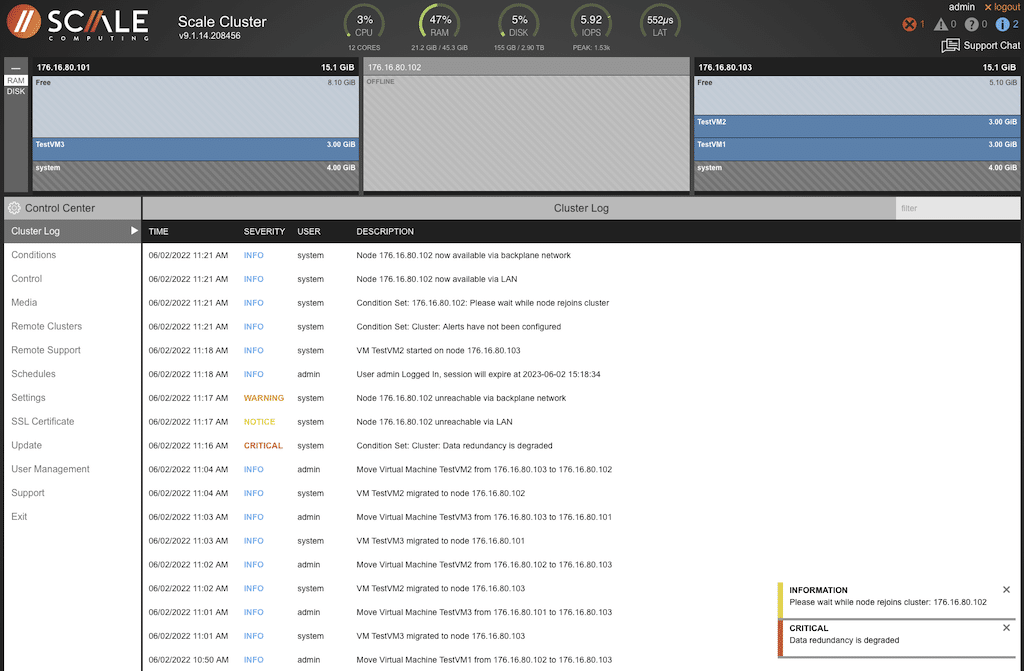
The display shows the node is online, but the VM has not migrated.
Once the VM had returned to the preferred node, the screen updated with location, and resources were restored to normal. The log also indicates the VM had returned to the preferred node.
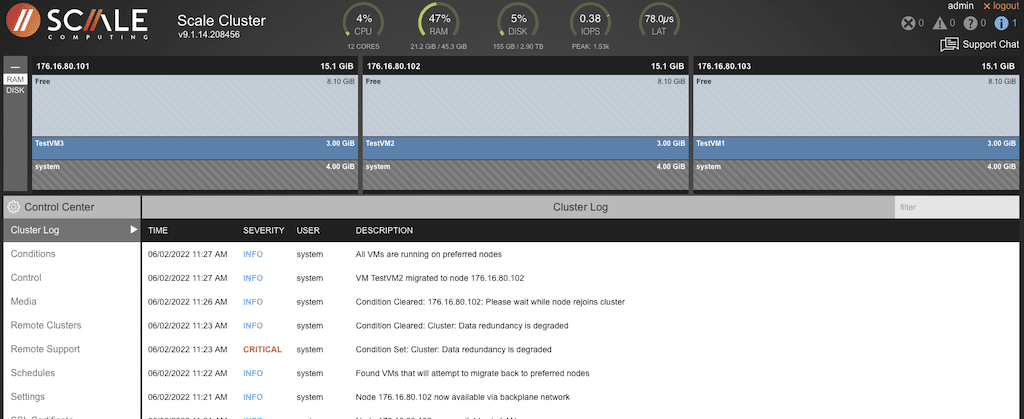
And everything is back to its original state.
The main takeaway from this sequence is that the entire process was automatic. Nothing was configured on the cluster to force a move for the VM from a failed node. The Scale cluster took care of all processes from power down to power up and restart.
If it is necessary to shut down a node, Scale Computing asks that support be contacted before shutting down the system, which sends an alarm to the remote system.
The local cluster manager provides plenty of information and the overall configuration. In the event of a failure, the cluster manager provides immediate detail and automatic actions taken by the cluster.
SC//Fleet Manager Remote Management
Scale Computing Fleet Manager is the first cloud-hosted monitoring and management tool built for hyperconverged edge computing infrastructure at scale. SC//Fleet Manager makes it easy to securely monitor and manage an entire fleet of clusters running Scale Computing HyperCore. For IT Managers with multiple clusters, maintenance time will be reduced by 50 percent or more with the simplicity designed into this platform.
SC//Fleet Manager consolidates real-time conditions and resource utilization for all SC//HyperCore clusters. SC//Fleet Manager eliminates the need to navigate to individual cluster UIs, giving managers the ability to look at every cluster from a single pane of glass.
SC//Fleet Manager features:
- Check Connectivity and Health with a quick glance from any browser on any device, even mobile
- Drill down into a specific cluster to diagnose and fix any problems
- View CPU and Disk utilization in real-time at the cluster, node, and VM levels
- Drill down to the HyperCore login of any cluster
- View the current firmware of all clusters at-a-glance
- Apply a firmware upgrade to a cluster with a single click from SC//Fleet Manager
- Monitor real-time firmware upgrades for clusters across the entire fleet from a single pane of glass
SC//Fleet Manager in action
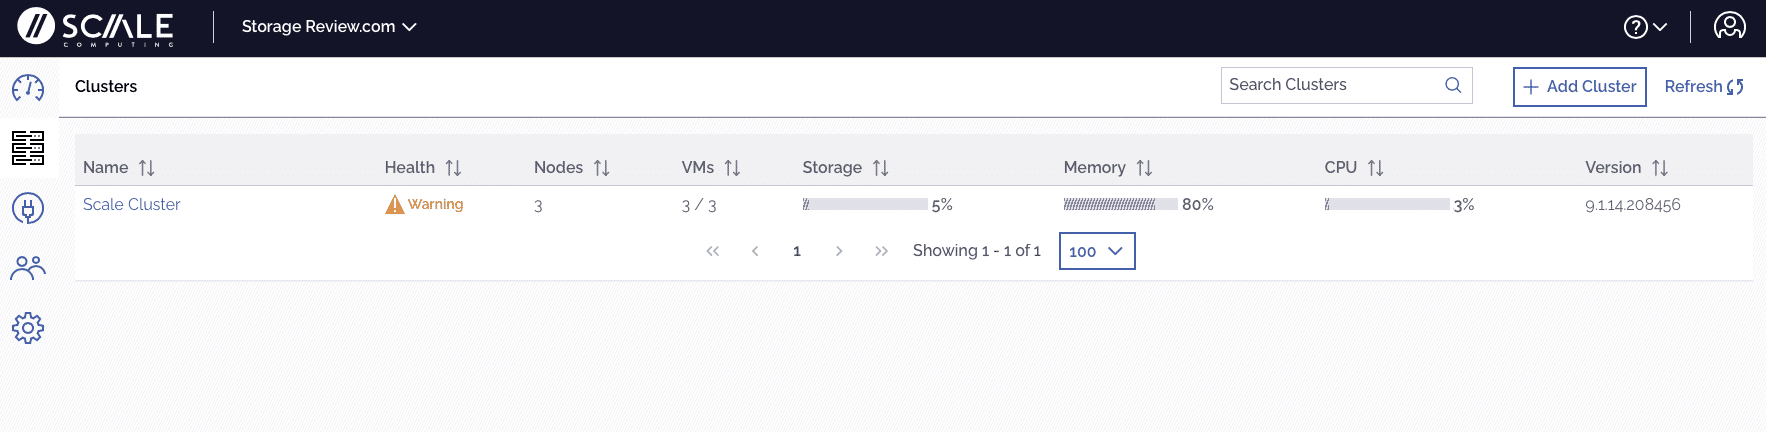
Logging into the cloud-hosted SC//Fleet Manager provides detailed information on all clusters globally. The look and feel of the GUI are similar to the local manager.
There are icons down the left side of the display to access the cluster, perform specific management functions, and add users and organization details.
This is the cluster view with health details and memory, disk, and CPU utilization.
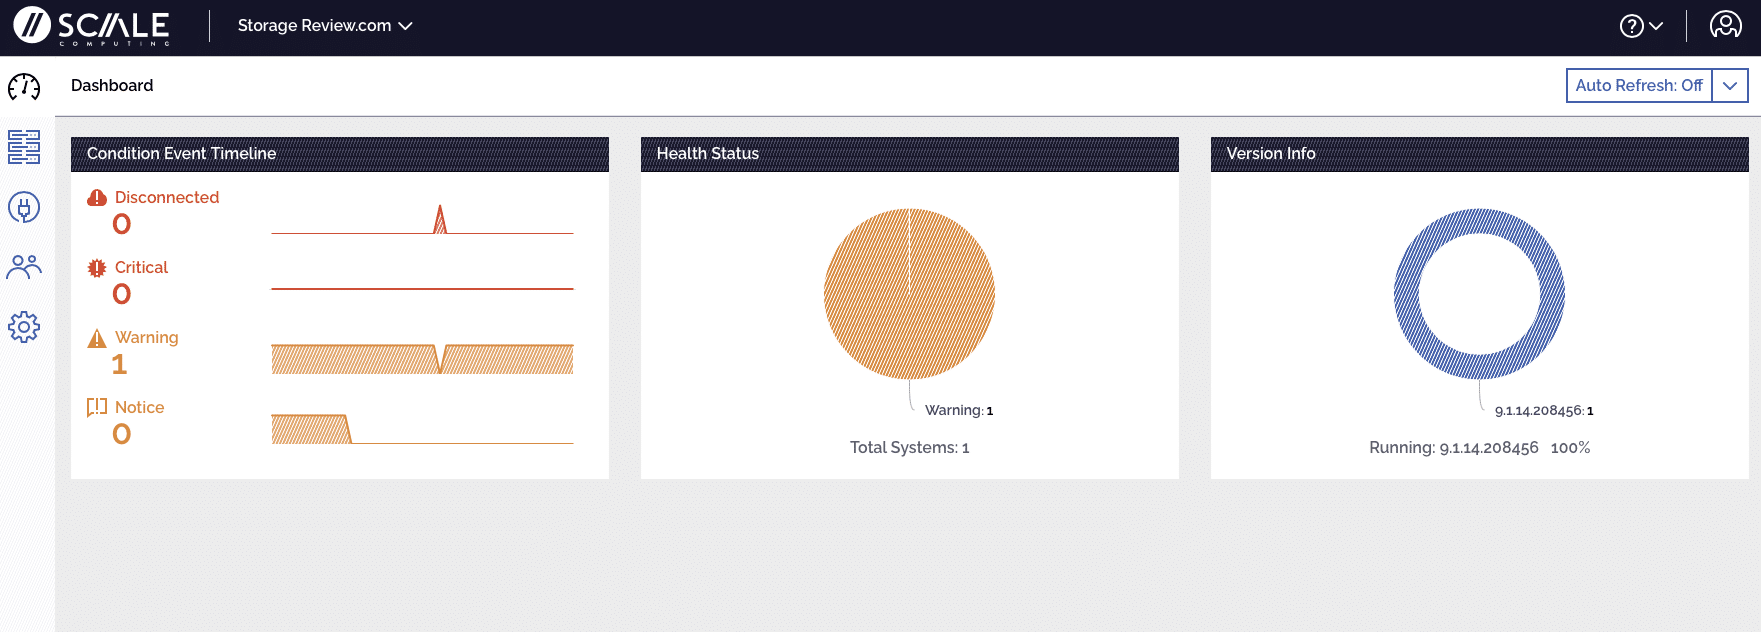
Clicking on the speedometer icon will change the display to a dashboard view detailing cluster and node events.
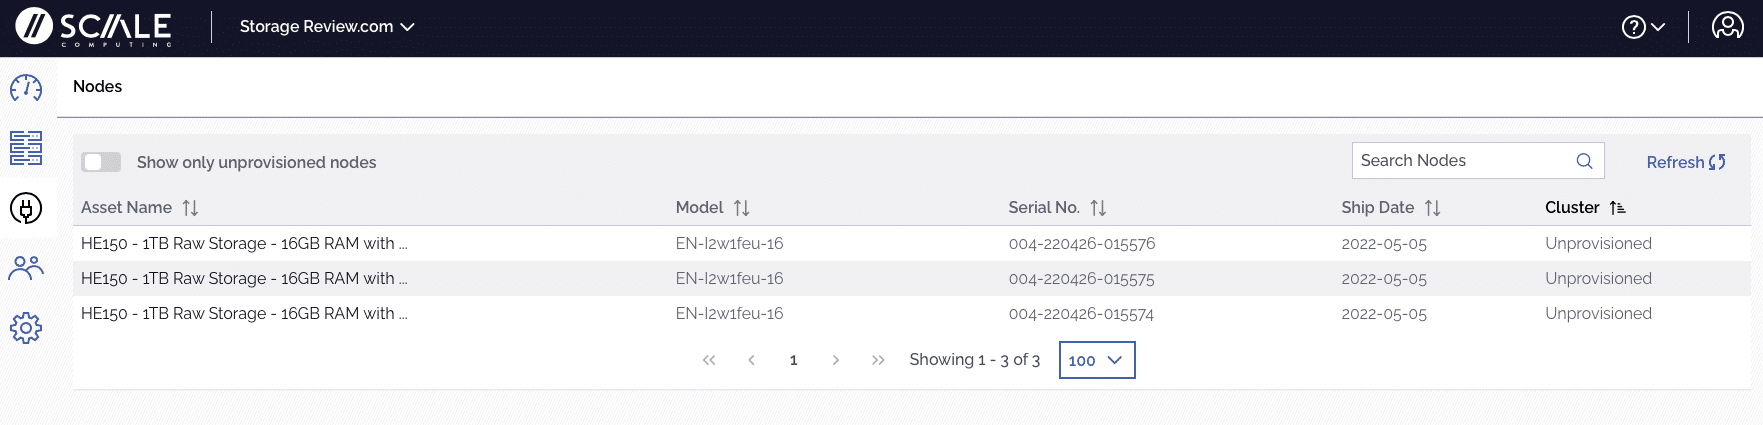
Node-specific functions are accessed by selecting the plug icon.
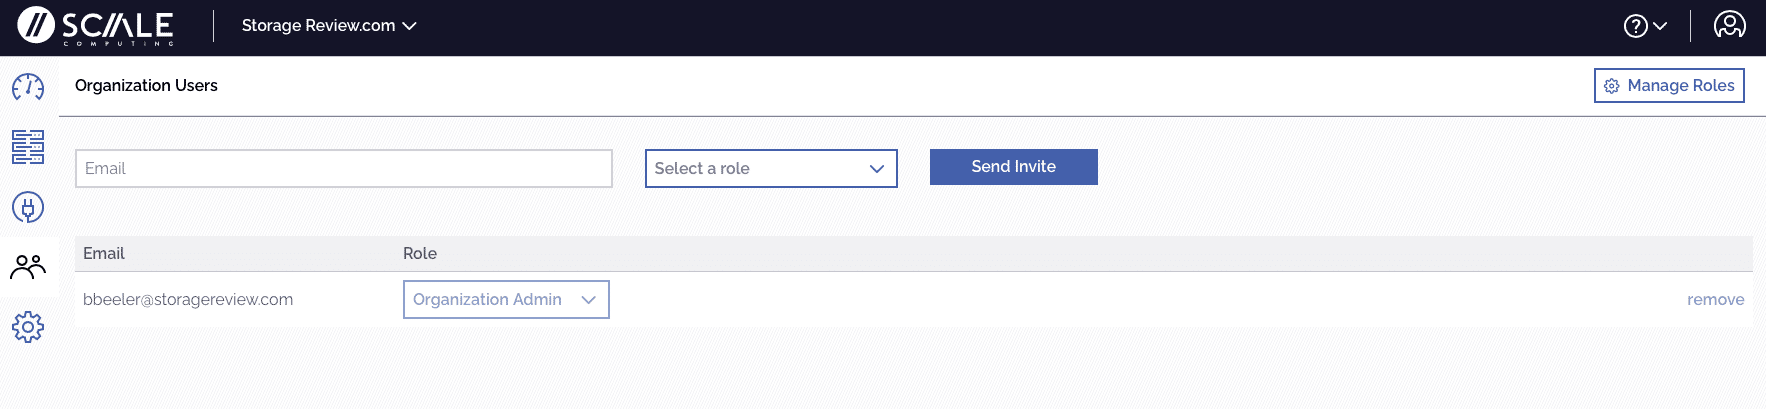
Clicking the user icon provides a screen to add or modify user accounts.
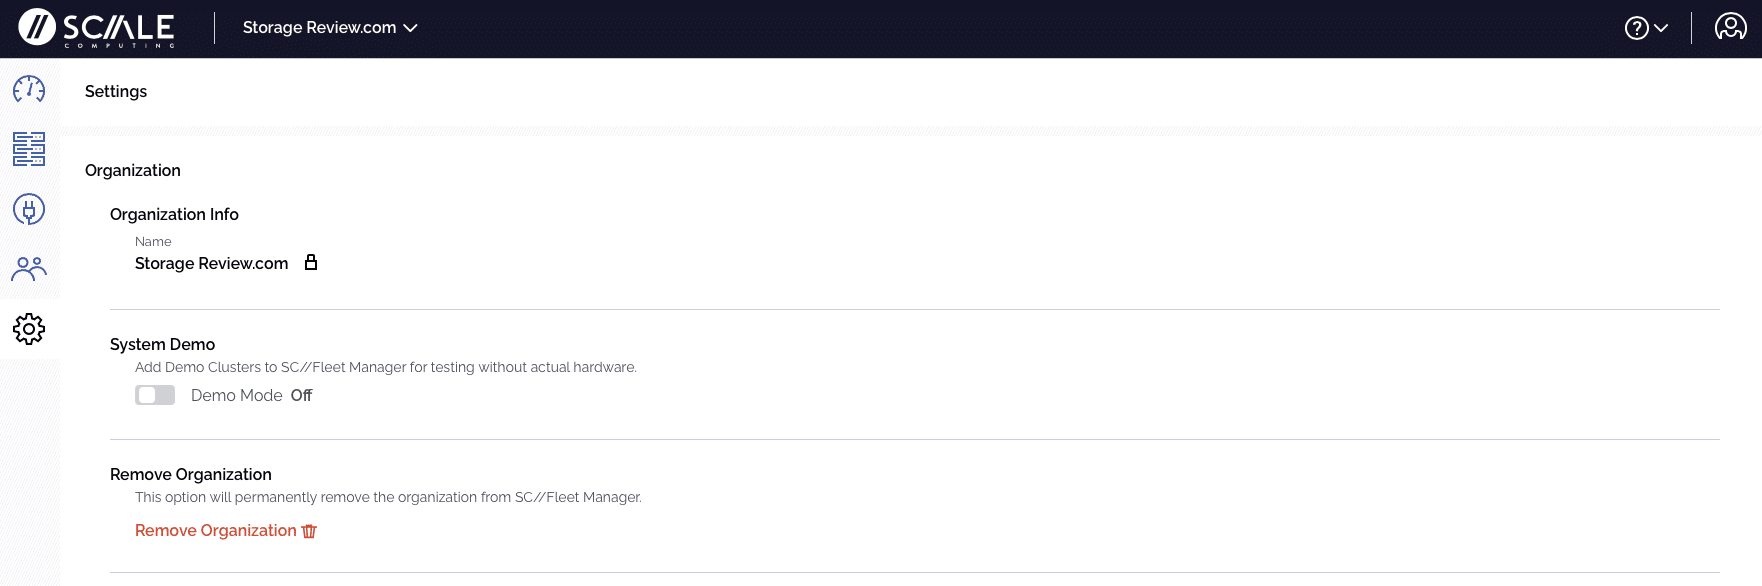
The gear icon will display the organization details.
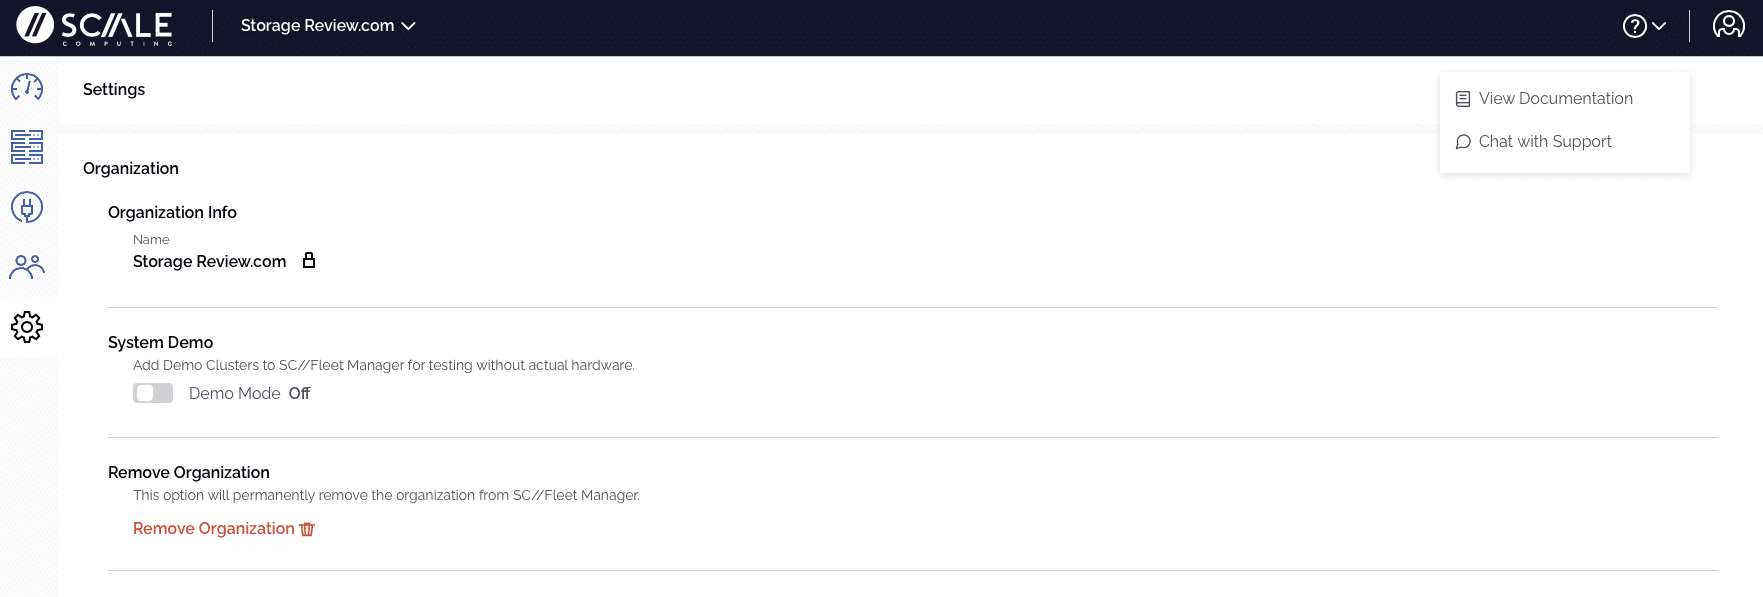
Across the top right of the screen, there is an option to chat with support or view documentation without logging into another system. The other icon will log the user out of the SC//Fleet Manager tool.
SC//Platform Power Consumption
Running on the compact and efficient Intel NUC 11 platform, this SC//HyperCore cluster is very power friendly. Given the flexible deployment options for the Scale Computing cluster, we measured power draw from the cluster in startup and normal operations using our XiTRON XT2640 power analyzer.

The analyzer showed the power ramping up as each node came on during the startup process. We delayed pressing the power button on each node by about 5 seconds to see the increased draw from each node. The analyzer measured a peak power draw of under 150 watts during the quick startup process before tapering its baseline power usage.

With the 3-node cluster online and our 3 VMs active, the total power usage on the cluster remained between 90 and 115 watts. This is a fraction of what a single full-size server would consume, making these compact nodes deployable for virtually any location.
Ask the Scale Computing Community
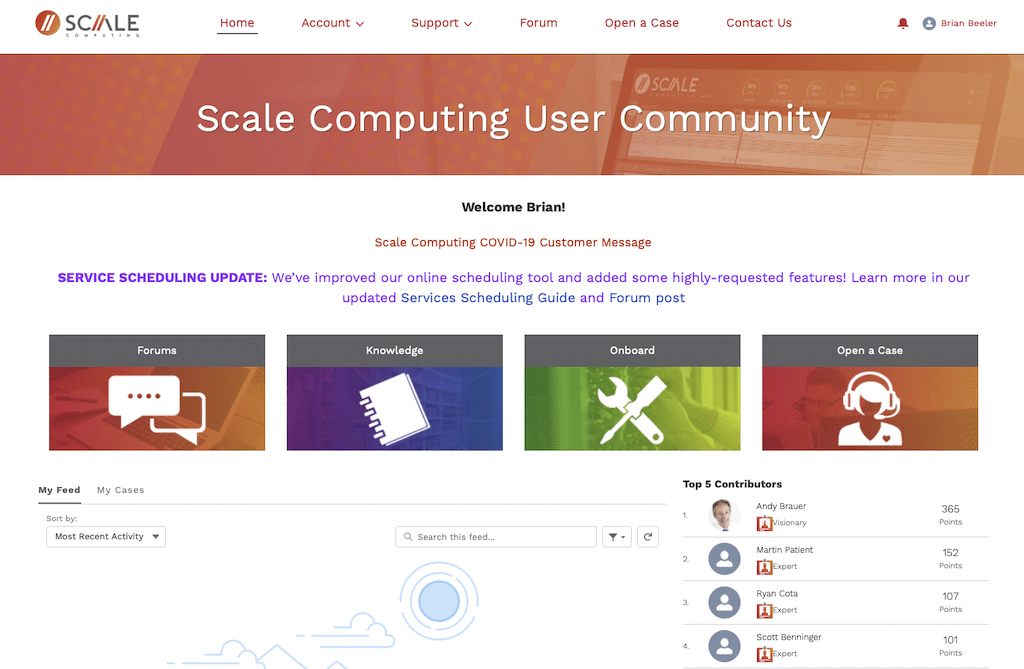
Scale Computing has a very active user community. So much so that there is a dedicated website for users and subscribers to ask questions, post resolutions, get advice, and interact with other Scale Computing users. Of course, if the answer is unavailable on the community site, there is always 24/7 support.
The Community site is available at Community.scalecomputing.com. Signing up is simple as well. Registered users can check the knowledgebase from the home page, open a case or check the status, get onboarding help, access the user forums, and download software updates. Scale Computing has put a lot of effort into maintaining this type of access.
Harrison Steel Castings Company – An Early Adopter
When considering where small HCI clusters can add value, edge applications immediately bubble to the top. The edge market is hot right now, with so many opportunities for a small and simple solution to install and operate. Retail is top of mind, with security probably a close second. But how far down the list would a steel castings company land in our edge scenario?
Enter Harrison Steel Castings Company. Scale Computing customer, Harrison Steel Castings Company, agreed to spend a few minutes offering their take on their experience with Scale Computing’s HyperCore solution.
As the name implies, the Indiana company is in the business of producing precision-engineered steel casting solutions. Each of these castings can take weeks to produce, with improper castings having to be scrapped in their entirety if they are deemed defective.

Steel castings are not as simple as they might sound. There are stages within the process that require specific vibrations, adding measured molten, and temperature monitoring, to name a few. Harrison needed a cost-effective, easy-to-manage, reliable solution to help them collect this sensor data.
This industrial edge problem is very common. Companies are discovering that if they can effectively track elements like humidity, vibration, PSI, telemetry data from machines, and other vital data, those new actionable insights will impact business operations and profitability.
Harrison is invested in this analytics journey. They’re trying to discover how their engineers can make better use of data to cut waste and ultimately increase efficiency and profitability. Their original HE150 HCI cluster handles this task quite effectively, sitting on the shop floor as an aggregator of all this sensor data. Every night, Harrison batches the data and brings it into their core data center that contains Scale Computing’s larger HCI systems for further processing and analysis.
Following a successful six-month proof of concept, they purchased a production cluster. The production H150 cluster was put into a test environment for six months and ultimately moved into production. That production cluster has been running for six months with no complaints on any units from day one.
Shane Rogers, IT Director, Harrison Steel Castings, has been involved with the Scale Computing Platform installation from the beginning and was the advocate for data collection for analysis. When asked about reliability and failures, Shane said:
“We kept the POC cluster, and those have been running for close to two years without failure. A foundry environment is not pretty. Microdust is a huge issue that we deal with. So to stay on top of the system, I will fail my production nodes every once in a while just to test failover. And they work perfectly. I will move the nodes around on the cluster just to make sure each node is used effectively.”
Ultimately, it’s this ease of management that provides tremendous benefits for Harrison. The simplicity of standing up the system on Day 0 is excellent, as we saw in our lab tests. Still, the ongoing operational benefits from there on out can be challenging to quantify, but customers appreciate it.
Final Thoughts
Scale Computing HyperCore on NUC11 delivers as promised. The folks at Scale Computing told us it is possible to have a HyperCore cluster up and running in 30 minutes, and they hit the mark. Setup and configuration are intuitive with an easy-to-navigate set of tools. Of course, Scale Computing provides support via Zoom and can walk anyone through the process to ensure there aren’t any snags along the way.
The steps were spelled out with the data sheets provided before installing the nodes, so there were no surprises during the process.
Edge Computing Transformation, Powered by Intel®

Scale Computing Platform is an Intel IoT RFP Ready Kit (Intel RRK). Intel RRKs are focused technology offerings that solve a class of market problems, have been deployed and tested in the field, and provide bundled hardware, software, and support. The technology is scalable and designed to grow with customer requirements—enabling accelerated development and time to market.
Intel delivers power-efficient performance and intelligence optimized for business. With vision technology and deep learning capabilities at the edge, your business can realize new use cases and faster response times. Our built-in baseline suite of security capabilities makes it easier to implement a consistent security model that helps protect against a wide range of threats.1
With broad connectivity support, Intel streamlines data sharing between devices and the cloud. Our specialized technologies for virtualization help you simplify your IT environment, increasing the efficiency and value of your technology investments. And because Intel products are designed for high reliability and a long lifetime, you can count on support for years.
Solutions available today make edge implementation simple and seamless. The result means a full capacity to rapidly develop and distribute new technology without architectural complexity or IT staff limitations.
This report is sponsored by Scale Computing All views and opinions expressed in this report are based on our unbiased view of the product(s) under consideration.


 Amazon