

Western Digital SSD Dashboard is used to manage the company’s drives (which includes SanDisk products), featuring useful disk information, ways to optimize and sanitize/clean your SSD, and easy point-and-click firmware updates. At first glance, we noticed that the interface has a much more modern look than most other SSD drive management tools we’ve looked at. It sports a nice blue background with an intelligent panel-layout design along the bottom. Navigating through sections is easy, responsive and intuitive.
After you load up the tool, the Dashboard will automatically detect supported drives. If you have more than one WD SSD installed, you will be able to choose it from the drop-down list at the top right corner of the dashboard. This drop-down list can be accessed from each section, which is very handy. If your drive(s) aren’t listed, simply click the “Refresh” icon in the upper right corner of the window to rescan the system for WD SSDs (though they should show up automatically).
General information about the selected drive is displayed at the top, including the model number and firmware version. It also displays information about the drive health (based on S.M.A.R.T. attributes) with two indicators: normal, which means the drive is in good condition; or poor, which indicates that the number of spare blocks is at the minimum threshold or the drive is overheating. It will also alert users of any notifications, such as available software or firmware updates or any S.M.A.R.T. attribute warnings, and will indicate if the SSD’s security protocol is activated or not (for supported drives).
Below, in the Status section, the SSD tool displays more detailed information about the drive. The capacity panel shows the total size of the WD drive, along with the amount of free, used and unallocated space. If the drive is full, the pie chart will simply turn red. Just to the right will list all volumes, color-coded with free vs. unused space. In our case, our WD Blue drive is virtually empty.
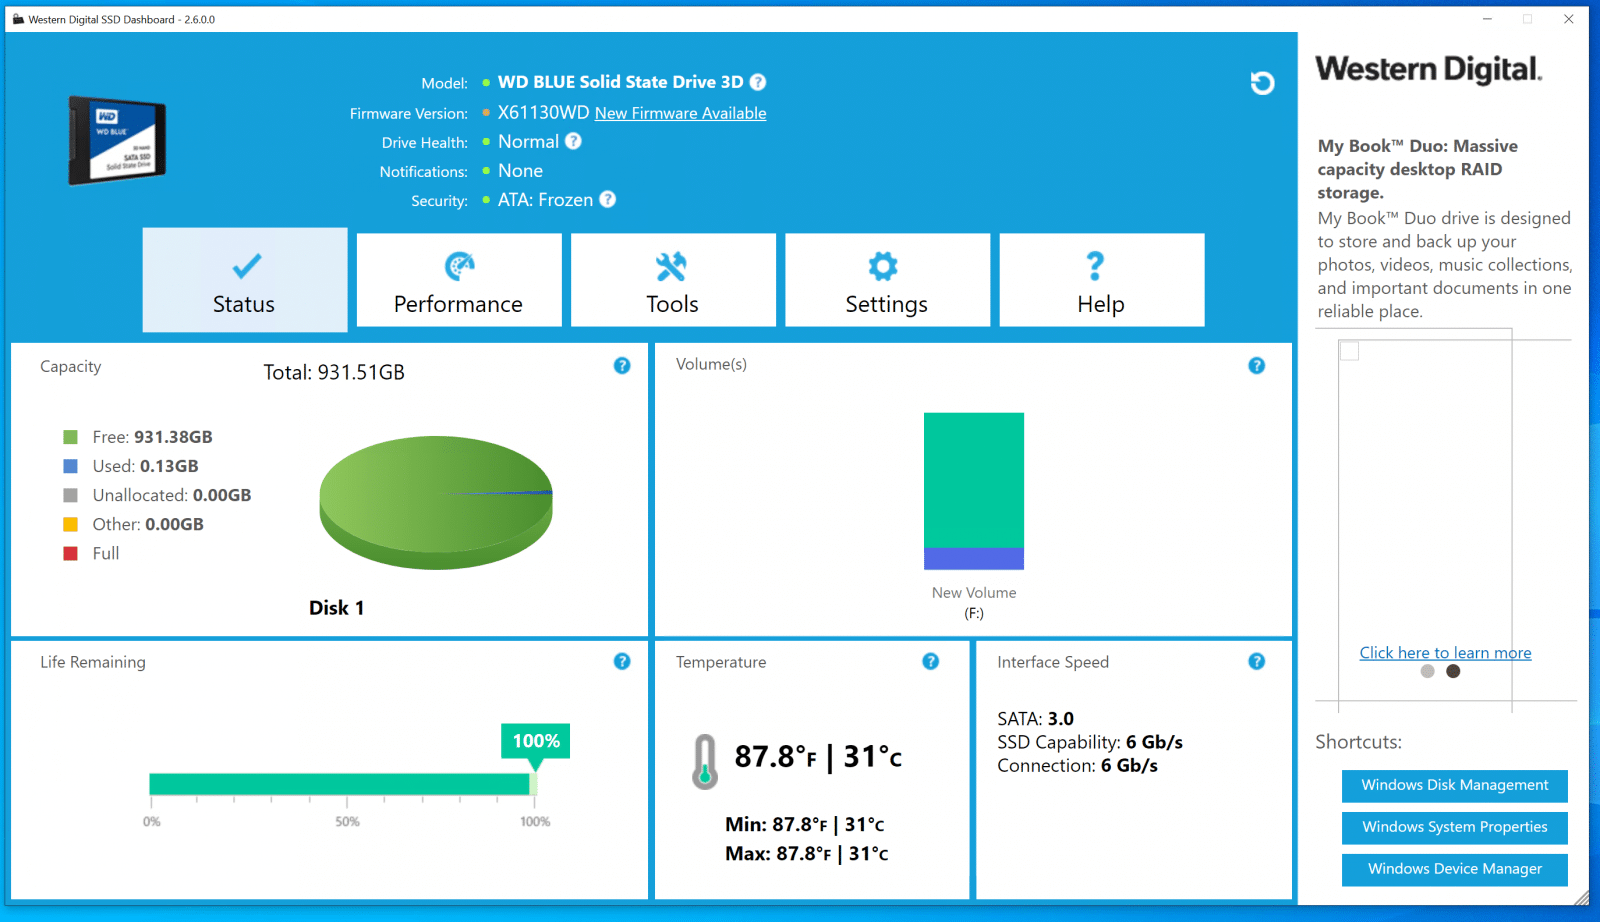
Below the Capacity panel is the Life Remaining panel, which displays, in percentage, the remaining writes your WD drive can perform. Not all drives support this feature.
The temperature panel to the right reports the temperature of the drive every 30 seconds. A green thermometer means normal operation while yellow indicates that the SSD is currently overheating. Lastly, the Interface Speed panel at the bottom right tells users the fastest supported speed of the drive and the current connection it is using.
The Performance section displays real-time performance metrics, including transfer speed MB/s and transfer IOPS via a chart. WD makes it very easy to see and understand the chart: MB/s write and read speeds are shown with blue and green indicators, respectively, while the I/O write and read speeds are shown in purple and red indicators, respectively. Unfortunately, it does not have a test feature, so you’ll have to do that on your own (e.g., manually transfer large files to and from the drive) and then monitor its performance on the chart.
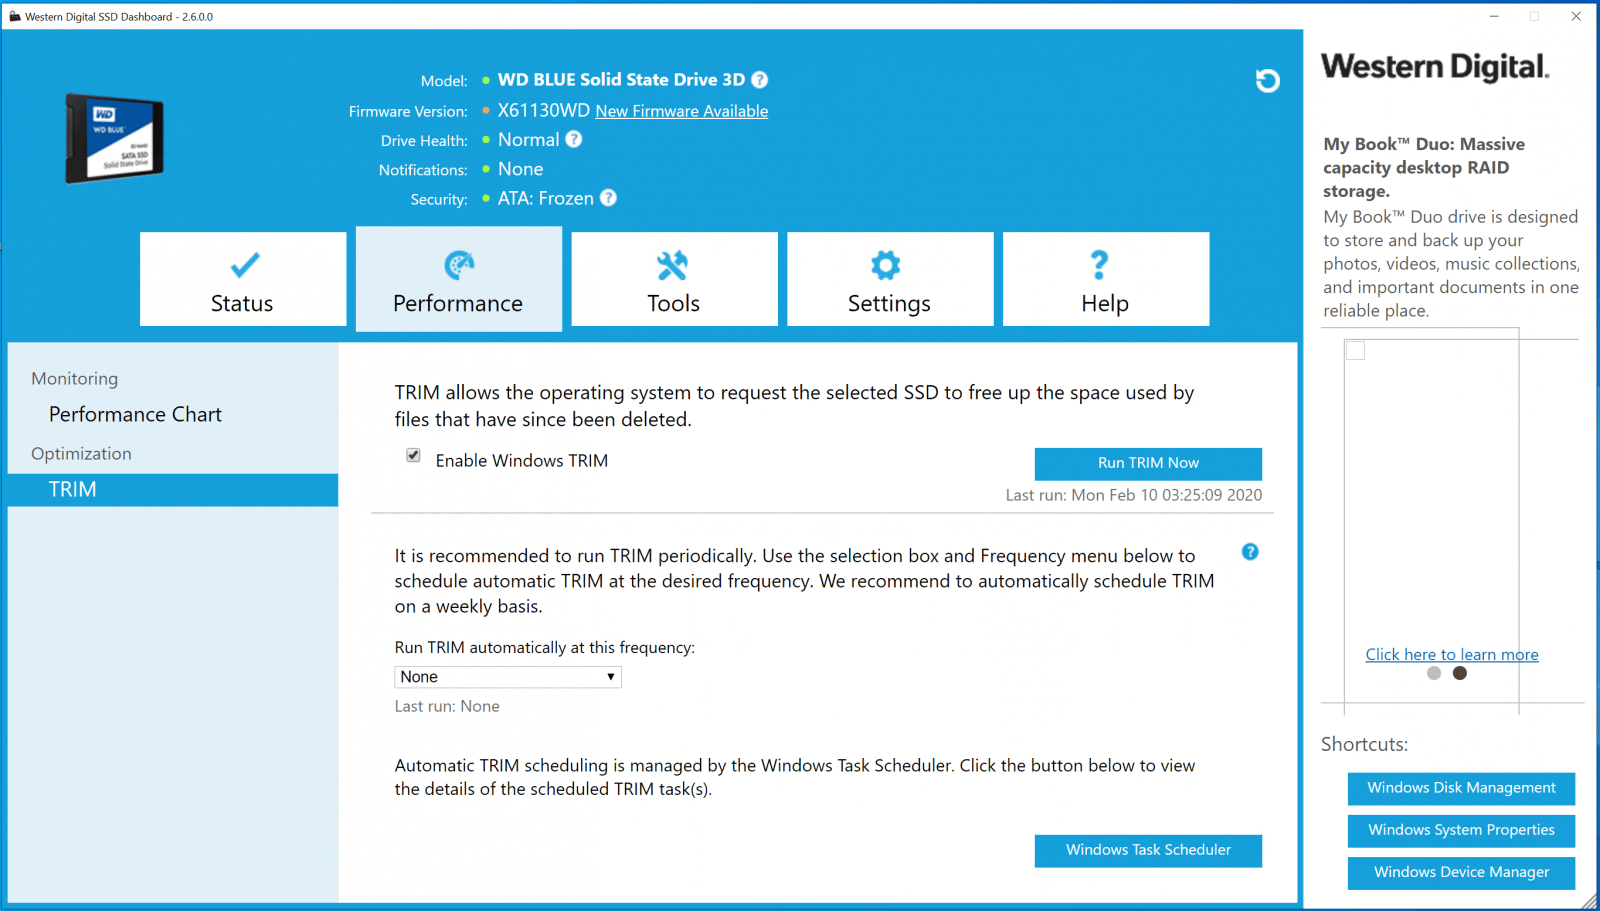
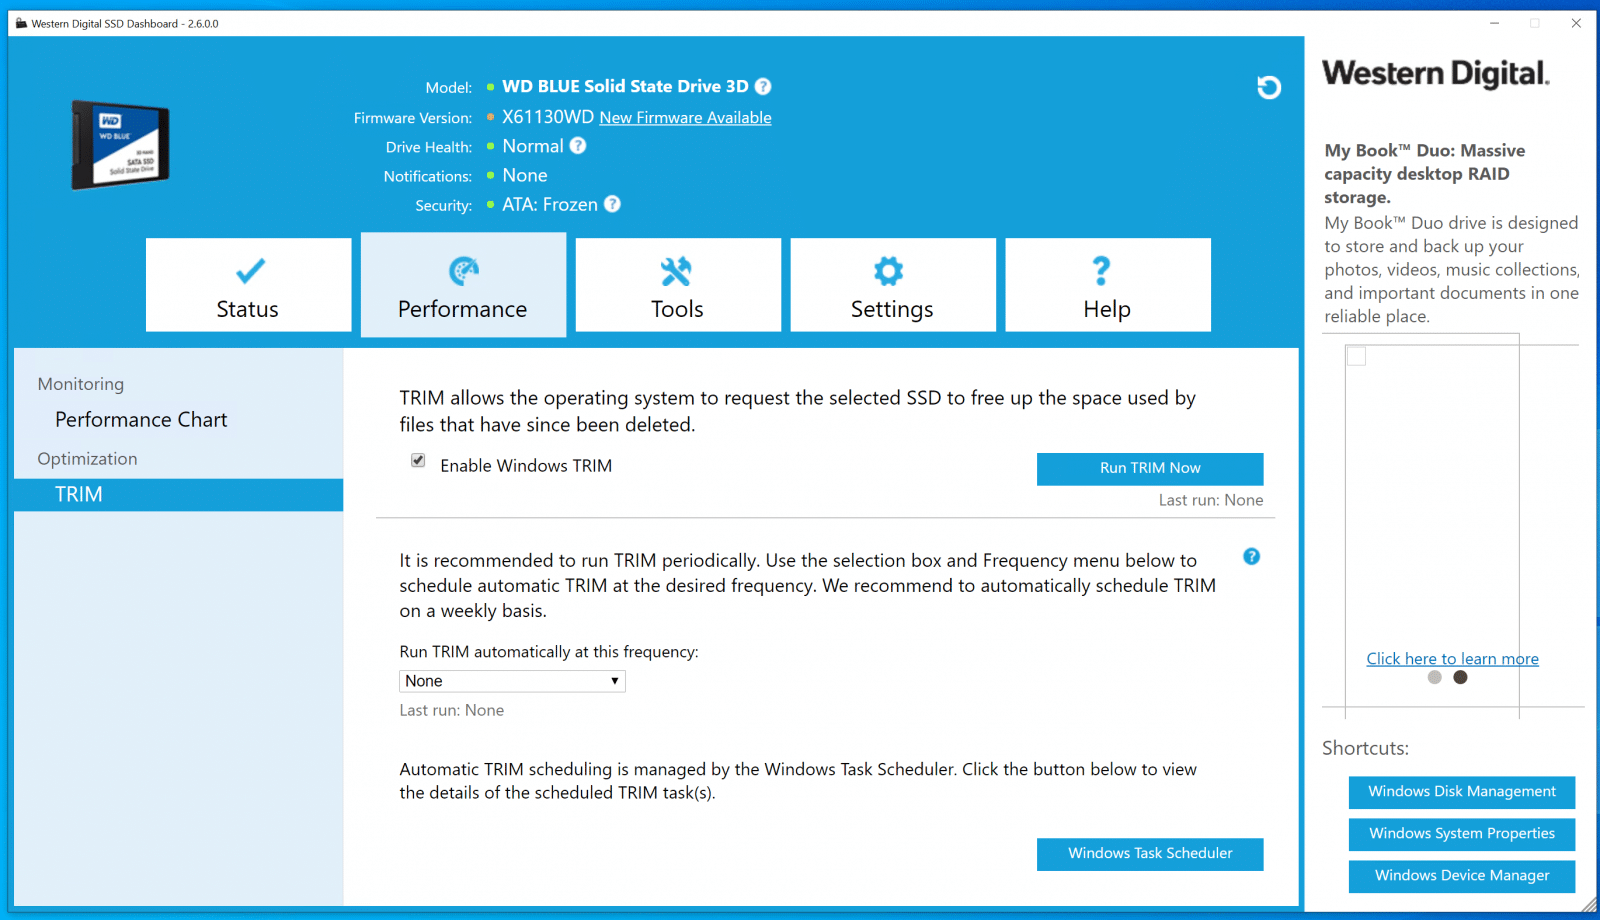
The TRIM function frees up space on the SSD that was used by files that have been deleted. You can either schedule it to run automatically based on your needs or you can run it manually whenever you want via the Run TRIM Now button.
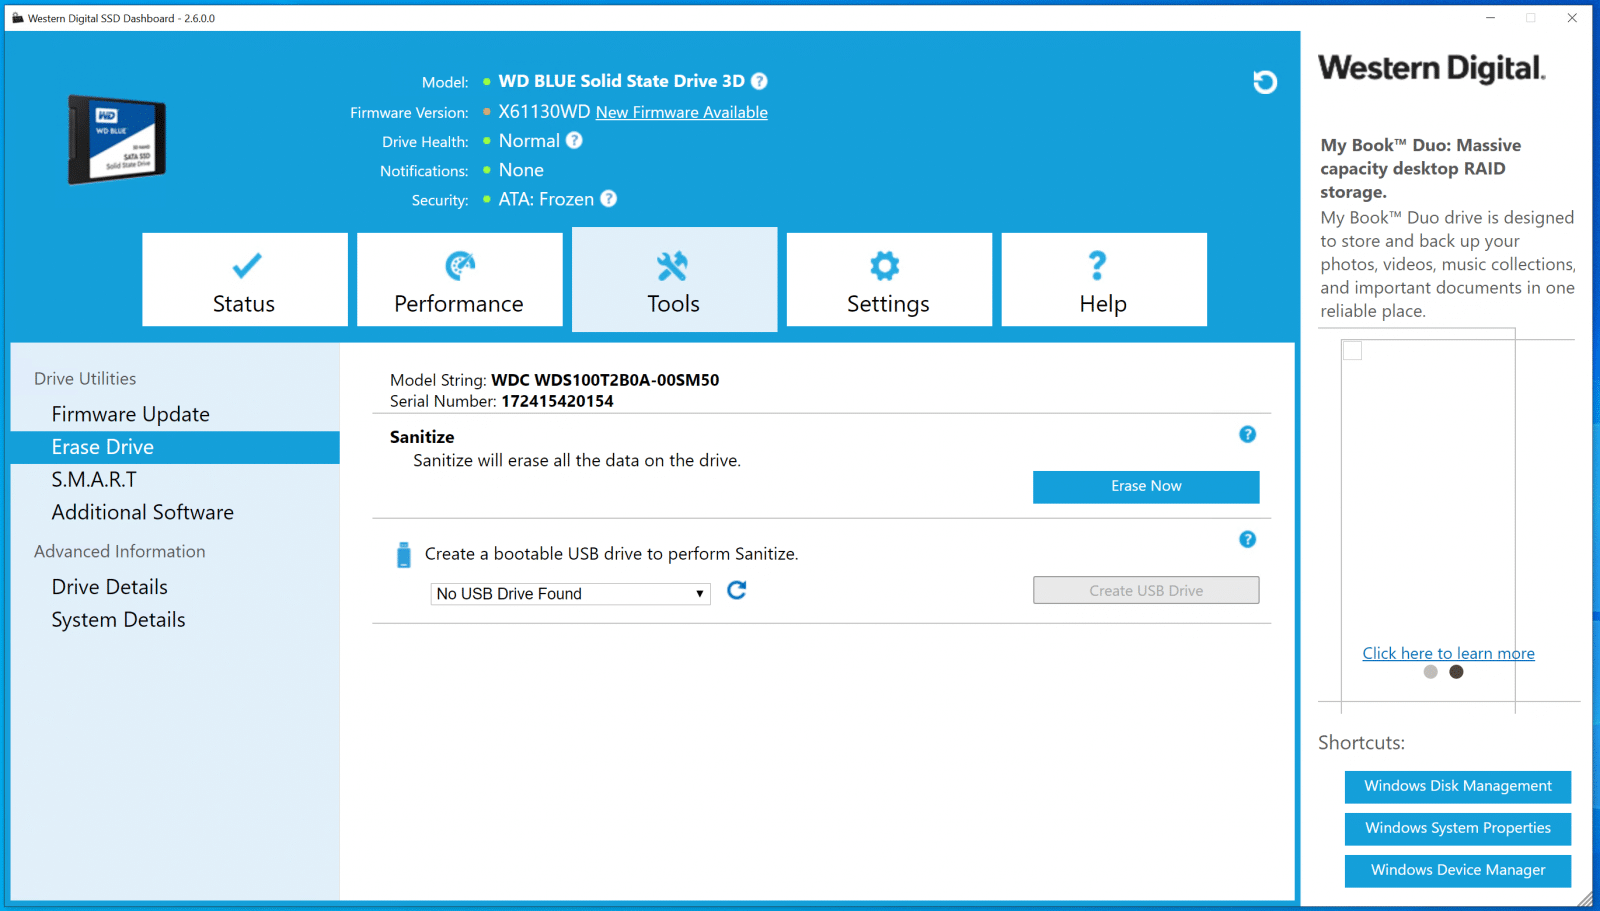
WD’s Tool section has a ton of useful features. These include updating firmware, erasing drives, creating bootable USB drive for secure erase, sanitizing, disk tests and displaying system and drive details.
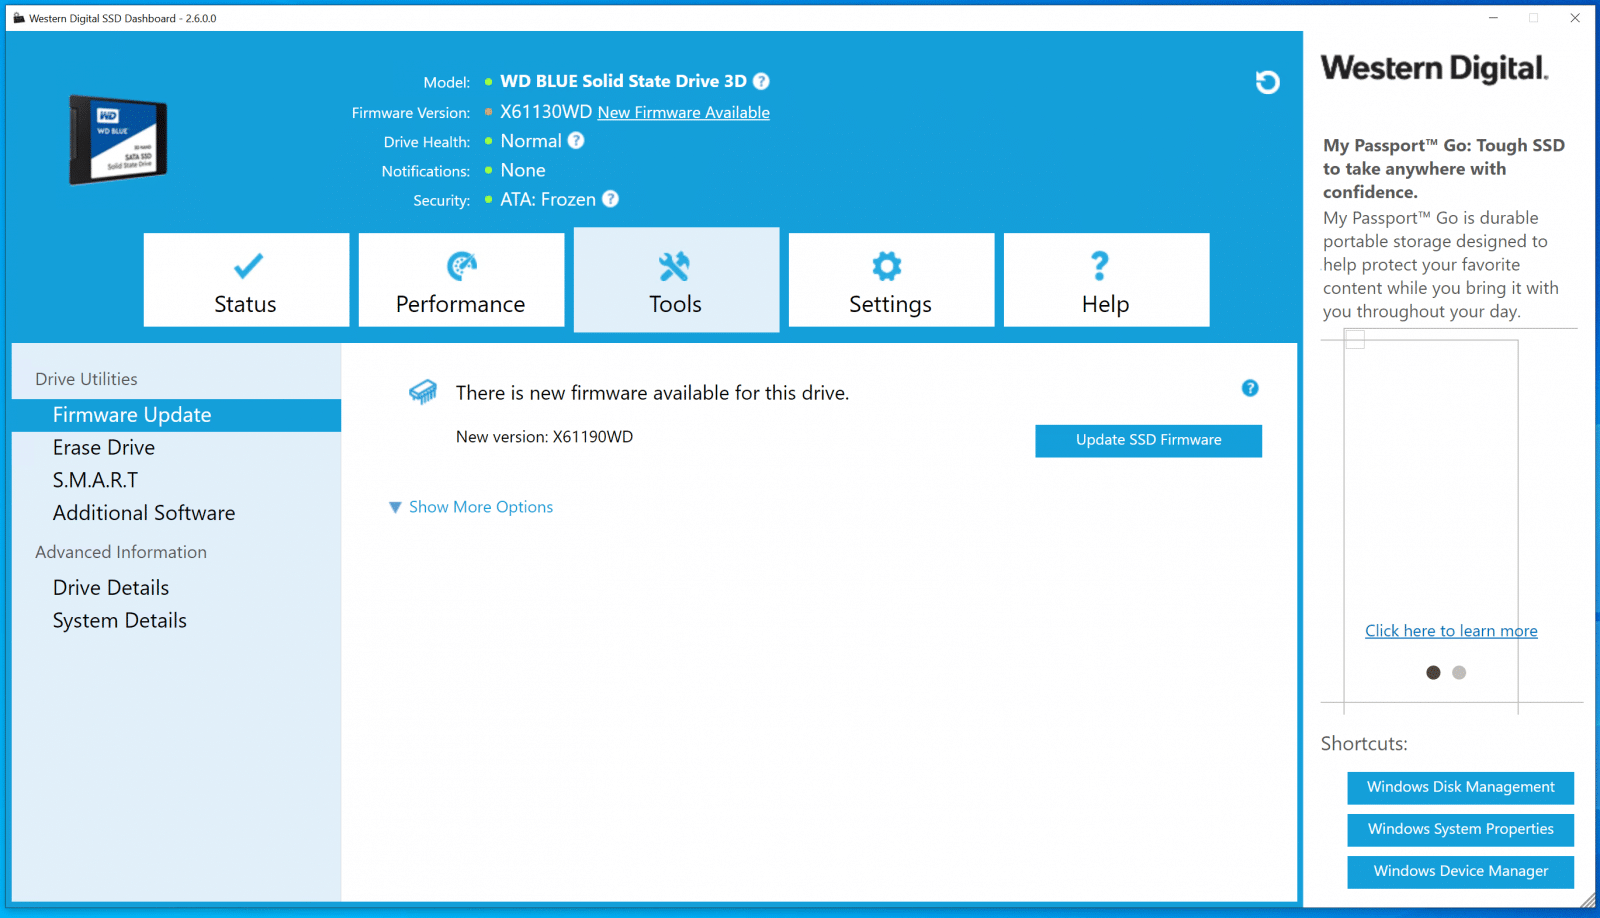
To update the firmware, simply click the Firmware Update link on the top left and click Update SSD Firmware to start the process (you can also click Check for updates to manually see if one is available. This only appears if the SSD Tool doesn’t, for some reason, automatically check for a firmware update).
You will then get a warning about backing up your data. As always, we’ll note that firmware updates are generally non-destructive, but can sometimes adversely affect your data (e.g., unexpected errors or faults). While updates usually specify whether they are destructive or not, step number one when updating the firmware is to always back up important data just to be safe. After we completed this step, it was time for us to move on and click Proceed.

After the update, you should completely shut down your computer and boot it up again. The tool will give you the option to do this right away.
If you click “Hide Options”, it will allow you to create a bootable USB drive as well as the option to create a CD/DVD version. You can also manually select the firmware update file if you downloaded it from the WD website yourself.
The Secure erase option permanently deletes all data on the selected SSD. However, unlike the Sanitize feature (which thoroughly destroys all data), Secure Erase does not remove all blocks that have been written to. Both options are easy enough to do: simply click Erase Now under the correct label after you select the drive you want to be cleaned.
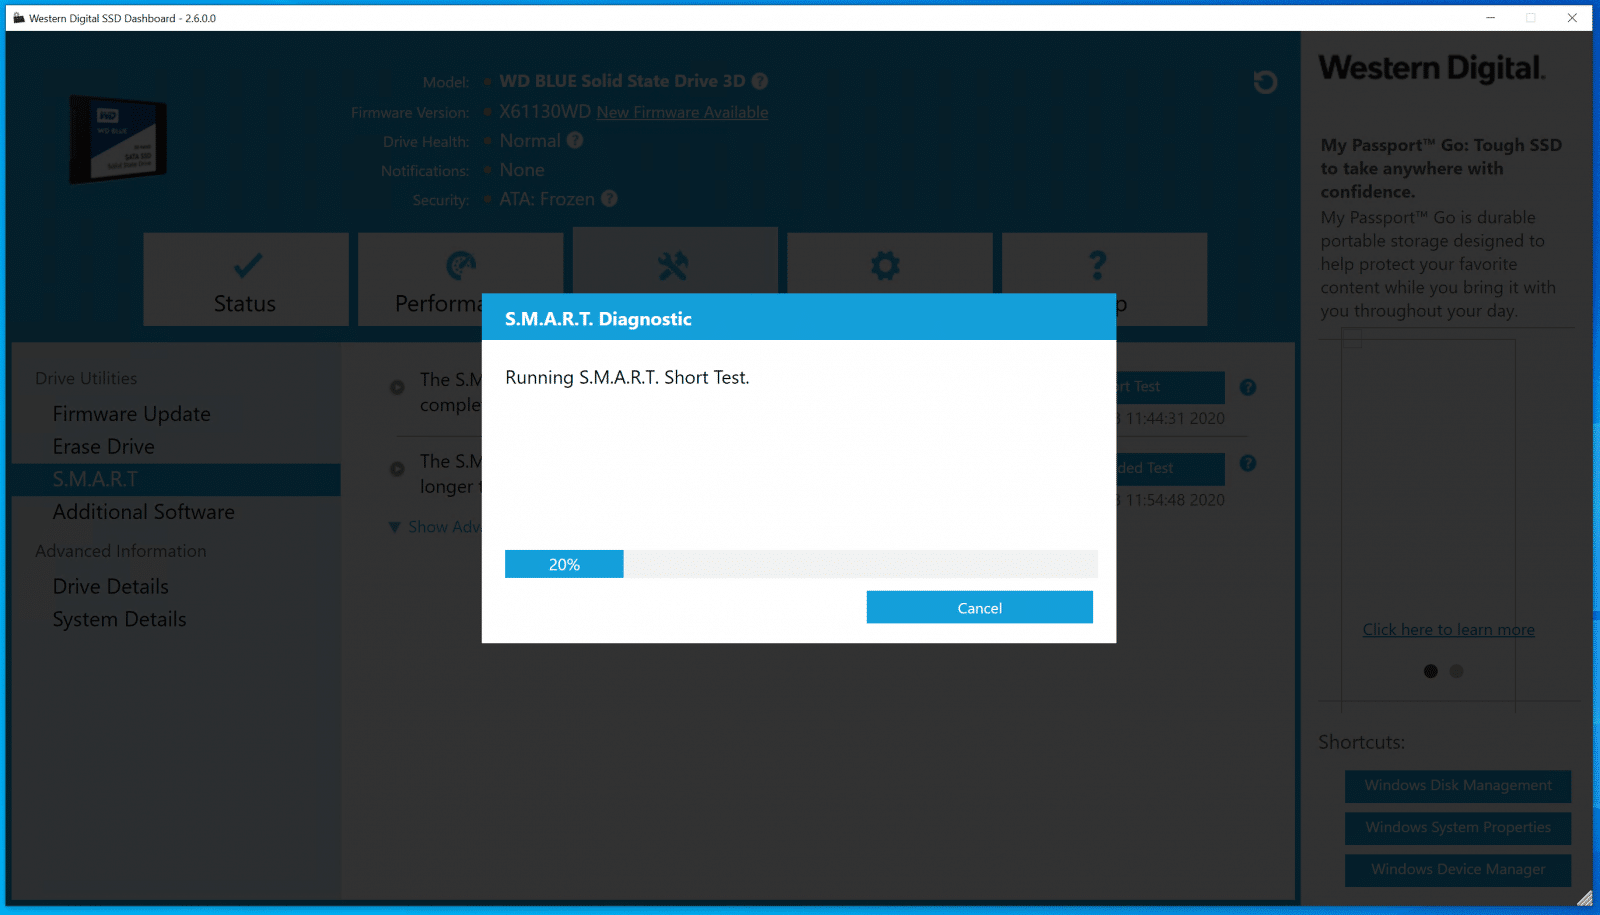
S.M.A.R.T., which is featured in most SSD management tools, is an industry-standard drive monitoring system. Here you can either start a Diagnostic Short Test or the extended version; the former quickly analyzes the health of the drive, while the latter is an extended version that takes a bit longer. The short test took us under a minute and the extended version took roughly 10 minutes, though these times will certainly vary depending on the size and condition of the drive. While these tests are running, the WD SSD Dashboard cannot be used (though you can cancel the tests whenever you like).
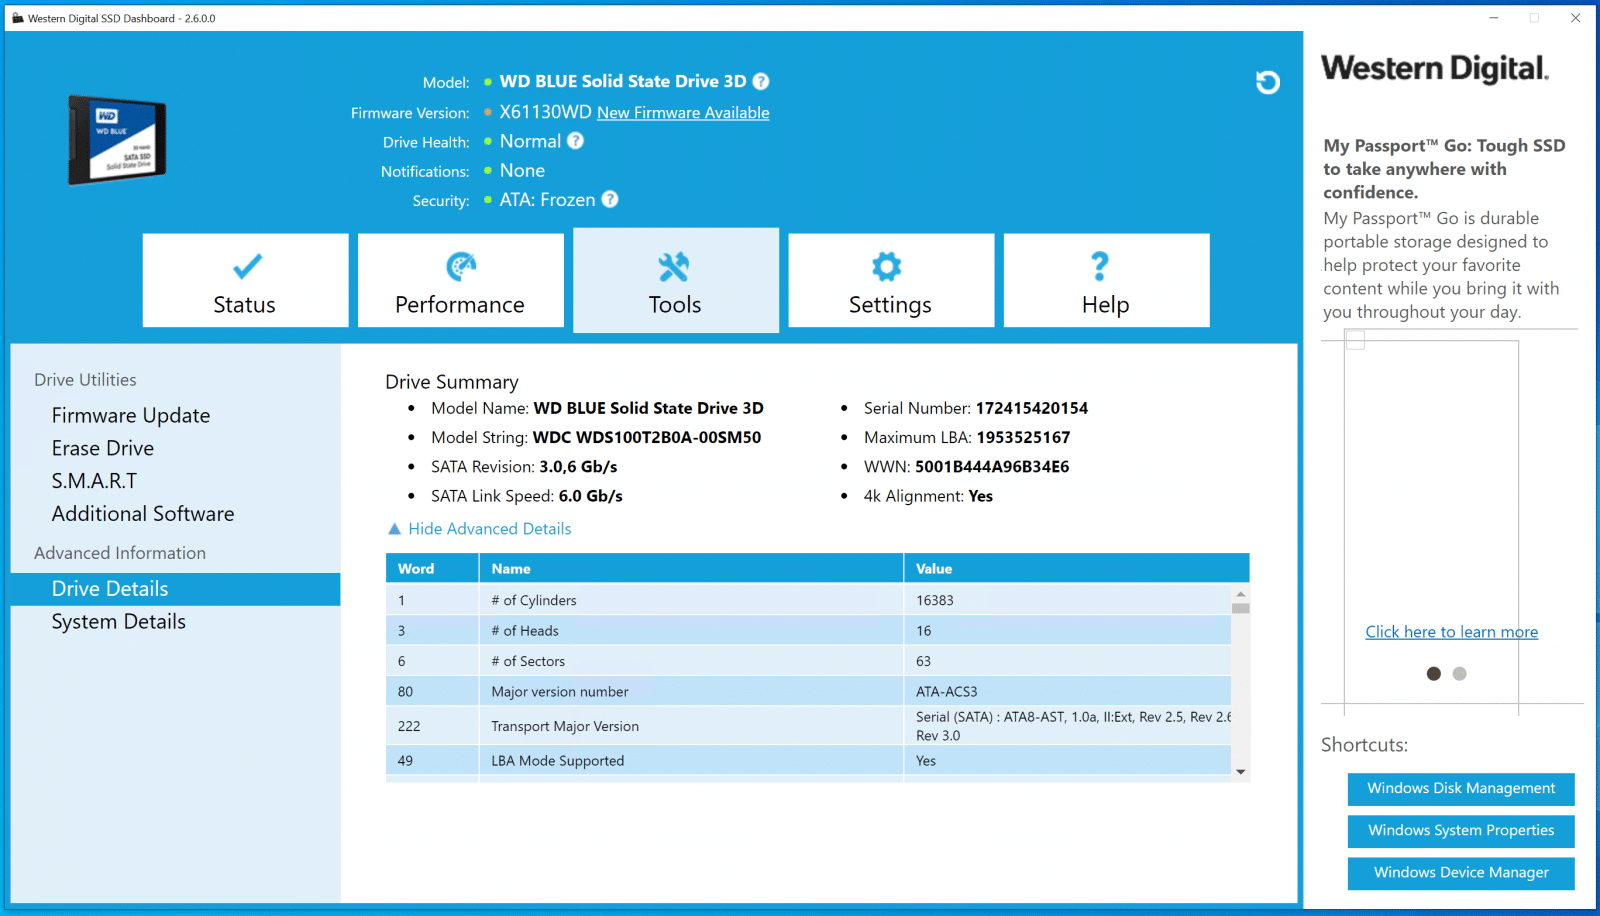
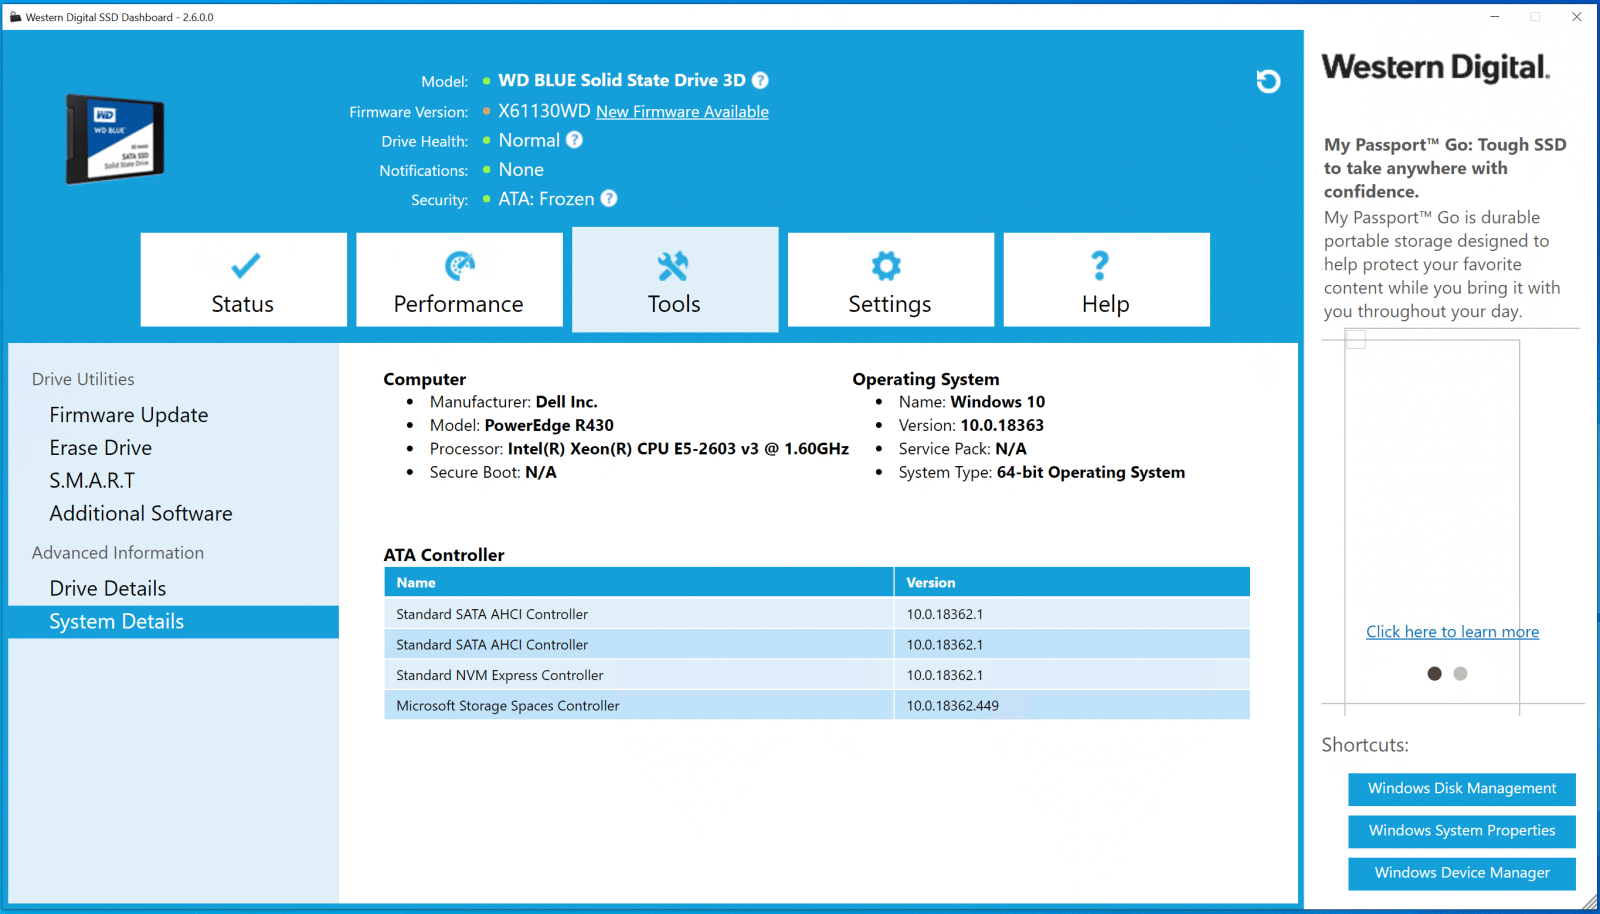
The Drive Details section displays the comprehensive information about the selected drive, including the model name and string, serial number, NVMe Revision / SATA Revision, NVMe Link Speed / SATA Link Speed, and maximum LBA. System Details System Details displays information about the operating system, computer hardware, and ATA controller(s) used in the system on which Western Digital SSD Dashboard is installed.
In the Settings section, you can configure a few different options, such as enabling WD dashboard to load when you boot up your computer, change the software language, or turn off Windows write-cache buffer flushing. If the latter is enabled, your computer will regularly write all cached data to your main drive.

Conclusion
Overall, the Western Digital SSD Dashboard is a great drive management tool. It offers easy ways to update, optimize and erase your drive, and gives users useful health monitoring tools. Users will have the ability to do everything from see how well the drive is holding up to firmware updates to securely deleting all data and using the drive for something new. It does all this via a clean and modern interface that is noticeably better than some other SDD management software.


 Amazon