

VMware developers released the ESXi ARM fling, a version of ESXi that can run on devices based around ARM processors such as the Raspberry Pi 4b we are using, Nintendo Switch Consoles, and many other SBC’s. Setting up the Raspberry Pi to run ESXi is fairly quick, we covered the installation and setup of a VM in a previous article here.
To set up a Raspberry Pi already running the ESXi Arm fling you will need 2 additional storage devices as well as the SD card used for the UEFI and the USB storage device that ESXI is installed on. For this demo, we are using a Samsung T5 portable SSD and an ADATA SE800 portable SSD. For this demo check that ESXi is installed and running on your Pi, both storage drives are free from partitions, and the ESXi shell along with SSH is running on the rPi.
William Lam from the VMware Cloud dev team created the guide on VirtuallyGhetto that I will follow to set up our Raspberry Pi vSAN witness, check out his tutorial here.
Set Up Raspberry Pi as a vSAN Witness
Steps to allow vSAN to use the 2 storage devices:
- Connect to the Pi with SSH and stop the usbarbitrator allowing ESXi to query the 2 new drives:
- ‘/etc/init.d/usbarbitrator stop’
- Use the command chkconfig to confirm that the usb arbitrator is stopped
- ‘chkconfig usbarbitrator off’
- Now that the drives are visible (you can check using ‘vdq -q’ 3 drives should appear) ESXi must be allowed to claim the USB storage devices and one device must be dedicated as a capacity drive for vSAN. Normally vSAN would only allow internal SATA/SAS/M.2/etc drives to we have to change the ESXi settings to allow USB devices to be recognized as SSDs and allow vSAN to use USB drives. This is done using commands:
- ‘esxcli system settings advanced set -o /Disk/AllowUsbClaimedAsSSD -i 1’
- ‘esxcli system settings advanced set -o /VSAN/AllowUsbDisks -i 1’
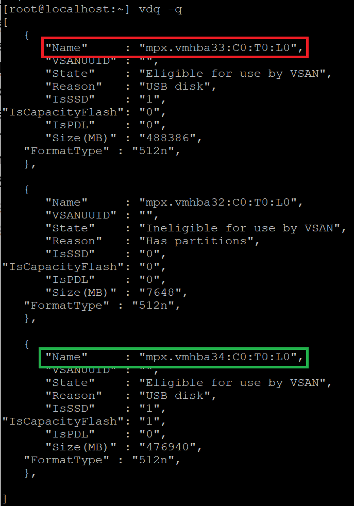
- The command ‘vdq -q’ should be run, be sure to take note of the names of your 2 drives. If either of the 2 drives have “Has partitions” in the Reason you should either access the Pi from the ESXi web interface and clear partitions from the drive or use commands
- ‘partedUtil get “/vmfs/devices/disks/<DeviceName>”’

- ‘partedUtil delete “/vmfs/devices/disks/<DeviceName>” <Partition#>’
- Where <Device Name> is “mpx.vmhba33:C0:T0:L0”, after you are done ‘partedUtil get “/vmfs/devices/disks/<DeviceName>”’ should look similar the screenshot below.
- To tag a USB storage device as a SSD we will need to create a claim rule adding enable_ssd to both our USB storage devices. Without these tags ESXi will not be able to use the USB drives as if they were SSDs. Run the following commands replacing <DeviceName> with the proper names for your devices.
- ‘esxcli storage nmp satp rule add -s VMW_SATP_LOCAL –device=<DeviceName> –option=enable_ssd’
- ‘esxcli storage core claiming unclaim –type device –device=<DeviceName>
- ‘esxcli storage nmp satp rule add -s VMW_SATP_LOCAL –device=<DeviceName> –option=enable_ssd’
- ‘esxcli storage core claiming unclaim –type device –device=<DeviceName>’
- ‘esxcli storage core claimrule load’
- ‘esxcli storage core claimrule run’
- The next step is to tag one of our drives for use as a capacity drive by vSAN using the command below replacing <DeviceName> with the proper name for the device to be used.
- ‘esxcli vsan storage tag add -d <DeviceName> -t capacityFlash’
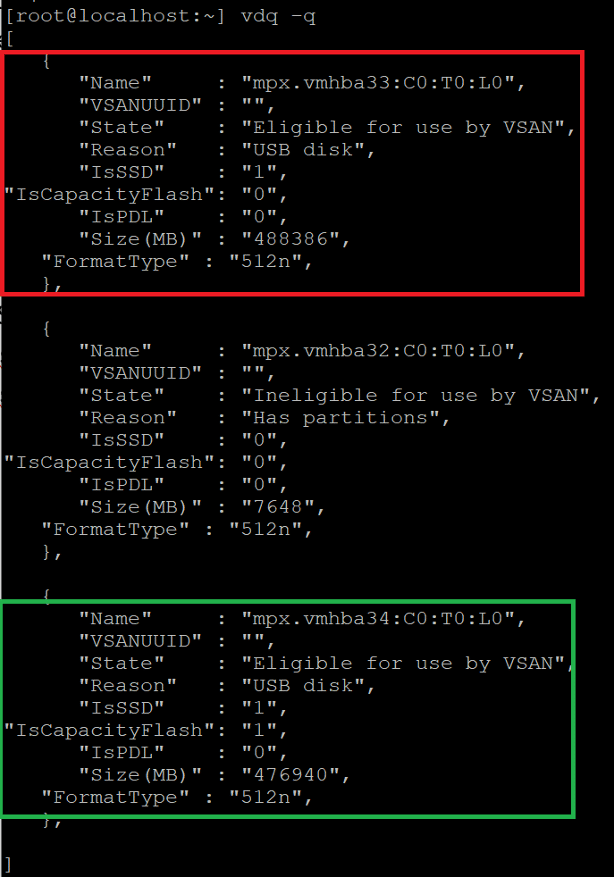
- Running ‘vdq -q’ should now look similar to the screenshot, both drives should have State “Eligible for use by VSAN” and IsSSD should be “1”. Only one of the drives should have IsCapacityFlash “1”, this is the drive assigned by us to be the Capacity storage for the witness node.
- To allow vSAN traffic on our Pi node, this can be done from the web ui, instructions here, or with the ESXiCLI using:
- ‘esxcli vsan network ip add -I vmk0’
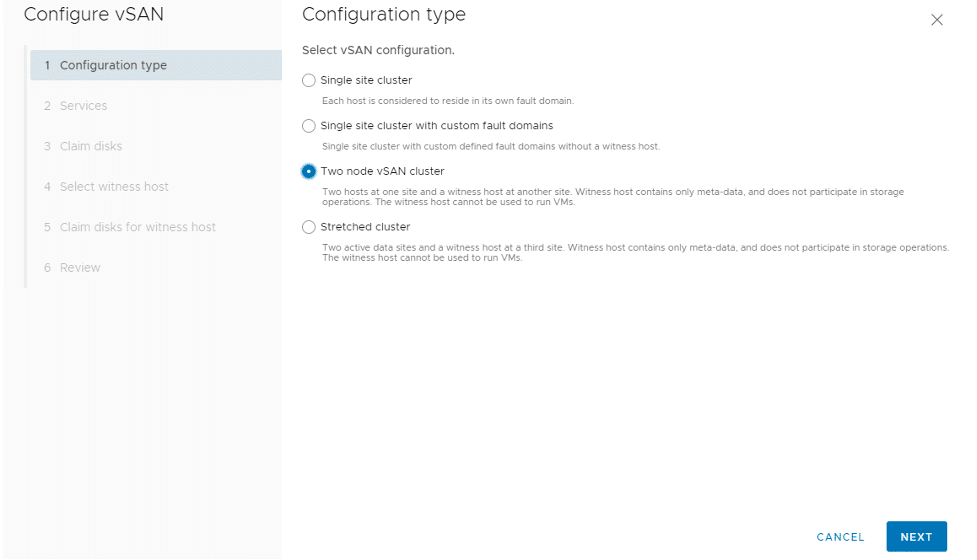
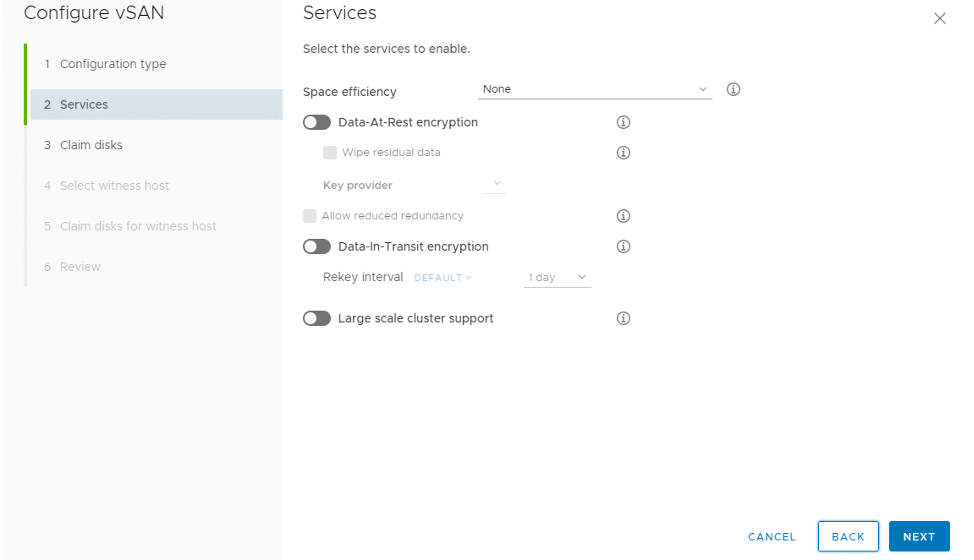
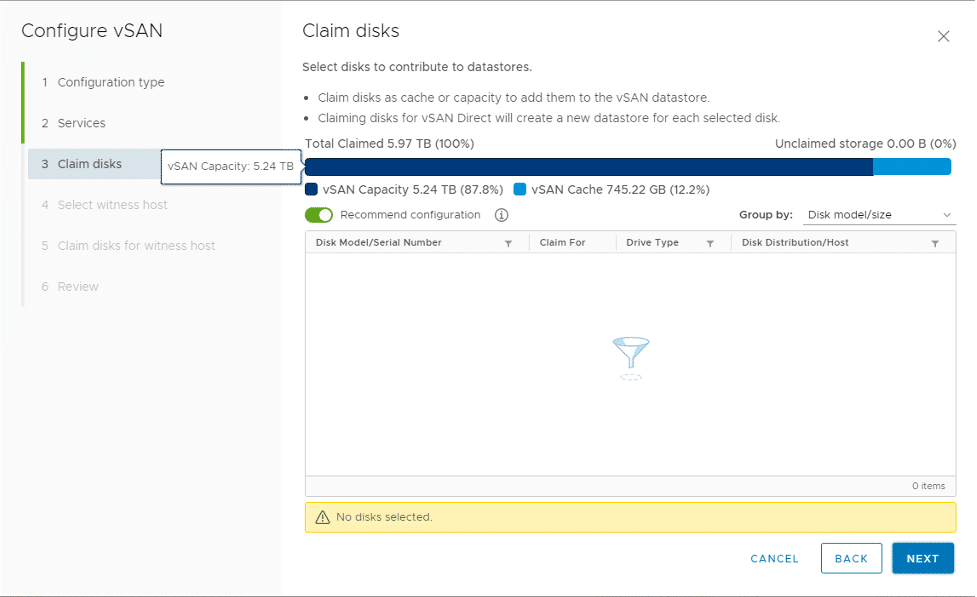
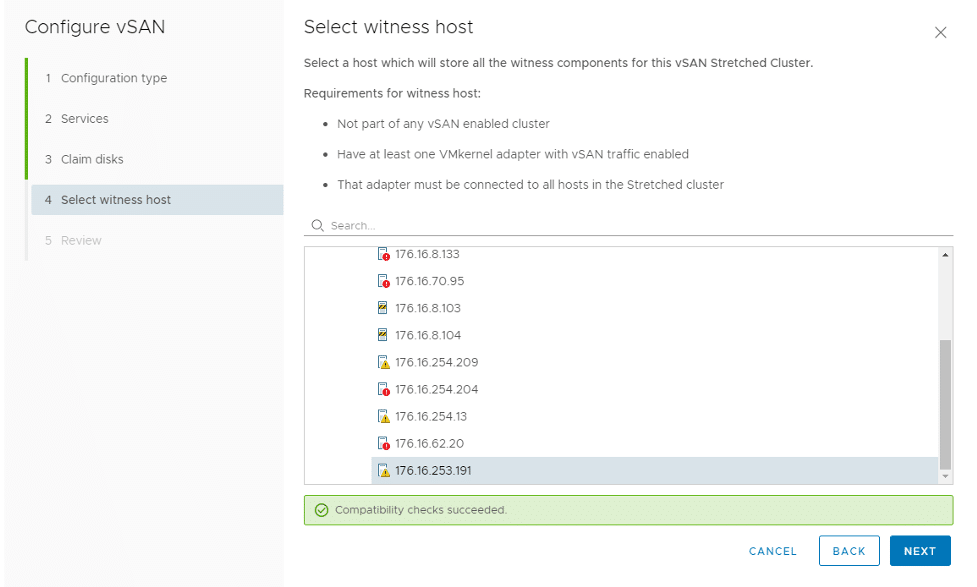
- Assuming you already have a 2 node cluster setup, the next step is to enable vSAN. In vSphere go to Configure>vSAN>Services then click configure following our screenshots.
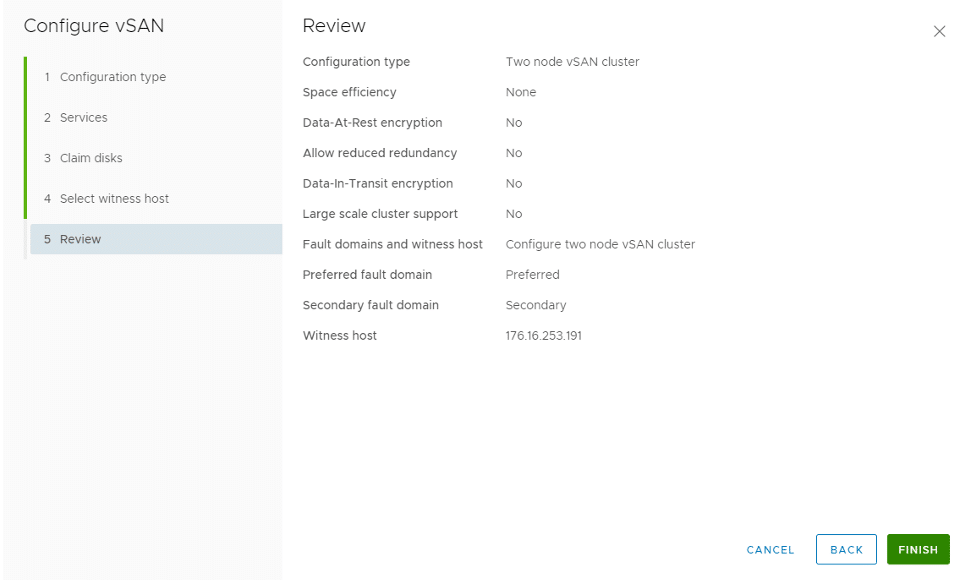
If all the steps were completed correctly the Raspberry Pi should be set up as a vSAN Witness and your vSAN cluster should be up and running. There are many x86 computers that would serve the purpose of a vSAN witness node better and run into fewer compatibility issues than what we’ve done here. Using the Raspberry Pi is a fun project though for enthusiasts wanting to explore the upper limits of what the Raspberry Pi can achieve running the ESXi ARM fling.
William Lam from the VMware Cloud dev team created the guide on VirtuallyGhetto that I followed to set up our Raspberry Pi vSAN witness, check out his tutorial here.


 Amazon