

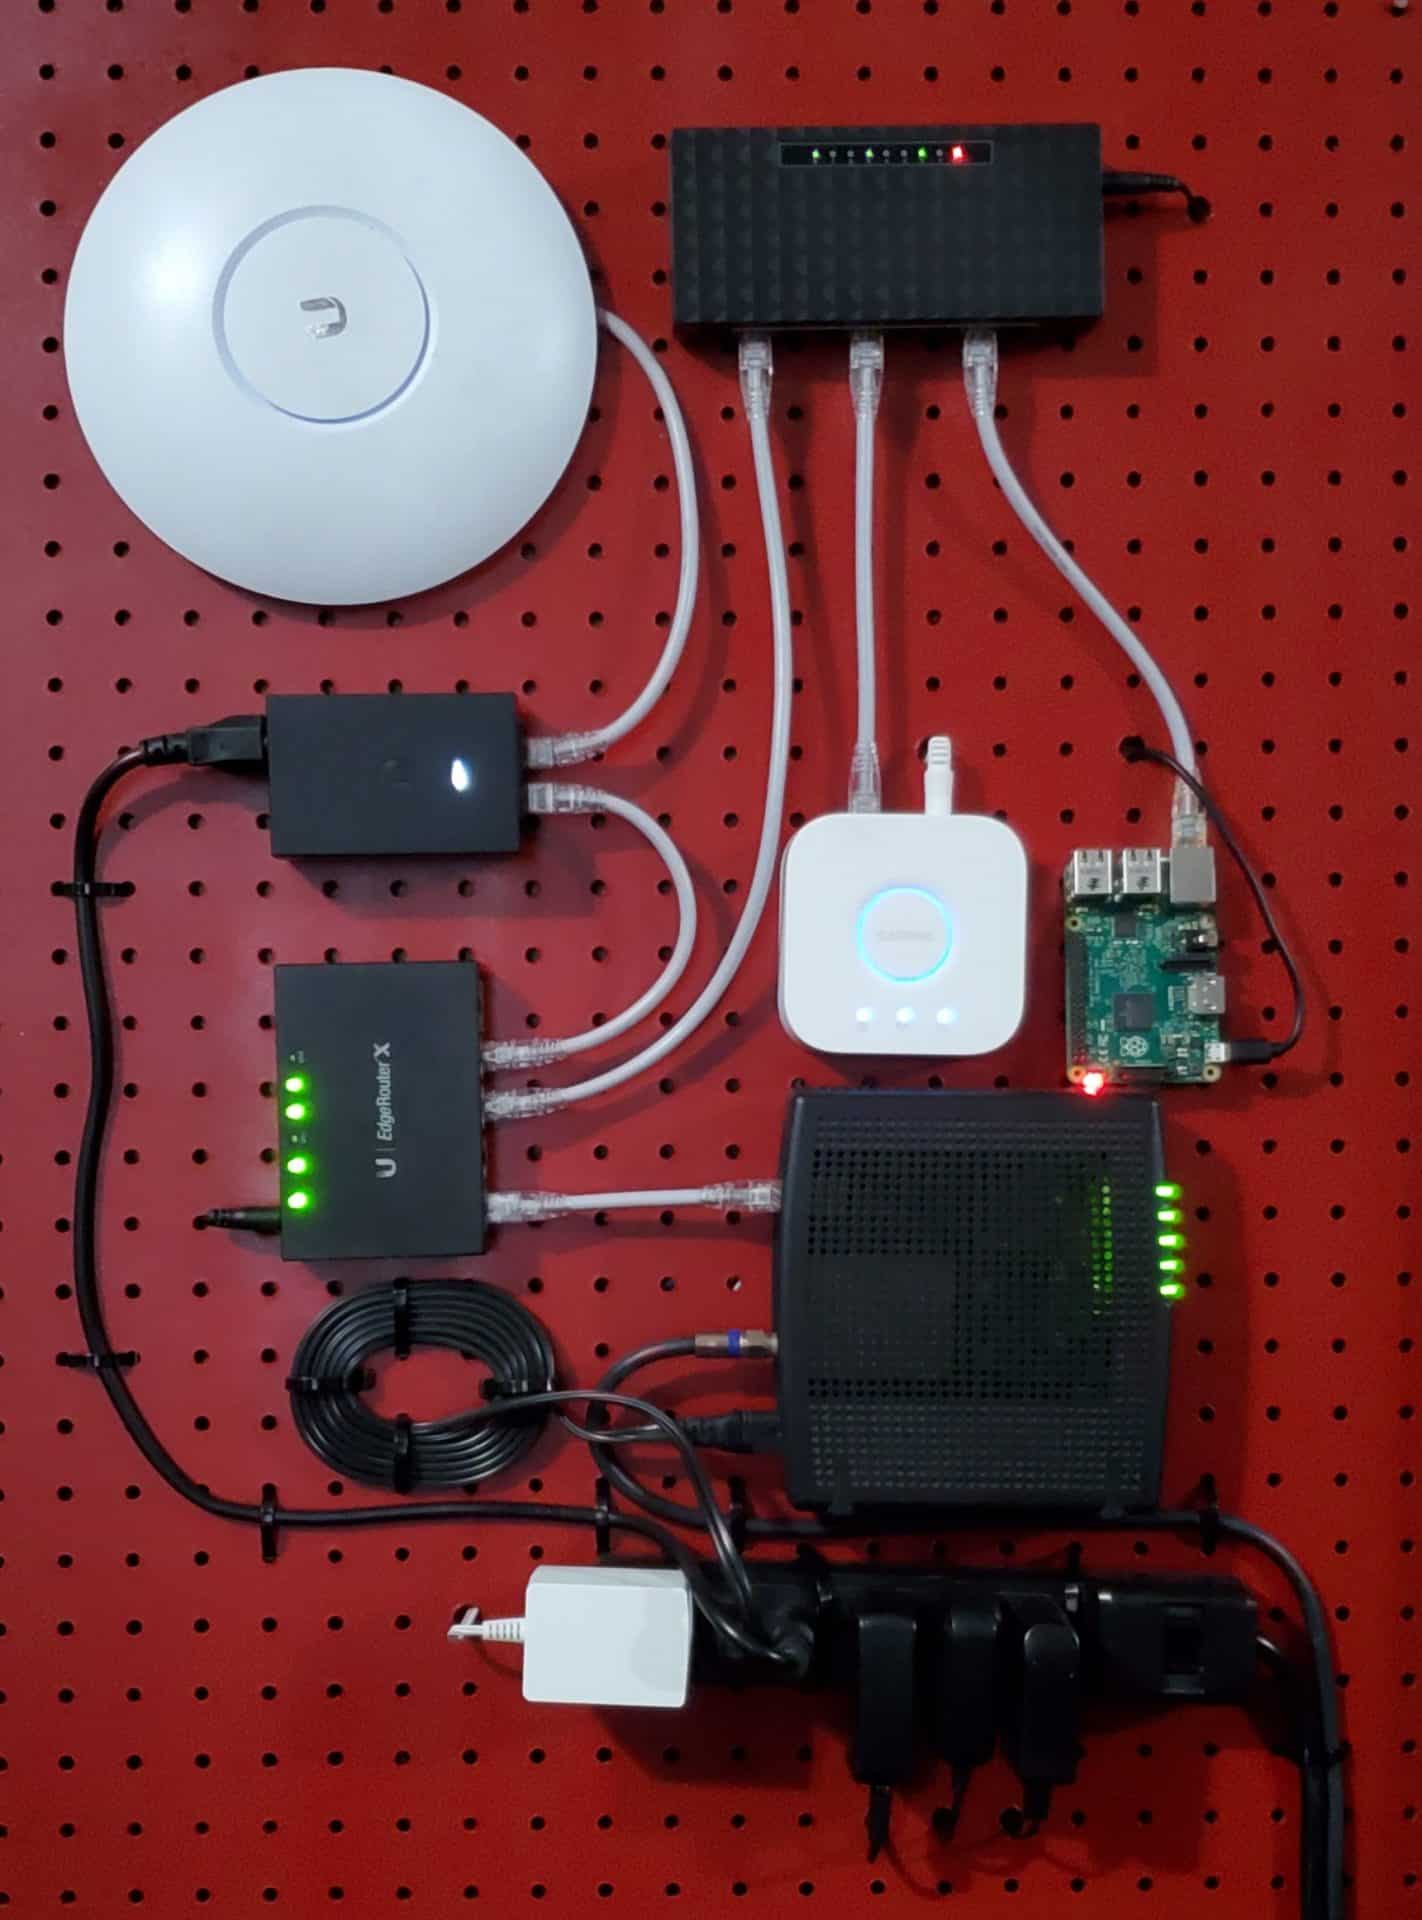
As an engineer who is new to homelabs, networking, and software configuration, one of the first and simplest improvements to my quality of life was setting up a Pi-hole! In this Pi-hole install guide, we’ll go through the basic steps one needs to do to lower the number of advertisements in their life. This Pi-hole is hosted on a raspberry pi, which is located in the center of the right-hand side in the picture of my network-board shown below.
A Pi-hole acts as a Domain Name System, or DNS. A DNS is used to translate hostnames and IP addresses. Essentially, what happens is that all of the internet traffic that is flowing through a network is sent to a DNS, which determines where the traffic should be sent based on what is calling and or sending said traffic. This traffic contains information about where it is coming from. For example, if a webpage is navigated to, and that webpage has one of those constant banner advertisements along the bottom, the DNS is actually what directed the content of the advertisement to be delivered to the device which pulled the webpage up.
That applied concept is very important to understanding how the Pi-hole works. The Pi-hole contains a list of (at the time of writing this article) 84,965 domains that host advertisement material. When the Pi-hole DNS sees that traffic is originating from one of the said domains, instead of forwarding the traffic to the requesting device as it normally would, the DNS does not send the advertisement content! (I like to think of the Pi-hole shooting those advertisements into a black hole of nothingness).
Pi-Hole Install Guide
A very powerful aspect of the Pi-hole blacklist is that it is editable by the user. If the user notices that a specific domain continues to send advertisement traffic to his/her device, then the user is manually able to add that specific advertisement domain to the blacklist. For this installation of Pi-hole, we will assume that the Raspberry Pi already has an operating system installed. To set up Pi-hole, we navigate to pi-hole.net. Once there, an install button navigates the user to a webpage that contains several different ways to proceed with the Pi-hole installation, the easiest of which is a single-line command.
If the user is wary of piping to bash, the repository can be cloned and ran, and the installer can be downloaded and ran.
Once installed, you are presented with the dashboard shown below (which can be accessed by entering “pi.hole/” in the address bar of the browser):
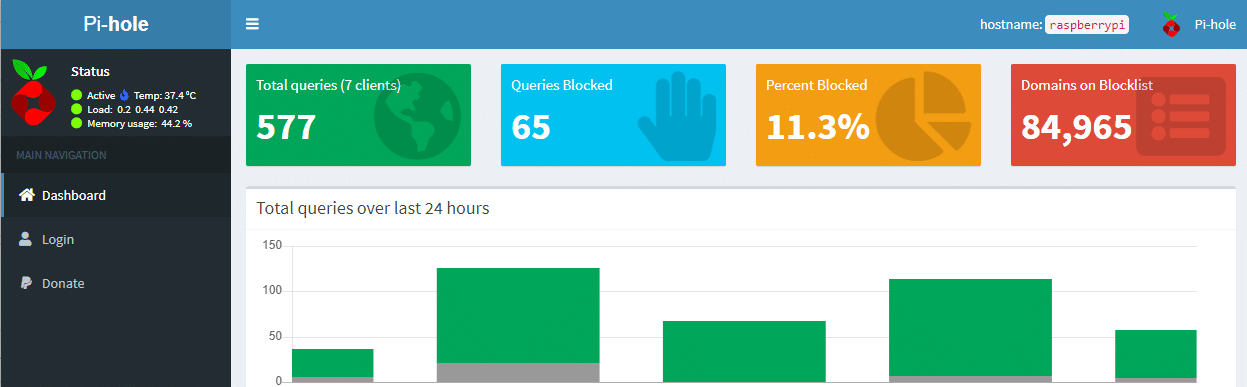
This dashboard displays various statistics about the traffic flowing through the Pi-hole. As shown above, since restarting my Pi-hole today, the network has made 577 queries, and Pi-hole has “blocked” 65 of them, or 11.3%. This means that 11.3% of the traffic being sent to or requested to the network has been identified as advertisements and has not even shown up on my devices. A key difficulty that I encountered when setting up the Pi-hole on my network was to make the Raspberry Pi the default DNS server on my network. Here are the steps that I took with my EdgeRouter X:
To configure the EdgeRouter X to use the Rasberry Pi as the DNS, first, enter the IP of the router into your favorite browser (the default for the Edgerouter X is 192.168.1.1). Next, Navigate over to the Config Tree tab of the configuration software:
Follow that by drilling down to the subnet within the navigation tree, and finish by entering in the IP of the Rasberry Pi that is hosting the Pi-hole:


In addition to the IP of the Rasberry Pi, a secondary, failover DNS is recommended so that if the Raspberry Pi is not functioning, the secondary DNS server then takes over. In this case, 1.1.1.1 is used, which is the IP address of CloudFlare, one of the fastest and most popular DNS resolvers.
Important note: it is recommended to set the IP of the Pi-Hole’s host as static instead of dynamic. This is because the DNS server that the router is looking at is a static address. As a result, if the Pi-hole’s host is set to DHCP, and is assigned a new IP address due to a power cycle, then the router will no longer be looking at the correct IP address of the Pi-hole DNS.
I hope that this Pi-hole install guide will help others in their quest to lessen the number of advertisements in their
lives.
-Jack G.


 Amazon