

When it comes to learning or building out components for a homelab, the trash heap of tech known as eBay or NewEgg refurbs is a thing of greatness. Last year, we put together a VMware server setup article, for which we acquired an HP EliteDesk 800 G1 SFF. It had an SSD and a supported NIC for $155. We gave that system away though, so this time we went shopping again, for a slightly more powerful system that could solve our needs as a budget Proxmox server.
Budget Proxmox Server Backed by an Outdated PC?
For the readers that aren’t entirely familiar with the hypervisor scene, Proxmox is one of the most popular ways to get virtual machines, alongside VMware and others. Proxmox is an entirely free-to-use software and does offer a subscription to get tech help and access to other features, however, the free version of Proxmox is entirely fine to use and will run everything necessary. The entire Proxmox website is easy to follow and simple to find the downloads and other features that people look for. To download the Proxmox ISO, it is as simple as going to the download tab, hitting the software that you want, then ISO images, and then the orange download button.
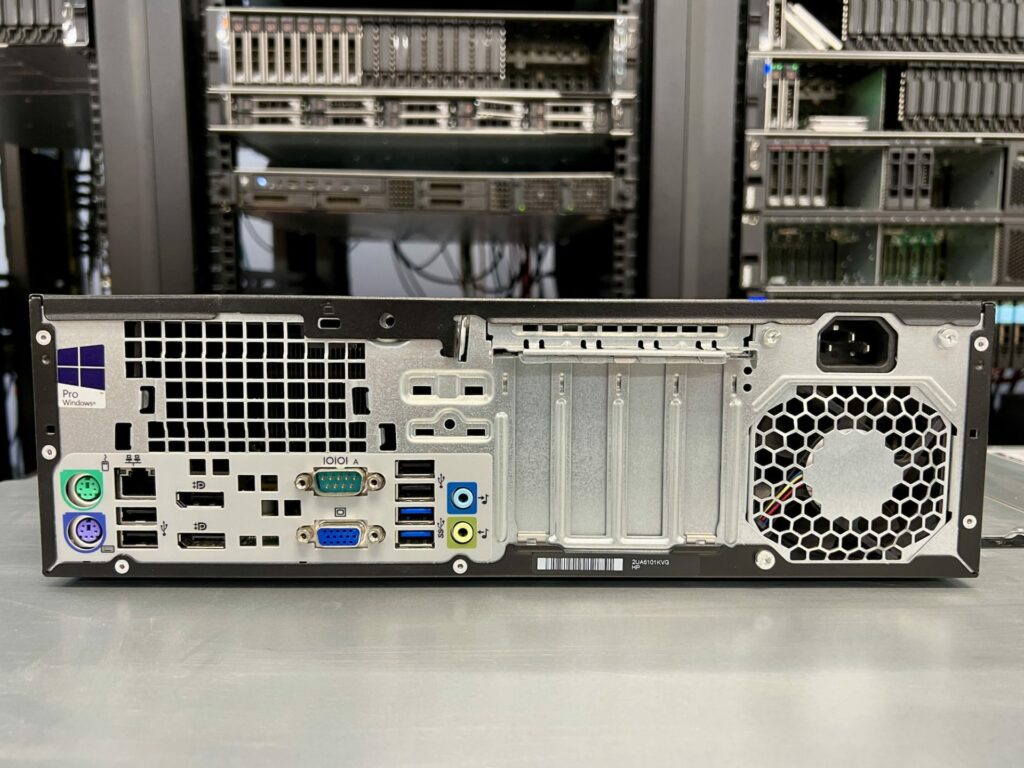
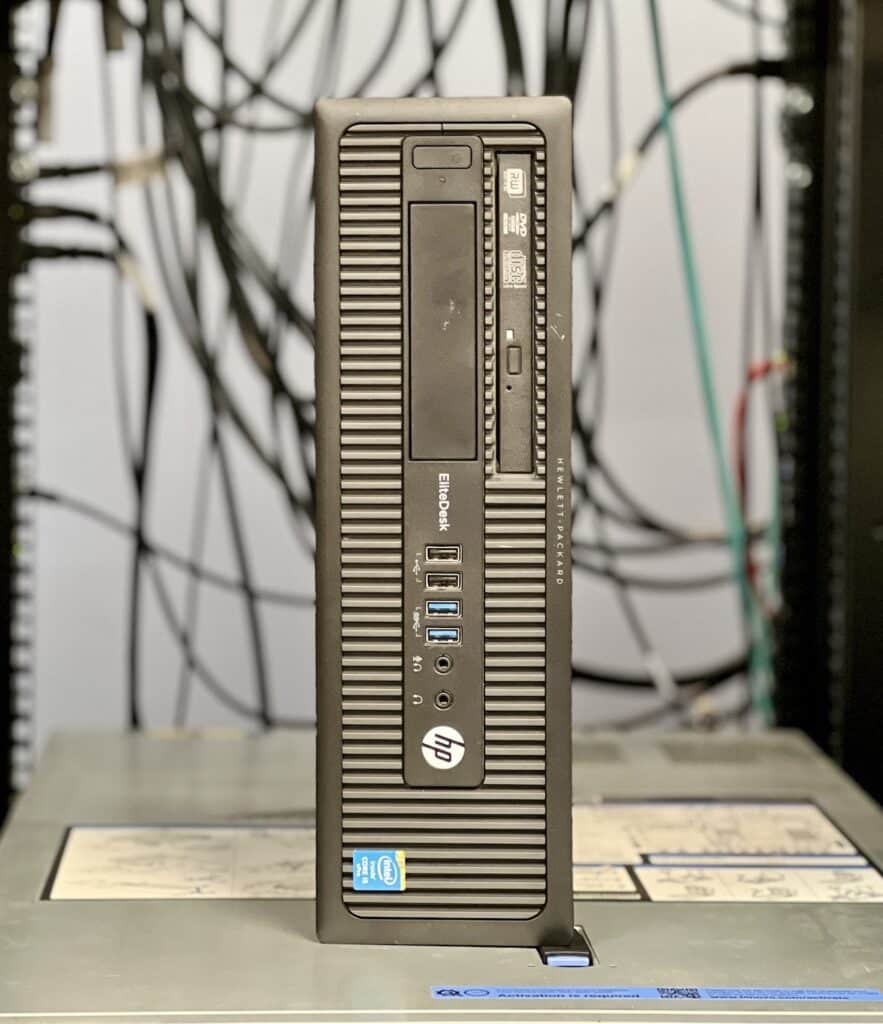
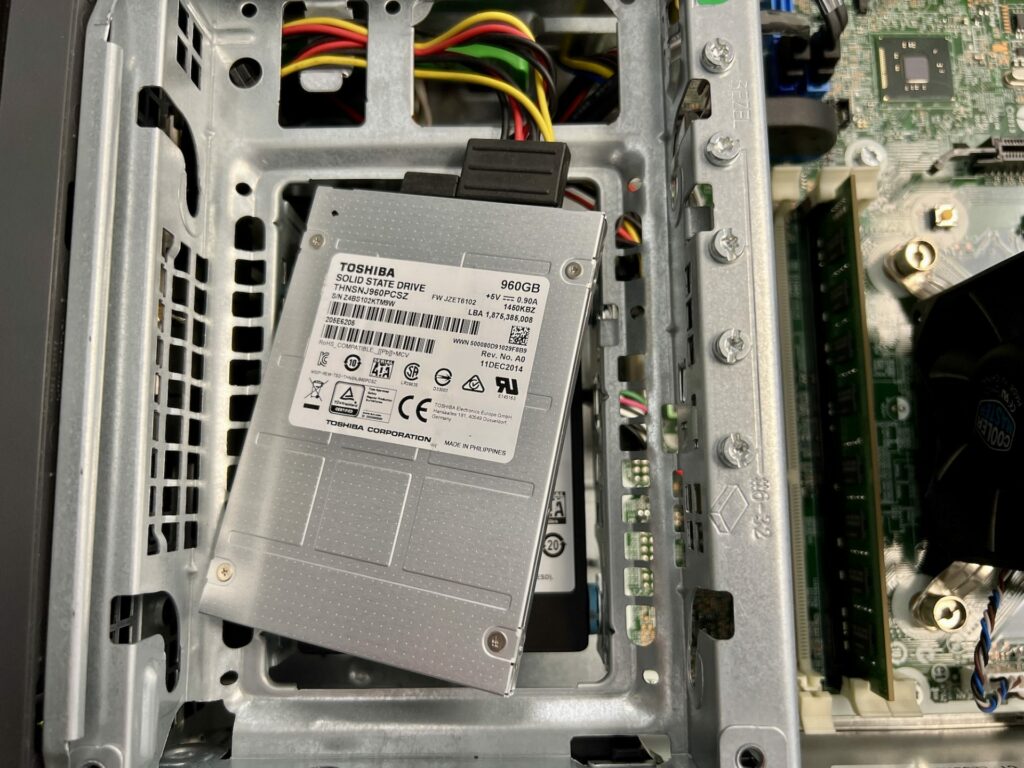
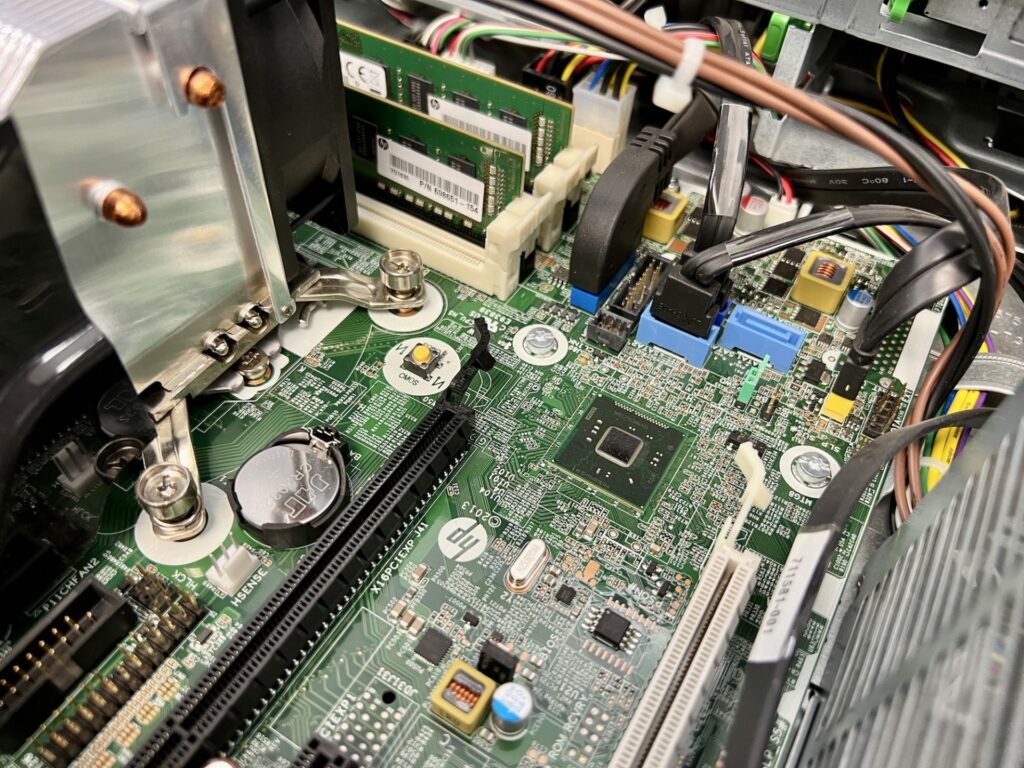
The PC that we are using for this build is again an HP EliteDesk 800 G1 SFF we scavenged off of eBay for about $135. Our HP is configured with a Core i5-4590 at 3.3GHz, along with 16GB of RAM, and a 1TB SSD we had in the lab (originally shipped with a 256GB SSD). In addition to the SSD, we did punch up the RAM from the 4GB included. Having 16GBs of RAM isn’t necessary, there is the possibility of getting away with 4GB, however, if you wanted to run multiple VMs at once, then it would be pretty tough on the system.
One thing that drew our attention when researching hardware opportunities was the onboard NIC, which for this system is the Intel I217LM. Intel GbE drivers tend to be the most stable for a wide range of server applications.
From Proxmox’s website, the recommended hardware required to run Proxmox is the following, Intel EMT64 or AMD64 with Intel VT/AMD-V CPU flag. Memory, minimum 2GB for OS and Proxmox VE services. Plus designated memory for guests. Fast and redundant storage, best results with SSD disks. Redundant Gbit NICs, additional NICs depending on the preferred storage technology, and cluster setup – 10 Gbit and higher is also supported. For PCI(e) passthrough a CPU with VT-d/AMD-d CPU flag is needed.

Installation and Setup of our Budget Proxmox Server
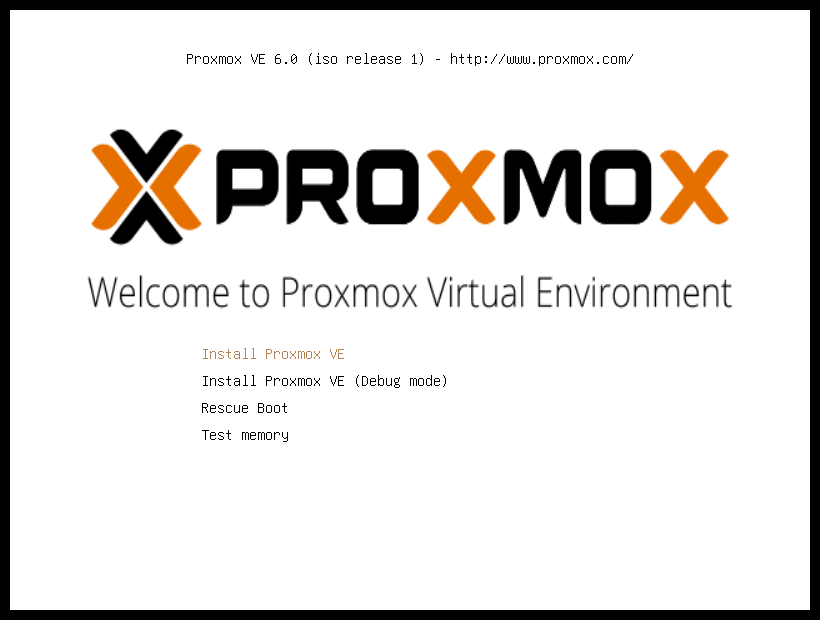
The entire process of downloading Proxmox, writing to a USB, and installing it to a host device is very easy and simple. Proxmox is one of the easiest to download and get running as it is a simple download from their website and once booted into it, some basic questions, and then it is complete. We followed the same procedure that we do for all ISO installations, which is just to use Rufus, download link here, and write the ISO to the flash drive that we have. Upon plugging in the installation media and booting from it on our system, we were greeted with the Proxmox installation GUI.
Upon booting into the Proxmox GUI, there are a few options for Proxmox, however, to just simply install Proxmox to use the virtual machine environment, the first option, “Install Proxmox VE.” The other options are going to be used in case Proxmox bugs out or stops working in its full functionality. Full disclosure, these screencaps are from Proxmox. We used them for improved quality.
 After the welcome screen, Proxmox will ask where to install Proxmox on the system. In our case, we only had one drive installed on the system so it was easy for us to create the image on one drive, however, if Proxmox is going to be installed on a device with multiple drives, the disk installation screen will look something like this.
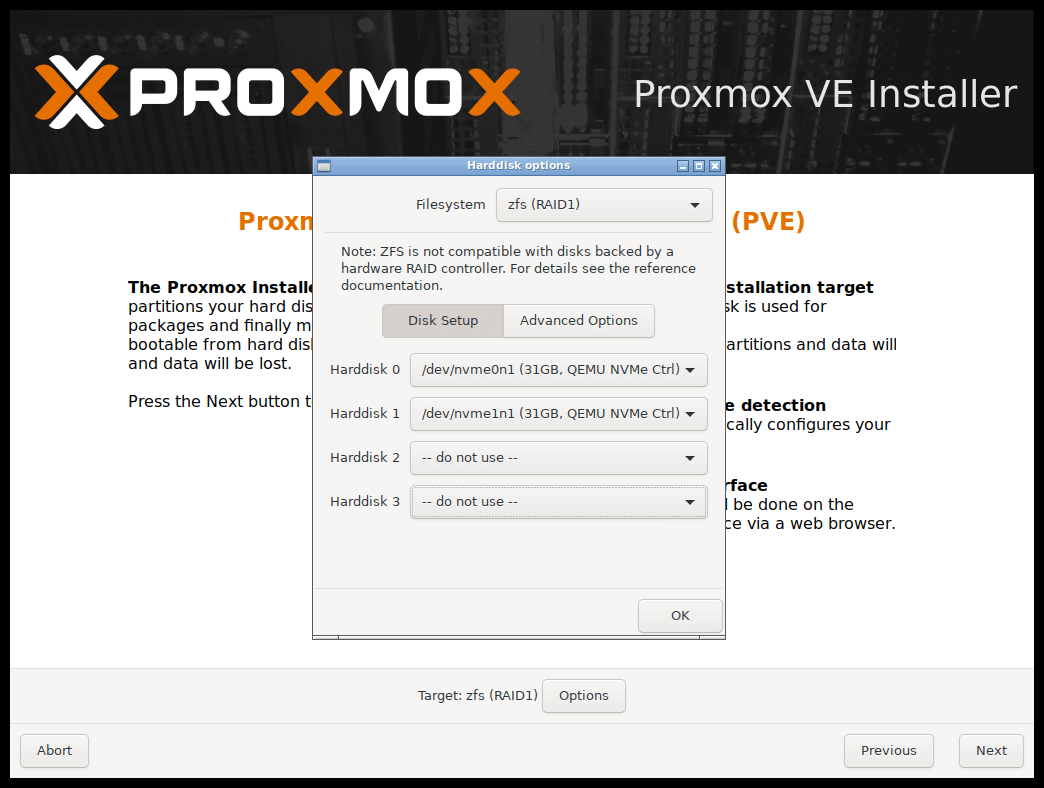
After selecting the drive installation disk, Proxmox is going to ask a few basic questions about the location that Proxmox is installed in. The location selection plays into where Proxmox is able to pull updates from in the most efficient manner, and also speed up downloads. This screen also allows for time zone selection so the time is right and daylight savings time can be configured correctly. There is also a keyboard layout selection, since Proxmox is international, it will ask for a layout.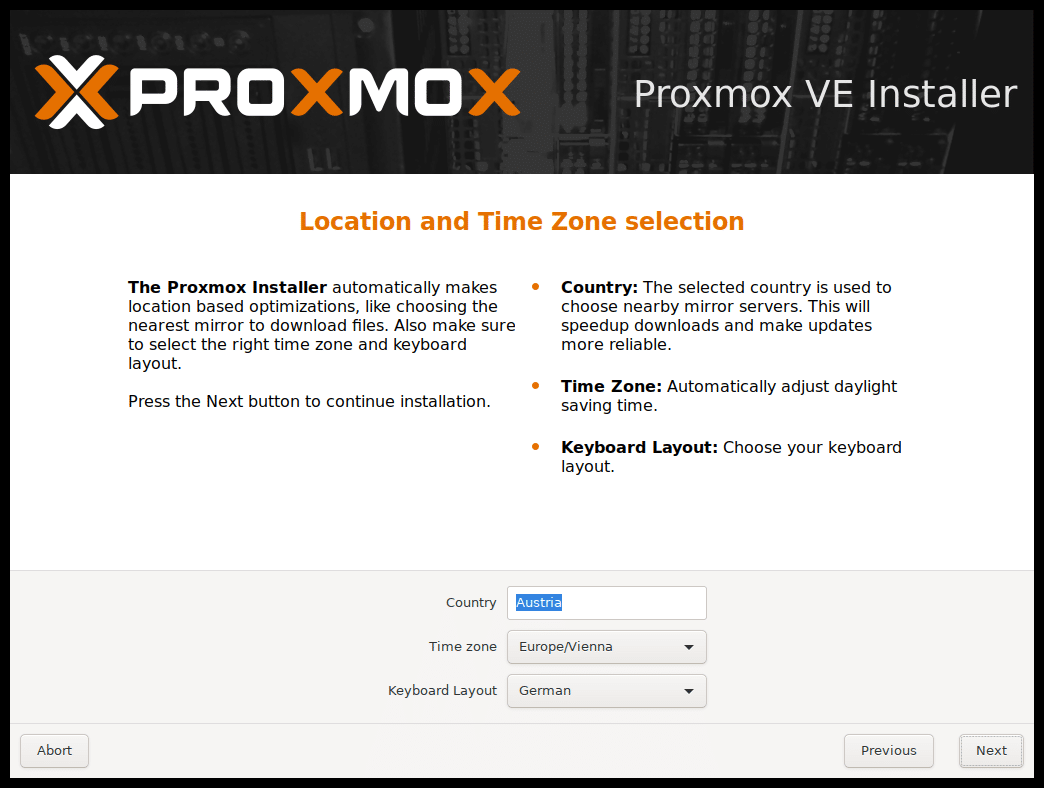
Next will be the Password creation screen. This is simply to make an administrator password so it can be logged into after basic installation has been completed. Proxmox will also ask for an email address, this email will receive important alerts from Proxmox, so it is important to enter a valid email address.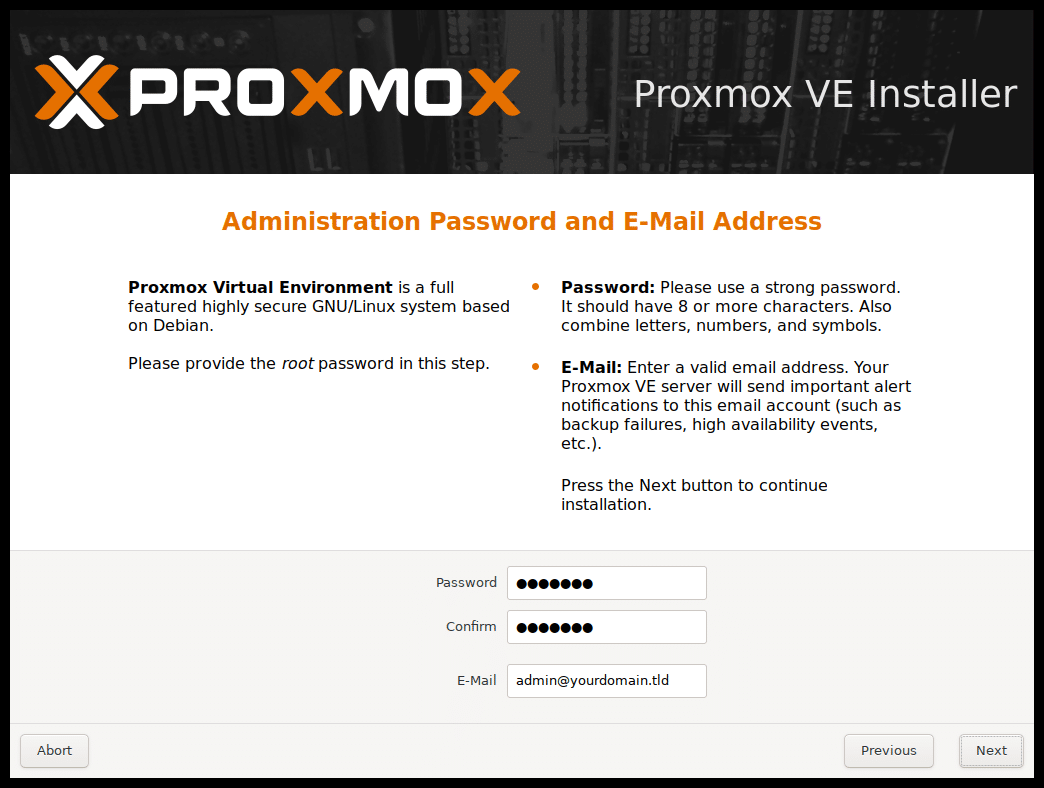
After the initial setup options, Proxmox will begin installing on the disk that was selected along with all the options that were set and/or created. Proxmox will also display some important tips that come along with it, such as a JavaScript-based GUI, Web-Based Console, Online Backup, and Live Migration.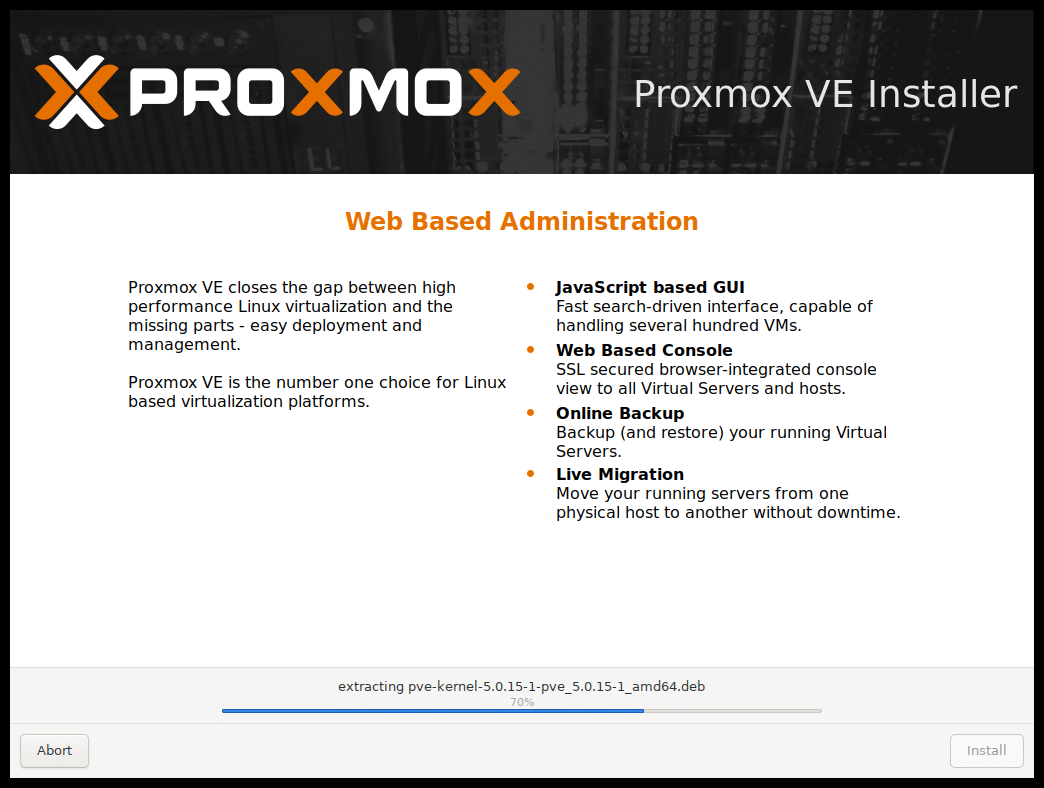
The last GUI that Proxmox will show on the system will just be an overview of what was configured and created during the setup process. If there is a mistake made in the configuration, the previous button will allow redoing any of the settings. Or if the system was completely messed up, the Abort option will restart the entire process.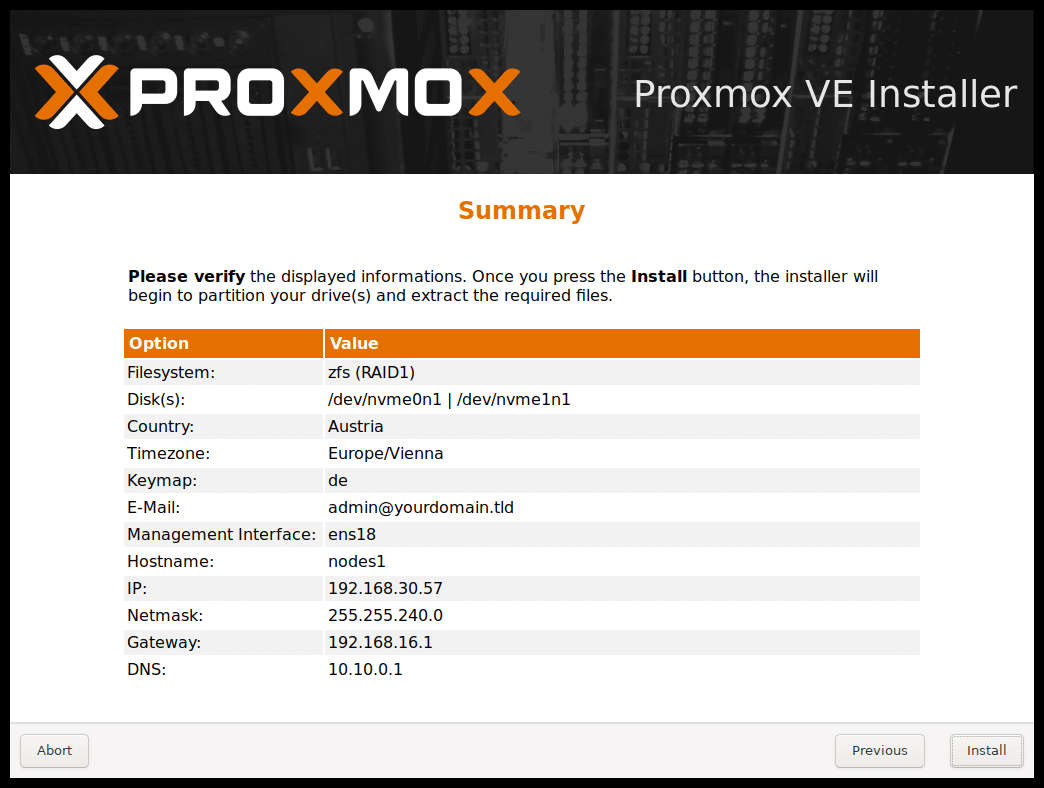
Finally, after the Summary menu and the Install button has been clicked, Proxmox will restart the system, and now is the time to unplug the boot drive so the system doesn’t try to reboot from that. Once rebooted, Proxmox will display a screen that will just have an IP address that will need to be accessed from a web console in order to configure and create the VMs on Proxmox.
Creating VMs
Creating VMs on Proxmox is fairly simple and easy to do. Since our machine only had one SSD, the following steps are important in the configuration, however, if your machine has more than one drive, this isn’t necessary. The first thing to do is to increase the storage that the local VM has; right from the get-go, Proxmox isn’t giving the full extent of the hard drive space to the local VM. In order to change that, go to Datacenter -> Storage -> select local-lvm -> click remove and yes. Now is the little bit more daunting part of increasing the storage. We have to go into the shell, which is found under Proxmox on the left, and then shell. Here we are going to enter a few commands: lvremove /dev/pve/data; lvresize -l +100%FREE /dev/pve/root; resize2fs /dev/mapper/pve-root. The commands will look like this in the shell.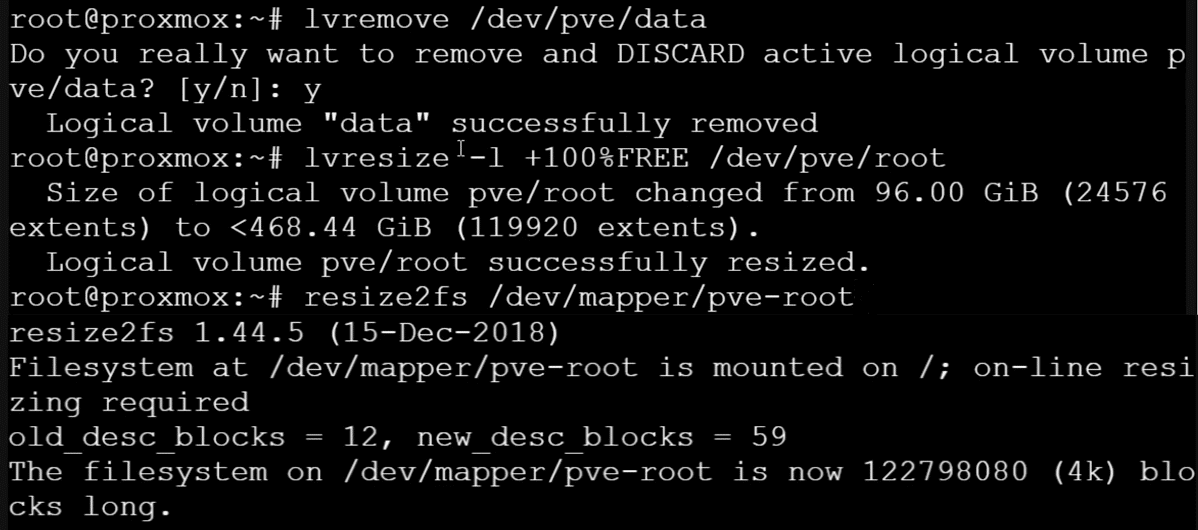
After the basic configuration steps have been completed, creating a VM is simple to do as the creation menu for the VMs outlines every feature and configuration option that you may need. Once hitting the create VM in the top right of the dashboard, the Create Menu will boot into the General tab which will allow for the node, which should always be Proxmox. The ID which is just a basic ID to keep track of all the VMs that will be created, the Name, which can be anything, for our case, we set up the Ubuntu. Finally, the Resource Pool, which isn’t necessary.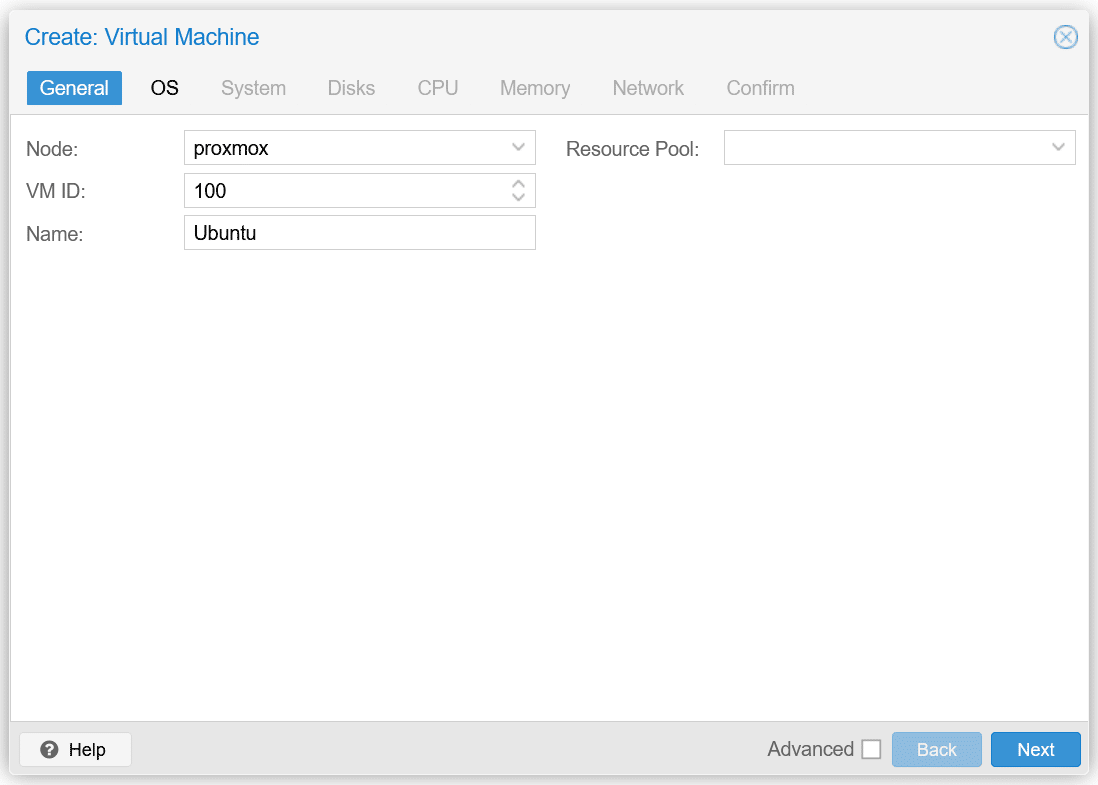
Next is the OS menu, which is where the operating system for the VM will be made, the best way to do this step is to take the upload that was done in the steps before and choose it under the ISO image drop-down menu with local storage that we expanded earlier. This can all be done under the CD/DVD option, which is the most popular option. As for the Guest OS, make sure the right OS is selected and next.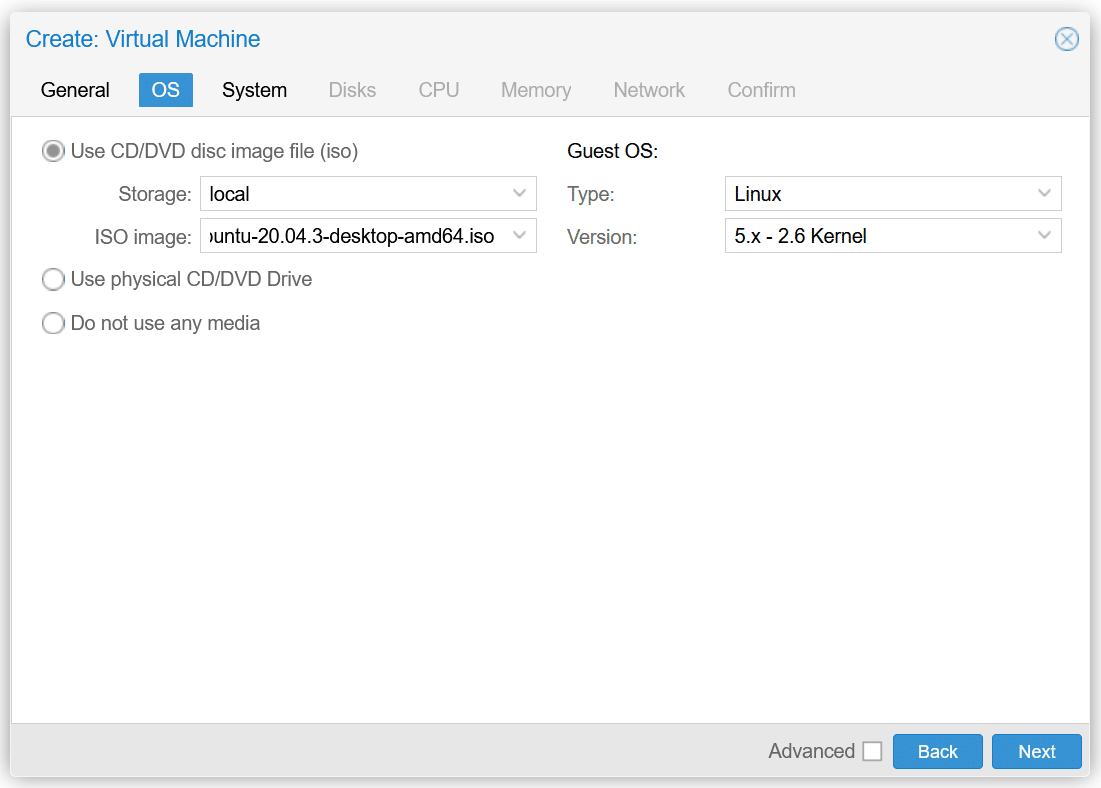
Next is the System tab, which we kept everything as default since we really don’t want to mess with anything, we are just trying to get a VM operational.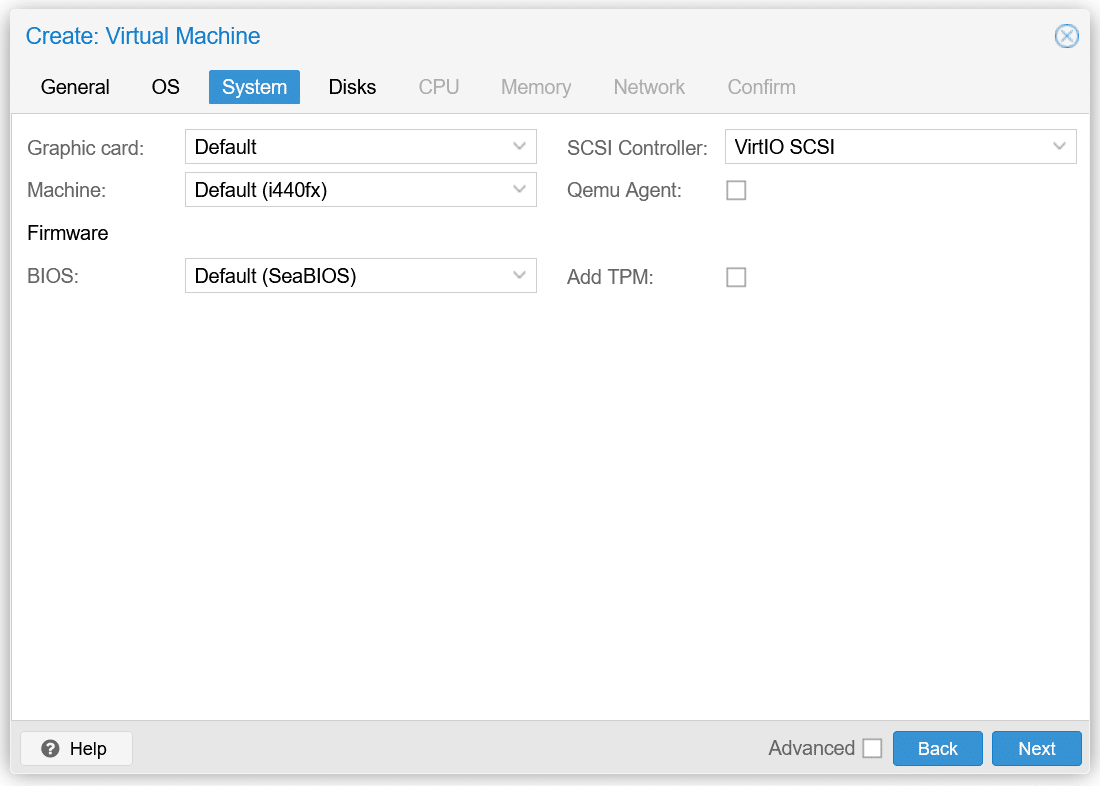
The Disk tab is where the storage size of the VM will be created along with the storage location. In terms of the Storage, we configured this earlier to allow for VMs to use it, so make sure local is selected from the drop-down menu. Next is the disk size, we chose 100GBs just to give the VM some room to breathe, since it is a Linux machine 100GBs is plenty, however, if we were doing a Windows VM, closer to 200GB would be better.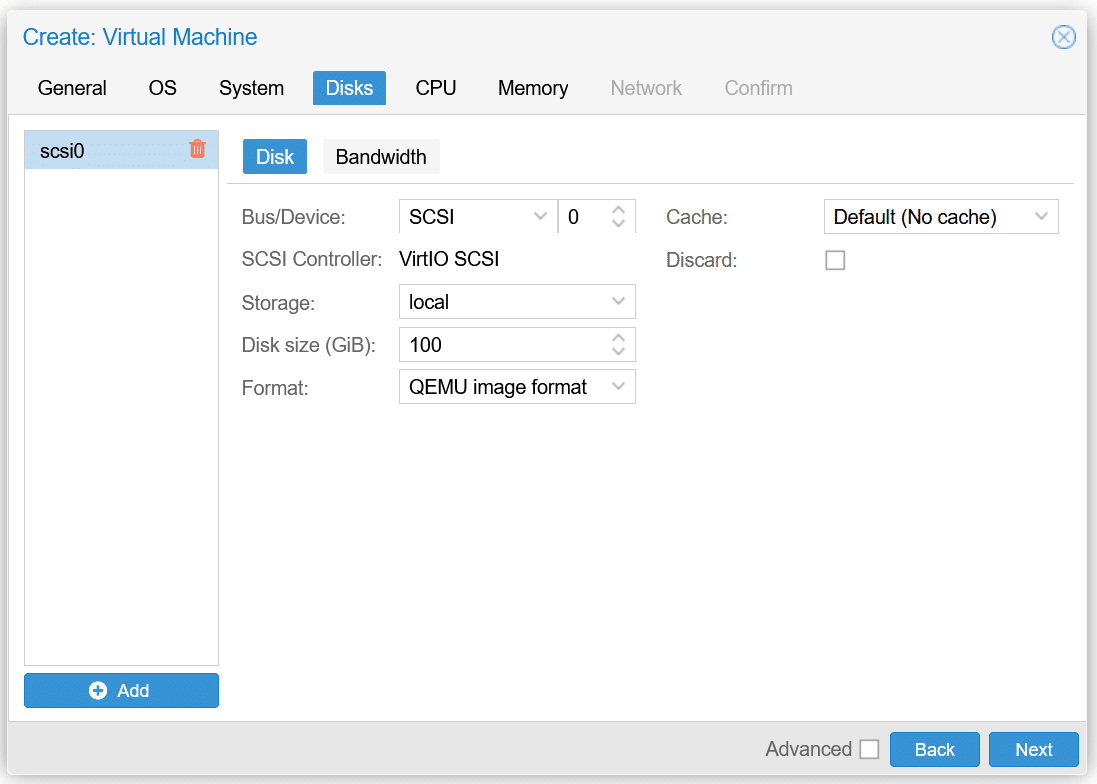
Next is the CPU configuration tab. This is where the number of cores comes into play, and remember to keep in mind that these cores will actually use the cores of the physical machine so make sure not to exceed. For the Linux VM, we just did two cores, as two is sufficient enough for the testing and creation that we are doing.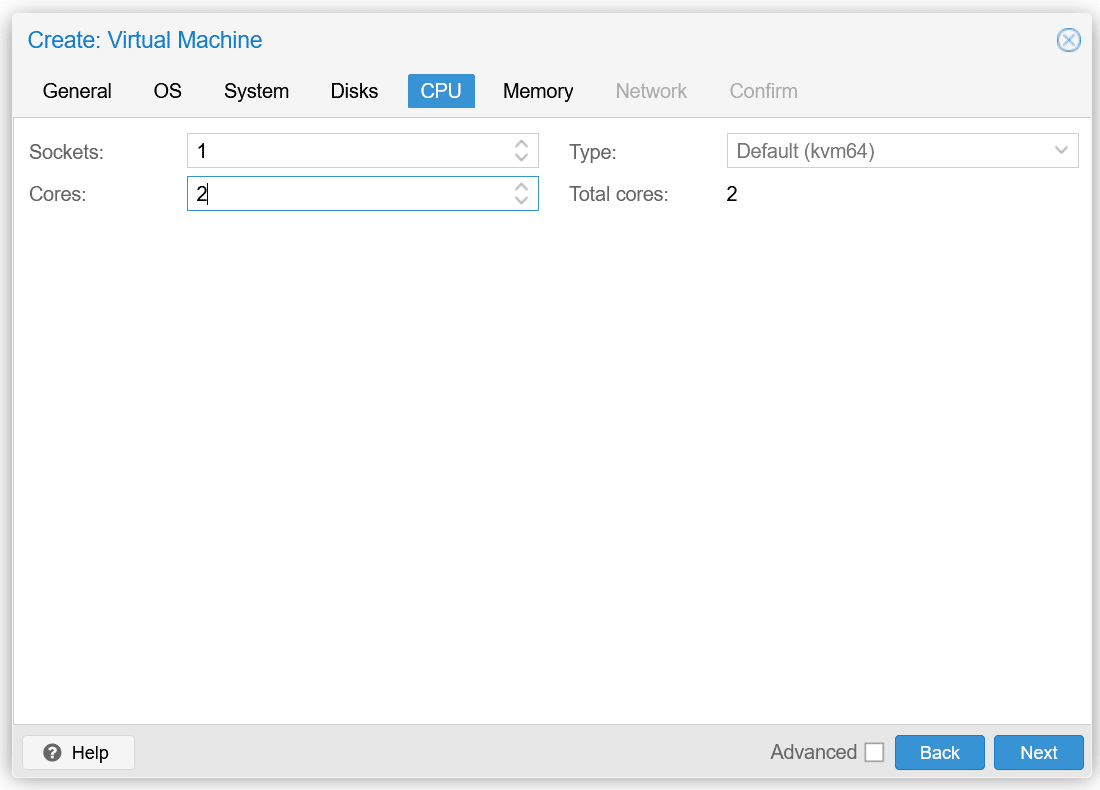
The Memory Tab is also going to be using the physical memory that is installed on the machine, so again, make sure to not go over the total that is installed on your machine. Also to note, depending on how many VMs are running at once, will determine how much RAM should be installed on the machine. To run 4 VMs at once, just add the totals and add 2 to it, the extra two will also allow other things to run in the background and give the actual PC or server a little leeway. We chose to use 4GB of memory, just a good standard to have nowadays.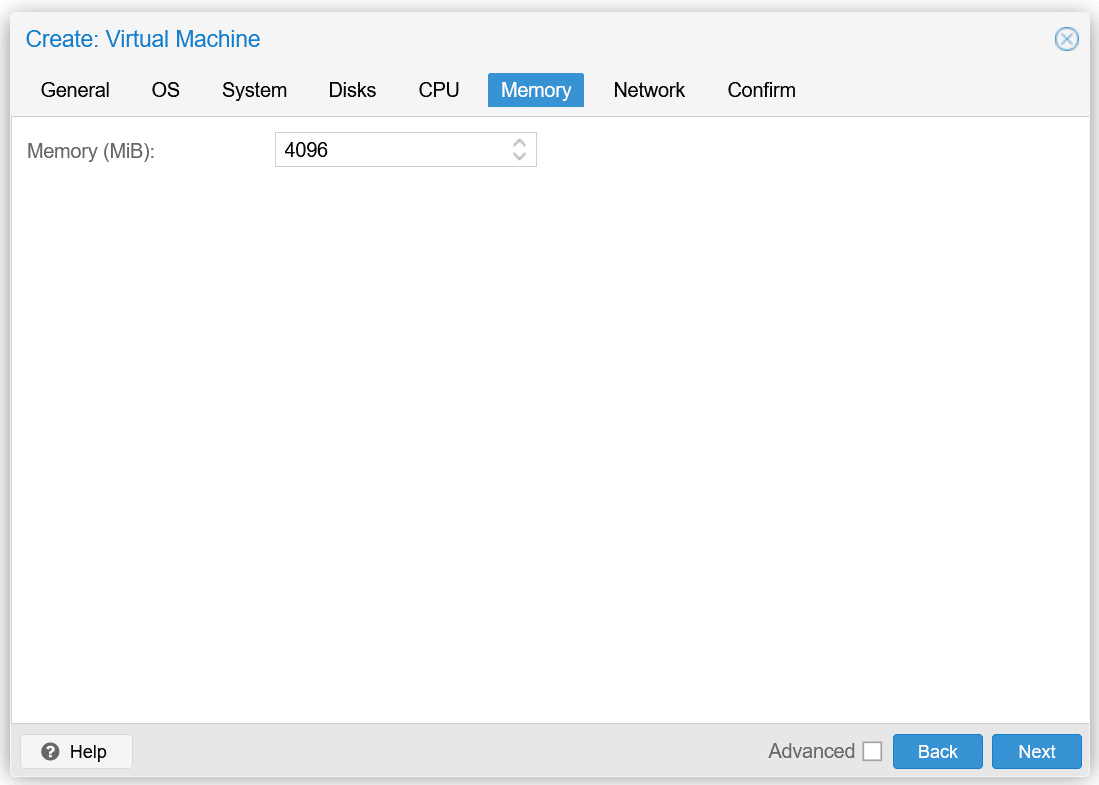
The last configuration step is the type of network that the VM is going to be running off of. In our case, the physical ports on the PC were fine, since Proxmox is able to recognize those. So going with the defaults in our case was the best option. There is also VLAN Tagging if you wish to do that, however, not necessary.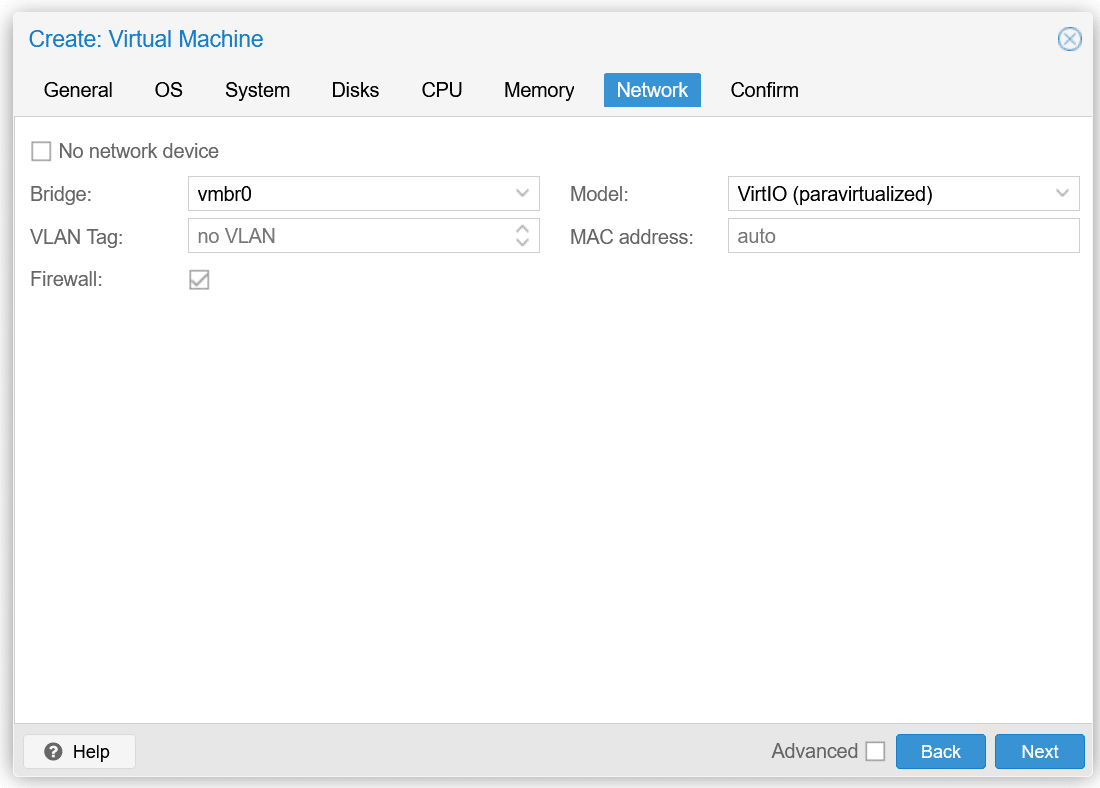
The last tab will just be a confirm tab, showing all the configurations just done in the previous steps. If anything is wrong, now is the time to go back and fix or change. If there is a need to change later, editing the VMs later is also an option.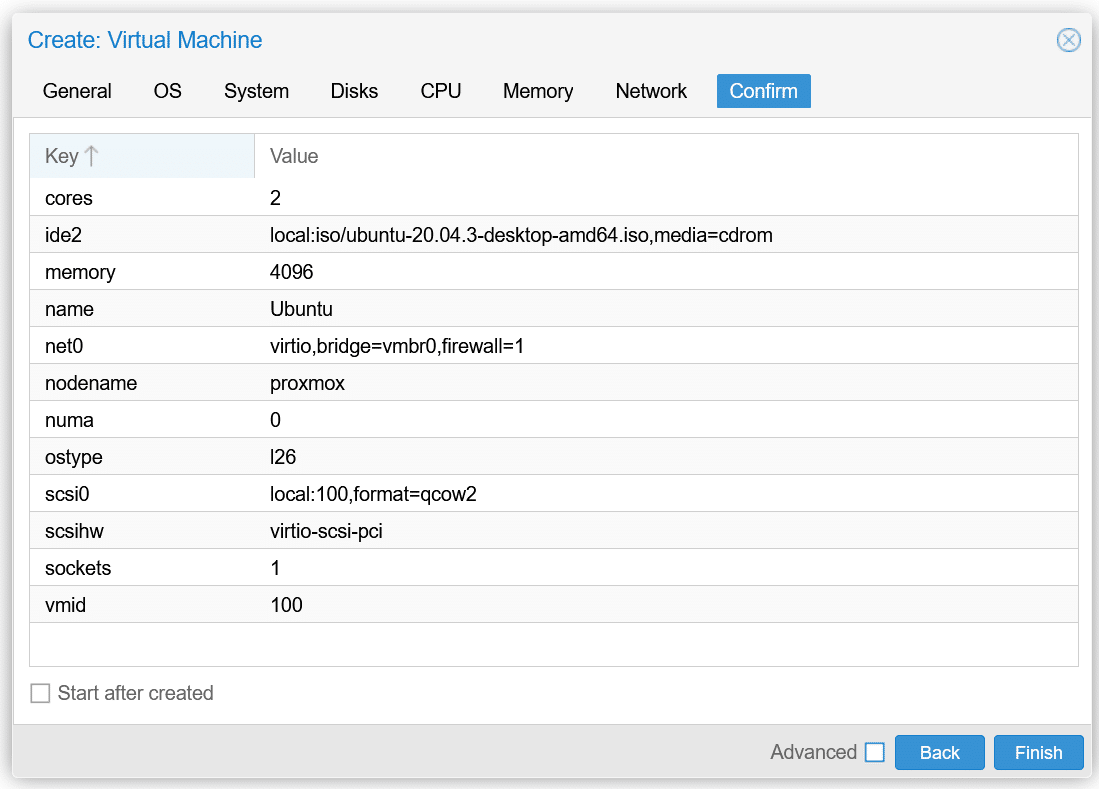
Now that we have the VM up and running, we also made a Windows Server 2019 one, just to have two different OS’s. We also turned both on and ran them at the same time to show that it is possible on outdated hardware that running multiple VMs at once is possible. Here is our basic utilization graph that just shows the system resources that are being used. The CPU is only at 5%, however, if there are active programs or downloads going, it may be way higher than that. Also, seeing the Memory is a good gauge of how VMs affect it. Since both are running at once and each contains 4GB, it takes up over 50% of the system, which is why that 2GB buffer is good to have.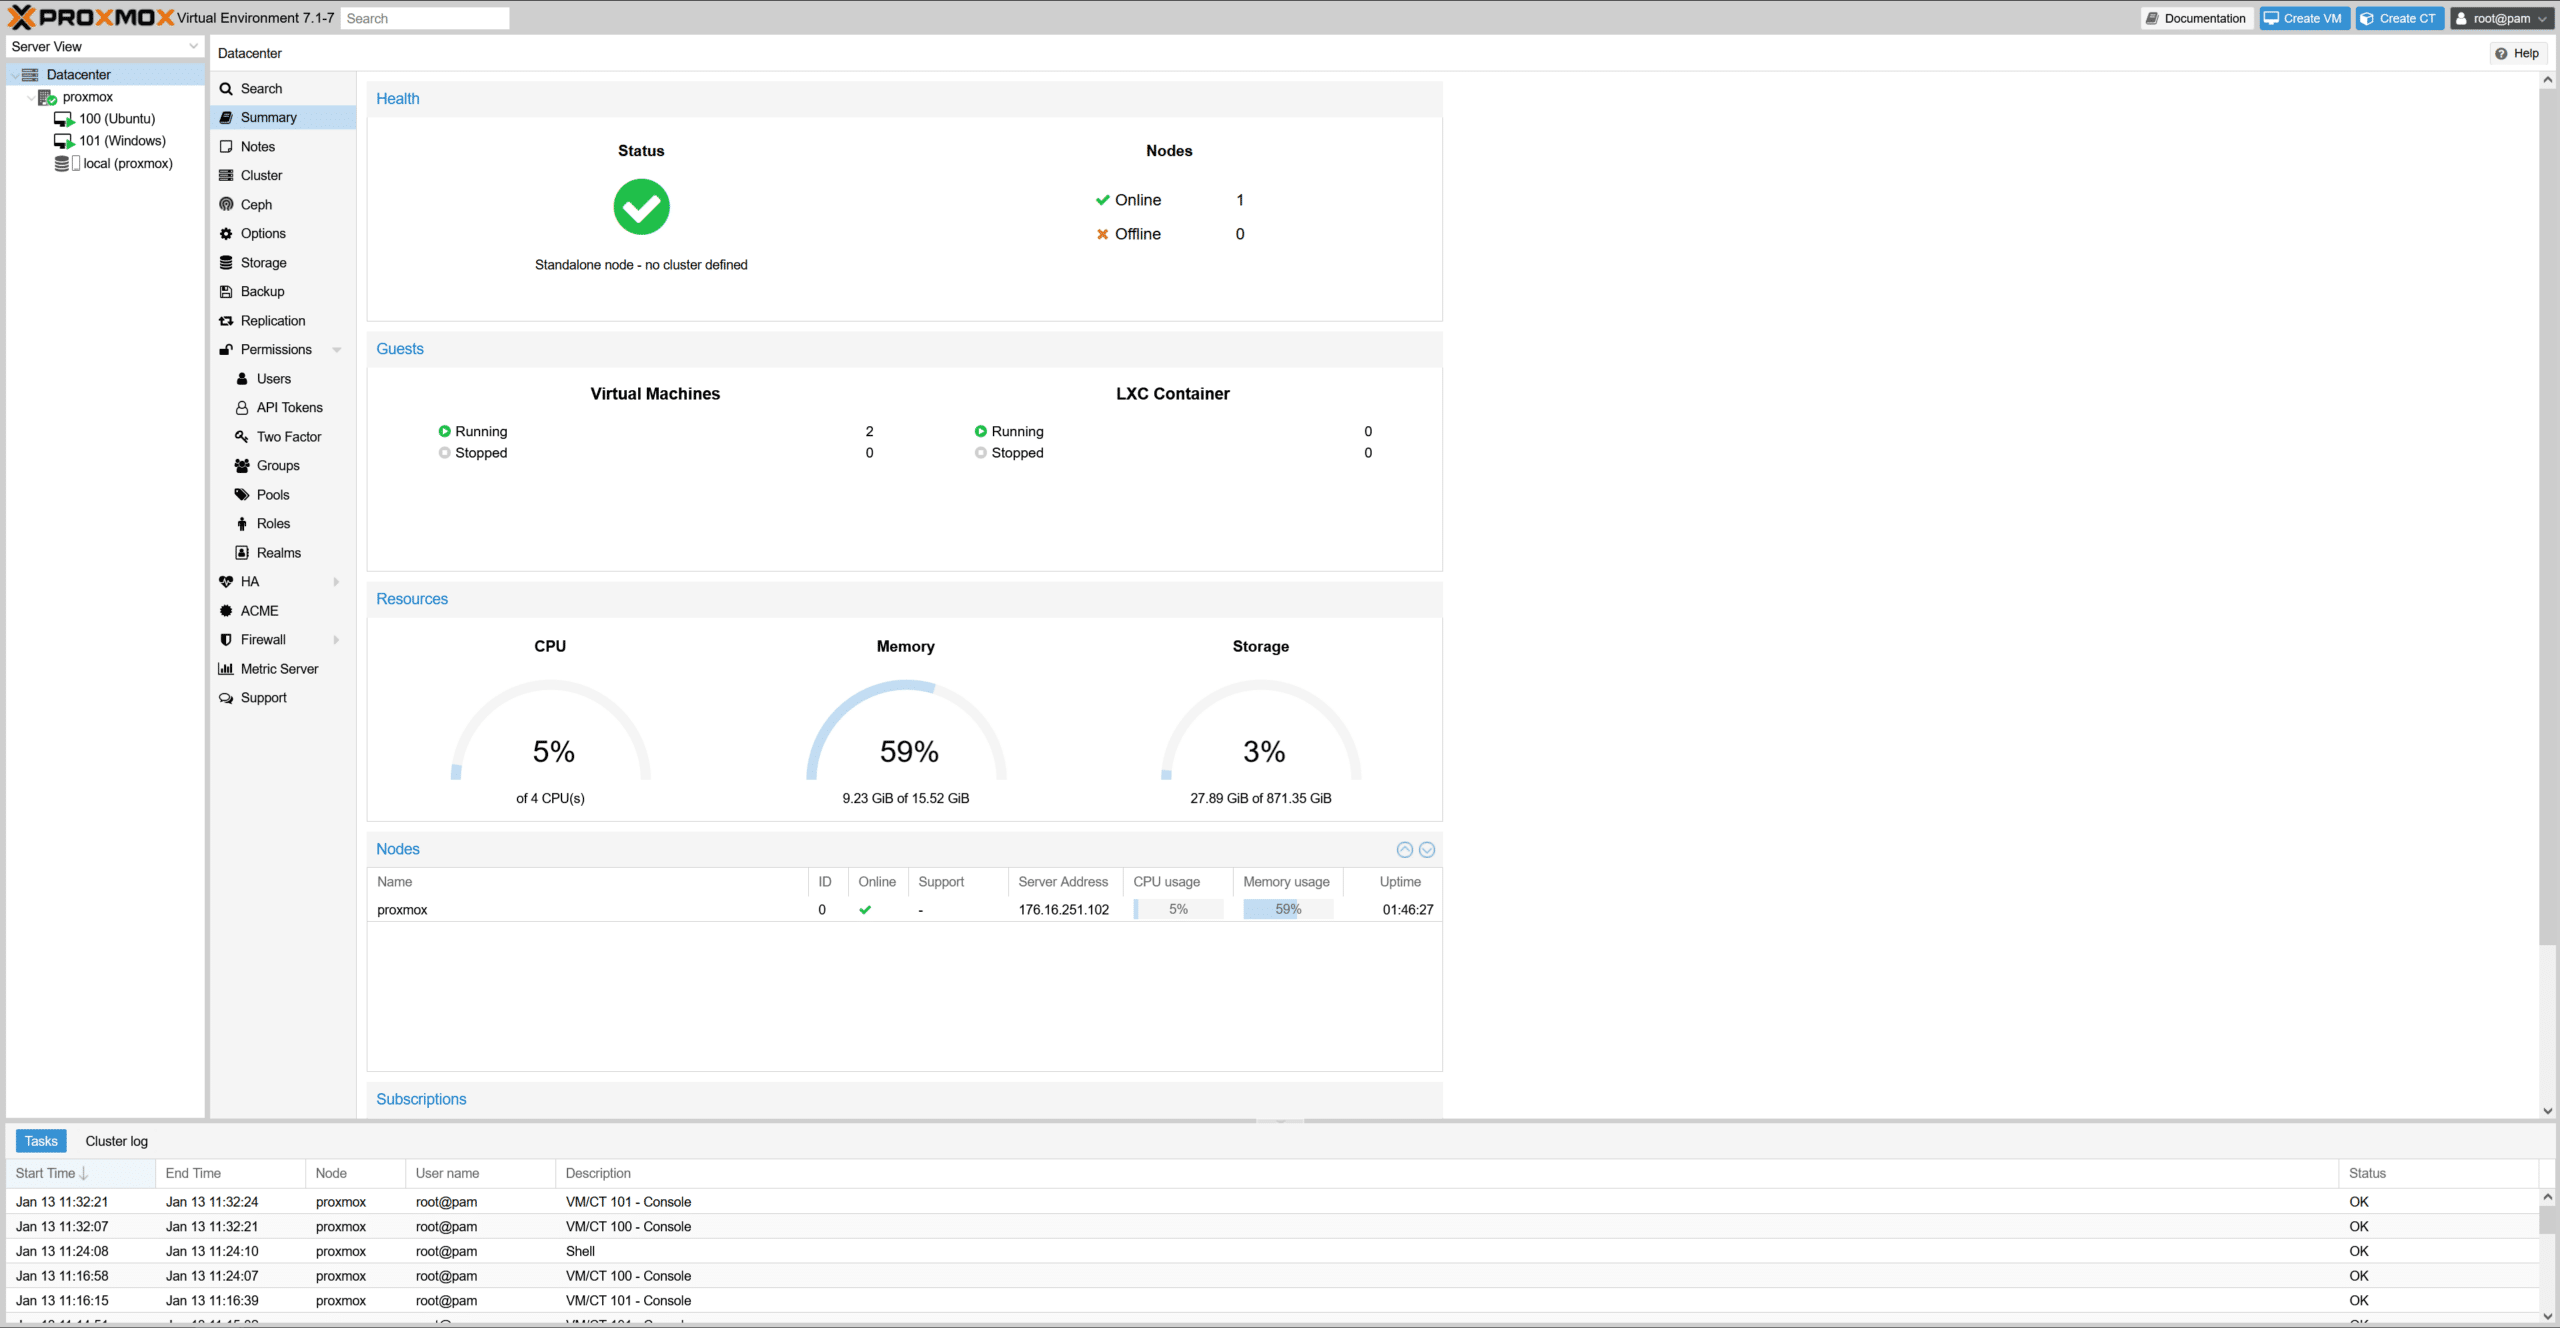
Conclusion
Setting up Proxmox and configuring the VMs are really simple and easy to do. The hardest step is just changing the storage and expanding it, but other than that, everything that Proxmox has to offer is right at the fingertips. Proxmox is one of the most popular hypervisors out there. Proxmox has a huge community around it and there are plenty of guides and videos out there to will help if there are problems. Proxmox also has chats on their website that offer help if that is needed too.
What we did see in the setup and use of the old HP hardware was what our little outdated machine really put in the work. The parts or tech wasn’t too bad, obviously could have been better, however, that wasn’t the goal of this article. We chose this hardware as it isn’t the best and it doesn’t have to be. The tech market is crazy right now and getting parts is very hard to do, however, if all you are looking for is a VM PC/server, it really isn’t hard to find a decent one for under $200. eBay or other sellers have good deals on machines out there. It just takes a little time and some patience to find the right one.
Do remember the extent that the machine can go to however, the PC doesn’t have a graphics card or the top-of-the-line Intel 12th Gen chips. Learning the limitations of the machine through VMs is a great way to learn about software and the overall extent that these servers are able to get to. Keep in mind that Homelabs are supposed to be fun…so have with it.
Check out the Budget VMware Server article as well.


 Amazon